Flight and Operations Manual
ATEC 122 Zephyr · Flight Manual Supplement
Overview
The ATEC 122 Zephyr Flight and Operations Manual provides essential information for the safe operation of the ATEC 122 Zephyr ultralight aircraft. It includes operational limits, emergency instructions, specifications, and maintenance guidelines.
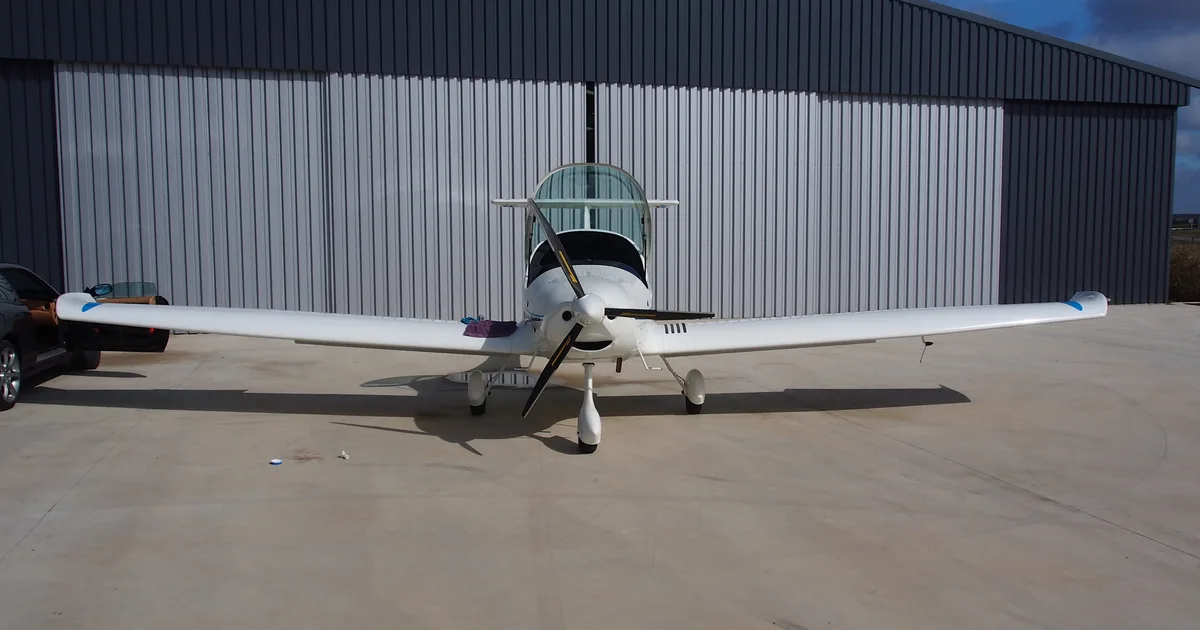
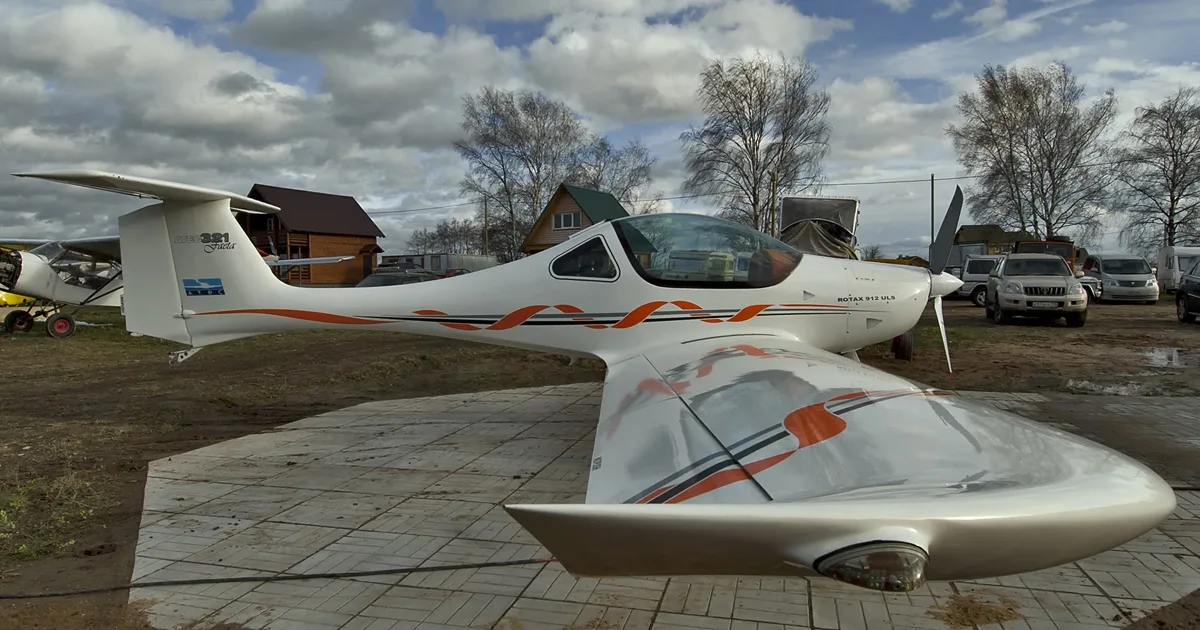
- The ATEC 122 Zephyr is an ultralight two-seater aircraft.
- It features a fixed tricycle undercarriage and a ROTAX engine.
- Maximum take-off weight is 450 kg, or 472.5 kg with a rescue system.
- Cruising speed is limited to 220 km/h under normal conditions.
- Aerobatic maneuvers are prohibited.
- The aircraft must be operated according to the flight manual.
- Emergency procedures are outlined for various scenarios.
- Smoking and mobile phone use are prohibited in the aircraft.
Summary written by AI from the source document. Check the original before relying on it. See which parts of Sprinkle are written by AI.
Reference only, not for flight. Use the current approved manual for your aircraft. See terms, section 5.
Document
Source
Copy found at atecaircraft.eu. Sprinkle hosts a reference copy with an added summary, specifications and searchable full text.
Document details
- Type ·
- Flight Manual Supplement
- Year ·
- 2016
- File size ·
- 1.7 MB
- Copy found at ·
- atecaircraft.eu
- Language ·
- en
Specifications & performance
Extracted from this document.
Specifications
- Wing span m ·
- 9.4
- Wing area m2 ·
- 10.3
- Total height m ·
- 2.0
- Fuel capacity l ·
- 60
- Not usable fuel l ·
- 0.7
- Length of fuselage m ·
- 6.2
- Maximum take off weight kg ·
- 450
- Maximum take off weight with rescue system kg ·
- 472.5
Performance
- Maximum speed kmh ·
- 265
- Design manoeuvre speed kmh ·
- 149
- Maximum cruising speed kmh ·
- 220
- Stalling speed flaps retracted kmh ·
- 76.5
- Stalling speed landing configuration kmh ·
- 64.9
V-speeds
- VA_KIAS ·
- 80
- VC_KIAS ·
- 119
- VFE_KIAS ·
- 70
- VNE_KIAS ·
- 143
- VRA_KIAS ·
- 107
- VS1_KIAS ·
- 41
- VSO_KIAS ·
- 35
Weight & balance
- Maximum take off weight kg ·
- 450
- Maximum weight of luggage kg ·
- 5
- Cg range mtow 450kg percent mac ·
- 27–40
- Cg range mtow 472 5kg percent mac ·
- 32–40
What is the Flight and Operations Manual?
The Flight and Operations Manual is a flight manual supplement for the ATEC 122 Zephyr, dated 2016.
What year was the Flight and Operations Manual published?
The Flight and Operations Manual — the ATEC 122 Zephyr flight manual supplement on file — is dated 2016.
Rare. Rarer than 82% of the aircraft models we track.
Most owners only have the POH. Here's the essential set for the ATEC 122 Zephyr.
- Pilot's Operating Handbook / AFM
- Checklist
- Maintenance Manual
- Parts Catalog (IPC)
- Systems & Wiring
- Service Bulletins on file
- Type Certificate (TCDS)
Free — save the 122 to your watchlist and track it in one place.
More ATEC 122 Zephyrmanuals & documents
Related documents
- Flight and Operations Manual of ATEC 321 Faeta NG aircraft with Rotax 912 iSATEC 321 Faeta · Pilot's Operating Handbook
- Flight and Operations Manual of ATEC 321 Faeta UL aircraftATEC 321 Faeta · Pilot's Operating Handbook
- Flight Manual for DV-1 SKYLARKDOVA DV-1 Skylark · Pilot's Operating Handbook
- Preefight CheckAERO AT-3 R100 · Checklist
- AEROPRAKT-32 Pilot Operating HandbookAEROPRAKT LTD A-32 · Pilot's Operating Handbook
If you fly the ATEC 122 Zephyr, you may also be researching these.
In this document
General
This section introduces the aircraft and emphasizes the importance of following the manual for safe operation.
Operational Limits
Details the airspeeds, weights, center of gravity limits, and operational load factors for safe aircraft operation.
Emergency Instructions
Provides procedures for handling engine failure, in-flight fire, and emergency landings.
Specifications
Lists the aircraft's dimensions, weights, engine parameters, and other technical specifications.
Standard Procedures
Outlines pre-flight inspections, engine start procedures, and flight operations.
Weight, Centre of Gravity
Describes weight limits and center of gravity ranges for safe flight.
Summary written by AI from the source document. Check the original before relying on it. See which parts of Sprinkle are written by AI.
Safety notes
- The pilot is fully responsible for the operation of the aircraft.
- Never exceed the maximum take-off weight.
- Aerobatic operations are prohibited.
- Smoking and mobile phone use are prohibited in the aircraft.
- Engine failure may occur at any time; the pilot accepts all risks.
- Emergency procedures must be followed in case of engine failure.
Summary written by AI from the source document. Check the original before relying on it. See which parts of Sprinkle are written by AI.
Full document text
1 Sole Manufacturer and Distributor in the Czech Republic: ATEC v.o.s. Location of the factory: ATEC v.o.s., Opolanská 350, 289 07 Libice nad Cidlinou Czech Republic, Tel.: +420 731 440 144, sales@atecaircraft.eu ATEC 122 ZEPHYR Flight and Operations Manual Libice nad Cidlinou, September 2016 2 Type of aircraft ATEC 122 ZEPHYR Serial number Identification label LAA CR type licence ULL-05 / 2001 issued 12. 04. 2001 This aircraft is not registered at the state office and is to be operated at operator’s own responsibility. The aircraft must be operated according to the information and limits of this flight manual. This manual must ever be on the board of aircraft. 3 Contents Chapter General 1 Operational Limits 2 Emergency Instructions 3 Standard Instructions 4 Specifications 5 Assembly, Disassembly 6 Aircraft Description and Systems 7 Maintenance 8 Weight, Centre of Gravity 9 Enclosure 1 Record of Revisions 4 Chapter 1 1. General 1.1. Introduction 1.2. Personal Data of the Owner 1.3. Aircraft Description 1.4. Completing of the Manual, Changes 1.5. Specification 1.6. Three-View Sketch 5 1.1. Introduction The information provided within this manual is a necessary requirement for an effective and save operation of the ATEC 122 ZEPHYR aircraft. This information and documents are compiled around manufacturer’s recommendations, and therefore should be given the utmost importance. 1.2. Personal Data of the Owner Owner of aircraft: Address: Telephone No: Date of ownership from - to: Owner of aircraft: Address: Telephone No: Date of ownership from - to: Owner of aircraft: Address: Telephone No: Date of ownership from - to: 6 1.3. Description of Airplane The ATEC 122 ZEPHYR is an ultralight two-seater, cantilever, low-wing aircraft of mixed construction. The landing gear has a fixed tricycle undercarriage with a steerable front wheel. The power-plant is a pull arrangement and consists of a ROTAX 912 UL 80 HP or ROTAX 912 ULS 100 HP engine and a two bladed or three bladed fix or adjustable propeller FITI. 1.4. Modifications and Changes If any changes or modifications to the aircraft are made, the owner of the said aircraft must notify the manufacturer and supply drawings and specifications of materials used. If the aircraft is sold, the manufacturer must be notified with address of the new owner. 1.5. Specification Dimensions Wing span 9,4 m Length of fuselage 6,2 m Total height 2,0 m Wing area 10,3 m Depth of mean aerodynamic chord 1,12 m Span of horizontal tail surface 2,4 m Flap position I 15° 75 mm II 30° 140 mm III 45° 180 mm Aileron deflection up 95 mm down 60 mm Elevator deflection up 80 mm down 65 mm Rudder deflection L/R +-20° 180 mm Airfoil Section Root section UA 2 End section UA 2 Landing Gear Wheel spacing 1,9 m Wheel base 1,4 m Tire dimensions 380 * 100 Tire pressure 0,16 MPa / 1,6 atp Spring system Main wheels composite spring Front wheel rubber spring Brakes Main wheels hydraulic disc brakes Rescue System installed / not installed USH 52 S SOFT PACK, vMAX = 293 km/h 7 Weights Empty weight kg Maximum take-off weight 450 kg Maximum take-off weight including rescue system installed 472,5 kg Maximum weight of luggage in luggage space 5 kg Power Plant and Engine Parameters Propeller manufacturer FITI design s.r.o. Type of propeller FITI ECO COMPETITION 2 blade, 3 blade Engine manufacturer Bombardier – ROTAX GmbH Engine type ROTAX 912 UL 80 HP ROTAX 912 ULS 100 HP Power Take-off power 59,6 kW/80 HP/5800 RPM 73,5 kW/100 HP/5800 RPM Maximum continuous power 58,0 kW/78 HP/5500 RPM 69,0 kW/94 HP/5500 RPM Cruising power 37,7 kW/51 HP/4800 RPM 44,6 kW/60 HP/4800 RPM Engine Speed Maximum take-off engine speed 5800 RPM / 5 minutes maximum Max. continuous engine speed 5500 RPM Cruising engine speed 4800 RPM Engine idle speed 1400 RPM approximately Oil Temperature Minimum 50 °C 50 °C Maximum 140 oC 130 °C Operational optimum 90 °C-110 °C 90 °C-110 °C Cylinder Head Temperature Minimum 60 °C 60 °C Maximum 150 °C 135 °C Oil Pressure Maximum short time operated by cold start 7,0 bar Minimum 0,8 bar (engine speed below 3500 1/min) Operational 2,0 – 2,5 bar (over 3500 1/min) Fuel Type See Art. 2.10. Oil Type Any branded oil for 4 stroke motorcycle engines with gearbox additives. Power class API SF, SG + GL4 or GL5. AeroShell Sport Plus 4 10W-40 in preference recommended. 8 ROTAX 912 UL is not certified aeronautical engine. An engine failure may occur at any time. The pilot is fully responsible at all times for the operation of this engine and accepts all risk and consequences of an engine failure! The correct operation of this aircraft is the sole responsibility of the pilot. 9 1.6. Three-View Sketch 10 Chapter 2 2. Operational Limits 2.1. Introduction 2.2. Air Speeds 2.3. Weights 2.4. Centre of Gravity 2.5. Manoeuvre and Gust Envelope 2.6. Permitted Manoeuvres 2.7. Operational Load Factors 2.8. Type of Operation 2.9. Crew 2.10. Fuel 2.11. Wind 2.12. Other Limits 2.13. Placards and Markings 11 2.1. Introduction The chapter 2 contents are operational limits necessary for a save operation of the aircraft 2.2. Air Speeds Never exceed speed vNE 265 km/h 143 kt Do not exceed this speed in any case Design manoeuvre speed vA 149 km/h 80 kt Do not use full deflection of the rudders and sudden control operations above this speed. Overload of the aircraft may occur Maximum design cruising speed vC 220 km/h 119 kt Operation over this speed must be conducted with caution in smooth air only Max. cruising speed at severe turbulence vRA 198 km/h 107 kt Never exceed this speed at severe turbulence Maximum speed by full flaps deflection vFE 130 km/h 70 kt Do not exceed this speed by flaps deflected Stalling speed flaps retracted vS1 76,5 km/h 41 kt The loss of uplift and fall of aircraft with flaps retracted happens at this speed Stalling speed in landing configuration vSO 64,9 km/h 35 kt The loss of uplift and fall of aircraft with flaps position III deflected happens at this speed 12 2.3. Weights
Show full textShow less
Empty weight kg Maximum take-off weight kg Useful load kg Never exceed the maximum take-off weight of the aircraft! 2.4. Centre of Gravity ( CG ) CG of the empty aircraft % MAC Flight range of CG, MTOW = 450 kg 27–40 % MAC Flight range of CG, MTOW = 472,5 kg 32–40 % MAC 13 2.5. Manoeuvre and Gust Envelope 14 2.6. Permitted Manoeuvres Category of the aircraft: Normal Operations are limited to non-aerobatic manoeuvres that include: - Any manoeuvres incident to normal flying - Training of stalls - Steep turns, in which the angle of bank is not more than 60° Aerobatic operations are prohibited! 2.7. Operational Load Factors Maximum positive load factor in CG +4,0 g Maximum negative load factor in CG -2,0 g 2.8. Type of Operation Permitted day flights VFR only ( flights by unobstructed field of vision ) IFR flights ( instrument flights ) and flights by ice formation are prohibited! 2.9. Crew Number of seats 2 Minimum weight of crew 50 kg / 110 lb (see corrections Art. 9.4) Maximum weight of crew 180 kg / 397 lb (see corrections Art. 9.4) 2.10. Fuel Recommended motor unleaded petrol of minimum octane number RON 90. Fuel capacity 60 l / 16 us gal ( alternately 83 l / 22 us gal ) Not usable rest of fuel 0,7 l / 0,18 us gal 2.11. Wind The safe taking off and landing is possible if the following wind speed limits are not exceeded: a) taking off or landing against wind up to 12 m/s b) taking off or landing tail wind up to 3 m/s c) taking off or landing cross wind up to 6 m/s 15 2.12. Other Limits Smoking and use of mobile phones is prohibited in aircraft. 2.13. Placards and Markings The aircraft shall be equipped with mandatory placards placed on instrument panel containing following information: - Identification of aircraft Identification number. Serial number. Designation. Empty weight. Maximum take off weight. - Operating limitations Weight limits depending on weight of crew, fuel and luggage. Speed limits for standard flight configurations. - Passenger warnings Definition of aircraft category, its airworthiness conditions and limitations. Intentional spins, stalls and aerobatics prohibition. 16 Chapter 3 3. Emergency Instructions 3.1. Engine Failure - Take Off 3.2. Engine Failure - in Flight 3.3. Rescue System Deployment 3.4. In Flight Fire 3.5. Engine Loss 3.6. Emergency Landings 3.7. Precautionary Landing 3.8. Aborted Landing 3.9. Vibration 17 3.1. Engine Failure – Take Off 1. Push stick forward aircraft into gliding attitude and maintain airspeed of 100 km/h (54 kt). 2. Determine the wind direction, adjust flaps for suitable position, turn off fuel valve, switch-off ignition, adjust safety belts and switch-off the master switch just before landing. A. At a height up to 50 m get the aircraft into landing configuration and carry out a landing with respect for obstructions in take-off direction. B. At a height above 50 m choose a suitable area for emergency landing. 3.2. Engine Failure - in Flight 1. Get the aircraft into gliding attitude and maintain airspeed of 100 km/h (54 kt). 2. Check a fuel level, switch on and make sure ignition is switched on. 3. If no problem found, try restarting the engine once more using additional fuel system. 4. If restarting impossible, use the instructions 3.1. 3.3. Rescue System Deployment In distress by final loss of flight control do activate the rescue system 1. Switch off ignition 2. Adjust safety belts 3. Activate the rescue system In case of landing on a limited area when collision is inevitable, use the rescue system as a braking device. The aircraft can be damaged or the crew may be injured due to using a rescue system 3.4. In Flight Fire 1. Close the fuel valve 2. Open the throttle 3. Switch off the main switch and ignition 4. Do emergency landing 5. Get off the aircraft 3.5. Engine Loss 1. Speed 100 km/h 54 kt 2. Flaps retracted 3. Normal flight conditions 18 3.6. Emergency landing 1. Carried out in case of engine failure 2. Speed 100 km/h 54 kt 3. Adjust safety belts 4. Flaps according to situation 5. Announce the situation by the aircraft radio station 6. Close the fuel valve 7. Turn off ignition 8. Turn off the main switch 3.7. Precautionary Landing Carry out in case of the loss of orientation, fuel exhaustion or for other reason if the aircraft is fully controllable. 1. Determine the wind direction 2. Choose a suitable landing area 3. Carry out a low pass into the wind along the right-hand side of landing area and inspect the area thoroughly. 4. Carry out a circuit flight 5. Calculate the landing plan 6. Land in the first third of the landing area using landing flaps 3.8. Aborted Landing Carry out in case of wrong calculation of landing manoeuvre or after jump out by landing in case of pilot’s consideration to abort landing manoeuvre and continue to fly. 1. Set up engine speed on maximum power 2. Set up take-off flaps position – I 3. Get level speed 110 km/h 59 kt 4. Draw up control stick slowly to get aircraft into climbing by speed 110 – 120 km/h 59 – 65 kt 5. Retract flaps 3.9. Vibrations In case of unusual vibrations occurs. 1. Set the engine speed to where vibration is least 2. Carry out the safety landing checks for a possible emergency landing and head for the nearest airport 19 INTENTIONALLY LEFT BLANK 20 Chapter 4 4. Standard Procedures 4.1. Pre-Flight Inspection 4.1.1. Procedures Before Entering the Cockpit 4.1.2. Procedures After Entering the Cockpit 4.1.3. Procedures Before Engine Start, Starting the Engine 4.2. Engine Warm up, Engine Test 4.3. Taxiing 4.4. Engine Check 4.5. Procedures Before Take-Off 4.6. Take-Off and Climb Away 4.7. Cruising Flight 4.8. Descend and Landing 4.9. Flight in Rainy Conditions 21 4.1. Pre-Flight Inspection It is important to carry out appropriate pre-flight inspection. To perform a negligent or incomplete inspection could be a cause of accident. The Manufacturer recommends to make following procedure: 1/ Cockpit – switches, seat belts, instruments, seats, controls, canopy locks, canopy condition check 2/ Left wing – coating and fabric bonding condition*, play, Pitot tube 3/ Left aileron – coating and fabric bonding condition*, free movement, attachments, controls 4/ Left flap – coating and fabric bonding condition*, attachments, controls, play Left main gear leg – condition, brake fluid leak, wheel spat 5/ Tail – surface condition, coating and fabric bonding condition* VT – surface, attachments, control HT – coating, attachments, fitting covers Rudder – surface, attachments, control 6/ Right flap - coating and fabric bonding condition*, attachments, controls, play Right main gear leg - condition, brake fluid leak, wheel spat 7/ Right aileron - coating and fabric bonding condition*, free movement, attachments, controls 8/ Right wing – coating and fabric bonding condition*, play 9/ Nose wheel – condition, play, wheel Engine – operation liquids amount, engine cowling Propeller – condition, spinner tightness * for detailed instructions see Art. 8, Par. 8.1., 8.1.1. and 8.1.2. 22 4.1.1. Procedures Before Entering the Cockpit 1. Check ignition – turned off 2. Check main switch – turned off 3. Check the wings, wing surfaces ailerons and flaps, clearances, hinges and connections of the controls, security of the wing pins, Pitot tube 4. Check the tail surfaces, elevator and rudder for secure connections, clearances and free movement 5. Check the fuselage, the surface and state 6. Check the landing gear, laminate springs, security of main and front wheels, their covers, screws and nuts, proper tire pressure, break function 7. Engine – the state of fastening of the engine covers, the state of the engine bed, intact fuel, oil and cooling system hoses, the fuel system drain 8. Propeller – the surface state, if it is intact, the state and fastening of the propeller cone 9. Cockpit – control of fastening and proper locking of the canopy, correct functioning and condition of the electrical installation of instruments, the state of the flight instruments, control of the fuel level, proper functioning of controls 4.1.2. Procedures After Entering the Cockpit 1. Check foot operated controls – function 2. Check brakes – function, brakes on 3. Check hand – operated controls – function 4. Check flaps – function, retract 5. Check engine controls – switched off, throttle idle 6. Check fuel valve – turned on 7. Check fuel level indicator – fuel volume 8. Check ignition – turned off 9. Check main switch – turned off 10. Check instruments – state, zero positions, adjust altimeter 4.1.3. Procedures Before Engine Start, Starting the Engine 1. Rescue system – unlock 2. Safety belts – fasten 3. Close the canopy and secure 4. Check fuel valve – turned on 5. Check throttle – idle 6. Open the choke if the engine is cold 7. Brakes on 8. Main switch on 9. Ignition on 10. Pull up the control stick 11. Start the engine 12. Oil pressure minimum within 10 seconds 13. Turn off the choke 14. Warm up the engine until the operating temperature 23 4.2. Engine Warm up Start to warm up the engine at 2000 rpm, hold approx. 2 minutes, continue until 2500 rpm till the oil temperature reaches 50 oC. Check both ignition circuits according to Art. 4.5. 4.3. Taxiing Recommended speed of taxiing is 15 km/h 8 kt max, direction is controlled by the front wheel. 4.4. Engine Ignition Check 1. Brakes on 2. Engine speed 4000 RPM 3. Switch off first ignition circuit – engine speed drop not over 300 RPM 4. Switch on – 4000 RPM 5. Switch off second ignition circuit – engine speed drop not over 300 RPM Speed difference between circuits running separately not over 120 RPM 4.5. Pre Take-Off Compulsory procedures prior take-off: 1. Brakes checked 2. Foot-operated controls checked 3. Hand operated controls checked 4. Flap position I set and checked 5. Fuel valve on checked 6. Choke turned off checked 7. Throttle idle checked 8. Fuel gauge indicator checked 9. Instruments on and within limits checked 10. Safety belts secure checked 11. Cockpit secure and locked checked 4.6. Take Off and Climbing By accelerating until the maximum position of the throttle is reached, make the aircraft move. With the help of the front wheel and the rudder keep the aircraft in the axis of the runway. At speed of 70 km/h you make the aircraft fly off the earth by a light pull of the stick and continue the flight until 110 km/h. Then by gradual pull you make the aircraft start climbing at the optimum speed of 110 km/h. During the take-off, the marginal engine values must not be exceeded. 24 4.7. Cruising Flight ATEC 122 ZEPHYR has good flight features in the whole range of permitted speeds and centre of gravity positions. The cruising speed is in the range 120 – 215 km/h 65 – 116 kt. 4.8. Descending and Landing Carry out descending with throttle idle at the speed of 100 km/h 54 kt Flaps position limit according to Art. 2.2. Procedures in the final: 1. Speed 100 km/h 54 kt 2. Wing flaps in position III ( at strong turbulence or headwind position II ) 3. Throttle idle or corrected if necessary 4. Instruments in the permitted limits Landing The aircraft in the hold-up position decreases its speed by a gradual pull of the control stick until it touches down at speed of 70 km/h 38 kt. After the touch down of the front wheel, the landing run can be cut down by breaking. Do not apply a maximum brake effect except of an extreme situation. An undue wear of tyres, brake lining and disc comes to and an over-stress of undercarriage and other parts may shorten durability of an aircraft rapidly. 4.9. Flight in Rainy Conditions During the flight in the rain, the pilotage should be carried out with increased caution because of the decreased visibility and cockpit transparency. Furthermore, one should take into account a shortened hold-up position during the landing and extended take-off distance. Maintain the following speeds during the flight in the rain: 1. Climb away 110 km/h 59 kt 2. Cruising flight 120 – 180 km/h 65 – 97 kt 3. Descent at landing 115 km/h 62 kt 25 Chapter 5 5. Performances 5.1. Introduction 5.2. Air Speed Indicator Corrections 5.3. Stalling Speeds 5.4. Loss of Height by Stalling 5.5. Take off Distance at 15 m Height 5.6. Rate of Climb 5.7. Cruising Speeds 5.8. Range of Flight 26 5.1. Introduction The information on speedometer calibration, stalling speed and other performances of the ATEC 122 ZEPHYR with ROTAX 912 UL 80 HP and ROTAX 912 ULS 100 HP engine is provided in this chapter. 5.2. Air Speed Indicator Corrections Calibrated air speed CAS Km/h Kt Indicated air speed IAS Km/h Kt Deviation Km/h Kt 65 35 59 32 -6 -3 80 43 77 42 -3 -1 100 54 98 53 -2 -1 120 65 122 66 2 1 140 76 143 77 3 1 160 86 166 90 6 4 180 97 190 103 10 6 200 108 212 114 12 6 220 119 235 127 15 8 240 130 258 139 18 9 260 140 282 152 22 12 265 143 289 156 24 13 5.3. Stalling Speeds Engine idling Flaps retracted Flaps II Flaps III One pilot 65 km/h … 35 kt 62 km/h … 33 kt 62 km/h … 33 kt Two pilots 450 kg 69 km/h … 37 kt 64 km/h … 35 kt 64 km/h … 35 kt Engine stopped One pilot 66 km/h … 36 kt 62 km/h … 33 kt 62 km/h … 33 kt Two pilots 450 kg 70 km/h … 38 kt 65 km/h … 35 kt 64 km/h … 35 kt 5.4. Loss of Height by Stalling Level flight flap position Flap deflection Height loss m / feet I 15° 30 / 100 II 30° 30 / 100 III 50° 30 / 100 0 -2,5° 30 / 100 27 5.5. Take off Distance at 15 m Height Engine 80 HP 100 HP Runway surface Take off distance m feet Take off distance m feet Concrete 205 675 180 590 Turf 240 790 210 690 5.6. Rate of Climb Engine 80 HP 100 HP One pilot at 100 km/h 54 knot 6 m/s 1180 FPM 8 m/s 1570 FPM Two pilots 472,5 kg 4,5 m/s 890 FPM 6,0 m/s 1180 FPM 5.7. Cruising Speeds ROTAX 912 UL 80 HP Air speed km/h knot RPM Consumption l/h 120 64,8 4000 5,8 140 75,6 4250 7,2 160 63,4 4600 9,5 180 97,2 4850 10,8 200 108 5200 13,1 215 116 5600 17,0 ROTAX 912 ULS 100 HP 120 64,8 3250 4,0 140 75,6 3700 5,5 160 63,4 4100 8,2 180 97,2 4500 10,8 200 108 4950 12,6 220 119 5500 18 28 5.8. Range of Flight By maximum fuel capacity 60 l ROTAX 912 UL 80 HP Air speed km/h kt Range of fl. km nm Flight endurance h 15 l Flight reserve h 140 75,6 816 441 5,8 2 160 83,4 707 382 4,4 1,5 180 97,2 700 378 3,8 1,3 200 108 640 346 3,2 1,1 ROTAX 912 ULS 100 HP By maximum fuel capacity 60 l 140 75,6 1070 578 7,6 2,7 160 83,4 820 443 5,1 1,8 180 97,2 700 378 3,8 1,3 200 108 666 360 3,3 1,2 220 119 515 278 2,3 0,8 ROTAX 912 ULS 100 HP By maximum fuel capacity 83 l 140 75,6 1983 1071 14,16 2,7 160 83,4 1394 753 8,7 1,8 180 97,2 1112 600 6,18 1,3 200 108 894 483 4,47 1,2 220 119 748 404 3,4 0,8 29 Chapter 6 6. Assembly and Dismantling 6.1. Introduction 6.2. Dismantling the Horizontal Tail Surface 6.3. Dismantling the Rudder of the Vertical Tail Surface 6.4. Dismantling the Wings 6.5. Assembly 30 6.1. Introduction The assembly of individual parts of the aircraft is described in this chapter. At least two persons are necessary for the assembly and dismantling. 6.2. Dismantling the Horizontal Tail Surface Release and unbolt the bolt M6 adjusting the position of the horizontal tail surface. This bolt is situated at the upper side of the stabiliser. Take care that spacer do not fall into the stabiliser. For assembly, it is important to preserve this spacer. Release and remove the left and right screw of the main HT fittings. Tilt the HT so that it is possible to disconnect the pin of the control. Remove the HT and put it into a safe place to prevent its damage. Secure the ball bearing with a binding wire. 6.3. Dismantling the Rudder of the Vertical Tail Surface Release and unbolt two M5 bolts connecting rudder with the cables. Release and lift up the upper pin. The rudder slips out by moving it backwards. 6.4. Dismantling the Wings Disconnect the control of ailerons in the cabin space. Release and remove the lock nut of the bolt of the wing pins. Screw the bolt off by about 20 mm. The helper lifts the wing a bit by holding it at the end. By light taps on the head of the bolt the bottom pin is knocked-out. Unscrew the bolt and remove the pin. Then the upper pin is driven out with the help of a rod with 18 mm diameter. When pins removed, lift up the wing and disconnect the hoses of the static and total pressure. Those hoses must not be interchanged during assembly. Disconnect strobe-light or position light cables if the aircraft equipped with them. 6.5. Assembly The assembly is carried out in the opposite way. All pins must be cleaned and greased and then secured. Max. tightening torque is 20 Nm (2 kpm). Take care about the proper adjustment of ailerons, which is done by shortening and extending the aileron connection struts. 31 Chapter 7 7. Aircraft and Its Systems Description 7.1. Wing 7.2. Fuselage 7.3. Tail Surface 7.4. Landing Gear 7.5. Controls 7.6. Engine 7.7. Fuel System 7.8. Instrument Equipment 7.9. Hand and Foot Controls 7.10. Cockpit Equipment 32 7.1. Wing The cantilever wing of mixed construction has a laminar profile UA 2. The wing is rectangular in its central part, the ends are trapezoidal equipped with wingtips. The main spar of multilayer hard wood saturated with synthetic resin at a high temperature. It is placed in the 30% depth of wing. The wing flaps and ailerons are suspended on the rear auxiliary spar. Ribs in the leading wing edge are made of divinicell, the other ribs are the wood structure. From the leading wing edge, the wing torsion box covering is made of composite sandwich, the rest of wing is covered by PES fabric. The aileron and wing flaps are analogous construction. The centre-section is welded from high quality CrMo steel tubes. 7.2. Fuselage The fuselage is an all-composite shell reinforced by bulkheads. The fuselage cross-section is elliptic, with wing fillets and spacious cockpit. The cockpit enclosure is from organic glass and it is lifted up and backwards. The engine space in the front part of the fuselage is separated by a firewall. The engine bed and the front wheel are fastened to a fire-proof engine bulkhead. 7.3. Tail Surfaces The T-shaped tail surfaces are of a mixed construction. The horizontal tail surface has a trapezoidal shape formed by a rigid stabiliser and elevator. Covers of the torsion boxes of elevator are made of laminate, the spar and ribs are made of wood. The covering is made of the PES fabric. The vertical tail surface has a trapezoidal shape. The dorsal fin part is an integral part of the fuselage, the rudder is an all-laminate shell. 7.4. The Landing Gear The landing gear is a fixed tricycle undercarriage with a controllable front wheel. The main landing gear is formed by a pair of composite flat springs. Main wheel dimensions are 380 x 100 mm, the front one 300 x 100 mm. The front wheel leg is made of duralumin tubes and composites equipped with a rubber spring. All wheels have an aerodynamic fairing, the main undercarriage wheels have disc brakes hydraulically controlled. 7.5. Controls The steering of all rudders is duplicated. The ailerons, elevator and the flaps are controlled with the help of connection struts and levers, the rudder with the help of steel wire ropes. Important check points have inspection openings overlapped by organic glass. 7.6. Engine Aircraft propulsion is provided by a ROTAX 912 UL or SUL and the owner’s choice of two or three bladed fix or ground adjustable propeller FITI. 33 7.7. Fuel System The fuel system is formed by an integral fuselage tank with a fuel drain. Double fuel supply circuit with a spare electric pump. The pressure of supplied fuel is measured with a fuel- pressure gauge. 7.8. Instrument Equipment The instrument equipment consists of basic instruments for flight control, engine control and navigation. The static and dynamic pressure is taken from the Pitot tube at the bottom of the port wing. Standard instrument panels layout on the picture 7.10. 7.9. Hand and Foot Controls Foot-operated control By pressing the left pedal 9, the aircraft turns left when mowing at sufficient speed on the ground or in the air, and vice versa. Hand-operated control By pulling the control stick 3 towards the pilot, the nose lifts up (the angle of incidence increases) and the aircraft climbs. By pushing the control stick, the aircraft descends. By deflecting the control stick to left, the aircraft banks to left, and vice versa. Wing flaps – mechanical option By pressing the securing pin on the control lever 6a, the wing flaps are released and extend by an upwards motion, and vice versa. Wing flaps – electric option The flaps are actuated to the positions OFF, I, II, III by means of the linear potentiometer 6b. All flap positions are indicated by a control lamp. The engine throttle By moving the throttle 7 in the flight direction, the engine power increases, and vice versa. Choke Choke pushrod 11 pulled – the choke is turned on Choke pushrod 11 pushed – the choke is turned off 34 7.10. Cockpit Equipment 35 Chapter 8 8. Care and Maintenance 8.1. Maintenance Schedule 8.2. Aircraft Repairs 8.3. Major Overhaul 8.4. Anchorage of the Aircraft 8.5. Cleaning and Care 36 8.1. Maintenance Schedule Inspection, Mandatory Work Inspection Period 10 25 50 100 200 Engine As per ROTAX Manual attached. Engine Compartment Engine Attachment Check integrity of construction with special care for welds, fixing points, silent blocks, bushings. Surface finish quality. x Bolted Connections Check surface quality of bolted connections and bearing surfaces. Securing, tightening. Tighten and re-secure if necessary, Replace self locking nuts, split pins and securing wires. x Silent Blocks Check elasticity of engine bearing, integrity of rubber blocks, degree of permanent deformation. Replace silent blocks if necessary, tighten, secure. x Oil, Water and Fuel Hoses Check surface integrity, liquid leakage, quality of connections, protection against oscillating parts and exhausts. Replace if necessary. x Working Liquids Check level, refill keeping instruction of engine manufacturer. x Coolers Check integrity, sealing, purity. x Controls Check control forces, free play, hinges, end stops adjustment, self-locking. Adjust, secure. x Exhausts Check integrity, sealing, corrosion degree, springs quality and prestress. Grease ball connections. x Carburetters Check surface quality, controls adjustment, quality of elastic connection flange – integrity, sealing. Replace flange if material degradations or surface cracks appear. x Electric Installations Check quality, integrity and purity if cables, contacts, welds, bunched cable supports and bushings. Check gauges and senders connections. x Propeller Attachment Check quality of bolts, tightening moments, securing. x Cockpit Control Sticks Check free movement in longitudinal and cross direction, clearance fits, end stops adjustment, securing. Replace pins or bolts if worn-out, grease, secure. x Rudder Control Check integrity of pedals with special care for surface cracks near welds. Full and free movement right and left (raise nose wheel off ground), end stops adjustment, rudder cable tensioning, clearance fits, securing. Adjust, replace worn-out parts, grease, secure. x Flap Control Check free movement of flap control lever, stable bearing in every flap position, interlock pin wear. Replace worn-out parts, grease, secure. x Canopy – Open / Close Check quality and function of locks and hinges, canopy bearing. Adjust, replace worn- out parts, grease, secure. x 37 Flight Control Instruments Check legibility, markings, attachment instruments in panel, installations, wiring. x Electric Installations Check quality, integrity and purity of cables, insulations, contacts and welds. Battery attachment, working condition. x Safety Belts Check fixing points rigidity, belt surface quality, adjustment. x Fuel System Check leak-proof condition, fuel supply quality, fuel pumps and valve function, tank deaeration. Replace fuel filters. x Parachute Rescue System Check general condition, attachment. Do mandatory work as per instructions of rescue system manufacturer. x Landing Gear Main Gear Check attachment rigidity, surface quality, degree of permanent deformation. x Wheels Check attachment, brakes condition, brake pads, disc quality, leak-proof condition. Attachment and purity of wheel spats. x Front Gear Check general condition, integrity, rubber damper, clearance, springing deflection, steering quality. Grease sliding bearings, replace rubber springs if worn-out. x Fuselage Check general condition, integrity. Antennas, lights and coverings attachment. x Wing Check general condition, surface quality, integrity, attachment, fittings, play. Ailerons and flaps condition, surface quality, hinges, play, securing. Controls condition, free movement, end positions, clearance. Pitot tube condition and attachment. Check the condition of the coating and fabric bonding (see the Par. 8.1.1.). x Tail Surfaces Rudder, Elevator Check general condition, hinges, movement, clearance, securing. Check the condition of the coating and fabric bonding (see the Par. 8.1.1.). X HT Stabilizer Check general condition, attachment, fittings, securing. x 10 25 50 100 200 8.1.1. Inspection of the condition of the coating and fabric bonding There can not be any visible crack between the fabric coating and hard surface of the wings/ elevator/rudder. If even limited detachment of the coating is observed, try to input any sharp tool (e.g. knife) into that slit and gently pass the tool through it to check its depth. If the tool is able to easily intrude between the coating and wing structure, it is necessary to remove the aircraft from operation and to make its complete re-coating. If the tool is not able to intrude into the slit, bond the slit by contact glue to avoid water intrusion between the fabric coating and wing structure and so to avoid further degradation of bonding. We recommend to cover all bonded connections situated on torsion box of wings and horizontal tail by white plastic tape of 25mm width. The tape shall be placed in a position to cover the connection of torsion box and coating by its middle part. 38 8.1.2. Report about the condition of the coating and fabric bonding The owner of the airplane shall periodically report the information about the condition of the coating on his airplane via Report Form in the Enclosure 2. The Report Form is also available to download from producer´s websites: www.atecaircraft.eu. Such form shall be transmitted to the producer once in 2-years period. 8.2. Aircraft Repairs Minor repairs are the repairs of those parts, which do not participate substantially in the aircraft function and stiffness. Among the permitted repairs are: - the lacquer repair - replacing worn-out parts - repairing the tyres of the landing wheels These repairs can be carried out by the owner itself. Repairs of the torsion box, spars, wings or tail surfaces must be carried out in a special workshop. 8.3. Major Overhaul The major overhaul is carried out after 1500 flight hours but not later than 10 years after putting the aircraft into operation, unless decided otherwise during regular technical inspections or by producer´s bulletin. The overhaul will be carried out in the ATEC factory or in a professional workshop authorized by the ATEC. The engine overhaul and maintenance are carried out according to the instructions of the engine producer. The time between overhauls (TBO) is the period approved to operate the airplane under normal operational conditions before the obligation to deliver the airplane for major overhaul arises. After the TBO is expired, the next operation of the airplane can not be considered as safe and due to this reason it is not allowed to exceed the TBO limit. Normal operational conditions are such conditions which are in compliance with the requirements of the manufacturer and appropriate aviation authority. The TBO limit assessed by the manufacturer and by appropriate authority is based on airplane performance tests and operation experience necessary to reach the airworthiness approval. The TBO limit can be changed by the producer based on production progress intended for TBO extension. The TBO limit is always directed by flight hours or flight records. The number of flight hours shall be recorded in the logbook. The entry about the execution of the major overhaul shall be recorded in the logbook by the manufacturer or by his authorized service centre by which the major overhaul was carried out. 39 Except other worn-out parts and other components subjected to maintenance instructions according to their appropriate manual, the following works are being performed during the major overhaul: - Re-coating of fabric on wings, ailerons, flaps and horizontal tail - New impregnation of the wooden frame of wings and horizontal tail - Conservation of internal tubes of the centre wing - Engine mount replacement - Wings attachments inspection - Undercarriage inspection, rubber springs exchange - Electrical installation and battery inspection - Replacement of all engine hoses - Back-up fuel pump inspection - Fuel tank leak inspection, pressure test - Steering inspection and parts replacement, plays correction - Inspection of rescue system attachments - Exhaust system inspection 8.4. Anchorage of the Aircraft The anchorage of the aircraft is necessary in order to protect the aircraft against eventual damage caused by the wind or wind blasts during parking outside the hangar. For the purpose, the aircraft is equipped with parking grips at the bottom side of the wing and at the tail skid. 8.5. Cleaning and Care The aircraft surface should always be treated by using suitable cleaning agents. The oil and grease rests can be removed from the aircraft surface by suitable surface active substances or eventually by petrol. The cockpit enclosure should be cleaned only by washing using a sufficient water flow with an addition of suitable surface active substances. Never use petrol or chemical solvents. 40 Chapter 9 9. Weights and Balance 9.1. Introduction 9.2. Empty Weight 9.3. Maximum Take-Off Weight 9.4. CG Range 9.5. CG Determination 9.6. Useful Load, Weight Table