YMF WACO F5 SERIES MAINTENANCE MANUAL
WACO YMF-5 · Maintenance Manual
Overview
The WACO YMF-5 Series Maintenance Manual provides comprehensive maintenance guidelines for the YMF WACO F5 series aircraft. It includes information on aircraft specifications, maintenance procedures, and safety instructions to ensure continued airworthiness.
- The manual is a complete rewrite and revision H was released on 07/21/2017.
- The YMF WACO F5 series includes models F5A, F5B, and F5C with varying maximum gross weights.
- The aircraft features a single engine and can seat two passengers and a pilot.
- Construction includes TIG welded 4130 steel tubing and Sitka spruce wings.
- The aircraft is covered with Ceconite (Polyfiber) 102 Dacron fabric.
- All models are equipped with a Jacobs 7 cylinder radial engine.
- The manual includes instructions for continued airworthiness as per FAR Part 23.
- Service Letters and Instructions are provided for additional maintenance guidance.
Summary written by AI from the source document. Check the original before relying on it. See which parts of Sprinkle are written by AI.
Reference only, not for flight. Use the current approved manual for your aircraft. See terms, section 5.
Document
Source
Copy found at dreamwacos.com. Sprinkle hosts a reference copy with an added summary, specifications and searchable full text.
Document details
- Type ·
- Maintenance Manual
- Year ·
- 2017
- File size ·
- 17 MB
- Copy found at ·
- dreamwacos.com
- Language ·
- en
Specifications & performance
Extracted from this document.
Specifications
- Maximum gross weight f5a (lb) ·
- 2650 Pounds
- Maximum gross weight f5b (lb) ·
- 2770 Pounds
- Maximum gross weight f5c (lb) ·
- 2950 Pounds
What is the YMF WACO F5 SERIES MAINTENANCE MANUAL?
The YMF WACO F5 SERIES MAINTENANCE MANUAL is a maintenance manual for the WACO YMF-5, dated 2017.
What year was the YMF WACO F5 SERIES MAINTENANCE MANUAL published?
The YMF WACO F5 SERIES MAINTENANCE MANUAL — the WACO YMF-5 maintenance manual on file — is dated 2017.
Common. More common than 81% of the aircraft models we track.
Most owners only have the POH. Here's the essential set for the WACO YMF-5.
- Pilot's Operating Handbook / AFM
- Checklist
- Maintenance Manual
- Parts Catalog (IPC)
- Systems & Wiring
- Service Bulletins on file
- Type Certificate (TCDS)
WACO YMF-5 for sale now
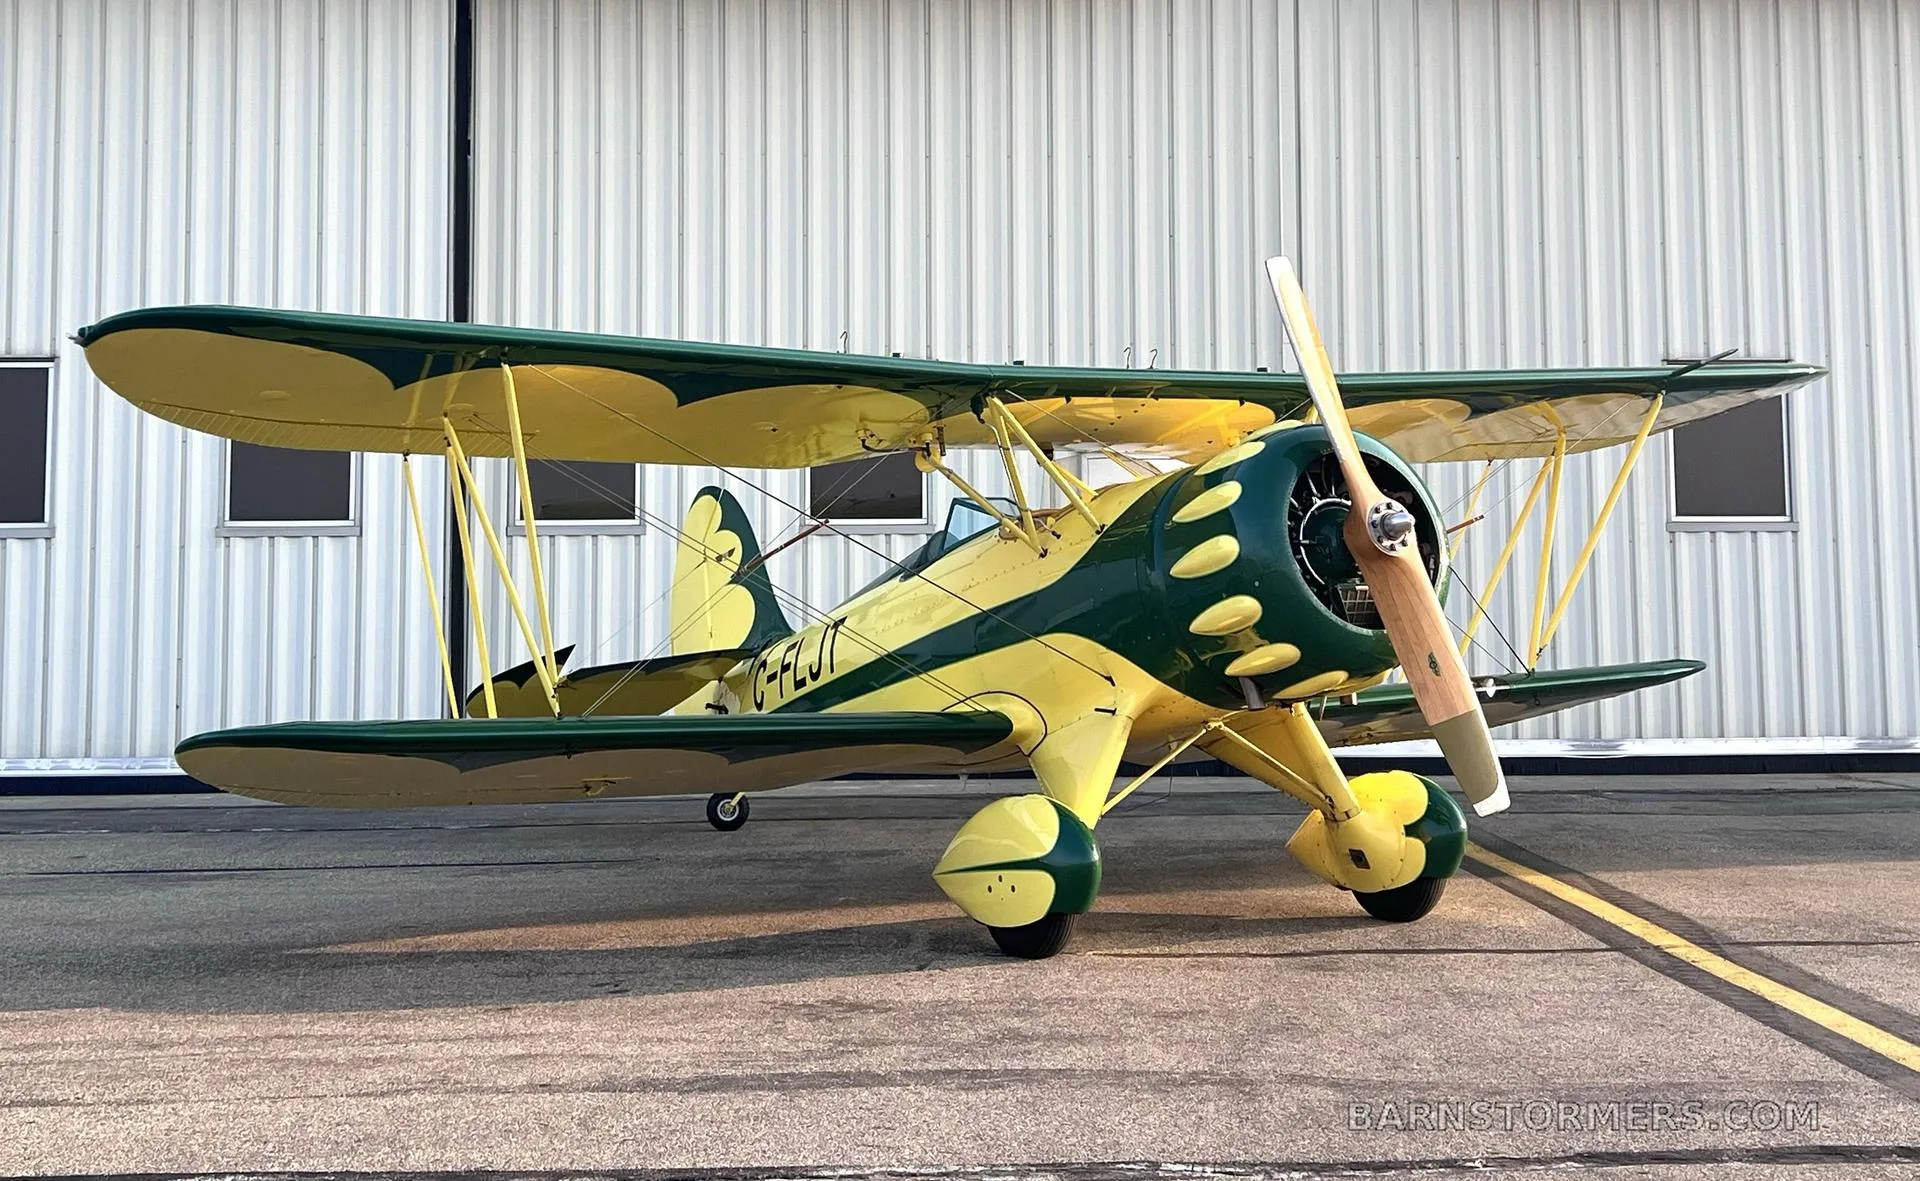
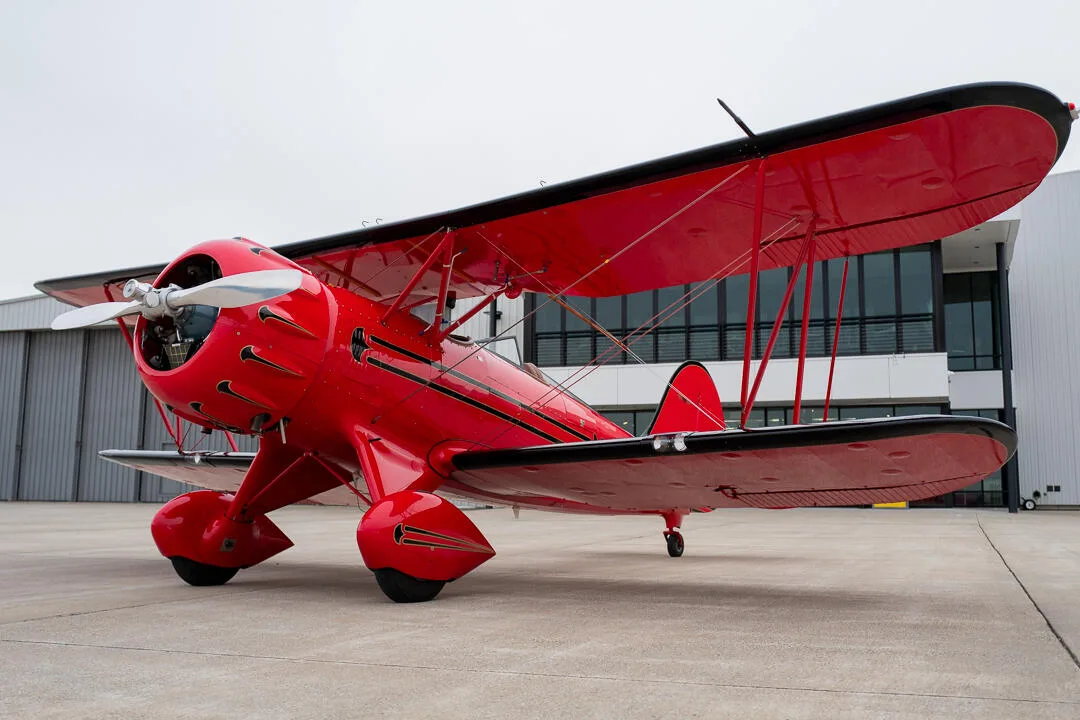
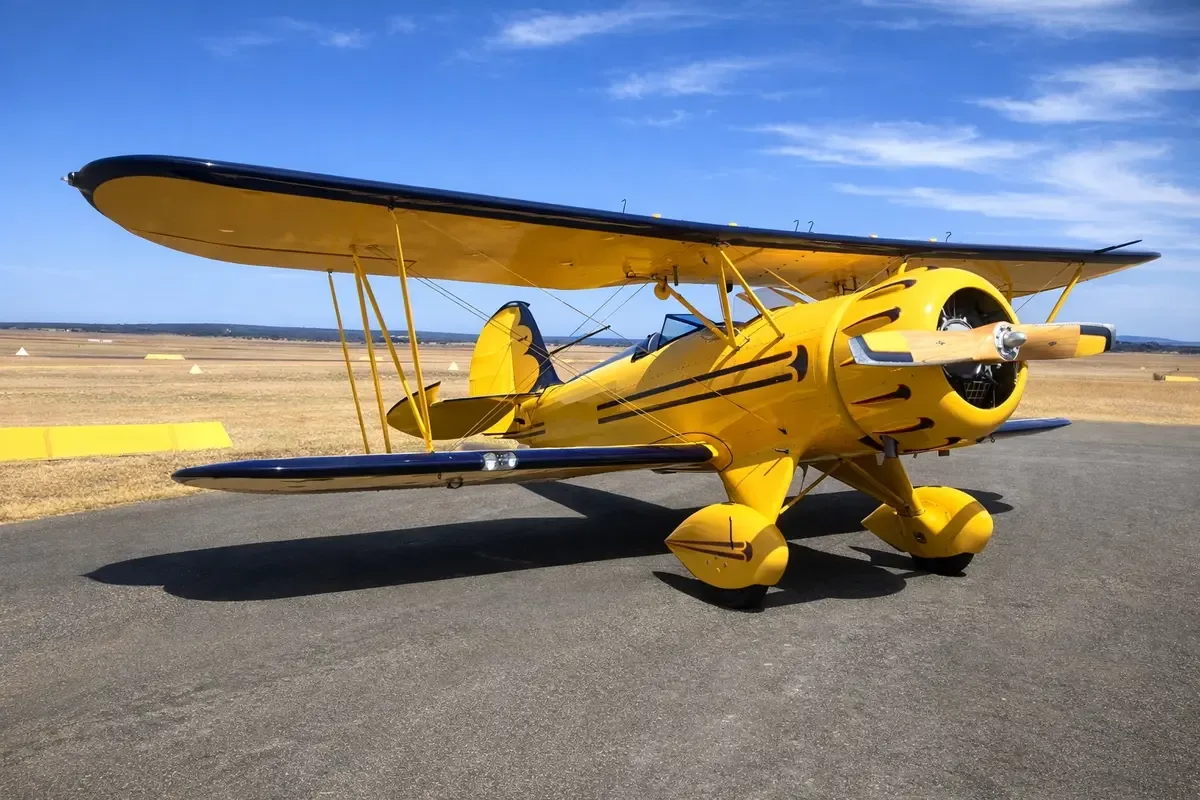
Free — save the YMF to your watchlist and track it in one place.
More WACO YMF-5manuals & documents
Related documents
- VASHON AIRCRAFT RANGER R7 MAINTENANCE MANUAL-REV 3Vashon Aircraft Ranger R7 · Maintenance Manual
- RV-12 MAINTENANCE MANUALVANS RV-12IS · Maintenance Manual
- RV-12 Maintenance ManualVANS RV-12IS · Maintenance Manual
- OWNER/OPERATOR INFORMATION MANUALCESSNA TURBO 210L · Maintenance Manual
- FALCON 50/50EX MAINTENANCE MANUALDASSAULT FALCON 50 · Maintenance Manual
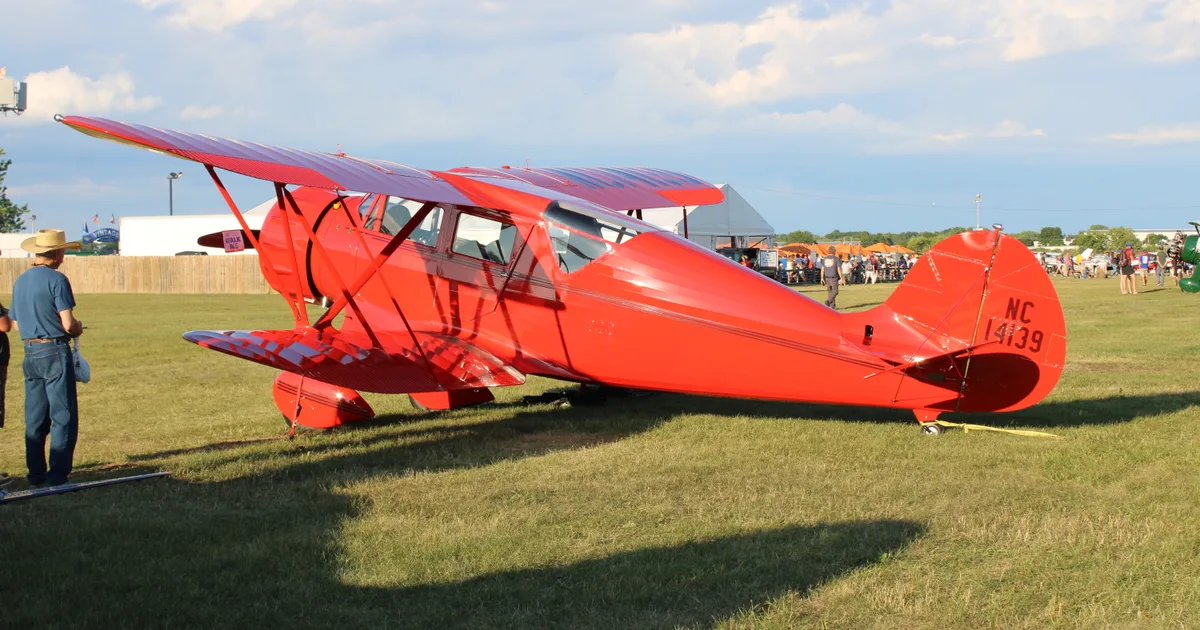
If you fly the WACO YMF-5, you may also be researching these.
In this document
Introduction
This section outlines the Instructions for Continued Airworthiness for the YMF WACO F5 series aircraft, superseding previous editions.
General Description
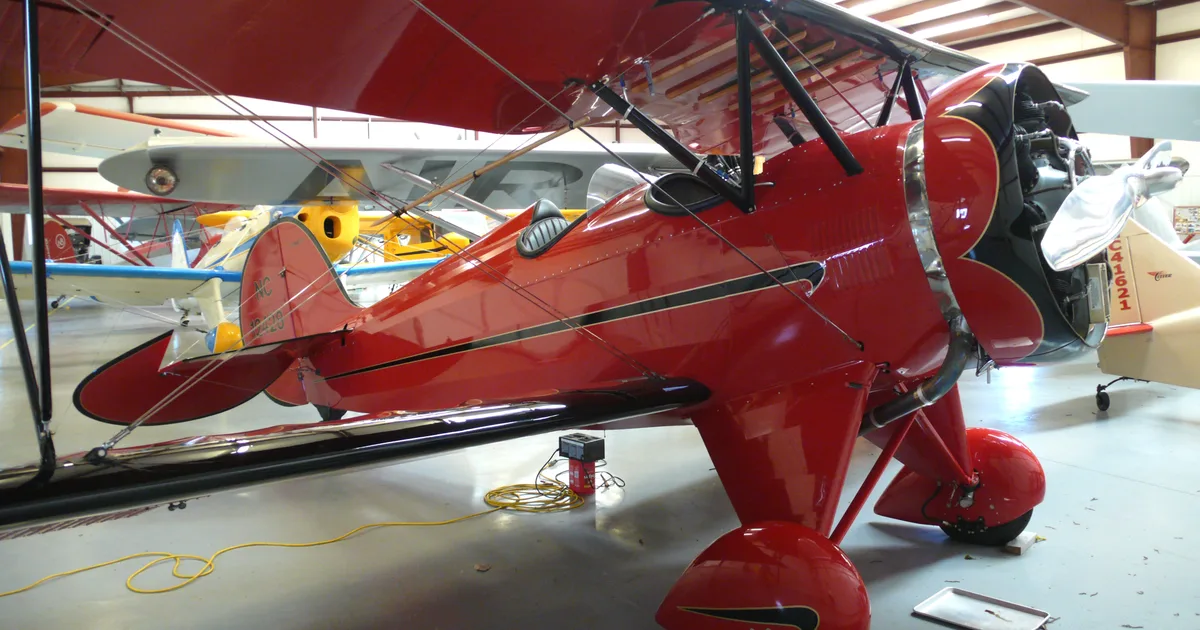
The YMF WACO F5 series is a single engine, three place, open bi-plane with a conventional landing gear arrangement, constructed from high-quality materials.
Specifications
Specifications for the YMF WACO F5 series are provided, including model designations and maximum gross weights for each model.
Powerplant
Details on the engine, including removal, installation, and compression testing procedures, are covered in this section.
Airframe
This section includes maintenance information related to the fuselage, landing gear, empennage, and wings.
Miscellaneous Maintenance Information
This section provides additional resources such as wiring diagrams and maintenance procedures for various components.
Summary written by AI from the source document. Check the original before relying on it. See which parts of Sprinkle are written by AI.
Safety notes
- Caution: Failure to follow instructions could lead to a non-airworthy condition.
- Warning: Non-compliance with safety instructions may result in serious operational issues.
- Service Letters are strongly advised for continued airworthiness.
- Consult the Type Certificate Data Sheet for conformity determinations.
Summary written by AI from the source document. Check the original before relying on it. See which parts of Sprinkle are written by AI.
Full document text
YMF WACO F5 SERIES MAINTENANCE MANUAL YMFAMM-1 WACO Classic Aircraft Corporation YMF WACO F5 SERIES MAINTENANCE MANUAL REVISION: H Page 1 of 33 RELEASED: 07/21/2017 PART NO. YMFAMM-1 SECTION 1 RECORD of REVISIONS 1.1 REVISION LOG LTR. DATE DESCRIPTION PAGES AFFECTED E 05/10/2010 Complete rewrite, reformatted, all pages. 1 through 31 F 02/08/2013 Sec. 7 Paragraph 7.2(c) Revised. Fig. 7.2 Added. Paragraph 7.4 added. New number of pages is 33. 2,23,24,28 G 06/20/2016 Sec. 10 revised. Form F-236 added 33 H 07/21/2017 Sec. 7 revised. Fig. 4 added Sec. 10 revised 30 33 Note: Newly revised material is identified by a vertical line in the left margin of the paragraph of text affected. WACO Classic Aircraft Corporation YMF WACO F5 SERIES MAINTENANCE MANUAL REVISION: H Page 2 of 33 RELEASED: 07/21/2017 PART NO. YMFAMM-1 SECTION 2 CONTENTS 2.1 TABLE of CONTENTS SECTION 1 RECORD of REVISIONS .................................................................................... 1 1.1 REVISION LOG .......................................................................................................... 1 SECTION 2 CONTENTS ........................................................................................................ 2 2.1 TABLE of CONTENTS................................................................................................ 2 SECTION 3 DEFINITIONS ..................................................................................................... 4 3.1 TERMS: ...................................................................................................................... 4 3.2 SPECIAL INSTRUCTIONS: .................................................................................... 4 3.3 SERVICE LETTERS: .......................................................................................... 4 3.4 SERVICE INSTRUCTIONS: ............................................................................ 4 SECTION 4 INTRODUCTION ................................................................................................ 5 4.1 INSTRUCTIONS FOR CONTINUED AIRWORTHINESS:........................................... 5 SECTION 5 GENERAL:.......................................................................................................... 6 5.1 DESCRIPTION: .......................................................................................................... 6 5.2 SPECIFICATIONS:......................................................................................................... 7 5.2.1 MODEL DESIGNATIONS: .......................................................................................... 7 5.2.2 DIMENSIONS: ........................................................................................................ 7 5.2.3 FLUID CAPACITIES: .......................................................................................... 8 5.2.4 FLUID GRADES: ............................................................................................ 8 5.3 GROUND HANDLING .................................................................................................... 8 5.3.1 MOVING: .................................................................................................................... 8 5.3.2 TAXIING: ................................................................................................................... 9 5.3.3 PARKING: ............................................................................................................11 5.3.4 MOORING ..........................................................................................12 5.3.5 JACKING: .........................................................................................................12 WEIGHING THE AIRPLANE .....................................................................................12 5.3.6 CARE OF THE AIRPLANE.........................................................................14 SECTION 6 AIRFRAME ........................................................................................................15 6.1 FUSELAGE ...............................................................................................................15 6.2.1 INSPECTION PERIODS ........................................................................................15 6.2 LANDING GEAR ................................................................................................19 6.3 EMPENAGE...................................................................................................20 6.4 WINGS .......................................................................................................21 SECTION 7 POWERPLANT ..................................................................................................23 7.1 ENGINE COWLS.......................................................................................................23 7.2 ENGINE REMOVAL & INSTALLATION .................................................................23 7.4 COMPRESSION TESTING OF ENGINE CYLINDERS: .....................................28 PROPELLER INSTALLATION ...................................................................................29 SECTION 8 SYSTEMS..........................................................................................................31 8.1 GASOLINE SYSTEM.................................................................................................31 8.2 OIL SYSTEM .........................................................................................................31 8.3 ELECTRICAL SYSTEM .....................................................................................31 SECTION 9 AIRWORTHINESS LIMITATIONS .....................................................................32 9.1 APPLICABILITY ........................................................................................................32
Show full textShow less
SECTION 10 MISCELLEOUNEOUS MAINTENANCE INFORMATION ...............................33 A. WCAC FORM SMWS SCHEDULED MAINTENANCE WORKSHEET ...........................33 WACO Classic Aircraft Corporation YMF WACO F5 SERIES MAINTENANCE MANUAL REVISION: H Page 3 of 33 RELEASED: 07/21/2017 PART NO. YMFAMM-1 B. WIREING DIAGRAMS ...................................................................................................33 C. JACOBS OPERATORS MANUAL MODELS R-755A2 7 R-755B2 ................................33 D. SENSENICH PROPELLER CO. INSTALLATION AND MAINTENANCE INSTRUCTIONS ........33 E. MT-PROPELLER INSTALLATION AND MAINTENANCE MODEL MT233R150-6AJ ....33 F. HAMILTON STANDARD MODEL 2B20 CONSTANT SPEED PROPELLER INSTRUCTIONS ...33 G. BENDIX BATTERY IGNITION SERVICE INSTRUCTIONS AND PARTS LIST .............33 H. BENDIX-SCINTILLA AIRCRAFT MAGNETOS SERVICE INSTRUCTIONS ..................33 I. SIGTRONICS (JASCO) ALTERNATOR TROUBLE SHOOTING INFORMATION .........33 J. BRACKET AIR FILTER INSTRUCTIONS FOR CONTINUED AIRWORTHINESS .........33 K. PARKER HANNIFIN WHEEL AND BRAKE MAINTENANCE PROCEDURES ..............33 L. SERVICE LETTERS and SERVICE BULETINS ............................................................33 M, K&L SOARING FORM F-236 ........................................................................................33 N. MT-PROPELLER INSTALLATION AND MAINTENCE MODEL MTV-15-AA-C/C-236-29 ............ 33 WACO Classic Aircraft Corporation YMF WACO F5 SERIES MAINTENANCE MANUAL REVISION: H Page 4 of 33 RELEASED: 07/21/2017 PART NO. YMFAMM-1 SECTION 3 DEFINITIONS 3.1 TERMS: Aeronautical terms used in this manual are as defined in CFR Title 14 Part 1, "Definitions and Abbreviations". Other terms used are defined as follows: 3.2 SPECIAL INSTRUCTIONS: Information or instructions considered to be of special significance are annotated as shown below: (a) NOTE: - Used to call attention to information or instructions of an advisory nature only. This information is enclosed in a box as shown below: NOTE (b) CAUTION: - Used to call attention to information or instructions which, if not followed, could lead to a non-airworthy condition or result in the airplane being operated outside of it's Approved Limits. This information is enclosed in a box as shown below: CAUTION (c) WARNING: - Used to call attention to information or instructions which, if not followed, would result in a non-airworthy condition. This information is enclosed in a box as shown below: WARNING 3.3 SERVICE LETTERS: Service Letters are issued by WACO Classic Aircraft Corporation as needed to provide additional maintenance information not included in the current revised maintenance manual or to alert owners and operators of service issues that if unaddressed could lead to an un- airworthy condition. Compliance with Service Letters is not mandatory but is strongly advised to insure the continued airworthiness of the affected aircraft. WACO Classic Aircraft will make every reasonable effort to make Service Letters available to all owners of record. 3.4 SERVICE INSTRUCTIONS: Service Instructions are provided as needed to assist maintenance personnel with the installation of Service Kits or when a replacement part or assembly has been changed in such a way as to require additional information not included in the current revised Maintenance Manual. WACO Classic Aircraft Corporation YMF WACO F5 SERIES MAINTENANCE MANUAL REVISION: H Page 5 of 33 RELEASED: 07/21/2017 PART NO. YMFAMM-1 SECTION 4 INTRODUCTION 4.1 INSTRUCTIONS FOR CONTINUED AIRWORTHINESS: In accordance with Federal Aviation Regulations (FAR) Part 23, Appendix G, this Maintenance Manual constitutes the Instructions for Continued Airworthiness for the YMF WACO F5 series aircraft manufactured by WACO Classic Aircraft Corporation and its predecessor Classic Aircraft Corporation and supersedes previous editions of the WACO Classic Service Manual as revised March 13, 2006 which is obsolete. WACO Classic Aircraft Corporation YMF WACO F5 SERIES MAINTENANCE MANUAL REVISION: H Page 6 of 33 RELEASED: 07/21/2017 PART NO. YMFAMM-1 SECTION 5 GENERAL: 5.1 DESCRIPTION: The WACO Classic Aircraft YMF WACO F5 series aircraft is a single engine, three place, open bi-plane seating two passengers in the front cockpit and a single pilot in the rear and having a conventional landing gear arrangement. The fuselage frame and tail surfaces are constructed of TIG welded 4130 steel tubing and the wings of premium aircraft grade Sitka spruce with 4130 steel fittings throughout. The fuselage frame is fitted with mahogany plywood formers and spruce stringers to give it shape. The entire aircraft is covered with Ceconite (Polyfiber) 102 Dacron fabric and finished according to WACO Classic Process Specifications with the standard finish color being PPG Urethane enamel. All models are equipped with a Jacobs 7 cylinder radial engine either carburetor or fuel injection equipped and with either a fixed pitch or constant speed propeller. The following table lists the various models of the series. MODEL DESIGNATION SERIAL NUMBERS MAXINUM GROSS WEIGHT MODEL YEAR YMF WACO F5A F5001 THRU F5009 2650 Pounds 1986 to1987 YMF WACO F5B F5010 THRU F5O36 2770 Pounds 1987to1991 YMF WACO F5C F5C040 and Up 2950 Pounds 1991 and On WACO Classic Aircraft Corporation YMF WACO F5 SERIES MAINTENANCE MANUAL REVISION: H Page 7 of 33 RELEASED: 07/21/2017 PART NO. YMFAMM-1 5.2 SPECIFICATIONS: All models are manufactured in conformance with FAA Type Certificate Number ATC542 and Supplemental Type Certificate Number SA1000GL the details of which can be found by accessing the Type Certificate Data Sheet (TCDS) for the WACO Aircraft Company YMF at www.faa.gov. Although a summary of specifications is given here, the TCDS should always be consulted when making conformity determinations. 5.2.1 MODEL DESIGNATIONS: Although Type Certificate Data Sheet ATC542 lists this series simply as the Model YMF F5 modification, modified by STC SA1000GL, for the purpose of clearly identifying to which aircraft an instruction or reference applies, the following model designations are used in this manual. Model YMF WACO F5A (Approved March 10, 1986): This model is the first of the series manufactured by Classic Aircraft Corporation of Lansing MI having a maximum gross takeoff weight of 2650 pounds, a Jacobs R755B2 engine and carry serial numbers F5001 through F5009. Although fitted with a Jacobs R755B2 engine rated at 275 HP at 2200 RPM, this model airframe is limited by propeller or placard to 245 HP and 1950 RPM at sea level. CAUTION ALTHOUGH A VARIETY OF PROPELLERS ARE ELEGIBLE FOR INSTALLATION ON THIS MODEL, IT SHOULD BE NOTED THAT THE 245 HP LIMITATION CAN BE EXCEEDED WITH A PROPELLER OF LESS THAN 96 IN. DIAMETER AND LESS THAN 72 IN. PITCH. IT IS THE OPERATOR’S RESPONSIBILITY TO INSURE THAT THE RPM AND HP LIMITATION IS NOT EXCEEDED. Model YMF WACO F5B (Approved January 28, 1988): This model is the second of the series manufactured by Classic Aircraft Corporation at Lansing MI, has a maximum gross takeoff weight of 2770 pounds and are identified by serial numbers F5010 through F5036. This model is fitted with a Jacobs R755B2 engine with a horsepower rating of 275 at 2200 RPM and is not HP limited. Model YMF WACO F5C (Approved June 24, 1991): The F5C is the third model of the series and has been manufactured in both Lansing and Battle Creek MI, first by Classic Aircraft Corporation and since 1997 by WACO Classic Aircraft Corporation. This version has a maximum gross takeoff weight of 2950 pounds and is powered by the Jacobs R755B2 engine rated at 275 HP at 2200 RPM and may be either carburetor or fuel injection equipped. Model YMF WACO F5C-8 (Approved May 12, 2010): The F5C-8 is a variation of the F5C with the optional Jacobs R755A2 engine rated at 300 HP at 2200 RPM installed either during manufacture or as a retrofit and may be equipped with either carburetor or fuel injection. Serial numbers F5C040 and up are eligible for this option and can be identified by a “-8” in the serial number (example F5C-8-121). 5.2.2 DIMENSIONS: The general dimensions of the Models F5A and F5B are as follows: WING SPAN (UPPER) 30 Ft. 0 In. (9.14M) WING SPAN (LOWER) 26 Ft. 10 In. (8.18M) LENGTH (OVERALL) 23 Ft. 4 In. (7.11M) HEIGHT (OVERALL) 8 Ft. 6 In. (2.59M) The general dimensions of the Model F5C are as follows: WING SPAN (UPPER) 30 Ft. 0 In. (9.14M) WING SPAN (LOWER) 26 Ft. 10 In. (8.18M) WACO Classic Aircraft Corporation YMF WACO F5 SERIES MAINTENANCE MANUAL REVISION: H Page 8 of 33 RELEASED: 07/21/2017 PART NO. YMFAMM-1 LENGTH (OVERALL) 23 Ft. 10 In. (7.26M) HEIGHT (OVERALL) 8 Ft. 6 In. (2.59M) 5.2.3 FLUID CAPACITIES: FUEL SYSTEM: All models have a standard fuel system capacity of 48 US Gal. (182 Litre) in two 24 gallon main tanks located in the center wing section above the front cockpit. One or two optional 12 US Gal. (45 Litre) tanks may be installed in the upper wings, one left or one right or both left and right, just outboard of the center wing section. These are connected to and feed directly into the respective adjacent main fuel tank outlet and cannot be individually selected. ENGINE OIL SYSTEM: The Jacobs engine is of the dry sump type with the lubricating oil being contained in a 4 (15 Litre) or 5 (19 Litre) gallon capacity tank mounted aft of the engine and forward of the firewall. The required engine oil capacity is established by regulation depending on fuel capacity. Airplanes equipped with a standard 48 gallon fuel system may have a 4 gallon oil tank and those with optional auxiliary fuel must have a 5 gallon oil tank. HYDRAULIC SYSTEM: The hydraulic system of all models consists of a hydraulically operated toe brake system. The reservoir is located on the left side of the engine firewall and has a capacity of approximately one pint. 5.2.4 FLUID GRADES: FUEL (AVIATION): All models require 80 Octane Aviation Gasoline minimum grade fuel. ENGINE OIL: All models require the use of only aviation grade engine oils, with or without ashless dispersant (AD). It is recommended that AD type oil be used to reduce sludge buildup. Single grade or multi-grade oils may be used. If single grade oil is used, the ambient temperature in which the engine will be operated should be considered as follows: Ground Temperature Grade of Oil Above 50 Deg. F (10 Deg. C) 100 Saybolt or SAE 50 50 Deg. F to 20 Deg. F (10 C to -5 C) 80 Saybolt or SAE 40 Below 20 Deg. F (-5 C) 65 Saybolt or SAE 30 In very hot ground conditions or if the inlet oil temperature frequently exceeds 185 Deg. F (85 C), Grade 120 Saybolt (SAE 60) should be used. HYDRAULIC FLUID: The hydraulic brake system in all models requires the use of Mil-H-5606 Hydraulic oil (Red) or equivalent. 5.3 GROUND HANDLING 5.3.1 MOVING: Always disengage the tail wheel steering mechanism before attempting to move the airplane by hand or by towing. This can be accomplished by moving the tail wheel steering control located on the left side of the rear cockpit to the forward position. To move the airplane it is recommended that a suitable tug or tow vehicle be used with a spreader type tow bar attached to the tow rings provided on the inboard side of each main landing gear axel. An acceptable alternate method would be the use of a tail wheel type towing device such as the Tail- Dragger Dragger®. In selecting a tail wheel towing device it is important to insure that it will be low enough to not come in contact with the rudder when connected, will securely engage the tail wheel or strut without danger of unwanted disengagement and has the power needed to safely move a 3000 pound airplane considering the surface to be traversed. If no towing device or tug is available, the airplane can be moved by hand by gripping the front inter-plane strut at its base near the leading edge of the lower wing. It is recommended that two persons be used for moving by hand, one on each side, and, if possible, a third person at the tail in front of the horizontal stabilizer gripping the stabilizer spar at the base of the fin to assist in steering, taking care not to push against the fuselage, fin or stabilizer. WACO Classic Aircraft Corporation YMF WACO F5 SERIES MAINTENANCE MANUAL REVISION: H Page 9 of 33 RELEASED: 07/21/2017 PART NO. YMFAMM-1 5.3.2 TAXIING: CAUTION IMPORTANT: GROUND RUN OPERATIONS SHOULD BE CONDUCTED ONLY BY PERSONNEL PROPERLY TRAINED AND EXPERIENCED IN THE OPERATION OF THIS TYPE AIRCRAFT! Before attempting to taxi the airplane, ground personnel should be instructed and approved by a qualified person authorized by the owner. Engine starting and shut-down procedures as well as taxi techniques should be covered. ENGINE STARTING PROCEDURES: Before Starting Engine: (a) Seat - Position and lock (b) Seat belt and shoulder harness – Fasten NOTE For safety it is recommended that the seat belt and shoulder harness be fastened even for taxi and run- up operations (c) Parking brake* - As needed *Refer to parking brake operating instructions below before using! (d) All electrical switches and avionics - Off (e) Fuel selectors - Both on (f) Fuel quantity indicators – Check Normal Engine Start - Carburetor Equipped: (a) Battery master switch - On (b) Light switches - As needed (c) Ignition switch - "Bat Ign" position ("Off" if dual magnetos are installed) (d) Mixture control - Full rich (forward position) (e) Carburetor heat control - Off (forward position) (f) Propeller control (if Hamilton Standard Propeller installed) - High pitch (Low RPM) full aft (g) Throttle lever - Cracked (1/4 inch) open (h) Engine primer pump - As needed (10 to 12 strokes for cold engine, (2 or 3 for hot engine) (i) Starter - Engage CAUTION Do not pump the throttle to start. Fuel can collect in the air inlet and cause a fire hazard. If the engine does not start immediately, disengage the starter, wait 2 to 3 minutes and repeat the start procedure. (j) Ignition switch - Both position after engine starts (Both after 2 – 3 revolutions if dual mags are Installed) (k) Primer pump - As needed to keep engine running (cold weather) (l) Primer pump - Lock closed when no longer needed (m) Oil pressure - Check (30 PSI min within 15 sec) If no oil pressure within 30 sec shut down and check for cause. (n) Propeller control lever (if Hamilton Standard prop installed) - After 30 sec. Move to full forward position WACO Classic Aircraft Corporation YMF WACO F5 SERIES MAINTENANCE MANUAL REVISION: H Page 10 of 33 RELEASED: 07/21/2017 PART NO. YMFAMM-1 (o) Alternator field switch - On (p) Avionics master switch - On (q) Engine warm-up - 600 RPM for 30 seconds after start then 800 to 1000 RPM to warm up Normal Engine Start Fuel Injection Equipped (Cold): (a) Mixture control in idle cut-off position (b) Set throttle to 1/8 open (c) Master switch - ON (d) Boost pump switch - ON (e) Move mixture control to FULL RICH until fuel flow meter reads 4 to 6 GPH then immediately return mixture control to cut-off position (f) Engage starter. When engine starts, move mixture control to full rich (g) After start, to verify function of engine driven fuel pump, momentarily switch boost pump off and watch fuel flow gauge for possible loss of pressure. Hot Engine Start Fuel Injection Equipped: Use the same procedure as for cold starts except that the boost pump May be left off and step (e) eliminated Engine Start Using External Power: CAUTION The airplane has a negative ground electrical system. Be sure the positive and negative leads are connected to the corresponding terminals of the power source. To prevent arcing at the power plug, no power is to be applied to the power cable while the connection is being made. (a) Battery master, avionics, alternator, and all other electrical switches - Off (b) External power unit - Off and connect (c) External power unit - Output set to 24 Volts and On (d) Battery master switch - On (e) Engine - Start using normal procedures described above (f) External power unit - Off and disconnect after engine is started AFTER ENGINE START (1) Before beginning to taxi, be sure the area in front of the airplane is clear of obstacles. It is advisable to initiate a slight turn to one side or the other as soon as practical to see this area. Taxi a few feet forward and apply the brakes to determine their effectiveness. (2) While taxiing, make slight turns to ascertain the effectiveness of the steering. The tail wheel steering should be engaged for normal steering, however, it may be disengaged and the brakes and rudder used to make sharp turns. (3) Observe wing clearance when taxiing near buildings or other stationary objects keeping in mind that the upper wings extend beyond the lower wings and the tips cannot be seen from the pilot’s seat. If possible, station an observer outside the airplane. (4) When taxiing over uneven ground avoid holes and ruts. (5) Do not operate the engine at high RPM when running up or taxiing over ground containing loose stones, gravel or any loose material that may cause damage to the propeller blades. It is also advisable to not taxi through aircraft tie-down areas except as necessary for parking to avoid the possibility of striking an unseen parked aircraft or chocks. WACO Classic Aircraft Corporation YMF WACO F5 SERIES MAINTENANCE MANUAL REVISION: H Page 11 of 33 RELEASED: 07/21/2017 PART NO. YMFAMM-1 NOTE REMEMBER – FORWARD VISIBILITY IS LIMITED. USE EXTREME CAUTION WHEN TAXIING 5.3.3 PARKING: * Parking Brake Operating Instructions: 1. To apply the parking brake: (a) Apply brakes by depressing toe brake pedals (b) Pull parking brake control "T" handle out NOTE Initial brake application pressure should be only enough to allow the control handle to be pulled out. Keep in mind that to release the parking brake, more pressure must be applied than was initially used, and that any brake application while the control handle is out traps additional pressure in the system. It is possible to accumulate enough pressure in the brake system so that the parking brake cannot be released. If this condition occurs, the pressure must be relieved by loosing the brake hose fitting at each brake caliper. Retighten after the parking brake valve has been returned to the off position. 2. To release the parking brake: CAUTION Do not push the parking brake control "T" handle in before applying brake pressure. Doing so can bend the control cable resulting in the control valve not being moved completely to the off position. Subsequent brake operation could result in unwanted parking brake application. (a) Apply brake pressure by depressing toe brake pedals firmly (b) Push the parking brake control "T" handle in When parking the airplane, be sure that it is sufficiently protected from adverse weather conditions and that it presents no danger to other aircraft. When parking the airplane for any length of time or overnight, it is suggested that it be moored securely, into the wind if possible. If the parking brake is set, follow the instructions above. CAUTION Brakes should not be set when overheated or during cold weather when accumulated moisture may freeze a brake WACO Classic Aircraft Corporation YMF WACO F5 SERIES MAINTENANCE MANUAL REVISION: H Page 12 of 33 RELEASED: 07/21/2017 PART NO. YMFAMM-1 Aileron and elevator controls should be secured with the aft seat belt and chocks used to properly block the wheels. 5.3.4 MOORING The airplane should be moored for immovability, security and protection. The following procedures should be used for the proper mooring of the airplane. (1) Head the airplane into the wind if possible. (2) Immobilize the ailerons and elevators by looping the seat belt around the control stick and pulling it snug. (3) Block the wheels. (4) Secure tie-down ropes to the wing tie-down rings and to the tail wheel fork at approximately 45 degree angles to the ground. When using rope of non-synthetic material, leave sufficient slack to avoid damage to the airplane should the ropes contract. CAUTION Use bowline knots, square knots or locked slip knots. Do not use plain slip knots. NOTE Additional preparation for high winds include using tie- down ropes from the propeller shaft and securing the rudder. (5) Install a pitot head cover if available. Be sure to remove the pitot head cover before flight. 5.3.5 JACKING: To raise the aircraft for landing gear servicing or weighing, jack point sockets are located just forward of the main landing gear legs and access is attained by removing the small round covers in the lower fairings. Insert the 5/8” jack point fitting into the socket and place the jack under it to hold it in place. The jacks may be used individually for lifting one wheel or together when raising both wheels simultaneously. The tail may be raised by jacking under the horizontal bushing located at the extreme aft end of the fuselage under the tail post. On some aircraft it is necessary to remove the lower tail fairing to gain access to the horizontal bushing. WEIGHING THE AIRPLANE The airplane is to be weighed in the level flight position. This necessitates an elevated platform on which to rest the scale for the tail wheel. The airplane should be first brought onto the main wheel scales either by jacking or rolling into position and then lifting the tail onto the elevated tail wheel scale. The airplane must be leveled horizontally and should be as level laterally as practical. The horizontal leveling means is the top longeron under the horizontal stabilizer (see Figs. 5-1, 5-2) and the rear cockpit floor can be used to level laterally. Aircraft serial numbers F5C120 and up have leveling lugs located under the left horizontal stabilizer. These can be accessed by temporarily replacing the two truss head machine screws found there with screws of the same size but long enough to allow a leveling device to rest upon them both (see Fig. 5-3). WACO Classic Aircraft Corporation YMF WACO F5 SERIES MAINTENANCE MANUAL REVISION: H Page 13 of 33 RELEASED: 07/21/2017 PART NO. YMFAMM-1 Fig. 5-1 Serial Numbers F5001 through F5036 Fig. 5-2 Serial Numbers F5C040 and Up WACO Classic Aircraft Corporation YMF WACO F5 SERIES MAINTENANCE MANUAL REVISION: H Page 14 of 33 RELEASED: 07/21/2017 PART NO. YMFAMM-1 Fig. 5-3 5.3.6 CARE OF THE AIRPLANE Your WACO airplane is a piece of fine machinery and is deserving of care and attention. When not in use it should be stored in a hangar as near dustproof, weatherproof and fireproof as is available. The finish of an airplane deteriorates much faster when out in the weather than when properly sheltered. CLEANING THE AIRPLANE It is desirable to keep the airplane clean both inside and outside at all times. We advise the use of petroleum solvent for cleaning the airplane finish only when it is absolutely necessary to remove grease spots. The best method of cleaning the airplane is to use warm water and mild detergent, washing a spot of about three square feet at a time and rinsing immediately afterward. Begin at the upper surface of one of the top wings and wash that wing, both upper and lower surface, working in from the tip and across to the other side. Then wash fuselage; tail surfaces and lower wing and lastly, landing gear. After completely washing and rinsing one surface, say one complete wing, if a chamois is available, go over the surface with chamois, which will add to the smoothness and luster of the finish. While washing the airplane, one has a good opportunity to inspect the vent grommets along the lower side of the trailing edge of wings and tail surfaces. These vents should be kept open at all times and it is well to make sure these are open by sticking a small instrument, such as a match or something of that nature, through the holes as you come to them while washing. Care should be taken to keep water off the engine and also out of the cockpits. For the leather interior and coaming wraps, we recommend a good grade of saddle soap be used to keep the leather clean and pliable. WACO Classic Aircraft Corporation YMF WACO F5 SERIES MAINTENANCE MANUAL REVISION: H Page 15 of 33 RELEASED: 07/21/2017 PART NO. YMFAMM-1 SECTION 6 AIRFRAME 6.1 FUSELAGE The Federal Aviation Administration (FAA) occasionally publishes Airworthiness Directives (ADs) that apply to specific groups of aircraft. They are mandatory changes and are to be complied with within a time limit set by the FAA. When an AD is issued, it is sent to the latest registered owner of the affected aircraft and also to subscribers of the service. The owner should periodically check with his/her A&P mechanic for the latest issued AD against the aircraft and accessories. One hundred hour inspections are required by law if the aircraft is used commercially. Otherwise this inspection is left to the discretion of the owner. This inspection is a complete check of the aircraft and its systems, and should be accomplished by a qualified aircraft and powerplant mechanic who owns or works for a reputable repair shop. The inspection is listed, in detail, in the inspection report of the appropriate service manual. An annual inspection is required once a year to keep the Airworthiness Certificate in effect. It is the same as a 100-hour inspection except that it must be signed by an Inspection Authorized (IA) mechanic or a Flight Standards District Office (FSDO) representative. This inspection is required whether the aircraft is operated commercially or for pleasure. For all information regarding engine operation, servicing and maintenance refer to the Jacobs Operators Manual. For all other accessory items such as instruments, radios, strobe lights, etc., refer to their respective manufacturer’s service manuals. Items needing repair or overhaul should be returned to the manufacturer or an approved repair station. 6.2.1 INSPECTION PERIODS An inspection schedule check list form can be found in Section 10 of this manual and should be used to perform the following inspections. (A) 50 Hour Maintenance Schedule – Every 50 hours (1) Engine check. (See Jacobs Operators Manual in Section 10) (2) Oil in engine should be changed every 50 hours or less with the oil of viscosity and grade defined in Section 3 of Jacobs Operators Manual. (3) Inspect gasoline gauges, and if sediment or water has accumulated in the bottom, remove it by opening the valve at the bottom of the gauge or by removing the gauge from the tank and shake the sediment out through the top. In extreme cases it may be necessary to remove and disassemble the gauge and then the gauge can be cleaned with a small bottle brush. Care must be taken when reinstalling the drain valve as to not over tighten. For the plastic type gauge see fuel gauge installation instruction sheet in Section 7 of this manual. (4) Clean gasoline strainer. (5) Make it a practice to keep the entire airplane clean inside and outside, this will greatly facilitate inspection. (6) Inspect airplane carefully and at the same time use light oil and lubricate moving parts on control system such as aileron and tail hinges, aileron strut connections, etc. (See Lubricant Chart). (7) Brake Service – The brake system is filled with MIL-H-5056 (petroleum base) hydraulic brake fluid. The fluid level should be checked periodically or at every 50 hour inspection and replenished when necessary. The brake reservoir is located on the left lower firewall in the engine compartment. If the entire system must be refilled, fill with fluid under pressure from the wheel end of the system. This will eliminate air from the system. WACO Classic Aircraft Corporation YMF WACO F5 SERIES MAINTENANCE MANUAL REVISION: H Page 16 of 33 RELEASED: 07/21/2017 PART NO. YMFAMM-1 No adjustment of the brake clearances is necessary. If, after extended service, brake blocks become excessively worn, they should be replaced with new segments. See Parker Hannifin Maintenance Sheets in Section 7 of this manual for details. (8) Check tire inflation and condition. Keep 7:50 x 10 tires inflated to 30 P.S.I. Keep 10” tail wheel tire inflated to 60 P.S.I. When checking tire pressure, examine the tires for wear, cuts, bruises and slippage. Replace when required. The main wheel tires are 7:50 x 10, 6 ply with tubes. The tail wheel tire is 10 x 3.5 x 4 with tube. (9) Battery Service – Access to the battery is obtained by removing the cover in the top cowl and removing the cover of the battery box. Check the drain tube to see that it is open and draining properly. Check the box for condition; clean and paint as required. The battery should be checked for proper fluid level. DO NOT fill the battery above the baffle plates. DO NOT fill the battery with acid – use only water. A hydrometer check will determine the percent of charge in the battery. Reinstall box cover and safety. Reinstall cowl cover. If the battery is not up to charge, recharge starting at a 4 amp rate and finishing with a 2 amp rate. Quick charges are not recommended. (10) Induction Air Filter Service – The dry type of air filter must be inspected at least every 50 hours, and more often, even daily, when operating in dusty conditions. The filter is disposable and inexpensive and a spare should always be kept on hand for a rapid replacement. (a) Removal of Engine Air Filter The filter is located in the lower front of the engine cowl and is accessible in the chin scoop intake with the cowling intact. It may be removed by the following procedure: (1) Remove spring pin from top of filter. (2) Remove the filter from intake opening. (b) Cleaning Engine Air Filter (1) Tap the filter gently to remove loose dirt particles, being careful not to damage the filter. DO NOT wash the filter in any liquid. DO NOT attempt to blow out dirt with compressed air. (2) If the filter is excessively dirty or shows any damage, discard it and replace it immediately. (3) Wipe the filter housing with a clean cloth. (c) Installation of Engine Air Filter (1) After cleaning or when replacing the filter, install the filter in the reverse order of removal. (11) Propeller Service – Clean propeller with water and mild detergent. Inspect blades and tipping for damage and repair as required. The complete propeller and hub should be waxed periodically. Whether prop is wood or metal, it should occasionally be checked for balance, leading edge repairs and generally reconditioned. It is suggested that it be returned to the propeller factory for reconditioning. For additional service instructions, see Sensenich instruction sheets or MT- Propeller maintenance instructions, as applicable, in Section 10 of this manual. (B) 100 Hour Inspection – Every 100 Hours (1) Give airplane a regular 50 hour check as outlined above. (2) Remove weight from one side of the landing gear at a time so that the wheels can be tested for play in the splined section of the oleo struts. The allowable play is movement of ½ inch from extreme toe- in position to extreme toe-out position on each wheel at outer circumference of tire. When play exceeds this, install new bronze splined bushing. WACO Classic Aircraft Corporation YMF WACO F5 SERIES MAINTENANCE MANUAL REVISION: H Page 17 of 33 RELEASED: 07/21/2017 PART NO. YMFAMM-1 (3) Check the oil in oleo shock struts as described elsewhere in this manual. If excessive leakage of the oleo is found, it is recommended to remove the strut and service per instructions in the maintenance section of this manual. (4) Service wheels and brakes per Parker Hannifin Maintenance Procedure sheets in Section 10 of this manual. (5) Raise tail of airplane and support with a horse or something of that nature at the tail post, making sure that it is protected with a pad. Remove tail cowl, which is screwed to bottom of fuselage to keep dirt out. Now, carefully inspect the tail wheel mechanism for wear and play. It is suggested that the entire mechanism be cleaned thoroughly and re-lubricated. Lubricate tail wheel fork support and tail wheel shock strut, both of which are supplied with a zerk fitting, the fitting on the shock being just inside the fuselage. This fitting can be reached through the aluminum cowling at the bottom of the fuselage, which is screwed to the bottom of the fuselage. (6) Test leading edge of stabilizer for play in stabilizer bearing. If there is play, remove tail cowl and take up play by removing shims from the socket, which holds the threaded ball to the stabilizer. (7) If stabilizer works hard with tail cowl removed, clean threads on long adjustment screw thoroughly and then lubricate with heavy oil or cup grease. If stabilizer cable is slipping, there is an adjustment to take up play in the stabilizer cable. Tighten until slipping is prevented. Remove metal pan at bottom of fuselage just behind the motor cowling and check controls, cables and parts. If the ship has been flown from a dry, dusty airport and these controls are covered with grit, clean them thoroughly with solvent removing all grit and then lubricate per Lubrication Chart. Where cables go around the pulleys, check to make sure they have not frayed. This can easily be detected by moving the hand carefully over the control cables. If they are frayed, there will be sharp ends of wire sticking out at the frayed point. (8) Inspect fire extinguisher mounting and check for proper pressure (if installed) (9) Carefully inspect the entire ship removing inspection plates where necessary. A Progressive Maintenance Program can be approved by the FAA. It involves routine and detailed inspections at 50-hour intervals. The purpose of the program is to allow maximum utilization of the aircraft, to reduce maintenance inspection cost and to maintain a maximum standard of continuous airworthiness. Complete details are available from your A&P mechanic. (C) Preventative Maintenance (1) The holder of a Pilot Certificate issued under FAR Part 61 may perform certain preventative maintenance described in FAR Part 43. This maintenance may be performed only on an aircraft, which the pilot owns or operates and which is not used in air carrier service. The following is a list of maintenance which the pilot may perform: (a) Repair or change tires and tubes. (b) Service landing gear wheel bearings, such as cleaning, greasing or replacing. (c) Service landing gear shock struts by adding oil. (d) Replace defective safety wire and cotter keys. (e) Lubrication not requiring disassembly other than removal of non-structure items such as cover plates, cowling or fairings. (f) Replenish hydraulic fluid in the hydraulic reservoir. (g) Refinish the exterior or interior of the aircraft (excluding balanced control surfaces) when removal or disassembly of any primary structure or operating system is not required. (h) Replace side windows and safety belts. (i) Replace seats or seat parts with replacement parts approved for the aircraft. (j) Replace bulbs, reflectors and lenses of position and landing lights. WACO Classic Aircraft Corporation YMF WACO F5 SERIES MAINTENANCE MANUAL REVISION: H Page 18 of 33 RELEASED: 07/21/2017 PART NO. YMFAMM-1 (k) Replace cowling not requiring removal of the propeller. (l) Replace, clean or set spark plug clearance. (m) Replace any hose connection, except hydraulic connections, with replacement hoses. (n) Replace prefabricated fuel lines. (o) Replace the battery and check fluid level and specific gravity. (2) Although the above work is allowed by law, each individual should make a self-analysis as to the ability to perform the work. If the above work is accomplished, an entry must be made in the appropriate logbook. The entry should contain: (a) The date the work was accomplished. (b) Description of the work. (c) Number of hours on the aircraft. (d) The certificate number of pilot performing the work. (e) Signature of the individual doing the work. (D) Airplane Alterations (1) If the owner desires to have the aircraft modified, FAA approval must be obtained for the alteration. Major alterations accomplished in accordance with the Advisory Circular 43.13-2, when performed by an A&P mechanic may be approved by the local FAA office. Major alterations to the basic airframe or systems not covered by AC 43.13-2 require a Supplemental Type Certificate. (2) The owner or pilot is required to ascertain that the following aircraft papers are in order in the aircraft: (a) To be displayed in the aircraft at all times: (1) Aircraft Airworthiness Certificate Form FAA-8100-2. (2) Aircraft Registration Certificate Form FAA-8050-3. (3) Aircraft Radio Station License if transmitters are installed. (b) To be carried in the aircraft at all times: (1) Pilot’s Operating Handbook. (2) Weight and Balance data plus a copy of the latest Repair and Alteration Form FAA-337, if applicable. (3) Although the aircraft and engine logbooks are not required to be installed in the aircraft, they should be made available upon request. Logbooks should be complete and up to date. Good records will reduce maintenance cost by giving the mechanic information about what has or has not been accomplished. (E) Fabric Covering and Finish This aircraft as covered by WACO Classic Aircraft Corporation use the Ceconite 102 fabric and Randolph Butyrate Dope System. In this covering system, the Ceconite 102 fabric is attached to the airframe with Ceconite Super Seam cement and then heat shrunk to the desired tautness with an electric clothes iron. The fabric is then primed for doping by brushing on two coats of G-6302 Rand-O-Proof Primer, followed by a spray coat of W-8350 Non-Tautening Clear Butyrate Dope. At this time the rib stitching is done and then the protective grade A cotton pinked tapes, reinforcing patches, inspection rings and drain grommets are applied using 9701 Tautening Clear Butyrate Dope as the adhesive. After allowing the dope to dry, the surface is sanded to remove rough tape edges, brush marks, etc., followed by four spray coats of W- 8350 clear dope, sanding as required between coats. WACO Classic Aircraft Corporation YMF WACO F5 SERIES MAINTENANCE MANUAL REVISION: H Page 19 of 33 RELEASED: 07/21/2017 PART NO. YMFAMM-1 To protect the fabric from the deteriorating effects of sunlight, three spray coats of silver dope are applied. The silver dope is prepared by adding 2 ½ to 3 ounces of silver paste to each gallon of unthinned W-8350 dope. The silver dope is thinned as necessary for spraying. A spray coat of white butyrate dope is applied as a final step in the dope system, which prepares it for the finish paint of the customers’ choice. WACO Aircraft Serial Numbers F5001 through F5C096 have been finished with Dupont Imron Polyurethane Enamel. Serial numbers F5C097 and up have been finished with PPG Delta Polyurethane Enamel. The finish is very durable and requires only washing to retain its original shine. When washing, flush off the abrasive dust and dirt using flowing water and a sponge or soft cloth. Then wash with mild detergent to remove grease and surface deposits. Rinse with clean water to remove detergent residue and wipe dry with a soft towel or chamois. If the dope or Ceconite surface is damaged it should be repaired immediately. Small cracks in the dope can be sealed by carefully feeding thin cyanoacrylate instant glue into the crack until the crack is filled. This reattaches the dope to the fabric and seals the crack. The crack can then be sanded and repainted in the usual manner. Care must be used to mask the adjoining areas as any glue drips or runs will instantly mark the surface. When a repair requires doping, all of the enamel must be sanded off of the area where dope will be applied because the dope will not bond to the enamel. Small holes or tears may be repaired with a patch cut from a three-inch cotton pinked tape or cotton cloth. Patches should be cut out with pinking shears, large enough to extend 12 ½ inches beyond the edges of the repair. The patch should be cemented in place with Ceconite Super Seam Cement and then finished with the original dope and paint schedule. Larger patches and replacement panels must be Ceconite 102 fabric cemented in place using Ceconite Super Seam Cement with 1 ½ inch edge lap. After the cement has dried, shrink the patch to the desired tautness and then apply two coats of G-6302 Ran-O-Proof Primer and one coat of W-8350 Butyrate Dope. The edges of the patch should be covered with two inch pinked tape and then the patch should be finished with the original dope and paint schedule. When panels between ribs must be replaced, cut the fabric one inch inside the rib nearest the damaged portion and carry the patch over and beyond the rib by three inches. The replacement panel must extend over the leading edge and back to the front spar and the other lapped over the trailing edge. When the replacement panel extends over ribs, apply reinforcing tape and rib stitch it, without disturbing the old rib stitching. All large patches and replacement panels shall be taped over all edges and refinished per the original dope and finish schedule. 6.2 LANDING GEAR (A) Landing Gear Oleo Shock Struts These shock struts are so constructed that initial landing shock is absorbed by the oleo action before the piston reaches the shock spring at the top of the strut. Taxi shocks are absorbed by this coil spring in combination with the normal oleo action of the strut. You will note there is practically no rebound after the initial impact with the ground in landing, as this initial impact is taken entirely by the oleo action of the strut. Very little maintenance is required. It is suggested, however, that the oil level be checked EVERY 100 HOURS, if the ship is in regular service. If excessive oil leakage occurs, the struts should be dismantled completely and each part cleaned with solvent. Each part should be inspected and all worn parts, if any, should be replaced. The struts when reassembled should be filled with new oil. Instructions on Filling Shock Struts (1) Remove lock wire locking 1/8” pipe plug at upper end of shock strut and remove plug. WACO Classic Aircraft Corporation YMF WACO F5 SERIES MAINTENANCE MANUAL REVISION: H Page 20 of 33 RELEASED: 07/21/2017 PART NO. YMFAMM-1 (2) With strut compressed to contact spring, add oil until it is within 3 ½” of the plug opening. Use MIL-H- 5056 petroleum base hydraulic fluid. Cycle strut to fill air pockets, recheck fluid level. (3) Replace plug securely making sure to lock in place with lock wire. (B) Instructions for Disassembling & Reassembling Shock Struts (1) Remove top and bottom gear fairings. (2) Drain oil into container having approximately one-quart capacity by removing the plug at the top of the strut and the plug at the lower end of splined axle. (3) Remove brake cylinder and line from bracket at wheel. Unfasten the line from the strut but do not disconnect the brake line. (4) Remove wheel assembly. (5) Remove bolt attaching lower end of strut to cross brace strut, thereby permitting the strut to swing out so internal parts can be removed. (6) Remove lock ring #14133 and back off nut #14132. (7) Slip leather boot #12127 down off from grooved flange by removing the upper clamp, thereby permitting access to bolts. By removing these bolts and pulling on the axle the internal parts will slide out of the cylinder. (8) Remove the lock wire which locks the aluminum retainer bearing #14135 and unscrew retainer bearing using a spanner wrench in holes provided for same. Care must be taken not to burr up the slots on this part, as this would cause scoring to the inside wall of the outer tube. (9) Pull piston assembly #19234 from splined axle. (10) Slide spring #12021, piston stop #15599 and retainer off from upper end of piston assembly. (11) To assemble, insert piston assembly into splined axle taking care to get leather plunger inserted evenly all around and assemble in the opposite manner from disassembling. Attention is also drawn to be sure that all surfaces of inside of housing, spring, piston tube and splined strut tube are coated with cup grease before assembly. Apply Permatex “Form A Gasket” or equivalent to threads in #14135 piston retainer bearing when installing onto the splined strut. After assembly is completed, re-lubricate splined bushing with grease gun at zerk fitting provided. Refill oil as above. 6.3 EMPENAGE (A) Tail Assembly and Rigging Get the stabilizer right side up, which will place the ball nut on bottom, and flange pointing downward. First, screw this ball nut on the threaded bolt, which will be done by having one man in the airplane work the stabilizer adjustment which will turn the bolt, and let another man hold the stabilizer properly aligned so the threads will start. When the nut has been screwed down to a neutral position, attach the rear of the stabilizer to the fuselage. The elevator control cables can now be connected, making sure to attach correct cables to the top and bottom of the elevator horn. Adjust the elevator cables and position of the elevators by the turnbuckles, being careful to not let over two threads form either end of the turnbuckle barrel show after adjustment. When properly adjusted, set cable tension to 25 +/- 5 pounds. The elevator control travel should be adjusted as follows: Set the stabilizer trim to the full nose down position. Align the elevator with the stabilizer as viewed from the end. The elevator balance area should align with the end rib of the stabilizer when in this position. This is considered the neutral position for establishing the elevator travels. For aircraft without a down stop at the elevator horn, the down travel should be 27 +/- 5 degrees. Adjustment is made by changing the cable length with the turnbuckles as required to move the elevator to the desired position with the stick full forward. Reset cable tension and WACO Classic Aircraft Corporation YMF WACO F5 SERIES MAINTENANCE MANUAL REVISION: H Page 21 of 33 RELEASED: 07/21/2017 PART NO. YMFAMM-1 safety all components. The elevator up travel should be 33 +/- 2 degrees and may be adjusted by varying the length of the stop tube welded to the fin post. For aircraft with a down stop at the elevator horn, set the down stop at 23 +/- 1 degree down and the up stop at 33 +/- 2 degrees up. Adjustment is made by varying the length of the stop tubes welded to the fin post. Then adjust the turnbuckles to position the control stick to the desired location. Reset cable tension and safety all components. Install the fin by inserting the fin into the tail post, bolting it in place with a bolt just above the lower rudder hinge. Bolt the front of the fin to the bracket on the stabilizer support tubes. Lubricate all working parts as detailed on Lubrication Chart. Inspect carefully all nuts and cotter keys and then install tail cowl, screwing in place using screws and holes provided for same. Attach the top and bottom tail wires to the stabilizer. The bottom wire is the shorter one. The clip on the stabilizer end of the top tail wire is more nearly straight than that on the upper end. Tighten the tail wires, being careful that the stabilizer is kept straight. When properly adjusted, both bottom wires will be approximately the same length and both top wires the same length. Check by eye to see that the fin post is perpendicular to the top of the fuselage and the stabilizer is parallel to the top of the fuselage. Alignment of the rudder hinge bearings is controlled by the adjustment of the upper tail wires for side to side alignment and by varying the engagement in and out for fore and aft alignment. Using a straight edge along the side and back of the bearings, check the alignment and make any adjustments necessary. Set the upper brace wire tension to 500 +/- 50 pounds. Secure all check nuts and safeties. Add a drop of soft loctite to rudder hinge bearing shank threads after completing adjustments. The rudder may now be attached to bearings on fin post. Attach the rudder cable turnbuckles to the rudder horn and adjust turnbuckles until rudder action from stop to stop gives comfortable pedal action. The rudder should be checked for travels of 30 +/- 2 degrees right and left. If adjustment is required, vary the length of the stop tubes on the fin post as required. When the rudder rigger is complete, attach the tail wheel steering cables and again check operation. Lubricate all working parts to complete the installation. 6.4 WINGS 6.4.1 ASSEMBLY INSTRUCTIONS Rights and lefts are determined while standing at the tail and looking toward the nose of the airplane. Bolts and clevis pins should be installed with heads up, forward and outboard. Make it a practice to tighten the nut and insert the cotter key on each bolt as used, never leaving any finishing process to be done at a later date. This will avoid the possibility of leaving out the very important cotter keys. (A) Wing Installation and Rigging For the assembly and rigging of your airplane we recommend the following procedure: Jack the airplane, remove the pants and wheels, then lower the axles onto secure blocking. Check the fuselage for level laterally by using a level across the cockpit floor. Adjust as required to level by shimming the blocking under the axles. All blocking must be solid and secure as some bumping and shaking will occur during wing installation. Cabane Installation Attach cabane struts to the eyebolts in the top longerons. Attach wing center section to the top of the cabane struts. Next, check to ascertain that the incidence is 0 degrees. To do this, compare the angle of the top fuselage longeron under the stabilizer with the bottom surface of the center section between the spars. They should be the same. If not, it will be necessary to adjust the center section angle by relocating the washers on the upper longeron eyebolts as required. When the incidence is correct, secure all eyebolts and strut bolts. Next install the flying wires being sure to have both end fittings equally engaged. Hang a plumb line from each front wing attach fitting on the WACO Classic Aircraft Corporation YMF WACO F5 SERIES MAINTENANCE MANUAL REVISION: H Page 22 of 33 RELEASED: 07/21/2017 PART NO. YMFAMM-1 center section. Adjust the flying wires to center the center section over the fuselage. This is indicated by having equal distance between the plumb lines and the top longerons. Adjust the flying wire tension by turning both wires equal amounts until 1175/1300 pounds tension is attained. Check to ascertain that all flying wire end fittings have proper engagement. Lock all check nuts and recheck all safeties. Wing Installation and Rigging Place a padded support where the outboard end of the upper wing panel will be. Slide upper wing into center section attach fittings using care to enter the pitot tubes and harness into the proper place. Install wing attach bolts. Place a padded support where the outboard end of the lower wing will be. Slide the wing into place being sure to enter the aileron control rod into place. Install wing attach bolts. Install the landing wires being sure to have both end fittings equally engaged and adjust both wires equally to obtain 2 degrees of dihedral. Install the center inter plane strut. Adjust front inter plane strut to length required to hold upper wing at 0 degrees incidence measured on lower surface at the strut points between the spars to match the center section and then install. Adjust rear inter plane strut to hold lower wing at 0 degrees incidence measured on the lower surface at the strut points between the spars to match the lower surface at the butt rib between the spars and then install. Install the wings on the other side using the same procedure. Install all three flying wires on each side being sure to have both end fittings equally engaged. Adjust all flying wires to the point where tension is just starting to build up. At this point, adjust the center flying wire to 1175/1300 pounds tension. Then adjust rear flying wire to 1175/1300 pounds tension. Now adjust front flying wire to 800/900 pounds tension. Check the tension in both landing wires and adjust by decreasing the tight wire and increasing the lower tensioned wire equal amounts until they are equal in tension. Recheck the flying wires to be sure they are still within tension tolerance. Recheck dihedral and incidence angels, making any final adjustment necessary. Check to ascertain that all flying wire and fittings have proper engagement. Tighten all check nuts and then recheck all cotter pins, lock nuts, check nuts, etc., for security and proper safeties. Aileron Control Installation and Rigging Block all ailerons in neutral position (aileron trailing edge aligned with the wing trailing edge). Block control stick in neutral (centered between cockpit sides). From underneath the airplane through the belly access panel, adjust the aileron push rod end fittings until the rod end fitting hold aligns with the control rod fittings and safety the bolts with a cotter pin. Tighten the check nuts on the push rod end fittings. Next adjust the aileron interconnect strut end fittings for equal engagement of both ends and a length to provide a slip fit of the end attachment bolts through the aileron fittings with the strut in position. Be sure to install 11688 bushing in each fitting and install. Tighten all check nuts and recheck all safeties. Remove the blocking from the ailerons and control stick. Check the aileron control system for free movement and proper operation. Set the up angular travel of both lower ailerons from neutral (trailing edge of aileron and wing aligned) to full up at 25 +/- 3 degrees. This is accomplished by changing the length of the stop tab located on the lower wing skin next to the aileron bell crank as required. Lubricate the various working parts of the control system using engine oil. Controls will naturally be rather stiff on a new airplane until they have been worked in for a few hours. Complete the installation of pitot and static lines, electrical harness, fuel system, fairings and access panels and covers. If properly rigged, the airplane should fly in a normal course with “hands off” for an indefinite period in smooth air. However, if it should prove to be a little right wing heavy, for instance, this can be corrected by lengthening slightly the right rear inter plane strut, or if left wing heavy, the left rear strut. WACO Classic Aircraft Corporation YMF WACO F5 SERIES MAINTENANCE MANUAL REVISION: H Page 23 of 33 RELEASED: 07/21/2017 PART NO. YMFAMM-1 SECTION 7 POWERPLANT 7.1 ENGINE COWLS Proper maintenance is an essential requirement to get proper service and long life from the NACA cowl. At each engine check the felt pads should be carefully examined and kept in good condition to make sure there is no metal to metal contact between the cowl and the engine. We use deicer boot adhesive cement to make the felt pads adhere in their proper location, and if these come loose from time to time, they should be replaced with new pads. The cowl should be kept snug with attachment fittings uniformly adjusted so as to distribute the load over the various fittings, rather than having one tight and carrying the entire load. It is well to remember that the engine expands when hot and it is better to be a little on the loose side than to have them too tight. The cowl should not vibrate in flight and if it is observed to start vibrating or shaking, steps should be taken to correct the condition causing this problem. Sometimes it will be found in a rough propeller or engine rather than in the actual cowl mountings. 7.2 ENGINE REMOVAL & INSTALLATION The procedure for removing the engine is the same for both the R-755B2 and the R-755A2 engine. All hardware, controls, hoses, fuel and oil systems are identical in both cases. The procedure is as follows: (a) Remove cowl (b) Disconnect engine controls – throttle, mixture and carb heat (c) Disconnect fuel and oil lines (d) Remove exhaust system (e) Disconnect electrical connections – mag P leads, battery ignition lead, alternator (f) Attach hoist using Jacobs engine sling (see Illustration No. 4, page 25) (g) Lift the engine slightly, remove engine bolts and swing engine free of engine mount Installation procedure is the same for both the A2 and B2 engine models with the exception of the mounting bolt length as follows: (a) Lift the new engine into position using the Jacobs engine sling (b) Install new mount rubber cones SA22387 (16) (c) 1. For the R-755A2, Install new AN6-45 mount bolts (8) and AN310-6 Nuts (8) and cotter pins. Tighten the AN310 nuts until there is approximately 1/8 in between the large washer under the head of the bolt and the edge of the mount rubber cup (see Fig. 7.2) and the cotter pin hole in the bolt aligns with a castellation in the nut. Install the cotter pin. 2. For the R-755B2, Install new An6-35 mount bolts (8) and AN310-6 Nuts (8) and cotter pins. Tighten the AN310 nuts until there is approximately 1/8 in between the large washer under the head of the bolt and the edge of the mount rubber cup (see Fig. 7.2) and the cotter pin hole in the bolt aligns with a castellation in the nut. Install the cotter pin. WACO Classic Aircraft Corporation YMF WACO F5 SERIES MAINTENANCE MANUAL REVISION: H Page 24 of 33 RELEASED: 07/21/2017 PART NO. YMFAMM-1 Fig 7.2 (d) Reconnect all electrical connections (e) Reconnect fuel and oil lines (f) Reconnect engine controls, throttle, mixture and carb heat (g) Install exhaust system See paragraph 7.3 for additional information provided by the Jacobs R-755 Instruction Manual. WACO Classic Aircraft Corporation YMF WACO F5 SERIES MAINTENANCE MANUAL REVISION: H Page 25 of 33 RELEASED: 07/21/2017 PART NO. YMFAMM-1 7.3 The following is an excerpt from the Jacobs R-755 Instruction Manual, Section 2 Unpacking and Installation: “To remove the engine from the shipping case and install in the plane, equipment consisting of crankshaft lifting nut, hoist, assembly stand and rocker box lifting sling should be available. Refer to illustration No. 4 and to paragraph headed “LIFTING SLING” in this section for fabrication instructions for the lifting sling. The procedure is as follows using and assembly stand: 1. Remove 4 bolts and lift cover of shipping case. 2. Remove waterproof cover on engine. 3. Unfasten ignition cable ends where anchored to shipping case. 4. Remove nuts holding mount plate in shipping case. 5. Remove engine with crankshaft lifting nut, Part No. T-3034, and hoist. The steel mount plate should remain attached to the engine. 6. Mount engine on assembly stand by means of the mount plate. 7. If the engine is to be operated immediately, it will be convenient at this time to drain rust preventative oil from cylinders by removing plugs in spark plug holes and turning the engine over several revolutions. 8. Rotate assembly stand to place crankshaft in horizontal position. 9. By means of the rocker box lifting sling, lift the engine free from the assembly stand. The mount plate should THEN be removed, by two men if possible, being careful to clear all parts of the engine. 10. Mount in airplane, using lifting sling. (See illustration No. 4.) If an assembly stand is not available, the shipping crate with the engine should be placed on a flat, level surface and the following procedure used: 1. Remove cover of shipping case, engine waterproof cover, and unfasten ignition cable ends as described above. 2. Check to determine that bolts holding mount plate to the bottom half of shipping case are tight. Carefully stand bottom half of shipping crate on its side so that the engine is in the flight position (with carburetor at bottom). 3. Install rocker box lifting sling as described in the paragraph headed “LIFTING SLING” in this section. Use hoist to take up slack in the cable. 4. Remove the six nuts between the engine mount plate and the shipping crate and employ hoist carefully to slide engine free of the crate. 5. Remove engine mount plate as described above and proceed with installation. When the engine mount bolts are seated in rubber bushings, the bolts should be drawn only moderately tight in accordance with the airplane manufacturer’s instructions, and should all be of equal tightness. Carburetor controls should be arranged to operate smoothly and permit full travel of the levers. If the magneto is equipped with an advance lever it should be wired in the advance position (clockwise as far as possible). The distributor adapter housing should be filled ¼ full with engine lubricating oil through the upper drive opening before the accessory is installed. All fuel and oil lines should be neatly installed in such a manner as to prevent the possibility of air pockets or vapor locks. Only the best quality metal tubing or hose should be used. Lines should be of good annealed seamless tubing without any short bends or kinks. All lines should be securely fastened to avoid vibration and chafing. WACO Classic Aircraft Corporation YMF WACO F5 SERIES MAINTENANCE MANUAL REVISION: H Page 26 of 33 RELEASED: 07/21/2017 PART NO. YMFAMM-1 OIL LINES The oil lines connecting the oil tank to the engine should be at least ¾ inch tubing. The supply line from the tank should be connected to the oil strainer. A second line is then installed from the outlet side of the strainer to the fitting located in the rear case on the right side of the oil pump. A return line from the outlet fitting on the left side of the oil pump returns scavenged oil to the tank. FUEL LINES Fuel may be supplied to the carburetor either by gravity or by pressure. When the gravity system is used the carburetor float level is set for a pressure of 1 ½ lbs. and the fuel tank should be high enough above the carburetor to produce a pressure of about 1 ½ lbs. at the carburetor. A fuel strainer should be installed at the low point between the fuel tank and carburetor. When the pressure system is used the float level of the carburetor is set for a pressure of 3 lbs. and the fuel pump pressure should be set at 3 lbs. and the fuel pump pressure should be set at 3 lbs. the fuel line should be run from the strainer to the inlet side of the fuel pump and from the outlet of the fuel pump to the carburetor. No external by-pass fuel line is required, as the approved fuel pumps have built-in by-pass. LIFTING SLING Whenever it is required that the engine be handled on a hoist the rocker box type lifting sling as shown in illustration No. 4 should be used. The sling should be fabricated locally from high quality steel wire cable .250 inch diameter. The steel cable should preferably be inserted in light weight rubber hose or other type protective sheath. Only one length of cable is used. Thread the cable through the rocker boxes, using the numbers on the illustration as a guide. Cable Sections 1 and 4 must be in front of Cable Sections 2 and 5 respectively. In this position Sections 1 and 4 will act to prevent Sections 2 and 5 from slipping off the rocker boxes. Securely clamp cable end 1 to 6, allowing enough slack so that Cable Sections 1 and 4 will clear the rocker boxes of the No. 1 (top) cylinder. Apply lifting action slowly so that the cable will center itself and all four lifting sections become taut. As cable is tightened, also check to see that the cable loops around the outside rocker boxes at 2 and 5 are not too close to the forward edge of the rocker boxes. The engine as supported by this lifting sling will have the crankshaft tipped slightly upward so that it can easily be attached to the aircraft structure. Only the engine itself may be lifted with the rocker box type lifting sling. Do not attempt to lift the engine plus overhaul stand by this method. WACO Classic Aircraft Corporation YMF WACO F5 SERIES MAINTENANCE MANUAL REVISION: H Page 27 of 33 RELEASED: 07/21/2017 PART NO. YMFAMM-1 ENGINE LIFTING SLING – ROCKER BOX TYPE ILLUSTRATION NO. 4 WACO Classic Aircraft Corporation YMF WACO F5 SERIES MAINTENANCE MANUAL REVISION: H Page 28 of 33 RELEASED: 07/21/2017 PART NO. YMFAMM-1 RUNNING-IN All Jacobs engines are thoroughly tested and run-in at the factory. However, a hone-hour check run should be made before flight, to check the installation. Before starting, turn the propeller at least six complete turns by hand to determine that there is no oil or gasoline accumulated in the lower cylinders. If rust preventative oil has not been previously drained from the cylinders, all plugs must be removed from rear spark plug holes. The engine must then be turned slowly by hand at least ten revolutions to drain the rust preventative oil. The engine should again be rotated several revolutions after reinstallation of the spark plugs. After the engine has been started, the oil pressure and fuel pressure should be immediately checked. The engine should be run-in at 600 RPM to 1000 RPM. Set controllable propellers in low pitch. After the oil is warm, check the oil and fuel lines, cowling, baffles and controls. In order to avoid overheating during the check run, a gasket type thermocouple should be installed under one of the rear spark plugs, and the temperature closely observed. The oil temperature should not be permitted to exceed allowable limits. The head temperature should not be permitting to exceed 400° F (200° C) except when opening the throttle to check maximum engine speed, when a maximum temperature of 450° F (232° C) is permissible. DO NOT “REV-UP” THE ENGINE UNTIL THE OIL HAS BEEN THOROUGHLY HEATED AND A SUFFICIENT LENGTH OF TIME ALLOWED FOR ALL PARTS TO BECOME THOROUGHLY LUBRICATED. THE “REVVING-UP” SHOULD NOT TAKE PLACE UNTIL THE ENGINE IS READY FOR FLIGHT AND SHOULD NOT EXCEED 20 SECONDS.” 7.4 COMPRESSION TESTING OF ENGINE CYLINDERS: Using the Differential Compression Test method described in FAA Advisory Circular AC 43.13- 1B CHG 1, paragraph 8-14(a), test to determine the internal condition of the combustion chamber cylinder assembly by ascertaining if any appreciable internal leakage is occurring. If a cylinder has less than a 60/80 reading on the differential test gauges on a hot engine, the cylinder must be removed and inspected. To determine the cylinder’s problem area, have someone hold the propeller at the weak cylinder’s top dead center and with compressed air still being applied, listen. If air is heard coming out of the exhaust pipe, the cylinder’s exhaust-valve is not seating properly. If air is heard leaking out of the air cleaner/carburetor heat box, the intake valve is leaking. If air is heard coming out of the engine crankcase breather tube, the piston rings are defective. Remove and repair/overhaul the defective cylinder. 7.4.1 When the spark plugs are removed from the engine, identify them to coincide with the cylinder and location from which they were removed. Close examination of the plugs will reveal the actual operating conditions and aid in diagnosing problems within each individual cylinder. 7.4.2 The operating and maintenance records of the engine should be reviewed. Records of previous compression tests are of assistance in determining progressive wear conditions and help to establish the necessary maintenance corrective actions. WACO Classic Aircraft Corporation YMF WACO F5 SERIES MAINTENANCE MANUAL REVISION: H Page 29 of 33 RELEASED: 07/21/2017 PART NO. YMFAMM-1 PROPELLER INSTALLATION There are Four (4) different propeller installations approved on the YMF WACO F5 series aircraft. A. The Fixed Pitch Sensenich wood W90T6JA and JB series and the Fixed Pitch Sensenich wood W96JA and JB series (Fig. 1). These propellers are eligible for installation on the Jacobs R-755B2, 275 HP engine only. See Section 10 (D) of this manual for installation and maintenance instructions for these propellers. Fig. 1 B. The Fixed Pitch MT-Propeller Model MT 233 R 150-6AJ wood propeller (Fig. 2). This propeller is eligible for installation on both the R-755B2 275 HP and R755A2 300 HP engines. See Section 10 (E) of this manual for installation and maintenance instructions for this propeller. Fig 2 WACO Classic Aircraft Corporation YMF WACO F5 SERIES MAINTENANCE MANUAL REVISION: H Page 30 of 33 RELEASED: 07/21/2017 PART NO. YMFAMM-1 C. The Hamilton Standard Model 2B20 Metal Constant Speed propeller (Fig. 3). This propeller is eligible for installation on both the R-755B2 275 HP engine and the R-755A2 300 HP engine. See Section 10 (F) of this manual for installation instructions. Fig. 3 D, The MT MODEL MTV-15-AA-C/C-236-29 Constant Speed propeller (Fig. 4). This propeller is eligible for installation on both the R-755B2 (including R-755B2M) 275 HP engine and the R-755A2 (including R-755A2M) 300 HP engine. See Section 10 (N) of this manual for installation and maintenance instructions. Figure 4 WACO Classic Aircraft Corporation YMF WACO F5 SERIES MAINTENANCE MANUAL REVISION: H Page 31 of 33 RELEASED: 07/21/2017 PART NO. YMFAMM-1 SECTION 8 SYSTEMS 8.1 GASOLINE SYSTEM Your WACO airplane is equipped with what is considered the simplest, most practical gasoline system obtainable, namely, a direct gravity flow of gasoline from wing tanks to carburetor. However, owing to the comparatively thin wing section, it is necessary that these tanks be fairly long and shallow. These tanks will drain to almost the last cup of gasoline in a normal flight position, but it is important that you have at least ten gallons of gasoline in the tank USED for take-off before a take-off is attempted. We recommend that a take-off never be made without at least ten gallons of gasoline in the selected tanks. This will insure a steady and continual flow of gasoline to the carburetor. Another item to take into consideration is that on the ground the gasoline will collect at the lower end of the tank. Since the gauges are located pretty well in the center of the tank, an accurate reading cannot be obtained from the gasoline gauge on the ground, although, these gauges are quite accurate for use in level flight. Therefore, particular care should be taken in checking the gasoline supply while the ship is on the ground. It is important that the vent lines protruding from top tanks be kept open at all times. It is also important that gas tank caps fit snugly and do not leak. Occasionally, the steel clip fittings which hold these tank caps in place will get pulled out of shape and not have the correct tension. This can be quickly remedied by putting them back in shape with a pair of pliers and if this fails to stop the leak, the cap should be replaced. You need not be alarmed if after filling the tanks completely, one tank appears to drain faster than the other does. This is normal and there is no set rule as to which tank will drain fastest under certain conditions. On some airplanes one tank will drain faster one day and the other the next day. You will note the tanks have been provided with two outlet lines, one at the front and one at the rear. This is to take care of all conditions and make sure the carburetor gets gas both during a steep climb and a steep descent. If the tank appears to leak, first make sure that all fittings are tight before going tot he trouble of removing the tanks. Leaks are usually found to be around the gasoline gauges or one of the fittings and easily repaired by tightening, or, if necessary, removing and adding filler such as thread dope or white lead to the threads and replacing. Gas Tank Vent Fittings Screw vent lines in place in upper surface of upper wings taking care to have openings in gooseneck line towards the REAR. 8.2 OIL SYSTEM The engine oil system consists of a five gallon reservoir mounted aft of the engine on the top of the engine mount and is connected to the engine pressure pump inlet and scavenge pump outlet with ¾ inch aluminum and Mil 6000 rubber lines. There is a removable brass screen housing mounted on the firewall through which all oil passes prior to entering the pressure pump inlet. This screen can be removed for cleaning at each oil change (see inspection schedule). There is an oil cooler mounted on the left side of the engine mount through which all return oil from the engine scavenge pump passes prior to entering the oil reservoir. See the Jacobs Operators Manual in Section 10 of this manual for additional information. 8.3 ELECTRICAL SYSTEM The electrical system consists of two 12 volt 25 or 35 AH lead acid batteries housed in a sealed battery box mounted aft of the engine compartment ahead of the firewall and connected in series to provide 24 VDC to the main A/C buss and is identical for both the A2 and the B2 engine installations. The battery charge is maintained by the gear driven JASCO 50 Amp alternator mounted on the engine accessory case and controlled by a JASCO solid state Regulator/OV-protection module mounted on the firewall. All circuits are protected by circuit breakers. There is a 24 volt E80 starter mounted on the accessory case at the rear of the engine. See Section 10 for wiring diagrams. WACO Classic Aircraft Corporation YMF WACO F5 SERIES MAINTENANCE MANUAL REVISION: H Page 32 of 33 RELEASED: 07/21/2017 PART NO. YMFAMM-1 SECTION 9 AIRWORTHINESS LIMITATIONS 9.1 APPLICABILITY The Airworthiness Limitations section is FAA approved and specifies maintenance required under §§43.16 and 91.403 of the Federal Aviation Regulations unless an alternative program has been FAA approved. 9.2 LIFE LIMITED PARTS There are no life limited parts or assemblies or mandatory replacement times for this aircraft. 9.3 INSPECTION INTERVALS Inspection intervals for this aircraft are as required by applicable Federal Aviation Regulation under which the aircraft is to be operated. It is the responsibility of the owner/operator to insure that required inspections are completed. 9.4 ALTERATIONS This aircraft is manufactured in accordance with STC SA1000GL and may not be altered without the express written consent of WACO Classic Aircraft Corporation. WACO Classic Aircraft Corporation YMF WACO F5 SERIES MAINTENANCE MANUAL REVISION: H Page 33 of 33 RELEASED: 07/21/2017 PART NO. YMFAMM-1 SECTION 10 MISCELLEOUNEOUS MAINTENANCE INFORMATION 10.1 The following pages contain the inspection schedule form and additional manufacturers maintenance instructions for accessories and equipment installed on this aircraft. A. WCAC FORM SMWS SCHEDULED MAINTENANCE WORKSHEET B. WIREING DIAGRAMS C. JACOBS OPERATORS MANUAL MODELS R-755A2 7 R-755B2 D. SENSENICH PROPELLER CO. INSTALLATION AND MAINTENANCE INSTRUCTIONS E. MT-PROPELLER INSTALLATION AND MAINTENANCE MODEL MT233R150-6AJ F. HAMILTON STANDARD MODEL 2B20 CONSTANT SPEED PROPELLER INSTRUCTIONS G. BENDIX BATTERY IGNITION SERVICE INSTRUCTIONS AND PARTS LIST H. BENDIX-SCINTILLA AIRCRAFT MAGNETOS SERVICE INSTRUCTIONS I. SIGTRONICS (JASCO) ALTERNATOR TROUBLE SHOOTING INFORMATION J. BRACKET AIR FILTER INSTRUCTIONS FOR CONTINUED AIRWORTHINESS K. PARKER HANNIFIN WHEEL AND BRAKE MAINTENANCE PROCEDURES L. SERVICE LETTERS and SERVICE BULETINS M, K&L SOARING FORM F-236 N. MT-PROPELLER INSTALLATION AND MAINTENCE MODEL MTV-15-AA-C/C-236-29 TYPE OF INSPECTION: EMAIL: ADDRESS: ENGINE TIME SMOH: OWNERS NAME: HOBBS METER HOURS: START DATE: ANNUAL PHONE: FAX: MOBILE: 100 HOUR 50 HOUR AIRCRAFT MAKE MODEL SERIAL NUMBER REGISTRATION NUMBER ENGINE TIME TOTAL: Classic Aircraft YMF WACO F5 YMF WACO F5C WACO Classic Aircraft AIRFRAME TIME TOTAL: TACHOMETER HOURS: REV: F RELEASED: 21 Jul 2017 PAGE 1 of 12 WCAC FORM SMWS YMF WACO F5/F5C SCHEDULED MAINTENANCE WORKSHEET TASK DESCRIPTION 5 0 H R 1 0 0 H R A N N U A L M E C H A N I C I N S P E C T O R A. PROPELLER MT_Propeller or Sensenich Wood Propeller: 1 Remove spinner 0 0 2 Inspect hub nut for security and safety 0 0 3 Inspect spinner bracket for condition and security 0 0 4 Re-install spinner 0 0 5 Inspect propeller hub bolts and nuts. Retorque bolts in accordance with Sensenich Propeller Co. Installation and Maintenance Instructions dated 6 Nov 1992 or MT_Propeller maintenance 0 0 0 6 Check track of blades per Sensenich Maintenance Instructions dated 6 Nov 1992 or MT_Propeller maintenance instructions. 0 0 7 Clean and wax the blades 0 0 0 8 Inspect blades and tipping for damage or cracks. For metal propellers, use the manufacturers recommended inspection and maintenance procedures. 0 0 0 Hamilton Standard Constant Speed Propeller: 9 Remove spinner front half (if installed) 0 0 0 10 Refer to Hamilton Standard Propeller Service Manual for correct lubrication instructions. 0 0 0 11 Inspect spinner and spinner bulkheads for security, cracks or other defects. 0 0 0 12 Inspect blades for nicks, scratches or any other defects. 0 0 0 13 Inspect counter weights for security. 0 0 0 14 Inspect piston for surface condition, and evidence of leaks. 0 0 0 15 Re-install spinner 0 0 0 MT Propeller MTV-15-AA-C Constant Speed Propeller: 16 Remove spinner Dome (if installed) 0 0 0 17 Refer to MT Propeller Service Manual for correct maintenance instructions. 0 0 0 18 Inspect spinner and spinner bulkheads for security, cracks or other defects. 0 0 0 19 Inspect blades for nicks, scratches or any other defects. 0 0 0 20 Inspect counter weights for security. 0 0 0 21 Inspect piston for surface condition, and evidence of leaks. 0 0 0 22 Re-install spinner 0 0 0 REV: F RELEASED: 21 Jul 2017 PAGE 2 OF 12 WCAC FORM SMWS YMF WACO F5/F5C SCHEDULED MAINTENANCE WORKSHEET TASK DESCRIPTION 5 0 H R 1 0 0 H R A N N U A L M E C H A N I C I N S P E C T O R B. POWERPLANT- For detailed instructions see Section 5 of the JACOBS Engine Operators Manual 1 Remove cowling 0 0 2 Clean and inspect the cowl for cracks, distortion, security and condition of felt pads, loose or missing fasteners and latches 0 0 3 Drain engine oil 0 0 0 4 Clean engine oil inlet screen located on bottom of firewall 0 0 0 5 Inspect the oil pressure and oil temperature sender installations for leaks and security 0 0 6 Inspect oil tank, hoses, lines and fittings for leaks, chafing, cracks and general condition 0 0 7 Fill oil tank with 5 gallons of engine oil. See JACOBS Operators Manual Section 3 for correct grade 0 0 0 8 Inspect oil radiator mounting, clean fins, air duct security and leaks 0 0 9 Inspect fuel lines, valves, hoses and lines for leaks, security, chafing and general condition 0 0 10 Drain carburetor float chamber and clean carburetor screen. Reinstall screen and safety 0 0 11 Inspect carburetor, controls and attachment 0 0 12 Drain and clean fuel strainer. Check for presence of water/foreign matter and correct color 0 0 0 13 Inspect primer, lines and fittings for leaks and security 0 0 14 Inspect air filter in accordance with Bracket Air Filter Document I-194 dated 3-16-94 0 0 0 15 Inspect carburetor air box for condition and attachment 0 0 16 Check throttle, mixture and carburetor heat controls for correct travel and general condition. All should have 1/8" min. cushion at travel limits 0 0 17 Check intake pipes for security and evidence of leakage 0 0 18 Check valve clearance (.007 to .012) with a cold engine (See JACOBS Service Manual page 49 for correct adjustment procedure) 0 0 19 Check push rod housings for security and leaks 0 0 20 Make a compression check and record the figures below 0 0 21 Check exhaust and induction hot air system and annually pressure test the heat exchanger system 0 0 0 22 Check heater bypass valve for proper operation. Insure that carburetor heat valve is allowed full travel with cabin heat selected 0 0 23 Inspect engine mount for cracks and general condition 0 0 24 Inspect breather tube for obstruction and security 0 0 25 Inspect engine installation/ rubber mount bushings and attachment bolts for condition and security 0 0 26 Cylinder compression leakage test Ref. YMFAMM-1 Rev. F para. 7.4 0 0 Minimum acceptable differential pressure (Lbs.) 60/80 1 2 3 4 5 6 7 REV: F RELEASED: 21 Jul 2017 PAGE 3 OF 12 WCAC FORM SMWS YMF WACO F5/F5C SCHEDULED MAINTENANCE WORKSHEET TASK DESCRIPTION 5 0 H R 1 0 0 H R A N N U A L M E C H A N I C I N S P E C T O R B. POWERPLANT continued 26 Check crankcase and cylinders for oil leaks, cracks, attachment of all nuts, screws and fittings etc. 0 0 27 Remove all inter-cylinder baffles if necessary. Re-torque all cylinder hold-down nuts to 250-300 lb/in in accordance with JACOBS Engine Service Manual 0 28 Inspect all cylinder baffles and baffle seals for condition 0 0 29 Inspect condition of all firewall seals 0 0 30 Inspect condition, attachment and wiring of starter and alternator 0 0 31 Service Alternator if required See note 7 page 10. 0 0 32 Inspect spark plugs. Clean, gap (.015-.018) and replace as required 0 0 33 Inspect ignition harness and insulators 0 0 34 Check magneto leads and distributor/coil wiring 0 0 35 Service the magneto(s) and distributor (if installed) in accordance with Section 5 of the JACOBS Engine Operators Manual 0 0 36 Check magneto and distributor timing in accordance with JACOBS Engine Operators Manual Section 5 0 0 37 Capacity test the battery 0 0 38 Inspect and service battery ( see note: 5 ), vents and drains 0 0 0 39 Inspect battery box, solenoids, connections and wires for condition, security and safeties. 0 0 0 40 Inspect prop governor, controls and oil lines if installed 0 0 41 Inspect vacuum pump, lines, regulator and separator if installed 0 0 42 Wash down and clean engine 0 0 0 43 Lubricate engine controls, linkages, heat boxes and carburetor 0 0 0 44 Service brake reservoir and check lines for leaks and security 0 0 0 45 Re-install cowlings 0 0 0 REV: F RELEASED: 21 Jul 2017 PAGE 4 OF 12 WCAC FORM SMWS YMF WACO F5/F5C SCHEDULED MAINTENANCE WORKSHEET TASK DESCRIPTION 5 0 H R 1 0 0 H R A N N U A L M E C H A N I C I N S P E C T O R C. COCKPIT/ ELECTRICAL/ RADIO/ INSTRUMENTS - For detailed instructions see WACO Classic Aircraft Service Manual 1 Inspect front cockpit door and pilot's step door for condition and operation 0 0 2 Inspect front and rear windshields for condition and security 0 0 0 3 Inspect upholstery for condition and cleanliness 0 0 0 4 Inspect seats, belts and harness and attachments for operation, condition and security 0 0 5 Check stabilizer trim for smooth operation and security 0 0 0 6 Inspect rudder pedals and brake cylinders for condition, security and operation 0 0 7 Inspect brake hoses, lines and fittings 0 0 8 Check operation, condition and security of the parking brake valve installation CAUTION: It is very important to refer to the Airplane Flight Manual Section V, Normal Operating Procedures, for instructions in the correct operation of this control. Failure to follow correct procedure can result in damage to the parking brake control system and subsequent unintentional parking brake application during flight operations! 0 0 0 9 Inspect control stick and torque tube assy for operation, condition and security and for free movement to control limits 0 0 10 Check all engine and flight controls for proper operation 0 0 0 11 Check landing, navigation, cockpit and instrument lights 0 0 0 12 Check pitot heat for operation 0 0 0 13 Check pitot/static systems condition of Pitot tube, static ports and plumbing 0 0 14 Inspect all instrument mounting, lines and attachments 0 0 15 Certify altimeter system if appropriate 0 0 16 Certify pitot system if appropriate 0 0 17 Carry out Compass swing 18 Check compass card valid until next check 0 0 0 19 Check pressure instruments with test equipment or by comparison 0 0 20 Check operation of cockpit heat controls, attachment of hoses and valves 0 0 21 Inspect fuel valves and lines for operation, leaks and security 0 0 0 22 Check fire extinguisher for charge and security if installed 0 0 0 23 Check tail-wheel steering disengagement for proper operation 0 0 0 24 Check that all placards and instrument markings are present and correct 0 0 25 Check for proper tow hook release operation if installed 0 0 26 Check ELT and battery IAW note 5 on page 10 0 0 27 OP/C over/under-volt system, warnings. 0 0 28 Check all ground operable circuits. Exercise all circuit breakers 0 0 38 Check insulators, controllers, instruments, displays, mics, headsets, jackplugs and sockets 0 0 39 Check Instrument legibility and markings of ranges and limits and consistent with ambient conditions 0 0 REV: F RELEASED: 21 Jul 2017 PAGE 5 OF 12 WCAC FORM SMWS YMF WACO F5/F5C SCHEDULED MAINTENANCE WORKSHEET TASK DESCRIPTION 5 0 H R 1 0 0 H R A N N U A L M E C H A N I C I N S P E C T O R D. FUSELAGE and EMPENNAGE 1 Remove inspection covers and fairings 0 0 2 Inspect fabric for holes or deterioration ( See Note 9 and FAA AC 43.13-1B) 0 0 3 Inspect front (if installed) and rear baggage compartment doors and proper stowage of equipment 0 0 0 4 Inspect electronic installations for security 0 0 5 Inspect antennae mounts and wiring for security 0 0 6 Inspect rudder, elevator and stabilizer trim cables, turnbuckles, fairleads, pulleys and attachments for safety devises, condition and proper operation 0 0 7 Inspect fuselage structure for damage or corrosion 0 0 8 Inspect fin and rudder structure and hinges for condition and security 0 0 9 Inspect stabilizer and elevator structure, hinges (see Note 6) and mounting for condition and security 0 0 10 Check external brace wires for corrosion, correct tension and safety 0 0 11 Check stabilizer trim screw for end play, security and proper lubrication 0 0 12 Check for correct rudder and elevator travels and proper elevator cable tension (see WACO Classic Maintenance Manual YMFAMM-1 page 20 paragraph 6.3 for detailed instructions) 0 0 13 Lubricate elevator hinge bearings in accordance with WACO YMF-5 lubrication chart 0 0 0 14 If Glider/Banner Tow Hitch system is installd, inspect in accordance with K&L Soaring Form F-236 (See Sec. 10 of YMFAMM-1) 0 0 15 Vacuum interior and inspect all areas under and behind seats for tools, rags and other loose equipment 0 0 0 16 Inspect internal structure of fuselage, bulkheads and tail section. (see Note 9) 0 0 17 Re-install inspection covers and fairings 0 0 REV: F RELEASED: 21 Jul 2017 PAGE 6 OF 12 WCAC FORM SMWS