IM199-90 INSTALLATION MANUAL WITH IPL FOR CONVERSION KIT PART NO. 199-90
Beechcraft King Air C90GTx · Flight Manual
Overview
This document is an installation manual for the Cleveland Conversion Kit Part No. 199-90, specifically designed for various Beechcraft King Air models including the C90 series. It provides detailed instructions for qualified maintenance personnel on how to install the conversion kit, which includes components for the main wheel and brake assemblies. The manual outlines the necessary procedures, safety precautions, and equipment descriptions required for a successful installation. It also includes a parts list and information on modifications that may be necessary for specific aircraft configurations. The manual emphasizes the importance of following the outlined procedures to ensure safety and compliance with FAA regulations.
- The conversion kit is applicable to Beechcraft King Air models including C90, C90A, C90GT, and C90GTi.
- Installation requires modification of the aircraft's wheel well for proper clearance.
- Torque specifications for various components must be strictly followed to ensure safety and functionality.
- Safety precautions must be observed when working with hydraulic systems and during installation procedures.
- Weight and balance must be recalculated after installation to maintain safe operational limits.
Document
Source
Originally published by www.parker.com. Sprinkle hosts a reference copy with an added summary, specifications and searchable full text.
Document details
- Type
- Flight Manual
- Year
- 2016
- Pages
- 163
- File size
- 7.1 MB
- Publisher
- www.parker.com
Common. Rarer than 0% of the aircraft models we track.
Most owners only have the POH. Here's the essential set for the Beechcraft King Air C90GTx.
- Pilot's Operating Handbook / AFM
- Checklist
- Maintenance Manual
- Parts Catalog (IPC)
- Systems & Wiring
- Service Bulletins
- Type Certificate (TCDS)
Beechcraft King Air C90GTx for sale now


Free — save the C90 to your watchlist and track it in one place.
More Beechcraft King Air C90GTxmanuals & documents
See all 19 →- AAIB Bulletin: 11/2024Other Documents
- AAIB Bulletin: 11/2024Other Documents
- BEECHCRAFT KING AIR 90 SERIES AUXILIARY FUEL TANKS ICA MANUALParts Catalog
- KING AIR C90GTxSpecifications
- BEECHCRAFT KING AIR 90 SERIES AUXILIARY FUEL TANKS ICA MANUALParts Catalog
- KING AIR C90GTxOther Documents
- 2008 King Air C90GTi Specifications and SummarySpecifications
- G1000/GFC 700 Post Installation Checkout Procedure – Hawker / Beechcraft King Air C90Flight Manual
- GWX 68 Weather Radar Installed in Beech Queen Air/King Air Series STC Master Data ListChecklist
- GWX 68 Installation DataType Certificate
- AIRWORTHINESS DIRECTIVE AD/BEECH 90/22 Amdt 3Airworthiness Directives
- SCHEDULE OF AIRWORTHINESS DIRECTIVESAirworthiness Directives
If you fly the Beechcraft King Air C90GTx, you may also be researching these.

In this document
Introduction
This section introduces the installation manual and its purpose, which is to guide maintenance personnel in installing the Cleveland Conversion Kit. It highlights the importance of adhering to the procedures outlined in the manual for safety and compliance.
Kit Applicability
The conversion kit is applicable to several Beechcraft King Air models, including the C90 series. Specific serial numbers for each model are listed, indicating which aircraft can utilize this kit. It is crucial to verify compatibility with the aircraft's configuration before installation.
Safety
Safety precautions are emphasized throughout the manual. Warnings and cautions are provided to prevent serious injury or damage during the installation process. Proper handling of hydraulic systems and equipment is stressed.
Kit Installation
This section provides step-by-step instructions for removing original equipment and installing the Cleveland equipment. It includes detailed procedures for mounting the brake assembly and wheel assembly, as well as necessary torque specifications for various components.
Modifications
Modifications to the aircraft's wheel well may be required to accommodate the new brake assembly. The manual provides instructions for these modifications, including the use of a template for accurate cutting and installation.
Weight and Balance Computations
This section discusses the importance of recalculating weight and balance after installation of the conversion kit. It provides guidelines for ensuring that the aircraft remains within safe operational limits.
Pilot Operating Manual Inserts
The manual includes inserts for the Pilot Operating Manual, which should be updated to reflect the changes made during the installation of the conversion kit.
Kit Parts List
A detailed parts list for the conversion kit is provided, including part numbers and descriptions of each component. This list is essential for maintenance personnel to ensure all necessary parts are available for installation.
Safety notes
- Ensure the aircraft is secure and stable before beginning any work.
- Always use an inflation cage when inflating tires to prevent explosions.
- Do not exceed specified torque values to avoid damaging components.
Full document text
FAA-PMA AIRCRAFT WHEEL & BRAKE DIVISION PARKER HANNIFIN CORPORATION AVON, OHIO PARTS LIST 199-90 CONVERSION KIT BEECH KING AIR AIRCRAFT MODEL SERIES 65-A90, B90, C90, C90A, C90GT, C90GTi, E90, H90, 65-A90-1, AND 65-A90-4 PART NUMBER DRAWING REVISION DESCRIPTION QUANTITY 30-144 Rev. M dated 05-07-2010 Brake Assembly 2 40-170A Rev. D dated 01-29-2014 Wheel Assembly 2 094-10400 ----------------------------- Nut (MS21044-N5) 24 095-02900 Rev. A dated 03-30-1998 Washer (Wheel Bearing Retaining) 2 095-10500 ----------------------------- Washer (AN960-516) 48 103-22100 ----------------------------- Bolt (AN5-10A) 24 105-00800 ----------------------------- Rivet (CherryMax P/N CR3243-4-2) 32 110-05400 Rev. F dated 11-19-2002 Bracket (Right Side) 1 110-05500 Rev. F dated 11-19-2002 Bracket (Left Side) 1 110-05600 Rev. C dated 04-22-2002 End Tab 4 110-05700 Rev. A dated 11-09-1982 Filler 2 158-01400 Rev. C dated 09-13-1994 Hubcap (To be used on early model 2 90’s with extended axle) Publication Package (P/N PP199-09000) IM199-90 Rev. K dated 04-01-2016 Installation Manual 50-80 Rev. H dated 01-07-2009 Installation Drawing (sheets 1 & 2) CM30-144 Rev. A dated 10-15-2011 Component Maintenance Manual for 30-144 CM40-170A Rev. A dated 04-01-2016 Component Maintenance Manual for 40-170A SA619GL ----------------------------- Supplemental Type Certificate ANAC#9210-04 ----------------------------- ANAC (Brazil) Supplemental Type Certificate EASA#10039114 ----------------------------- EASA Supplemental Type Certificate PRM14A ----------------------------- Conditioning Procedure For Metallic Brake Lining ------- Pilot Operating Manual Inserts ------- Product Registration Card Template A ---------------------------- Full-size Template for Wheel Well Modification NOTES: 1. This kit will convert one aircraft to Cleveland equipment. 2. For use with MIL-H-5606 brake fluid 3. Models (S/N): 65-A90 (LJ-114 thru LJ-317) E90 (LW-1 and up) B90 (LJ-318 thru LJ-501) H90 (all) C90 (LJ-502 thru LJ-1062) 65-A90-1 (all) C90A (LJ-1063 and up) 65-A90-4 (all) C90GT (all) C90GTi (LJ1847, LJ1853 and up) Rev Y 04-01-2016 (ECO-0066231) Rev W 02-12-2014 (ECO-0031955) Rev V 07-06-2012 (ECO-0011541) 199-90 FAA-PMA Technical Publication Conversion Kit Installation Manual With Illustrated Parts List Parker Hannifin Corporation Aircraft Wheel & Brake Division Avon, Ohio 44011 USA Cage Code 33269 . Page T-1 April 01, 2016 IM199-90 Wheel & Brake Assembly Main Wheel Assembly Part No. 40-170A Main Brake Assembly Part No. 30-144 Used On Beech Models: 65-A90, B90, C90, C90A, C90GT, C90GTi, E90, H90, 65-A90-1, 65-A90-4 Initial Issue June 30, 1982 IM199-90 INSTALLATION MANUAL WITH IPL FOR CONVERSION KIT PART NO. 199-90 Page i April 01, 2016 STOP! PLEASE COMPLETE AND RETURN THE ATTACHED REGISTRATION CARD. IT IS IMPORTANT THAT ALL INFORMATION IS LEGIBLY PRINTED. THIS DATA WILL ASSIST PARKER HANNIFIN, AIRCRAFT WHEEL & BRAKE DIVISION TO NOTIFY END USERS OF SPECIFIC AIRWORTHINESS DOCUMENTS IF NECESSARY. - IMPORTANT - MODEL YEAR AND SERIAL NUMBER EFFECTIVITY OF AN AIRCRAFT CAN AFFECT CONVERSION KIT INSTALLATION. AIRFRAME MANUFACTURER UPGRADES, SERVICE BULLETINS AND SIMILAR DOCUMENTATION CAN ALSO AFFECT HOW A KIT IS EQUIPPED. BECAUSE OF THE MANY POSSIBLE AIRCRAFT CONFIGURATIONS, SOME KITS WILL NOT INCLUDE THE HARDWARE NEEDED TO COMPLETE THE KIT INSTALLATION. THESE ITEMS MUST BE OBTAINED SEPARATELY. MODIFICATIONS TO THE AIRFRAME CAN ALSO BE REQUIRED. SEE SECTION 4.1 FOR ADDITIONAL INFORMATION SPECIFIC TO CONVERSION KIT NO. 199-90. For technical assistance, contact the TECHNICAL SERVICES HOTLINE: techhelp@parker.com Fax: 440-937-5409 1-800-BRAKING (272-5464) Tel.: 440-937-1315 IM199-90 INSTALLATION MANUAL WITH IPL FOR CONVERSION KIT PART NO. 199-90 List of Revisions Page LR-1 April 01, 2016 LIST OF REVISIONS Revision/Date Section/Page No. Description Of Change Apvd H 07-01-2005 Maintenance, Overhaul, Removed pages. Information is (DCN 0364-50) Parts List found in maintenance manuals All sections/All pages Revised to latest standard format J 01-07-2009 Title Page, Pg T-1, 65-A90 was A90, (DCN 0383-06) Add models C90GT, C90GTi Table 1 Kit Applicability, Pg 1 65-A90 was A90 Add models C90GT, C90GTi Section 6, Pg. 2 Update contact information Section 9.2.3, Pg. 7 (NOW) MIL-T-5544 (WAS) MIL-T-55544 K 04-01-2016 Title page Data rights statement updated from pg I. (ECO-0066231) (ADD) export statement Pg I (RE-LOCATE) data rights statement to title page. 9.2.2.1/pg 5, step a. (NOW) 60 to 80 in-lb (6,8 to 9,0 N-m) (WAS) 75 to 100 in-lb (8,4 to 11,3 N-m) 13.0/pg 16 (DELETE) PRM78 from Kit Parts List IM199-90 INSTALLATION MANUAL WITH IPL FOR CONVERSION KIT PART NO. 199-90 Table of Contents Page TC-1 July 01, 2005 TABLE OF CONTENTS SECTION SUBJECT PAGE 1.0 Introduction 1 1.1 Purpose 1 2.0 TSO Notice 1 3.0 Product Registration 1 4.0 Kit Applicability 1 4.1 Kit Equipment 2 5.0 Safety 2 6.0 Order Information 3 7.0 Equipment Description 3 7.1 Brake Assembly 3 7.2 Wheel Assembly 3 8.0 General Information 3 8.1 Brake Assembly 3 8.2 Wheel Assembly 3 9.0 Kit Installation 4 9.1 Remove Original Equipment 4 9.2 Install Cleveland Equipment 4 9.3 Brake Lining Conditioning 10 10.0 Modifications 10 10.1 Wheel Well Modification 10 11.0 Weight and Balance Computations 15 11.1 Weight and Balance Data 15 12.0 Pilot Operating Manual Inserts 15 13.0 Kit Parts List 16 IM199-90 INSTALLATION MANUAL WITH IPL FOR CONVERSION KIT PART NO. 199-90 Page 1 January 07, 2009 11..00 IIN NT TR RO OD DU UC CT TIIO ON N The information herein addresses the installation of a Cleveland Conversion Kit. It is published for the guidance of qualified maintenance personnel responsible for the installation of a Cleveland Conversion Kit, manufactured by Parker Hannifin Corporation,
Show full textShow less
Aircraft Wheel and Brake Division. 1.1 PURPOSE This manual provides the necessary procedures to accomplish the installation of an STC’d Cleveland Conversion Kit. For information regarding service limits, maintenance and component overhaul, a copy of the Cleveland Wheels and Brakes Component Maintenance Manuals, CM30-144 and CM40-170A are included in this kit. The manuals should be passed on to the owner or retained by the maintenance facility for future reference. 2.0 TSO NOTICE The wheels and brakes used in this STC’d conversion kit carry a “TSO” marking which identifies them as having been fully laboratory tested and qualified to meet the applicable Federal Aviation Agency (FAA) specifications and requirements. Modifications or use of unapproved parts will void the TSO qualification and warranty for the wheel and brake assemblies. 3.0 PRODUCT REGISTRATION The product registration card is located at the front of this manual. The card is our way of tracking the conversion kits and your guarantee of receiving any future airworthiness information applicable to Conversion Kit No. 199-90. Please fill out the registration card completely and return promptly. Postage is prepaid. 4.0 KIT APPLICABILITY NOTE: Service bulletins, service letters and similar documentation issued by the airframe manufacturer or other STC installations can affect the installation of Conversion Kit No. 199-90. Contact the airframe manufacturer for documentation applicable to your model aircraft and review the maintenance log for any other STC’s installed for compatibility before installing Conversion Kit No. 199-90. Table 1 Kit Applicability MAKE STC MODELS (SERIAL NUMBERS) Beech Aircraft SA619GL 65-A90 (LJ-114 through LJ-317) B90 (LJ-318 through LJ-501) C90 (LJ-502 through LJ-1062) C90A (LJ-1063 and up) C90GT (All) C90GTi (LJ1847, LJ1853 and up) E90 (LW-1 and up) H90 (All) 65-A90-1 and 65-A90-4 (All) IM199-90 INSTALLATION MANUAL WITH IPL FOR CONVERSION KIT PART NO. 199-90 Page 2 January 07, 2009 4.1 KIT EQUIPMENT Refer to paragraph 13.0 for the kit parts list. NOTE: Review this installation manual and the installation drawing, number 50-80, completely before removal of existing original equipment and installation of 199-90 kit equipment. a. The wheel well skin requires modification. Refer to section 10.0. b. The following hardware is not included in the 199-90 Conversion Kit: Hydraulic system connection hose. Axle nut and cotter pin. Fuel line repositioning hardware. 5.0 SAFETY Follow proper safety precautions when servicing aircraft braking systems. A “SAFETY WARNING” flagged by this symbol , calls attention to possible serious or life threatening situations if procedures are not followed. A “WARNING” calls attention to use of materials, processes, methods, procedures, or limits which must be followed precisely to avoid injury to persons. A “CAUTION” calls attention to methods and procedures that must be followed to avoid damage to equipment. A “NOTE” calls attention to an essential operating or maintenance procedure, condition, or statement, which must be highlighted. 6.0 ORDER INFORMATION To order spare parts, contact the nearest Parker Hannifin, Aircraft Wheel and Brake distributor in your area, or contact Aircraft Wheel and Brake Division at the following address or numbers: Parker Hannifin Corporation Websites: www.parker.com Aircraft Wheel & Brake Division E-mail: clevelandwbhelp@parker.com 1160 Center Road Fax: (440) 937-5409 Avon, Ohio 44011 U.S.A. Tel: 1-800-BRAKING (1-800-272-5464) Attn: Technical Services/Hotline (440) 937-1315 IM199-90 INSTALLATION MANUAL WITH IPL FOR CONVERSION KIT PART NO. 199-90 Page 3 July 01, 2005 7.0 EQUIPMENT DESCRIPTION 7.1 BRAKE ASSEMBLY For a complete parts breakdown and fastener torque values of the brake assembly, refer to CM30-144 Component Maintenance Manual. The brake is a cast aluminum dual caliper, four piston external disc design, with sintered metallic lining. It is suitable for use with brake fluid conforming to MIL-H-5606. 7.2 WHEEL ASSEMBLY For a complete parts breakdown and fastener torque values of the wheel assembly, refer to CM40-170A Component Maintenance Manual. The wheel is cast aluminum and conforms to all tire and rim association standards for a 24 x 7.7 divided type wheel, suitable for use with all 8.50 - 10, 8 or 10 ply tubeless or tube type tires. The wheel assembly is configured with an air valve assembly for use with a tubeless tire. NOTE: Refer to the installation drawing, 50-80, for aircraft model and tire ply rating applicability. 8.0 GENERAL INFORMATION 8.1 BRAKE ASSEMBLY The brakes are shipped from the factory as a complete assembly. Relocate the bleeder components and the inlet fitting to the necessary ports for left hand or right hand installation. The brakes are equipped with 7/16-20 UNF–3B ports. 8.2 WHEEL ASSEMBLY The wheels are shipped from the factory as a complete assembly. The bearing cones are packed with grease and installed in the wheel halves. 9.0 KIT INSTALLATION Review this installation manual, IM199-90 and the installation drawing, 50-80, completely before removal of existing equipment and installation of 199-90 kit equipment. SAFETY WARNING: INSURE AIRCRAFT IS SECURE AND STABLE BEFORE BEGINNING ANY WORK. WORKING UNDER AN IMPROPERLY STABILIZED AIRCRAFT CAN CAUSE INJURY OR DEATH. SAFETY WARNING: COMPLETELY DEFLATE THE TIRE BEFORE REMOVING THE VALVE CORE. VALVE CORES UNDER PRESSURE CAN BE EJECTED LIKE A BULLET AND CAUSE INJURY OR DEATH. IM199-90 INSTALLATION MANUAL WITH IPL FOR CONVERSION KIT PART NO. 199-90 Page 4 July 01, 2005 9.1 REMOVE ORIGINAL EQUIPMENT CAUTION: ALWAYS CHECK THE CONDITION OF ORIGINAL EQUIPMENT HARDWARE THAT WILL BE RETAINED SUCH AS FITTINGS, HOSES, AXLE NUTS, ETC. REPLACE THESE ITEMS AS NEEDED. a. Properly raise and support the aircraft by following the airframe manufacturer’s instructions. b. Remove the cap from the tire inflation valve and slowly deflate the tire. c. Confirm that the tire is completely deflated. d. When all the tire pressure has been released, remove the valve core from the inside of the valve stem. NOTE: The cotter pin is not supplied as part of the 199-90 kit and must be obtained separately. Refer to the airframe parts catalog for the part number and the quantity. e. Remove and retain the axle nut. Discard the cotter pin. f. Remove the original equipment main landing gear wheels from the axle. g. Disconnect the lower hydraulic line from the existing brake housing fitting and cap tightly. h. Remove the original equipment brake assemblies from the axle. i. Discard all the original brake assembly mounting hardware NOTE: New mounting hardware is including in the 199-90 kit. 9.2 INSTALL CLEVELAND EQUIPMENT Refer to installation drawing, 50-80 and Section 13.0 Kit Parts List, for item number identification. Item numbers are in parenthesis. 9.2.1 Install the Torque Plate Assembly The axle flange attachment hardware is included in the 199-90 Conversion Kit. Refer to the installation drawing, number 50-80 for details on axle attachment hardware. a. Refer to the 50-80 installation drawing for torque plate mounting orientation and alignment. NOTE: Install the bolt with the bolt head on the inboard side of the torque plate assembly. (1) The torque plate assembly (13) attaches to the axle flange using the mounting hardware: bolts (6), washers (5) and nuts (4). Torque the nuts in a criss-cross pattern to the value specified on the 50-80 installation drawing. After all the nuts have been torqued, check the torque a second time to ensure that the proper torque value is obtained. IM199-90 INSTALLATION MANUAL WITH IPL FOR CONVERSION KIT PART NO. 199-90 Page 5 April 01, 2016 9.2.2 Mount the Tire a. To facilitate the installation of the wheel assembly onto the axle later, remove the snap ring (33), hubcap (12A), and bearing cone (32) from the outboard wheel half. Place the removed items on a clean surface to avoid contamination. NOTE: You do not need to remove the inner wheel half snap ring (28) and grease seal (27). b. Remove all eight nuts (36), sixteen washers (35), and eight bolts, (36), then separate the wheel halves. c. Examine the bead seat area of the wheel halves. If necessary, remove all lubricant, grease or foreign material with a mild soap and water solution or with denatured alcohol. d. The mating surfaces of the wheel halves should not have nicks, burrs, small dents, or other damage. Damaged mating surfaces can prevent the wheel halves from mating or sealing. e. The preformed packing (31) groove in each wheel half should be examined for damage or other debris that would prevent the packing from properly seating. Remove any lubricant, grease or foreign material with a clean cloth moistened with a mild soap and water solution or with denatured alcohol. 9.2.2.1 Tubeless Tire a. Examine the air valve grommet for damage such as cuts, tears, cracking. Replace if necessary. Install the grommet dry. Re-install the air valve assembly in the outboard wheel half and dry torque the valve nut to 60 to 80 in-lb (6,8 to 9,0 N-m). b. Place the brake disc into position in the inner wheel half. Then while holding the brake disc and inner wheel half together, place the components on a clean work surface with the register side of the inner wheel half facing up. NOTE: The register is the area where the wheel halves contact each other. c. Remove and examine the preformed packing (31) for damage. Replace if necessary. (1) Apply a light coat of Dow Corning 55 O-ring lube or a lube per MIL-G-4343 or an equivalent to the preformed packing before installation. NOTE: A light coat of the wheel bearing grease can be used as an alternate. CAUTION: THE PREFORMED PACKING (31) MUST BE INSTALLED UNIFORMLY. IT SHOULD BE FREE OF KINKS AND TWISTS. (2) Re-install the preformed packing in the wheel register groove of the inboard wheel half. IM199-90 INSTALLATION MANUAL WITH IPL FOR CONVERSION KIT PART NO. 199-90 Page 6 July 01, 2005 CAUTION: COMPOUNDS SUCH AS TALC INCREASE TIRE SLIPPAGE. REMOVING TALC WILL MINIMIZE TIRE SLIPPAGE ON THE WHEEL. d. Make sure that the tire is clean inside. If it is not clean then wipe the bead seat base with a mild soap and water solution or with a suitable rubber cleaner. CAUTION: WHEN YOU INSTALL A TIRE, DO NOT APPLY A LUBRICANT TO THE TIRE OR THE WHEEL BEAD SEAT. A LUBRICANT CAN CAUSE THE TIRE TO SLIP IN SERVICE AND DAMAGE THE WHEEL BEAD SURFACE. e. Position the tire on the inner wheel / disc being careful not to disturb the preformed packing (31). f. Place the outer wheel half inside the tire and align the bolt holes of both wheel halves. g. Align the red balance dot on the tire with the air valve assembly. (1) If there is no balance dot on the tire. (a) Align the tire serial number with the air valve assembly. 9.2.2.2 Tube Type Tire NOTE: The preformed packing (31) does not need to be installed when using a tube type tire. CAUTION: COMPOUNDS SUCH AS TALC INCREASE TIRE SLIPPAGE. REMOVING TALC FROM THE TIRE BEADS WILL MINIMIZE TIRE SLIPPAGE ON THE WHEEL. a. Make sure that the tire is clean inside. If it is not clean then wipe the bead seat base with a mild soap and water solution or with a suitable rubber cleaner. CAUTION: WHEN YOU INSTALL A TIRE, DO NOT APPLY A LUBRICANT TO THE TIRE OR THE WHEEL BEAD SEAT. A LUBRICANT CAN CAUSE THE TIRE TO SLIP IN SERVICE AND DAMAGE THE WHEEL BEAD SURFACE. CAUTION: APPLY TIRE TALC TO THE TIRE TUBE ONLY. TIRE TALC ON THE TIRE BEADS CAN CAUSE THE TIRE TO SLIP IN SERVICE AND DAMAGE THE WHEEL BEAD SURFACE OR TUBE VALVE STEM. b. Lubricate or dust the tire tube lightly with tire talc. This will prevent the tube from sticking to the inside of the tire or to the tire beads. It also helps the tube assume its normal shape inside the tire during inflation and lessens the chances of wrinkling or thinning from irregular stretching. c. Inflate the tube with dry nitrogen to slightly round, and insert the tube in the tire. IM199-90 INSTALLATION MANUAL WITH IPL FOR CONVERSION KIT PART NO. 199-90 Page 7 January 07, 2009 NOTE: The tube heavy spot is indicated by a painted yellow stripe about ½ inch wide by 2 inches long. d. Align the stripe on the tube with the tire red balance dot. (1) If the tube has no balance mark. (a) Align the tube valve with the tire red balance dot. e. Position the tire and tube on the outboard wheel half inserting the valve stem through the valve hole in the wheel half tube well. f. Place the inboard wheel half/disc inside the tire and tube, so that the bolt holes in both wheel halves and brake disc are aligned. 9.2.3 Attach the Wheel Half Sub-Assemblies CAUTION: THE COUNTERSUNK SIDE OF THE WASHER (35) IS TO BE INSTALLED TOWARD THE BOLT HEAD OR NUT (AS APPLICABLE). NOTE: The nuts (36) are to be located on the outboard wheel half side of the wheel assembly opposite the brake disc. a. Prior to installed the fasteners, ensure that all bearing surfaces of the bolts (34), washers (35) and nuts (36) as well as the threads are coated with a uniform amount of SAE AMS2518 (MIL-T-5544) anti-seize compound. b. Install a minimum of three washers and bolts, (35 and 34) in the inboard wheel half equally spaced, then: (1) Compress the wheel halves and install a washer (35) onto the threaded end of each bolt. (2) Then, install a nut (34) and tighten the nuts by hand. c. Install the remaining bolts, washers, and nuts the same way. CAUTION: DO NOT USE IMPACT OR POWER WRENCHES TO TORQUE THE WHEEL NUTS AND BOLTS. THE USE OF IMPACT OR POWER WRENCHES CAN CAUSE OVER TIGHTENING. NOTE: The fasteners must be tightened by applying the torque to the nut while holding the bolt head. c. Use the following steps and torque all of the nuts (36). (1) Step one: (1/3 final torque): Lubtork to 100 in-lb (11,3 N-m) in a criss-cross pattern. (2) Step two: (2/3 final torque): Lubtork to 200 in-lb (22,6 N-m) in a criss-cross pattern. (3) Step three: (Final torque): Lubtork to 300 in-lb (33,9 N-m) in a criss-cross pattern. IM199-90 INSTALLATION MANUAL WITH IPL FOR CONVERSION KIT PART NO. 199-90 Page 8 July 01, 2005 9.2.4 Inflate the Tire SAFETY WARNING: ALWAYS PLACE THE TIRE IN AN INFLATION CAGE BEFORE INFLATING. INFLATING THE TIRE CAN BE VERY DANGEROUS. THE TIRE CAN EXPLODE. FAILURE TO USE AN INFLATION CAGE CAN CAUSE SERIOUS INJURY OR DEATH. SERVICE THE TIRE WITH INFLATION EQUIPMENT DESIGNED FOR THIS OPERATION. DO NOT INFLATE THE TIRE TO THE OPERATING PRESSURE UNTIL THE WHEEL/TIRE ASSEMBLY HAS BEEN MOUNTED ON THE AIRCRAFT. a. Inflate the tire just enough to seat the beads on the wheel. Then reduce the tire pressure to the tire manufacturer’s recommended storage pressure and remove the wheel/tire assembly from the inflation cage. 9.2.5 Install the Wheel/Tire Assembly On the Aircraft a. Examine the axle and nut for burrs or rough threads. The axle nut should rotate freely on the axle and not exhibit any drag or resistance. Apply a thin coat of the wheel bearing grease to the axle threads and all of the bearing surfaces of the washer (3) and axle nut. NOTE: Use the same grease that was used to pack the bearing cones. b. Mount the wheel/tire assembly on the axle. c. Install the outboard bearing cone (32) that was removed earlier (reference 9.2.2). d. Install the washer (3) that is included in the 199-90 kit and then install the existing axle nut. 9.2.6 Tighten the Axle Nut a. Tighten the axle nut to 300 in-lb (33,9 N-m) while rotating the wheel to make certain that the bearing cones are seated. Then back the torque off to zero (0 in-lb). CAUTION: DO NOT EXCEED 120 IN-LB (13,5 N-M) ON FINAL TORQUE WHEN ADVANCING THE AXLE NUT TO ALIGN THE COTTER PIN HOLE ON THE AXLE WITH ONE OF THE AXLE NUT SLOTS. b. While rotating the wheel, re-torque the axle nut to 60 to 120 in-lb (6,8 to 11,3 N-m) at the alignment position of the cotter pin hole on the axle and the axle nut castellation. If one of the slots in the axle nut do not line up with the cotter pin hole in the axle, continue to tighten the axle nut until the first available alignment is reached, but do not advance the axle nut using torque in excess of 120 in-lb (13,5 N-m). c. Install the cotter pin. d. Install the hubcap (12A) and secure with the snap ring (33). NOTE: Aircraft equipped with the extended axles are to use the hubcap (12B) that is included in the 199-90 kit. e. Service the tires to inflation pressure as specified on drawing no. 50-80. IM199-90 INSTALLATION MANUAL WITH IPL FOR CONVERSION KIT PART NO. 199-90 Page 9 July 01, 2005 9.2.7 Install the Brake Assembly On the Aircraft a. Remove the twelve brake tie bolts (15) and washers (14), and both insulator shims (25) from the brake assembly (2). Then remove all four of the back plate assemblies (26). NOTE: Leave the pressure plate assemblies (23) on the anchor bolts (20). b. Apply a dry graphite or silicone lubricant to the anchor bolts (20). c. Slide the brake assembly onto the torque plate assembly (13) that was installed earlier (reference 9.2.1). d. Re-install the twelve brake tie bolts (15 or 15A) and washers (14) into the two brake cylinders. NOTE: The supplied bolts (15) have a patch lock added (nylon material embedded in the threaded end) which serves as a self-locking element. NOTE: The optional field alternate bolts (15A) have drilled heads for safety wire retention. e. Re-install the two insulator shims (25) on the tie bolts. f. Position and align the back plate assemblies (26) between the brake disc (29) and the inboard wheel flange. Next, thread the brake tie bolts (15 or 15A) into the back plate assemblies. Torque to between 85 to 90 in-lb (9,6 to 10,2 N-m). NOTE: The optional field alternate bolts (15A) will require safety wire. Safety wire the bolts per NASM33540 after pressure testing the brake assembly. See step 9.2.8 f. 9.2.8 Connect the Brake Assembly CAUTION: DO NOT EXCEED 1,35 N-M (12 IN-LB) WHEN TIGHTENING THE BLEEDER SCREW. TORQUE IN EXCESS OF 1,35 N-M (12 IN-LB) WILL DAMAGE THE BLEEDER SEAT a. Re-connect the existing lower hydraulic line to the brake inlet fitting (item 17). NOTE: Pressure bleeding from the brake to the reservoir is recommended for best results. Repeat if necessary to ensure that any entrapped air is removed from the system. b. Check the brake reservoir for adequate fluid level and bleed the brake system. (1) No fluid flow from the bleeder screw is cause for examination. Refer to CM30-144 Component Maintenance Manual for troubleshooting. c. Tighten the bleeder screw snug to prevent leakage. d. Apply 600 psi to the brake and check for leakage. IM199-90 INSTALLATION MANUAL WITH IPL FOR CONVERSION KIT PART NO. 199-90 Page 10 July 01, 2005 e. Depress and release the toe pedal several times. (1) Check for brake drag by rotating the wheel by hand. Check for excessive play. A slight amount of drag is acceptable; however, a tightly bound wheel should be investigated and corrected before releasing the aircraft to service. NOTE: An improperly seated lining or air in the hydraulic system can cause excessive drag. f. Safety wire the optional field alternate bolts (15A) in accordance with NASM33540. 9.3 BRAKE LINING CONDITIONING It is important to condition new linings properly to obtain the service life designed into them. Condition the linings per the attached product reference memo PRM14A. 10.0 MODIFICATIONS 10.1. Wheel Well Modification NOTE: Modification Template ‘A’ is included in the 199-90 kit. Due to the location of the leading brake cylinder, the forward outboard lower wheel well skin will need to be trimmed to provide the proper clearance for the brake cylinder during wheel retraction into the wheel well. The modification to the lower skin is outlined as follows for both the left and the right wheel wells. a. Use Template ‘A’ to locate and mark the skin as shown on the installation drawing 50-80, sheet 2. Also refer to Figure 1. b. Cut and remove the brackets, Beech Part No. 50-980029-2 left, 50-980029-3 right section and lower skin. See Figure 2 for Beech bracket identification. c. Remove all sharp edges and burrs. d. Place the brackets (8 - left side) and (9 - right side) along the cutout. e. Locate by drilling from the top down. f. Place the filler (11) along the cutout area and drill to match the location of the brackets (8 and 9). g. Fasten the brackets (8 and 9) and the filler (item 11) into place with Cleco or an equivalent fastener system. h. Secure the brackets (items 8 and 9) and the filler (item 11) with sixteen rivets (item 7) as shown in the installation drawing 50-80. i. Secure the following with rivets (7). See Figure 2 and installation drawing 50-80: Two end tabs (10) to the left side brackets (8) and Beech P/N 50-980029-2 Two end tabs (10) to the right side brackets (9) and Beech P/N 50-980029-3 IM199-90 INSTALLATION MANUAL WITH IPL FOR CONVERSION KIT PART NO. 199-90 Page 11 July 01, 2005 CAUTION: MAINTAIN ADEQUATE CLEARANCE BETWEEN THE LEADING BRAKE CALIPER (LOWER EDGE) AND THE FUEL LINE IN THE NACELLE DURING THE RETRACTION TEST. SEE SECTION 10.2. NOTE: If the aircraft is equipped with a mechanical retraction system, the circuit breaker for gear retraction can be tripped then slowly jogged to slowly raise gear and inspect for clearance. Re-set the breaker after completing the retraction test. NOTE: If the aircraft is equipped with a hydraulic gear retraction system, the dragline can be disconnected and the gear can be manually raised to check for clearance. Re- connect the dragline after completing the retraction test. j. After the skin has been cut out and the support brackets (8 and 9) have been installed, perform a gear retraction test prior to releasing the aircraft back into service. k. Remove the aircraft from the jacks. Figure 1 Mark the Skin TEMPLATE SHOWN IN PROPER PLACE FOR CUTOUT OUTBOAR FORWARD TO BE PLACED ALONG EDGE OF SKIN AREA TO BE REMOVED NOTE: EDGE OF TEMPLATE TO EDGE OF THE SKIN NOT EDGE OF THE BRACKET IM199-90 INSTALLATION MANUAL WITH IPL FOR CONVERSION KIT PART NO. 199-90 Page 12 July 01, 2005 Figure 2 Beech Brackets BEECH BRACKETS 50-980029-2 LEFT SIDE 50-980029-3 RIGHT SIDE WHEEL WELL CUTOUT & BRACKET LOCATION CHERRYMAX RIVETS (ITEM 7) ANGLE BRACKET (ITEM 8, LEFT) (ITEM 9, RIGHT) FILLER ITEM 11) END TABS (ITEM 10) OUTBOAR FORWARD IM199-90 INSTALLATION MANUAL WITH IPL FOR CONVERSION KIT PART NO. 199-90 Page 13 July 01, 2005 10.2. Repositioning the Fuel Line (Refer to Figure 3) After completing the gear retraction test to check for adequate clearance between the brake cylinder and the fuel line, it may be necessary to reposition the fuel line and restrain it to ensure positive clearance at all times. Complete the following procedure if needed: CAUTION: LOOSENING OF THE B-NUTS WILL CAUSE FUEL SEEPAGE TO OCCUR. AT THE DISCRETION OF THE INSTALLER, WORK QUICKLY TO MINIMIZE FUEL SEEPAGE OR DEFUEL THE AIRCRAFT IN ACCORDANCE WITH THE AIRCRAFT SERVICE MANUAL. a. Loosen the B-Nuts on the T-Fitting then move the fuel line toward Bracket “B” (away from the skin cutout) to the desired clearance. b. Tighten the B-Nuts in accordance with the aircraft service manual requirements. c. Secure the fuel line to Bracket “A” using the following components not supplied in this kit: Clamp, P/N MS21919WDG13, quantity: one Bushing, Beech P/N 50-810145-3 or equivalent, quantity: as required Bolt, P/N AN3- (length as required), quantity: one Washer, P/N AN960-10, quantity: as required Nut, Beech P/N 130909N29 or equivalent, quantity: one d. Repeat the procedure for the fuel line in the opposite nacelle. IM199-90 INSTALLATION MANUAL WITH IPL FOR CONVERSION KIT PART NO. 199-90 Page 14 July 01, 2005 Figure 3 Securing the Fuel Line Clamp, Bushing, Bolt, Washer, Nut Fuel Line Line to Firewall Shutoff T-Fitting Wiggins Fitting Bracket “A” Bracket “B” Line to Cross- Feed Valve B-Nuts IM199-90 INSTALLATION MANUAL WITH IPL FOR CONVERSION KIT PART NO. 199-90 Page 15 July 01, 2005 11.0 WEIGHT AND BALANCE COMPUTATIONS Weigh the original equipment wheels and brakes. Subtract from the new weights to derive weight increase created by the kit installation. Multiply the weight increase by the applicable aircraft moment and revise the weight and balance information in the log book. 11.1 WEIGHT AND BALANCE DATA Weights do not include the tire or tube. New installed (per gear leg) Brake assembly .....…14.30 lbs. Wheel assembly ....…29.00 lbs. Total ...........………....43.30 lbs. Complete form 337 and make appropriate log book entries. 12.0 FLIGHT MANUAL INSERTS Inserts are located in front with conversion kit documentation. Attach the “Item Installed Labels” (referenced below) into (or copy into) the flight manual as close as possible to the original section titled Main Wheel and Brake Assembly. Enter the correct arm and moment in the blocks provided. Zero the items out for the original main wheel and brake assemblies that have been removed. X Two dual piston, single disc Brake Assemblies, Cleveland P/N 30-144 14.30 ea. X Two 24 x 7.7 Type VII Wheel Assemblies, Cleveland P/N 40-170A 29.00 ea. Attach the “Description Label” (referenced below) into (or copy into) the Pilots Operating Manual as close as possible to the section titled Brake System. Cleveland Brake Assembly P/N 30-144 is a dual caliper, single fixed disc design, using two pistons per caliper (total of four pistons per brake) which respond to fluid pressure from the master cylinders for brake application. IM199-90 INSTALLATION MANUAL WITH IPL FOR CONVERSION KIT PART NO. 199-90 Page 16 April 01, 2016 13.0 KIT PARTS LIST 199-90 KIT (1) ITEM NUMBER PART NUMBER DESCRIPTION QUANTITY (2) 1 40-170A Wheel Assembly 2 (3) 2 30-144 Brake Assembly 2 3 095-02900 Washer (Wheel Bearing Retaining) 2 4 094-10400 Nut (MS21044-N5) 24 5 095-10500 Washer (AN960-516) 48 6 103-22100 Bolt (AN5-10A) 24 7 105-00800 Rivet (CherryMax P/N CR3243-4-2) 32 8 110-05400 Bracket (Left Side) 1 9 110-05500 Bracket (Right Side) 1 10 110-05600 End Tab 4 11 110-05700 Filler 2 12B 158-01400 Hubcap (To be used on early model 90’s with extended axle) 2 IM199-90 Installation Manual for Conversion Kit 199-90 1 50-80 Installation Drawing (sheets 1 & 2) 1 CM40-170A Component Maintenance Manual for 40-170A Wheel Assembly 1 CM30-144 Component Maintenance Manual for 30-144 Brake Assembly 1 SA619GL Supplemental Type Certificate 1 PRM14A Conditioning Procedure for 1 Metallic Brake Lining PRM78 (Deleted) Template A Wheel Well Modification Template 1 ------- Pilot Operating Manual Inserts 1 ------- Product Registration Card 1 (1) Refer to 50-80 Installation Drawing. (2) For a complete parts breakdown, refer to Maintenance Manual CM40-170A. (3) For a complete parts breakdown, refer to Maintenance Manual CM30-144. Technical Publication Component Maintenance Manual With Illustrated Parts List Parker Hannifin Corporation Aircraft Wheel & Brake Division Avon, Ohio 44011 Cage Code 33269 Page T-1 October 15, 2011 CM30-144 Main Brake Assembly Parker Hannifin Part No. 30-144 Initial Issue July 01, 2005 This document contains information that is confidential and proprietary to Parker Hannifin Corporation (“Parker”). This document is furnished on the understanding that the document and the information it contains will not be copied or disclosed to others except with the written consent of Parker, will not be used for any purpose other than conducting business with Parker, and will be returned and all further use discontinued upon request by Parker. Copyright Parker. Year of copyright is first year indicated on this document. All rights reserved. U.S. EXPORT CONTROLLED – Dissemination is restricted by the Export Administration Act of 1979 (50 U.S.C. App. 2401, et seq) and the Export Administration Regulations. CM30-144 COMPONENT MAINTENANCE MANUAL WITH IPL FOR MAIN BRAKE ASSEMBLY PART NO. 30-144 Revision Highlights Page 1 of 1 July 01, 2005 TO: HOLDERS OF CM30-144 COMPONENT MAINTENANCE MANUAL WITH ILLUSTRATED PARTS LIST FOR MAIN BRAKE ASSEMBLY PART NO. 30-144. Attached to this transmittal letter is Revision NC of CM30-144 (dated July 01, 2005) Revision NC, Dated July 01, 2005 REVISION NC CONTAINS ALL PAGES OF THE MANUAL. Pages that have been added or revised are outlined below together with the highlights of the revision. Please retain all REVISION HIGHLIGHTS pages, inserting them into the manual for future reference. REVISION HIGHLIGHTS Section/Page No. Description Of Change All Sections/All Pages Initial Release (DCN 0364-50) CM30-144 COMPONENT MAINTENANCE MANUAL WITH IPL FOR MAIN BRAKE ASSEMBLY PART NO. 30-144 Revision Highlights Page 1 of 1 October 15, 2011 TO: HOLDERS OF CM30-144 COMPONENT MAINTENANCE MANUAL WITH ILLUSTRATED PARTS LIST FOR MAIN BRAKE ASSEMBLY PART NO. 30-144. Attached to this transmittal letter is Revision A of CM30-144 (dated October 15, 2011) Revision A, Dated October 15, 2011 REVISION A CONTAINS ALL PAGES OF THE MANUAL. Pages that have been added or revised are outlined below together with the highlights of the revision. Please retain all REVISION HIGHLIGHTS pages, inserting them into the manual for future reference. REVISION HIGHLIGHTS Section/Page No. Description Of Change As follows DCN 0394-55 Title Page/T-1 (ADD) proprietary and export statements Record of Revisions/ (UPDATE) to reflect latest revision RR-1 List of Effective Pages/ (UPDATE) applicable pages to reflect latest revision LEP-1 Introduction/Intro-1 (UPDATE) proprietary statement (ADD) export statement Illustrated Parts List/ (ADD) 101-39800 (M83461/2-904) P/N for items 165 and 175 10006 CM30-144 COMPONENT MAINTENANCE MANUAL WITH IPL FOR MAIN BRAKE ASSEMBLY PART NO. 30-144 Record of Revisions Page RR-1 October 15, 2011 RECORD OF REVISIONS Retain this record in front of manual. On receipt of revision, insert revised pages in the manual, and enter revision letter, date inserted and initial. REV. DATE ISSUED DATE INSERTED BY REV. DATE ISSUED DATE INSERTED BY NC 07-01-2005 07-01-2005 PHC A 10-15-2011 10-15-2011 PH CM30-144 COMPONENT MAINTENANCE MANUAL WITH IPL FOR MAIN BRAKE ASSEMBLY PART NO. 30-144 Service Bulletin List Page SB-1 July 01, 2005 SERVICE BULLETIN LIST Parker Hannifin Service Bulletins are issued in order to provide general information on product line concerns. The bulletin listings contained herein identify subject matter directly related to the support and function of the assembly and components. SERVICE BULLETIN NUMBER SUBJECT REV. DATE INCORPORATED CM30-144 COMPONENT MAINTENANCE MANUAL WITH IPL FOR MAIN BRAKE ASSEMBLY PART NO. 30-144 List of Effective Pages Page LEP-1 October 15, 2011 LIST OF EFFECTIVE PAGES SUBJECT PAGE DATE Title Page T-1 Oct 15, 2011 Record of RR-1 Oct 15, 2011 Revisions Service SB-1 July 01, 2005 Bulletin List List of LEP-1 Oct 15, 2011 Effective Pages Table of Contents T/C-1 July 01, 2005 Introduction INTRO-1 Oct 15, 2011 2 July 01, 2005 Description and 1 July 01, 2005 Operation 2 July 01, 2005 Testing 1001 July 01, 2005 1002 July 01, 2005 1003 July 01, 2005 1004 July 01, 2005 Disassembly 3001 July 01, 2005 3002 July 01, 2005 3003 July 01, 2005 3004 Blank Cleaning 4001 July 01, 2005 4002 July 01, 2005 4003 July 01, 2005 4004 Blank SUBJECT PAGE DATE Checks 5001 July 01, 2005 5002 July 01, 2005 5003 July 01, 2005 5004 July 01, 2005 5005 July 01, 2005 5006 July 01, 2005 5007 July 01, 2005 5008 Blank Repair 6001 July 01, 2005 6002 July 01, 2005 6003 July 01, 2005 6004 July 01, 2005 6005 July 01, 2005 6006 July 01, 2005 6007 July 01, 2005 6008 Blank Assembly 7001 July 01, 2005 7002 July 01, 2005 7003 July 01, 2005 7004 Blank Fits And 8001 July 01, 2005 Clearances 8002 Blank Special 9001 July 01, 2005 Equipment And 9002 Blank Consumables Illustrated 10001 July 01, 2005 Parts List 10002 July 01, 2005 10003 July 01, 2005 10004 July 01, 2005 10005 July 01, 2005 10006 Oct 15, 2011 Storage 15001 July 01, 2005 15002 Blank CM30-144 COMPONENT MAINTENANCE MANUAL WITH IPL FOR MAIN BRAKE ASSEMBLY PART NO. 30-144 Table of Contents Page TC-1 July 01, 2005 TABLE OF CONTENTS S SU UB BJJE EC CT T P PA AG GE E INTRODUCTION.............................................................................................. INTRO-1 DESCRIPTION AND OPERATION .............................................................................. 1 TESTING AND FAULT ISOLATION ....................................................................... 1001 SCHEMATIC AND WIRING DIAGRAMS ............................................... (Not Applicable) DISASSEMBLY ...................................................................................................... 3001 CLEANING ............................................................................................................. 4001 CHECKS ................................................................................................................ 5001 REPAIR.................................................................................................................. 6001 ASSEMBLY ............................................................................................................ 7001 FITS AND CLEARANCES ...................................................................................... 8001 SPECIAL EQUIPMENT AND CONSUMABLES ..................................................... 9001 ILLUSTRATED PARTS LIST................................................................................ 10001 SPECIAL PROCEDURES ..................................................................... (Not Applicable) REMOVAL ............................................................................................ (Not Applicable) INSTALLATION..................................................................................... (Not Applicable) SERVICING .......................................................................................... (Not Applicable) STORAGE ........................................................................................................... 15001 REWORK .............................................................................................. (Not Applicable) CM30-144 COMPONENT MAINTENANCE MANUAL WITH IPL FOR MAIN BRAKE ASSEMBLY PART NO. 30-144 Introduction Page INTRO-1 October 15, 2011 THIRD ANGLE PROJECTION INTRODUCTION 1. General SAFETY WARNING: ALL TORQUE AND SPECIFIC LIMITS OR VALUES CONTAINED HEREIN MUST BE STRICTLY OBSERVED. IGNORING OF TORQUE LIMITS AND OTHER SPECIFIC VALUES GIVEN BY THIS MANUAL, CAN CAUSE PROPERTY DAMAGE, PERSONAL INJURY, OR DEATH. This manual is published for the guidance of personnel responsible for the overhaul and/or maintenance of the Parker Hannifin Assembly covered in this publication. Third angle projection is used in this manual. All weights and measurements are in U.S. English units with metric units in parentheses. English units are shown with a period for the decimal point. Millimeters are shown with a comma for the decimal point. Numbers that contain five or more digits to the left of the decimal point have a space between the “thousands” and “hundreds” digits to prevent confusion with the metric decimal point. The manual for the aircraft shall take precedence for the component’s interface connections with the functional features as used in the aircraft. This manual may also describe functional features that may or may not be used when installed as a component of a system in the aircraft. The manufacturer recommends that you ask for the latest revision of the manual before continuing with overhaul or maintenance operations. Ask the Technical Services Department of the Aircraft Wheel & Brake Division for the latest revision. Parker Hannifin Corporation Websites: www.parker.com/ag/wbd Aircraft Wheel & Brake Division www.clevelandwheelsandbrakes.com 1160 Center Road E-mail: techhelp@parker.com Avon, Ohio 44011 U.S.A. Fax: (440) 937-5409 Attn: Technical Services/Hotline Tel: 1-800-BRAKING (1-800-272-5464) (440) 937-1315 2. Data Rights and Export Statement This document contains information that is confidential and proprietary to Parker Hannifin Corporation (“Parker”). This document is furnished on the understanding that the document and the information it contains will not be copied or disclosed to others except with the written consent of Parker, will not be used for any purpose other than conducting business with Parker, and will be returned and all further use discontinued upon request by Parker. Copyright Parker. Year of copyright is first year indicated on this document. All rights reserved. U.S. EXPORT CONTROLLED – Dissemination is restricted by the Export Administration Act of 1979 (50 U.S.C. App. 2401, et seq) and the Export Administration Regulations. CM30-144 COMPONENT MAINTENANCE MANUAL WITH IPL FOR MAIN BRAKE ASSEMBLY PART NO. 30-144 Introduction Page INTRO-2 July 01, 2005 INTRODUCTION 3. TSO Notice This assembly is certified for FAR Part 23 usage. It is identified with a “TSO-C26c” marking. This assembly has been tested and qualified to FAA (Federal Aviation Administration) requirements and specifications. 4. Manual Use This manual is divided into various section blocks such as Testing and Fault Isolation, Disassembly, Inspection / Check, Repair, etc. Each section has its own range of page numbers. Refer to the Table of Contents for the location of the applicable section. A. Warnings and Cautions and Notes These adjuncts to the text shall be used to highlight or emphasize important points when necessary. Refer to the descriptions of these statements that follow: • A “SAFETY WARNING” flagged by this symbol , calls attention to possible serious or life threatening situations if procedures are not followed. • A “WARNING” calls attention to use of materials, processes, methods, procedures, or limits which must be followed precisely to avoid injury to persons. • A “CAUTION” calls attention to methods and procedures, which must be followed to avoid damage to equipment. • A “NOTE” calls attention to an essential operating or maintenance procedure, condition, or statement, which must be highlighted. 5. Replacement Parts SAFETY WARNING: PARKER HANNIFIN WHEEL & BRAKE DOES NOT WARRANT OR ASSUME THE RISK OF THE USE OF REPLACEMENT PARTS NOT AUTHORIZED FOR USE BY PARKER HANNIFIN WHEEL & BRAKE. OPERATORS WHO USE REPLACEMENT PARTS NOT AUTHORIZED BY PARKER HANNIFIN WHEEL & BRAKE DO SO AT THEIR OWN RISK AND TAKE FULL RESPONSIBILITY FOR ALL PROPERTY DAMAGE, PERSONAL INJURY OR DEATH CAUSED BY SUCH REPLACEMENTS. Use only the approved parts that are listed in the illustrated parts list of this manual. CM30-144 COMPONENT MAINTENANCE MANUAL WITH IPL FOR MAIN BRAKE ASSEMBLY PART NO. 30-144 Page 1 July 01, 2005 DESCRIPTION AND OPERATION 1. Description Refer to IPL Figure 1 to identify the brake assembly components. The brake assembly is a piston actuated, dual cylinder, external disc design. It uses metallic linings. The brake is compatible with MIL-H-5606 and MIL-PRF-5606 hydraulic fluid. The cylinder is an aluminum alloy casting which is anodized and painted for corrosion protection. The brake assembly has two pressure plate assemblies (70), four piston assemblies (30), four back plate assemblies (95), a torque plate assembly (180), a hose assembly (195) and hardware and fittings. Each piston assembly uses a friction ring (40) to maintain ideal piston positioning that limits piston travel for fluid displacement concerns. The cylinder housing piston bores contain a preformed packing (25) to prevent leakage of hydraulic fluid. A piston insulator (50) in each piston (45) works to minimize heat transfer to the brake fluid generated during braking. 2. Operation Braking action occurs when hydraulic pressure is applied to the brake via the pilot’s or co-pilot’s master cylinders. As hydraulic pressure reaches the cylinders, the pistons move outward forcing the pressure plate assembly against the surface of the brake disc. This causes the cylinder to align itself so that the pressure plate linings and back plate linings provide uniform contact against both rubbed surfaces of the brake disc. Kinetic energy is transformed into thermal energy as braking action takes place. 3. Handling Procedures Handle and maintain the brake components properly to protect the paint and surface finishes. 4. Specifications Brake Cylinder Material ........................................................................ Aluminum Alloy Casting Brake Tie Bolt Torque ................................................................ 85 to 90 in-lb (9,6 to 10,2 N-m) Hydraulic Fluid ............................................................................ MIL-H-5606 or MIL-PRF-5606 Seals ...................................... Compatible with MIL-H-5606 and MIL-PRF-5606 Hydraulic Fluid Brake Cylinder Coatings ........... Surface Pretreatment: ................ MIL-A-8625, Type II, Class 1 Primer Coating: ............................ Refer to the Repair Section Finish Coating: ............................. Refer to the Repair Section CM30-144 COMPONENT MAINTENANCE MANUAL WITH IPL FOR MAIN BRAKE ASSEMBLY PART NO. 30-144 Page 2 July 01, 2005 DESCRIPTION AND OPERATION 5. Brake Lining Wear Check Maximum wear limits for the brake linings are shown below. Figure 1 Minimum Lining Thickness 6. Maintenance Schedule The maintenance schedule is intended to be a guideline based on laboratory testing environments that simulate normal braking conditions. Field operating requirements can vary from aircraft to aircraft. These variations will directly affect the wear rate of the brake assembly components. You must evaluate your own operating conditions to determine a suitable schedule to support and maintain the equipment. NOTE: All task procedures in Table 1 refer to paragraphs in the CHECKS section. Table 1 Maintenance Schedule INTERVAL ITEM TASK Every time the linings (85, 110) have reached the in- service wear limits as specified in Figure 1 and Table 8001 of the FITS AND CLEARANCES section 1. All parts a. Paragraph 1.B., visual examination. and b. Paragraph 2., detailed examination as necessary. Bolts (5) or (5A) Paragraph 2. A. detailed examination including magnetic particle inspection. Preformed Packings (25, 55, 140, 165, 175) Replace At the 3rd (third) set of lining replacement and every other set of lining replacement thereafter. Brake Cylinder (20) Paragraph 2.B. detail examination including liquid penetrant inspection. Torque Plate (185) Paragraph 2.H. detail inspection including liquid penetrant inspection. CM30-144 COMPONENT MAINTENANCE MANUAL WITH IPL FOR MAIN BRAKE ASSEMBLY PART NO. 30-144 Page 1001 July 01, 2005 TESTING AND FAULT ISOLATION 1. General Refer to IPL Figure 1 to identify the brake assembly components. This section contains test procedures that can be used both as troubleshooting measures and means to test overhauled brake assemblies. A test data sheet is included at the end of this section for reference. SAFETY WARNING: FULLY ASSEMBLE BRAKE BEFORE TESTING. SERIOUS INJURY OR DEATH CAN OCCUR FROM TESTING A BRAKE THAT IS NOT FULLY ASSEMBLED. WARNING: PUT ON PROTECTIVE CLOTHING AND EYEWEAR BEFORE DOING THE WORK. A. Equipment and Consumables The term “Commercial Source” lets the repair facility get the product from a supplier of choice. NOTE: Unless specified differently, you can use equivalent alternatives for the items listed. Table 1001 Equipment and Consumables NOMENCLATURE/ PART NO. SPECIFICATION / SOURCE OF SUPPLY Fluid, Hydraulic MIL-H-5606 or MIL-PRF-5606, Commercial Source Powered Hydraulic Test Stand 0 to 68,9 bar capacity, ± 1,38 bar gauge increment, (0 to 1000 psig, ± 20 psig gauge increment), Commercial Source Hydraulic Pump 0 to 68,9 bar capacity (0 to 1000 psig) Commercial Source Hydraulic Hose 68,9 bar minimum, (1000 psig), Commercial Source Pressure Regulator 0 to 68,9 bar (0 to 1000 psig), Commercial Source Pressure Gauge 0 to 68,9 bar (0 to 1000 psig), Commercial Source Automatic Cycler Commercial Source Hydraulic Filter 10 micron, Commercial Source Socket Set/ Wrench Set Standard Hex Head (inch units), Commercial Source Torque Gage Commercial Source CM30-144 COMPONENT MAINTENANCE MANUAL WITH IPL FOR MAIN BRAKE ASSEMBLY PART NO. 30-144 Page 1002 July 01, 2005 TESTING AND FAULT ISOLATION 2. Test the Brake Assembly Examine all brake assemblies that do not meet the test standards of this section. Disassembly will be necessary for further inspection of individual components to find the reason for failure. Replacement or repair of components may be necessary. A. Pretest Check Do these inspections and check procedures to approve the brake assembly for testing. Do not do a test on a brake assembly that shows signs of damage. (1) Examine the cylinder (20) surfaces for dents, cracks, or other visible damage. (2) Examine all fasteners and threaded components for loose fit. If a loose fastener is found, tighten it. Refer to Table 8002, Torque Values. B. Bleed and Pressure Test the Brake Assembly CAUTION: DO NOT EXCEED 1,35 N-M (12 IN-LB) WHEN TIGHTENING THE BLEEDER SCREW (150). TORQUE IN EXCESS OF 1,35 N-M (12 IN-LB) WILL DAMAGE THE BLEEDER SEAT (145). (1) Connect the hydraulic supply line to the brake inlet fitting assembly (170). NOTE: Pressure bleeding is recommended for best results. (2) Check the brake system reservoir for adequate fluid level and bleed the brake system (a) No fluid flow from the bleeder screw is cause for examination. Refer to Table 1002, Troubleshooting. (3) Tighten the bleeder screw (150) snug to prevent leakage. (4) Apply 600 psi to the brake and check for leakage. (5) Depress and release the toe pedal several times. (a) Check for brake drag by rotating the wheel by hand. Check for excessive play. A slight amount of drag is acceptable; however, a tightly bound wheel should be investigated and corrected before releasing the aircraft to service. NOTE: An improperly seated lining or air in the hydraulic system can cause excessive drag. CM30-144 COMPONENT MAINTENANCE MANUAL WITH IPL FOR MAIN BRAKE ASSEMBLY PART NO. 30-144 Page 1003 July 01, 2005 TESTING AND FAULT ISOLATION 3. Troubleshooting Refer to IPL Figure 1 for identification of brake assembly components. Table 1002 Troubleshooting is a list of the possible problems you can find while operating the brake assembly. The table cannot list all possible problems and is intended to assist with troubleshooting the brake assembly. Table 1002 Troubleshooting PROBLEM COMMON CAUSE CORRECTION Hydraulic fluid leaking from brake assembly piston bore areas Worn or damaged preformed packing (25) Replace preformed packing Pistons (45) worn or damaged Examine per CHECKS section and replace if necessary Piston bores of cylinder (20) worn or damaged Examine per CHECKS section and replace if necessary Hydraulic fluid leaking from inlet fitting (170), bleeder components (145, 150), hose (195) or fitting assembly (160) Loose hydraulic connection; worn or damaged preformed packing (140, 165 or 175) or damaged fitting (160, 170) or bleeder components (145, 150) Tighten hydraulic connection; replace packing; or replace fitting or bleeder components No fluid flow from fittings Obstruction in hydraulic line, fitting or brake port Clear obstruction – flush system if necessary Brake not engaging or releasing correctly. Air in the brake system Bleed the brake Obstruction in hydraulic line or fluid passage Remove obstruction – flush system if necessary Pistons (45) sticking or binding Replace preformed packing (25) or Examine parts per CHECKS section Pistons (45) damaged Replace pistons Brake cylinder (20) damaged Replace cylinder Anchor bolts (125) not sliding freely in torque plate bushings (190) Apply a lubricant such as dry graphite or silicone spray to the anchor bolts. Anchor bolts (125) bent or damaged. Replace anchor bolts. Torque plate assembly (180) damaged or bushings (190) worn Examine per CHECKS section and replace if necessary Pressure plate assembly (70) not sliding freely on anchor bolts (125) Examine per CHECKS section and replace if necessary Brake cylinder (20) damaged. Examine per CHECKS section and replace if necessary Maximum pedal effort does not decelerate aircraft properly or does not actuate brake. Linings (85, 110) and/or brake disc on wheel worn beyond limits Replace linings and/or disc Air in the brake system Bleed the brake Brakes have overheated Allow the brakes to cool and inspect CM30-144 COMPONENT MAINTENANCE MANUAL WITH IPL FOR MAIN BRAKE ASSEMBLY PART NO. 30-144 Page 1004 July 01, 2005 TEST DATA SHEET Date _____________________Brake Serial No. _________________ Pretest Check and Bleed Brake refer to paragraphs 2.A and 2.B. (1) Brake cylinder condition Accept ______ Reject ______ (2) Brake assembly hardware condition Accept ______ Reject ______ (3) Brake bleed Pass ______ Fail ______ Comments: __________________________________________________________________________ ____________________________________________________________________________________ ____________________________________________________________________________________ Pressure Test refer to paragraph 2.D. Pressure Applied ____________ bar/psig Required: 600 psig ± 20 psig (41,4 bar ± 1,4 bar) Leakage: Yes ______ No ______ Comments: __________________________________________________________________________ ___________________________________________________________________________________ ___________________________________________________________________________________ Tester: ______________________________________________________ Date: ________________ CM30-144 COMPONENT MAINTENANCE MANUAL WITH IPL FOR MAIN BRAKE ASSEMBLY PART NO. 30-144 Page 3001 July 01, 2005 DISASSEMBLY 1. General Refer to IPL Figure 1 to identify the brake assembly components. WARNING: PUT ON PROTECTIVE CLOTHING AND EYEWEAR BEFORE DOING THE WORK. NOTE: The brake assembly should only be disassembled as far as necessary to repair or replace defective parts. A. Equipment and Consumables The term “Commercial Source” lets the repair facility get the product from a supplier of choice. NOTE: Unless specified differently, you can use equivalent alternatives for the items listed. Table 3001 Equipment and Consumables NOMENCLATURE/ PART NO. SPECIFICATION / SOURCE OF SUPPLY Preformed Packing Extraction Tool Set P/N 199-18 Parker Hannifin Corp., Aircraft Wheel & Brake Division or Parker Hannifin distributor Socket Set/ Wrench Set Standard Hex Head (inch units), Commercial Source 2. Remove the Brake Assembly NOTE: Wheel removal is not necessary unless removal of the torque plate assembly (180) is required. Follow instructions in the wheel maintenance manual for wheel removal. Do not remove the torque plate assembly (180) from the axle strut flange unless: – The maintenance schedule requires removal. – The torque plate needs repair or it needs to be replaced. SAFETY WARNING: MAKE SURE THE AIRCRAFT IS SECURE AND STABLE BEFORE BEGINNING ANY WORK. WORKING AROUND AN AIRCRAFT THAT IS NOT SECURE AND STABLE CAN CAUSE INJURY OR DEATH. CAUTION: MAKE SURE PARKING BRAKE IS IN THE OFF POSITION AND THE WHEELS ARE BLOCKED. A. Remove and cap the hydraulic inlet line that is attached to the brake inlet fitting assembly (170). Cap the brake inlet fitting (170). CM30-144 COMPONENT MAINTENANCE MANUAL WITH IPL FOR MAIN BRAKE ASSEMBLY PART NO. 30-144 Page 3002 July 01, 2005 DISASSEMBLY B. To keep the back plate assembly (95) from falling, hold each back plate assembly (95) while loosening the bolts (5 or 5A) and washers (10) that secure the back plate assemblies to the brake cylinder (20). C. With the back plate assemblies (95) removed, carefully slide the brake cylinder from the torque plate assembly (180). D. If the torque plate assembly (180) is being removed, remove it now by removing the axle flange mounting hardware that attaches the torque plate assembly to the axle strut flange. 3. Disassemble the Brake Assembly SAFETY WARNING: FOLLOW ALL SAFETY PRECAUTIONS AND WEAR PROTECTIVE CLOTHING AND SAFETY GLASSES WHEN WORKING WITH THE BRAKE ASSEMBLY AND HYDRAULIC FLUIDS. FAILURE TO COMPLY CAN RESULT IN PERSONAL INJURY. CAUTION: BE CAREFUL TO KEEP BRAKE FLUID FROM SPLASHING ONTO THE BRAKE LININGS (85, 110). BRAKE FLUID THAT HAS SOAKED INTO THE FRICTION MATERIAL CAN AFFECT THE BRAKING PROCESS. NOTE: The anchor bolts (125) are pressed into the brake cylinder (20) and secured with a washer (130) and nut (135). Do not remove the anchor bolts unless replacement is necessary. Replacement will be necessary if the anchor bolts are damaged or if a more thorough inspection of the brake cylinder is to be made. NOTE: Drain the hydraulic fluid into an approved container. A. Remove the bolts (5 or 5A) and washers (10) from the assembled brake cylinder. This will also free the insulator shim (120). B. Slide the pressure plate assembly (70) off of the anchor bolts (125). C. Remove the hose assembly (195) that connects the two assembled brake cylinders together. CM30-144 COMPONENT MAINTENANCE MANUAL WITH IPL FOR MAIN BRAKE ASSEMBLY PART NO. 30-144 Page 3003/(3004 blank) July 01, 2005 DISASSEMBLY SAFETY WARNING: USE CAUTION IN BLOWING THE PISTONS OUT OF THE CYLINDER WITH COMPRESSED AIR. THE PISTONS CAN FLY OUT AT HIGH VELOCITY. TURN THE CYLINDER OVER SO THAT THE PISTONS ARE FACING THE WORK TABLE SURFACE. USE A RAG TO CUSHION THE PISTON AND TO PREVENT DAMAGE TO THE PISTON AND WORK TABLE SURFACE. SAFETY WARNING: DEATH OR SERIOUS INJURY CAN OCCUR IF COMPRESSED AIR IS DIRECTED AGAINST THE SKIN. DO NOT EXCEED 20 PSI (2,1 BAR). USE CHIP GUARDS, EYE PROTECTION, AND OTHER PERSONAL PROTECTIVE EQUIPMENT. D. Remove the pistons (45) by injecting air into the ports. E. The piston insulator (50) is press fit into the piston (45). Do not remove the insulator unless it needs to be replaced. Refer to the CHECKS section for replacement criteria. NOTE: A new stat-o-seal (55) must be used whenever the bolt (65) is removed for any reason because the original one will not seal properly if reinstalled. F. This brake design has an internal piston guide (35) attached to the cylinder by a bolt (65), washer (60) and stat-o-seal (55). It is recommended that this unit not be removed unless it is necessary due to: – Damage or corrosion to the piston guide (35) or the attaching hardware. NOTE: Do not remove the friction ring (40) from the piston guide (35) unless it needs to be replaced because of damage or corrosion. – Damaged or worn stat-o-seal (55). – Stripping and repainting of the cylinder (20). – Detailed inspection of the cylinder including liquid penetrant inspection. G. Remove the preformed packings (25) from the seal cavity of the cylinder piston bores. H. Remove the two hose fittings (160) from the brake cylinders. I. Remove the bleeder seat (145) and inlet fitting (170). CM30-144 COMPONENT MAINTENANCE MANUAL WITH IPL FOR MAIN BRAKE ASSEMBLY PART NO. 30-144 Page 4001 July 01, 2005 CLEANING 1. General Refer to IPL Figure 1 to identify the brake assembly components. WARNING: PUT ON PROTECTIVE CLOTHING AND EYEWEAR BEFORE DOING THE WORK. A. Equipment and Consumables The term “Commercial Source” lets the repair facility get the product from a supplier of choice. NOTE: Unless specified differently, you can use equivalent alternatives for the items listed. Table 4001 Equipment and Consumables NOMENCLATURE/ PART NO. SPECIFICATION / SOURCE OF SUPPLY Plastic Media Stripping Equipment Commercial Source Plastic Media MIL-P-85891, Type II or V, Grade 20/30, 3.5 MOH max U.S. Technology Corp. Air Supply 2,1 bar maximum (30 psig), Commercial Source Clean Cloths Lint Free, Commercial Source Brushes Non-Metallic Soft and Stiff Bristle, Commercial Source Solvent, Stoddard, Type 1 MIL-PRF-680, Commercial Source Cleaner/Degreaser AMS1526, Commercial Source Soap Solution Mild Dishwashing Liquid, Commercial Source 2. Cleaning Procedures SAFETY WARNING: MAKE SURE THAT THE AREA WHERE YOU WILL USE THE CLEANING SOLVENTS HAS GOOD AIRFLOW. DO NOT TOUCH OR GET FLUID ON YOUR BODY AND DO NOT BREATH VAPORS. KEEP CONTAINERS COVERED WHEN NOT IN USE. WARNING: USE NO MORE THAN 2,1 BAR (30 PSIG) AIR PRESSURE. EYE PROTECTION IS NECESSARY. EYE INJURY FROM DIRT PARTICLES OR SOLVENT SPRAY IS POSSIBLE WHEN COMPRESSED AIR IS USED. A. Clean the Metal Components (1) Clean the metal parts that follow in Stoddard Solvent (MIL-PRF-680). Use a non-metal soft bristle brush to remove the heavy dirt deposits: (5, 10, 60, 75, 100, 125, 130, 135, 145, 150, 160, 170). (2) Dry the parts using compressed air and lint-free cloths. CM30-144 COMPONENT MAINTENANCE MANUAL WITH IPL FOR MAIN BRAKE ASSEMBLY PART NO. 30-144 Page 4002 July 01, 2005 CLEANING B. Clean the Non-Metal Components (1) The preformed packings (25, 140, 165, 175), and bleeder cap (155) can be cleaned with a cloth dampened with hydraulic fluid. This will loosen the dirt. (2) The insulator shim (120) can be wiped clean with a cloth dampened with a mild soap and water solution. Wipe dry with a clean cloth. C. Clean the Aluminum Components and Magnesium Components NOTE: The piston insulator (50) is press fit into the piston (45). It is a fiber-based material and will not be harmed if the piston is cleaned with the Stoddard Solvent. NOTE: Do not remove the friction ring (40) from the piston guide (35) unless it needs to be replaced because of damage or corrosion. The stainless steel friction ring will not be harmed if the piston guide is cleaned with the Stoddard Solvent. (1) Clean the parts that follow in Stoddard Solvent (MIL-PRF-680): (20, 35, 45, 180). Use a non-metal soft bristle brush to remove the heavy dirt deposits. (a) Use a soft wire brush to remove any corrosion on the cylinder port threads. (2) To remove chemical residue, clean parts in a water based cleaner/degreaser (per AMS1526). (3) Rinse the parts with a mild soap and water solution. (4) Rinse the parts in clean water. (5) Dry the parts using compressed air and lint free cloths. F. Protective Coating Removal for the Brake Cylinder (20) and Torque Plate Assembly (180) SAFETY WARNING: DUE TO THE TOXICITY AND VOLATILITY OF CHEMICAL STRIPPING SOLVENTS, THEY ARE A HEALTH CONCERN AND NOT A RECOMMENDED SOURCE OF PROTECTIVE COATING REMOVAL. NOTES: Removal of the protective coating (primer and topcoat) is necessary when doing the liquid penetrant inspection of the brake cylinder. To achieve best results, always refer to the manufacturer’s instructions for use and disposal of blast media. NOTES: Stainless steel bushings (190) are press fit into the cast magnesium torque plate. The use of plastic media to remove the paint coating of the torque plate will not damage the bushings. (1) Clean the parts in accordance with paragraph 2. (2) Blast the parts per MIL-STD-1504 with plastic media per MIL-P-85891, Type II or V, Grade 20/30, maximum media hardness of 3.5 MOH. CM30-144 COMPONENT MAINTENANCE MANUAL WITH IPL FOR MAIN BRAKE ASSEMBLY PART NO. 30-144 Page 5001 July 01, 2005 CHECKS 1. General Refer to IPL Figure 1 to identify the brake assembly components. After a check is performed on a component, refer to the REPAIR section for applicable repairs. Refer to Table 1 Maintenance Schedule for a timetable of scheduled maintenance tasks for the brake assembly components. All parts must be cleaned before examination. Refer to the CLEANING section. WARNING: PUT ON PROTECTIVE CLOTHING AND EYEWEAR BEFORE DOING THE WORK. A. Equipment and Consumables The term “Commercial Source” lets the repair facility get the product from a supplier of choice. NOTE: Unless specified differently, you can use equivalent alternatives for the items listed. Table 5001 Equipment and Consumables NOMENCLATURE/ PART NO. SPECIFICATION / SOURCE OF SUPPLY Inspection Surface Plate Commercial Source Magnifier X10 Magnification, Commercial Source Micrometers Commercial Source Vernier Dial Calipers Commercial Source Magnetic Particle Inspection Kit ASTM E1444, Commercial Source Liquid Penetrant Inspection Kit MIL-STD-6866 or ASTM E1417, Type 1, Method A, Sensitivity Level 2, Commercial Source B. Visual Examination Examine all of the parts for cuts, tears, cracks, breaks, nicks, scratches, gouges, corrosion, wear, distortion, scoring, stripped or crossed threads and other damage. Replace a part that is cracked, worn beyond limits or has exceeded allowable repair or is not a repairable or reworkable part. CM30-144 COMPONENT MAINTENANCE MANUAL WITH IPL FOR MAIN BRAKE ASSEMBLY PART NO. 30-144 Page 5002 July 01, 2005 CHECKS SAFETY WARNING: THIS ASSEMBLY CONTAINS PARTS THAT HAVE A CADMIUM PLATING FINISH (5, 10, 60, 65, 75, 100, 130, 135, 145). REMOVING THE CADMIUM PLATING CAN CREATE EXPOSURE TO CADMIUM DUST AND CADMIUM COMPOUNDS. THIS CAN BE A POTENTIAL HEALTH HAZARD. USE APPROPRIATE SAFETY PRECAUTIONS. 2. Detailed Brake Examination A. Examine the hardware that is listed below. CAUTION: REWORK OF BOLTS IS NOT ALLOWED. (1) Examine the bolts (5 or 5A) for distortion, cracks, corrosion, or thread damage. Closely examine for cracks in the radius under the bolt head and in the threaded area next to the bolt shank. Use magnetic particle inspection (ASTM E1444). (a) The supplied bolts (5) have a patch lock added (nylon material embedded in the threaded end) which serves as a self-locking element. These bolts will require replacement after 6 to 8 installations or whenever the bolts can be run in past the locking feature by the use of your fingers only. (b) The optional field alternate bolts (5A) do not have a patch lock. They have drilled heads for safety wire retention. NOTE: If one or more of the bolts are damaged, then replace all of the bolts. (2) Examine the anchor bolts (125) for distortion, cracks, corrosion, or thread damage. NOTE: The anchor bolts are press fit into the brake cylinder (20). Refer to the REPAIR section for anchor bolt replacement. (3) Examine the washers (10, 130) for corrosion, distortion or damage. Replace a part that is distorted or damaged. (4) Examine the nuts (135) for damage to the self-locking feature. The self-locking feature can be a deformation of the nut (elliptical), segmented beam lock, or a non-metallic insert that provides the self-locking effect. The self-locking feature is defective if: – The self-locking feature does not tighten when you turn the nut onto the mating thread of the anchor bolt (125). – The nut is loose and you cannot tighten the nut to the necessary torque value. (5) Examine the hose assembly (195). Replace if the wire braiding is damaged, if the threads are damaged or any other indication of damage that would cause the hose to fail or leak. (6) Examine the fittings (160 and 170) for damage to the threads and sealing surfaces. Replace a part that is corroded or damaged. CM30-144 COMPONENT MAINTENANCE MANUAL WITH IPL FOR MAIN BRAKE ASSEMBLY PART NO. 30-144 Page 5003 July 01, 2005 CHECKS (7) Examine the bleeder seat (145) and bleeder screw (150) for damage to the threads and sealing surfaces. Replace a part that is corroded or damaged. B. Examine the Brake Cylinder (20) SAFETY WARNING: MAKE SURE THAT THE AREA WHERE YOU WILL USE THE LIQUID PENETRANT FLUID HAS GOOD AIRFLOW. DO NOT TOUCH OR GET FLUID ON YOUR BODY AND DO NOT BREATH VAPORS. KEEP CONTAINERS COVERED WHEN NOT IN USE. LIQUID PENETRANT FLUID CAN BE TOXIC AND EXPLOSIVE. NOTE: A new stat-o-seal (55) must be used whenever the bolt (65) is removed for any reason because the original one will not seal properly if reinstalled. (1) This brake design has an internal piston guide (35) attached to the cylinder by a bolt (65), washer (60) and stat-o-seal (55). It is recommended that this unit not be removed unless it is necessary due to: – Damage or corrosion to the piston guide (35) or the attaching hardware. NOTE: Do not remove the friction ring (40) from the piston guide (35) unless it needs to be replaced because of damage or corrosion. – Damaged or worn stat-o-seal (55). – Stripping and repainting of the cylinder (20). – Detailed inspection of the cylinder including liquid penetrant inspection. If the piston guide is removed for any reason, then examine the following: – Piston guide (35) for heavy scratches, nicks and burrs which can prevent the pistons from properly retracting, resulting in brake drag. – Friction ring (40) for burrs or distortion which can prevent the pistons from properly retracting, resulting in brake drag. – Bolts (65) and washers (60) for distortion, corrosion, or thread damage. A new stat-o-seal (55) must be used because the original one will not seal properly. (2) Examine the exterior surface for missing paint caused by erosion, wear, inspection methods or surface repair. (3) Visually examine the cylinder for surface cracks, nicks, corrosion, or other damage. (4) Visually examine the cylinder for cracks to the areas around the anchor bolt holes, the piston bores and the ports. CM30-144 COMPONENT MAINTENANCE MANUAL WITH IPL FOR MAIN BRAKE ASSEMBLY PART NO. 30-144 Page 5004 July 01, 2005 CHECKS (5) Examine for dimpled areas around the back plate to cylinder bolt holes. Refer to Figure 5001. Maximum allowable depression is 0.005 inch (0,127 mm). Figure 5001 Cylinder to Back Plate Surface Inspection (6) Examine the port threads for corrosion or damage to the sealing surfaces or threads. (7) Use a 10 power magnifier and examine the cylinder piston bores. Examine for scratches, nicks and burrs which can prevent the pistons from properly retracting, resulting in brake drag. Also examine the piston bores for wear and corrosion. Replace the cylinder if the bore diameter measures more than ∅ 2.150 inch maximum (54,61 mm). (8) When it is required to perform liquid penetrant inspection, use ASTM E1417 or MIL- STD-6866, Type 1, Method A, Sensitivity Level 2. NOTE: The protective coating (topcoat and primer) must be removed from the part and the part must be clean before doing a liquid penetrant inspection procedure. Refer to the CLEANING section for removal of the coating and cleaning instructions. (a) Examine for cracks paying particular attention to the areas around the anchor bolt holes, the piston bores and the ports. CM30-144 COMPONENT MAINTENANCE MANUAL WITH IPL FOR MAIN BRAKE ASSEMBLY PART NO. 30-144 Page 5005 July 01, 2005 CHECKS C. Examine the Pistons (45) and Insulators (50) The insulator is not repairable. (1) Examine the piston guide bore area for scratches, nicks and burrs which can prevent the pistons from properly retracting, resulting in brake drag. (2) Examine the external surfaces for wear, minor scratches, nicks, burrs, and other signs of damage that can lead to fluid leakage past the preformed packing (25). (3) Replace the pistons if the outside diameter measures less than ∅ 2.123 inch minimum (53,92 mm). (4) Constant heat and pressure will compress the insulators over time. Replace the insulator when it is flush with the head of the piston. Refer to the REPAIR section for removal instructions. D. Examine the Insulator Shims (120) The insulator shim is not repairable. (1) Replace insulators that are delaminating, cracked, or that show evidence of severe heat damage (e.g. charred). E. Examine the Pressure Plate Assembly (70) (1) Visually examine the pressure plate for cracks, nicks, corrosion, or other damage. (2) Examine the linings (85) for looseness. Refer to para. 2.G. for detailed examination of the linings. (a) If any rivets (90) are loose, damaged, or are missing, then replace per the REPAIR section. (b) It is not necessary to remove the pins (80) on the pressure plate (75) unless the outside diameter of the pin is worn and does not allow for secure engagement of the pins into the counterbore areas of the steel backed lining segments. (3) Examine the two anchor bolt holes for elongation or cracks. Badly elongated holes will prevent the pressure plate from moving or sliding freely on the anchor bolts and requires the replacement of the pressure plate. (4) When it is required to replace the pressure plate assembly linings (85), check the pressure plate (75) for the following. (a) Examine for distortion. Replace any pressure plate that is dished or out-of- flatness more than 0.020 inch (0,508 mm). (b) Visually examine for cracks at the rivet holes and surrounding areas. Replace if cracked. CM30-144 COMPONENT MAINTENANCE MANUAL WITH IPL FOR MAIN BRAKE ASSEMBLY PART NO. 30-144 Page 5006 July 01, 2005 CHECKS (c) Visually examine the pins (80) for looseness, mushroomed heads or other visible damage. Refer to the REPAIR section to replace loose or damaged pins. (d) If the pins (80) are removed, then check the pin holes for elongation. Replace the pressure plate if the pin holes are elongated. F. Examine the Back Plate Assembly (95) (1) Visually examine the back plate for cracks, nicks, corrosion, or other damage. (2) Examine the linings (110) for looseness. Refer to para. 2.G. for detailed examination of the linings. (a) If any rivets (115) are loose, damaged, or are missing, then replace per the REPAIR section. (b) It is not necessary to remove the pins (105) on the back plate (100) unless the outside diameter of the pin is worn and does not allow for secure engagement of the pins into the counterbore areas of the steel backed lining segments. (3) Examine the three threaded holes for thread damage. (4) When it is required to replace the back plate assembly linings (110), check the back plate (100) for the following. (a) Visually examine for cracks at the rivet holes and surrounding areas. Replace if cracked. (b) Visually examine the pins (105) for looseness or damage. Refer to the REPAIR section to replace loose or damaged pins. (c) If the pins (105) are removed, then check the pin holes for elongation. Replace the back plate if the pin holes are elongated. G. Examine the Linings (85, 110) The linings are not repairable. (1) Examine the linings for looseness. Examine for edge chipping and surface deterioration. Replace damaged or worn pads per the REPAIR section. NOTE: The wear limits for the linings on the pressure plate and back plate assemblies are the same. See paragraph 5. Brake Lining Wear Check in the DESCRIPTION AND OPERATION section CM30-144 COMPONENT MAINTENANCE MANUAL WITH IPL FOR MAIN BRAKE ASSEMBLY PART NO. 30-144 Page 5007/(5008 blank) July 01, 2005 CHECKS H. Examine the Torque Plate Assembly (180) NOTES: Stainless steel bushings (190) are press fit into the cast aluminum torque plate and swaged on the backside for retention. The bushings are not replaceable. A bushing that is not repairable will require the replacement of the torque plate assembly. Individual components are not available. (1) Examine the exterior surface for missing paint caused by erosion, wear, or inspection techniques. (2) Visually examine the torque plate for surface cracks, nicks, corrosion, or other damage. (3) Visually examine the torque plate for cracks to the areas around the anchor bolt holes and the mounting bolt holes. (4) Examine the mounting bolt holes areas for elongation. Badly elongated holes requires the replacement of the torque plate assembly. (5) Examine the bushings for internal corrosion or contamination. Also examine for elongation of the inside diameter which can prevent the brake from sliding freely resulting in excessive brake drag. (6) Examine the bushings for internal stepping which could indicate severe cocking of the cylinder anchor bolts in the torque plate. (7) When it is required to perform liquid penetrant inspection, use ASTM E1417 or MIL- STD-6866, Type 1, Method A, Sensitivity Level 2. NOTE: The protective coatings (topcoat and primer) must be removed from the part and the part must be clean before doing a liquid penetrant inspection procedure. Refer to the CLEANING section for removal of the coatings and cleaning instructions. (a) Examine for cracks paying close attention to the areas around the anchor bolt bushings and the mounting bolt holes. CM30-144 COMPONENT MAINTENANCE MANUAL WITH IPL FOR MAIN BRAKE ASSEMBLY PART NO. 30-144 Page 6001 July 01, 2005 REPAIR 1. General Refer to IPL Figure 1 to identify the brake assembly components. WARNING: PUT ON PROTECTIVE CLOTHING AND EYEWEAR BEFORE DOING THE WORK. NOTE: Repairs are limited to the replacement of parts and to the repairs specified in this section. A. Equipment and Consumables The term “Commercial Source” lets the repair facility get the product from a supplier of choice. NOTE: Unless specified differently, you can use equivalent alternatives for the items listed. Table 6001 Equipment and Consumables NOMENCLATURE/ PART NO. SPECIFICATION / SOURCE OF SUPPLY Brake Lining Rivet Tool Kit P/N 199-579 Parker Hannifin Corp., Aircraft Wheel & Brake Division or Parker Hannifin distributor Drill Bit ∅ 3.17 mm (0.125 inch), Commercial Source Hand Files Assorted, Commercial Source Bench Vise Commercial Source Aluminum Oxide Cloth 600 Grade or Finer, Wet or Dry, Commercial Source Alodine 1200 or Equiv. MIL-C-5541, Class 1A, Commercial Source Iridite 15 or Equiv. MIL-M-3171, Type VIII, Commercial Source Pin Punch Set Inch or Metric, Commercial Source Paint Application Equipment Commercial Source Primer and Topcoat Refer to Table 6002 Screw Driver Standard-Flat Head, Commercial Source CAUTION: DO NOT USE ABRASIVES CONTAINING IRON OR COPPER (STEEL WOOL, IRON OXIDE, BRASS OR STEEL WIRE). IRON OR COPPER PARTICLES WILL BECOME EMBEDDED IN THE ALUMINUM COMPONENTS AND WILL INCREASE THE AMOUNT OFCORROSION. CM30-144 COMPONENT MAINTENANCE MANUAL WITH IPL FOR MAIN BRAKE ASSEMBLY PART NO. 30-144 Page 6002 July 01, 2005 REPAIR 2. Detailed Repairs A. Repair the Brake Cylinder (20) The cylinder is made from a cast aluminum alloy. (1) Surface damage repair (a) Blend out small nicks, burrs, scratches and light corrosion. (2) Piston bore repair (a) Light scratches and nicks can be polished out. Repair of piston bore cavity must not exceed ∅ 2.150 inch maximum (54,61 mm). If blend or polishing repair exceeds limits and prohibits the brake cylinder from retaining pressure during testing, then the cylinder must be replaced. (3) Clean and surface treat the repaired areas (a) Clean the cylinder. Refer to paragraph 2.D., CLEANING section. (b) Prepare the repaired areas with corrosion preventative (Alodine 1200 or equivalent). Refer to MIL-C-5541, Class 1A. B. Repair the Torque Plate Assembly (180) The torque plate is made from a cast magnesium alloy. (1) Light scratches nicks and corrosion in the bushing (190) inside diameter can be polished out. (2) Torque plate surface damage repair (a) Blend out small nicks, scratches and light corrosion. (3) Clean and surface treat the repaired areas (a) Clean the torque plate. Refer to paragraph 2.D., CLEANING section. (b) Prepare the repaired areas with corrosion preventative (Iridite 15 or equivalent). Refer to MIL-M-3171, Type VIII. C. Painting the Brake Cylinder (20) and Torque Plate Assembly (180) SAFETY WARNING: PAINT MATERIALS CAN BE TOXIC AND VOLATILE. USE ONLY IN WELL VENTILATED AREAS. AVOID PHYSICAL CONTACT WITH PAINTS AND DO NOT INHALE VAPORS. KEEP PAINT CONTAINERS COVERED WHEN NOT IN USE. OBSERVE FIRE PRECAUTIONS. CM30-144 COMPONENT MAINTENANCE MANUAL WITH IPL FOR MAIN BRAKE ASSEMBLY PART NO. 30-144 Page 6003 July 01, 2005 REPAIR NOTE: Because of local EPA low VOC requirements, Aircraft Wheel & Brake uses Columbia or Sherwin Williams primers and topcoats in the production of the brake assembly. Alternative products can be used by the repair facility but should be aircraft quality finishes. (1) For small areas requiring a paint touchup. (a) Prepare the area by sanding lightly with 600 grade or finer, wet or dry aluminum oxide cloth and feather out all edges of the adjacent area. (2) Clean the surfaces to be painted. (a) Plug the cylinder piston bores and cylinder ports to prevent paint material overspray. (b) Mask the torque plate bushings (190) to prevent paint material overspray on internal surfaces of the bushings. (3) Apply the primer and topcoat per Table 6002. NOTE: To achieve best results, always refer to the manufacturer’s instructions for mixing, application and use; for forced dry (oven heating) schedule and also for disposal of primer and topcoat media. Table 6002 Primer and Topcoat Product Characteristics MANUFACTURER PRIMER TOPCOAT DRY FILM THICKNESS AND AIR DRY TIMES Columbia Paint Corp. Huntington, WV P/N 18-017A (water reducible) No mixing required. P/N 17-250A (524 Aluminum) (water reducible) No mixing required. It is desirable to apply topcoat without thinning, however, topcoat material may be thinned up to 10% by volume with either water (use distilled) or a mixture of 4 parts water to 1 part butyl cellosolve.. Primer: 0.0002-0.0005 in. 15 minutes min. (to touch or topcoat) 60 minutes (to handle) 4-24 hours (dry hard) Topcoat (includes primer): 0.0008-0.0014 in. 15 minutes (to touch) 30 minutes (to handle) 48 hours (dry hard) Alternate: Sherwin Williams Co. Cleveland, OH 2 parts washcoat (P/N P60G2) 3 parts catalyst reducer (P/N R7K44) P/N F63BXS58-4337 6 parts base 1 part catalyst (P/N V66V27) Thin using up to 20% polane reducer (P/N R7K84). Primer: 0.0002-0.0004 in. 3-10 minutes (to touch) 10-60 minutes (to topcoat) Topcoat (includes primer): 0.0008-0.0014 in. 20 minutes (to touch) 60 minutes (to handle) 24 hours (dry hard) CM30-144 COMPONENT MAINTENANCE MANUAL WITH IPL FOR MAIN BRAKE ASSEMBLY PART NO. 30-144 Page 6004 July 01, 2005 REPAIR D. Repair the Piston Guide (35) The piston guide is made from an aluminum alloy. (1) If the piston guide required removal, then repair is limited to polishing out small nicks, scratches and light corrosion. Replace the piston guides if the outside diameter measures less than ∅ 0.558 inch minimum (14,17 mm). Damage to the threads requires replacement of the guide. E. Repair the Pistons (45) The piston is made from an aluminum alloy and hard anodized. NOTE: The piston insulator (50) is press fitted into the piston (45). (1) Piston repair is limited to polishing out small nicks, scratches and light corrosion. Replace the pistons if the outside diameter measures less than ∅ 2.123 minimum (53,92 mm). (2) Worn insulators (50) can be replaced by drilling a ∅ 0.125 (1/8) (3,17 mm) hole directly into the insulator approximately 0.100 (2,54 mm) deep, slightly off center, but not close to outside of piston. Use a small screwdriver to work through the ∅ 1/8 diameter hole and lift to pry off insulator. Then, press in a new insulator. F. Replace the Anchor Bolt (125) The anchor bolt is made from stainless steel. Refer to Figure 6001 and use an arbor press to remove and install the anchor bolts. (1) Polish out small nicks, burrs, and scratches. Removal Installation Figure 6001 Replace Anchor Bolt CM30-144 COMPONENT MAINTENANCE MANUAL WITH IPL FOR MAIN BRAKE ASSEMBLY PART NO. 30-144 Page 6005 July 01, 2005 REPAIR G. Remove the Linings (85, 110) The metallic lining used on the brake assembly is a hard composition and is attached by pins which press fit into the back surface (steel carrier plate) of the lining. A center rivet completes the attachment. The holes for the pins are not visible on the lining surface unless the lining is worn beyond its wear limit. WARNING: USE PROTECTIVE GOGGLES OR GLASSES WHEN REMOVING RIVETS TO AVOID INJURY TO EYES. AVOID GRABBING SHARP EDGES OF RIVETS WITH HANDS. CAUTION: DO NOT ENLARGE THE RIVET HOLES IN THE PRESSURE PLATE, OR BACK PLATE. IF THE RIVET HOLE EXCEEDS ∅ 5,1 MM (0.201 INCH) THE PRESSURE PLATE OR BACK PLATE MUST BE REPLACED. (1) Use a ∅ 0.125 inch (3,17 mm) drill bit, to drill out the rivets (90, 115). Discard the rivets. (2) Pry the lining off of the pressure plate (75) and the back plate (100) with a thin screwdriver. (3) Damaged attachment pins (80, 105) can be removed by carefully drilling out the pin with a ∅ 0.187 inch drill. (4) The pressure plate (75) should now be examined for continued service per the CHECKS section. (a) After the pressure plate is judged serviceable, refer to paragraph 2.H. and install the linings (85). (5) The back plate (100) should now be examined for continued service per the CHECKS section. (a) After the back plate is judged serviceable, refer to paragraph 2.H. and install the linings (110). H. Install the Linings (85, 110) Refer to Figure 6003 for pin / rivet installation acceptance criteria. (1) Install a pin in the holes of the pressure plate (75) or back plate (100). Align each pin (85) or (105) with the tail of the pin toward the counterbored side of the part. Refer to Figure 6002. (2) If new pins are required, then place the pins and the pressure plate or back plate on a flat metal surface. (3) Use the Cleveland Brake Lining Rivet Tool Kit P/N 199-579 (or equivalent) and install the pins on the pressure plate or back plate. (4) Check to be sure the pins are tight and movement free with no distortion of parts. CM30-144 COMPONENT MAINTENANCE MANUAL WITH IPL FOR MAIN BRAKE ASSEMBLY PART NO. 30-144 Page 6006 July 01, 2005 REPAIR (5) Install the lining segment onto the pins. Check to make sure the metal backing is tight against the pressure plate or back plate surface. A fibre mallet may be used to tap the lining onto the pins lightly to seat it. (6) Next, install the center retention rivet (90) or (115) using the Cleveland Brake Lining Rivet Tool Kit P/N 199-579 (or equivalent). Refer to Figure 6002. Figure 6002 Pin / Rivet Installation Figure 6003 Pin / Rivet Installation Acceptance Criteria CM30-144 COMPONENT MAINTENANCE MANUAL WITH IPL FOR MAIN BRAKE ASSEMBLY PART NO. 30-144 Page 6007/(6008 blank) July 01, 2005 REPAIR SAFETY WARNING: REMOVING THE CADMIUM PLATING CAN CREATE EXPOSURE TO CADMIUM DUST AND CADMIUM COMPOUNDS. THIS CAN BE A POTENTIAL HEALTH HAZARD. USE APPROPRIATE SAFETY PRECAUTIONS. I. Repair the Pressure Plate (75) and Back Plate (100) The pressure plate and back plate are made of steel and are cadmium plated. NOTE: Stripping and re-cadmium plating steel parts is generally cost prohibitive in small lot sizes. Therefore, the pressure plate and back plate can be protected with an application of a zinc rich cold galvanizing compound. (1) Blend out small nicks, burrs, scratches and light corrosion. CM30-144 COMPONENT MAINTENANCE MANUAL WITH IPL FOR MAIN BRAKE ASSEMBLY PART NO. 30-144 Page 7001 July 01, 2005 ASSEMBLY 1. General Refer to IPL Figure 1 to identify the brake assembly components. A. Equipment and Consumables The term “Commercial Source” lets the repair facility get the product from a supplier of choice. NOTE: Unless specified differently, you can use equivalent alternatives for the items listed. Table 7001 Equipment and Consumables NOMENCLATURE/ PART NO. SPECIFICATION/SOURCE OF SUPPLY Fluid, Hydraulic MIL-H-5606 or MIL-PRF-5606, Commercial Source Socket Set/ Wrench Set Standard Hex Head (inch units), Commercial Source Preformed Packing Extraction Tool Set 199-18 Parker Hannifin Corp., Aircraft Wheel & Brake Division or Parker Hannifin distributor Torque Gage Commercial Source 2. Assembly Procedures A. Assemble the Main Brake Assembly (1) If the anchor bolts were removed, then install them now (refer to REPAIR section). After the anchor bolts have been installed, then install a washer (130) onto the threaded end of the anchor bolt. Install a nut (135) and tighten to 85 to 95 in-lb (9,6 to 10,7 N-m). (2) Lubricate the preformed packing (140) with MIL-H-5606 or MIL-PRF-5606 hydraulic fluid and install the packing on the bleeder seat (145). Install the bleeder seat into the cylinder. Tighten to between 65 to 70 in-lb (7,3 to 7,9 N-m). CAUTION: DO NOT TORQUE BLEEDER SCREW (150) TO A VALUE GREATER THAN 12 IN-LB (1,35 N-M). TORQUE GREATER THAN 12 IN-LB (1,35 N-M) WILL DAMAGE THE BLEEDER SEAT. (3) Install the bleeder screw (150) into the bleeder seat (145). Tighten the bleeder screw snug to prevent leakage. (4) Install the fittings (160, 170) into the cylinder. Tighten to 50 to 70 in-lb (5,6 7,9 N-m). (5) Lubricate the preformed packings (25) with MIL-H-5606 or MIL-PRF-5606 hydraulic fluid and install in the cylinder (20) piston bore groove. CM30-144 COMPONENT MAINTENANCE MANUAL WITH IPL FOR MAIN BRAKE ASSEMBLY PART NO. 30-144 Page 7002 July 01, 2005 ASSEMBLY (6) If the piston guide unit (35) was removed, install it now as follows: NOTE: A new stat-o-seal must be used because the original one will not seal properly. (a) Lubricate a new stat-o-seal (55) with MIL-H-5606 or MIL-PRF-5606 hydraulic fluid. Install the Washer (60), then the new lubricated stat-o-seal (55) on the bolt (65). (b) Position the piston guide (35) in the cylinder piston bore and from the opposite side (exterior of cylinder bore) insert the bolt through the hole and thread the bolt into the guide (35). Ensure that the friction ring (40) is installed on the piston guide (35). (c) Tighten the bolt (65) to 25 to 30 in-lb (2,8 to 3,4 N-m). (7) Install the piston (45) as follows: (a) Lubricate the piston, preformed packing (25), piston guide (35) and cylinder piston bore with a small amount of MIL-H-5606 or MIL-PRF-5606 hydraulic fluid. (b) Place the piston in the bore and rotate while pressing down to seat the friction ring and insure that the piston and the preformed packing (25) are in the proper alignment. (c) Tap the piston with a wooden or plastic mallet while alternately rotating the piston. NOTE: If considerable effort is required, then remove the piston and inspect the pilot bore area for damage. If the bore is damaged, check the corresponding area of the piston guide for damage. Repair or replace if necessary and repeat the procedure. (8) Install the pressure plate assembly (70) by aligning the anchor bolt holes with the anchor bolts and slide onto the cylinder. NOTE: The pressure plate must float freely on the anchor bolts. (9) Install the hose assembly (195) between the two cylinders. Tighten the hose ends to between 100 to 110 in-lb (11,3 to 12,4 N-m). NOTE: Hold the fittings (160, 170) stationary while tightening the hose ends. B. Mount the Main Brake Assembly onto the Aircraft Refer to Parker drawing no. 50-80, sheet 1 NOTE: The torque plate mounting bolts, washers and nuts are included in the 199-90 kit. (1) If removed, re-install the torque plate assembly (180) now. Attach the torque plate assembly to the axle strut-mounting flange with the 12 bolts, 24 washers (one under each bolt head and nut), and 12 nuts. Tighten the nuts to 130 to 150 in-lb (14,7 to 17,0 N-m). CM30-144 COMPONENT MAINTENANCE MANUAL WITH IPL FOR MAIN BRAKE ASSEMBLY PART NO. 30-144 Page 7003/(7004 blank) July 01, 2005 ASSEMBLY (2) Slide the brake assembly onto the torque plate assembly (180) while aligning the anchor bolts (125) to the torque plate holes. NOTE: The cylinder anchor bolts must slide freely in the torque plate bushings (190). (3) Install the washers (10) and bolts (5 or 5A) and insulator shim (120). (4) Install the back plate assemblies (95) between the brake disc and the wheel flange, and align with the bolts (5 or 5A). Tighten the bolts to 85 to 90 in-lb (9,6 to 10,2 N-m). NOTE: The optional field alternate bolts (5A) will require safety wire. Safety wire the bolts after pressure testing the brake assembly. See step 2.B. (7). (5) Re-connect the aircraft system hydraulic supply line to the fitting (170). (6) Refer to the TESTING AND FAULT ISOLATION section to bleed and pressure test the brake assembly. (7) If using the optional field alternate bolts (5A), safety in accordance with NASM33540. C. Brake Lining Conditioning Procedure NOTE: PRM14A is included in the 199-90 kit. It is important to condition new linings properly to obtain the service life designed into them. Condition the linings by following the instructions in product reference memo PRM14A. CM30-144 COMPONENT MAINTENANCE MANUAL WITH IPL FOR MAIN BRAKE ASSEMBLY PART NO. 30-144 Page 8001/(8002 blank) July 01, 2005 FITS AND CLEARANCES 1. General Refer to IPL Figure 1 to identify the brake assembly components. A. Assembly Wear Limits Table 8001 In-Service Wear Limits PART NAME (IPL ITEM NUMBER) FIGURE WORN AREA DESCRIPTION WORN DIMENSION Pressure Plate Assembly (70): Lining (85) 1 Thickness 0.100 inch (2,540 mm) minimum Back Plate Assembly (95): Lining (110) 1 Thickness 0.100 inch (2,540 mm) minimum Cylinder Piston Bores N/A Diameter ∅ 2.150 inch (54,61 mm) maximum Piston (45) N/A Outside Diameter 2.123 inch (53,9 mm) minimum Pressure Plate Assembly (70): 2 Anchor Bolt Holes N/A Diameter ∅ 0.505 inch (12,827 mm) maximum B. Assembly Torque Values Table 8002 Assembly Torque Values PART NAME TORQUE LIMITS Bolt (5) 85 to 90 in-lb (9,6 to 10,2 N-m) Bolt (65) 25 to 30 in-lb (2,8 to 3,4 N-m) Nut (135) 85 to 95 in-lb (9,6 to 10,7 N-m) Bleeder Seat (145) 65 to 70 in-lb (7,3 to 7,9 N-m) Bleeder Screw (150) Close the screw, then tighten snug to prevent leakage. Do not tighten to a value greater than 12 in-lb. (1,35 N-m). Torque greater than a value of 12 in-lb (1,35 N-m) will damage the bleeder seat (145) Fitting Assembly (170) 50 to 70 in-lb (5,6 to 7,9 N-m) Fitting Assembly (160) 50 to 70 in-lb (5,6 to 7,9 N-m) Hose Assembly (195) 100 to 110 in-lb (11,3 to 12,4 N-m) CM30-144 COMPONENT MAINTENANCE MANUAL WITH IPL FOR MAIN BRAKE ASSEMBLY PART NO. 30-144 Page 9001/(9002 blank) July 01, 2005 SPECIAL EQUIPMENT AND CONSUMABLES 1. General This section contains source of supply information for all applicable sections of this manual. A. Source of Supply NOTE: Unless specified differently, you can use equivalent alternatives for items listed. Table 9001 List of Manufacturers PRODUCT NOMENCLATURE SPECIFICATION OR REQUIREMENT SOURCE OF SUPPLY DISASSEMBLY CLEANING REPAIR ASSEMBLY Preformed Packing Extraction Tool Set P/N 199-18 N/A Parker Hannifin Corp. Aircraft Wheel & Brake Div. Avon, OH 44011 U.S.A. X X or Parker Hannifin distributor Plastic Media for stripping paint MIL-P-85891, Type II or V, Grade 20/30, 3.5 MOH max U.S. Technology Corporation Canton, OH 44702 U.S.A. X Lining Rivet Tool Kit P/N 199-579 N/A Parker Hannifin Corp. Aircraft Wheel & Brake Div. Avon, OH 44011 U.S.A. X or Parker Hannifin distributor Primer and Topcoat Refer to the REPAIR section Refer to the REPAIR section X CM30-144 COMPONENT MAINTENANCE MANUAL WITH IPL FOR MAIN BRAKE ASSEMBLY PART NO. 30-144 Page 10001 July 01, 2005 ILLUSTRATED PARTS LIST 1. General The illustrated parts list describes and illustrates the detail parts of the brake assembly. All parts are listed, except parts, which lose their identities by being permanently fastened to other parts of assemblies and cannot be disassembled. A. Explanation of Columns (1) Figure/Item column: The figure and item numbers refer to the applicable Illustrated Parts List (IPL) Figure. The first number shows the figure number of the illustration. (2) Part Number column: This column shows the Parker Hannifin Aircraft Wheel and Brake part number for the individual item. (3) Airline Stock Number column: This column gives the Airline Stock Number when applicable. (4) Nomenclature column: This column identifies the parts being listed by noun name followed by modifiers when applicable. The indenting system used in the parts list shows the relationship of the parts to their subassemblies and to the assembly: 1 2 3 4 Assembly Attaching Parts for Assembly Detailed Parts for Assembly Subassembly Attaching Parts for Subassembly Detailed Parts for Subassembly (5) Effectivity column: An effectivity code shows the difference in parts within different configurations. The effectivity code is used for more than one configuration of the basic part number. Effectivity codes only apply to the figure in which they are used. (6) Units Per Assembly column: This column shows the total number required for each assembly or for each subassembly as applicable. These abbreviations may appear in the Units Per Assembly column: AR...... As Required (for bulk items) RF ......Reference NP...... Item is Nonprocurable (item listed for reference onl
What's in the Beechcraft King Air C90GTx TCDS
A Type Certificate Data Sheet (TCDS) is the FAA's record of what an aircraft type was approved as. It is the source of truth for weights, seating, fuel and the rules the design was certified against. Expand any line to see what it means.
1,480 Beechcraft King Air C90GTx parts for sale
See all →


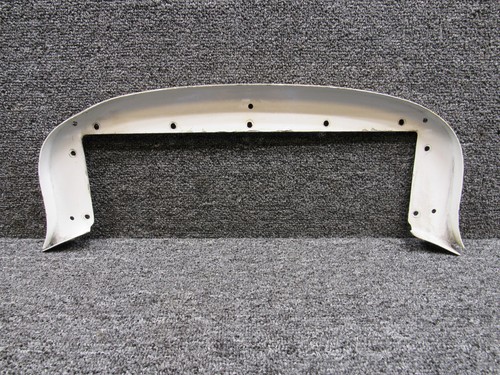

Parts listed for sale by vetted eBay sellers — confirmed on eBay at checkout.