Interior Maintenance Manual Illustrated Parts Catalog Model 750
CESSNA 210N · Parts Catalog
Overview
This document is the Interior Maintenance Manual and Illustrated Parts Catalog for the Cessna Model 750. It serves as a comprehensive guide for maintenance personnel, providing detailed information on servicing and maintaining the interior components of the aircraft. The manual includes instructions for inspecting, removing, and replacing various interior parts, as well as guidelines for proper care and cleaning of materials used in the aircraft's interior. It is essential for ensuring the aircraft's interior remains in optimal condition and complies with safety standards. The manual also references additional technical publications for more in-depth information on specific components and systems not covered within this document.
- Model: Cessna 750
- This manual includes detailed cleaning instructions for materials such as PVC suede and leather.
- A comprehensive vendor list is provided for sourcing parts and components.
- Loose equipment details include essential items like first aid kits and flashlights.
- Interior care guidelines emphasize the use of specific cleaning products to avoid damage.
Document
Source
Originally published by 560wiringdiagrams.z13.web.core.windows.net. Sprinkle hosts a reference copy with an added summary, specifications and searchable full text.
Document details
- Type
- Parts Catalog
- Pages
- 786
- File size
- 16 MB
- Publisher
- 560wiringdiagrams.z13.web.core.windows.net
Common. One of the most common aircraft types we track.
Most owners only have the POH. Here's the essential set for the CESSNA 210N.
- Pilot's Operating Handbook / AFM
- Checklist
- Maintenance Manual
- Parts Catalog (IPC)
- Systems & Wiring
- Service Bulletins
- Type Certificate (TCDS)
CESSNA 210N for sale now
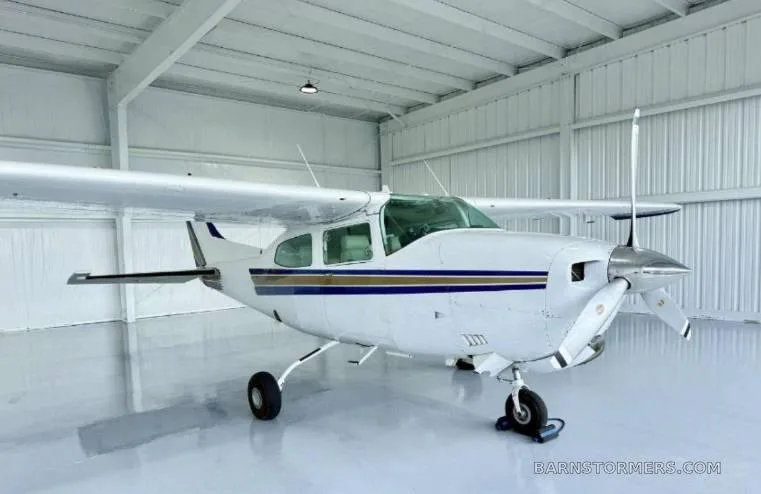
Free — save the 210N to your watchlist and track it in one place.
More CESSNA 210Nmanuals & documents
See all 13 →- CHECKLISTS - Aircraft SpruceChecklist
- CHECKMATE CHECKLISTS - Aircraft SpruceChecklist
- SERVICE TABLE OF LIMITS AND TORQUE VALUE RECOMMENDATIONSV Speeds Reference
- Loading SummaryWeight And Balance
- B&C Standby Alternator System for the Cessna 210Wiring Diagram
- Wheels up landing involving Cessna 210, VH-UPNOther Documents
- CAP – Cessna Short- and Soft-Field OperationsChecklist
- TYPE ACCEPTANCE CERTIFICATEType Certificate
- EASA STC no. STC holderTraining Manual
- SCHEDULE OF AIRWORTHINESS DIRECTIVESAirworthiness Directives
- Cessna T210N - AirMartSpecifications
- Airplane Flight ManualFlight Manual
If you fly the CESSNA 210N, you may also be researching these.


In this document
General Information
This section outlines the purpose of the manual and provides general warnings, cautions, and notes relevant to interior maintenance activities. It emphasizes the importance of following accepted maintenance practices and exercising sound judgment during servicing.
Interior Care
This section provides detailed cleaning instructions for various materials used in the aircraft's interior, including PVC suede, leather, wood veneer, and carpets. It specifies recommended cleaning products and methods to maintain the appearance and integrity of these materials.
Loose Equipment
A list of loose equipment included with the aircraft is provided, detailing part numbers and descriptions for items such as flashlights, first aid kits, and various assembly components. This section is crucial for inventory management and ensuring all necessary equipment is available.
Vendor List
This section contains a comprehensive list of vendors for various components and systems used in the Cessna 750. Each vendor is listed with their contact information, which is essential for maintenance personnel when ordering parts or seeking technical assistance.
Interior Trim Coordination Package
This section outlines the specifications for the interior trim materials, including colors and finishes for carpets, cabinetry, and seat belts. It provides guidance on coordinating interior aesthetics and ensuring consistency across different components.
Safety notes
- Ensure all installation point attachments are secured when installing interior components.
- Always turn off system power when removing or installing electrical components.
- Maintain proper placard and limitation requirements as specified in the aircraft.
Full document text
Interior Maintenance Manual Illustrated Parts Catalog Model 750 UNIT 0107 FOR ITEMS BEYOND THE SCOPE OF THIS MANUAL SEE IPC AND MAINTENANCE MANUALS CESSNA AIRCRAFT COMPANY MODEL 750 INTERIOR MAINTENANCE MANUAL AND ILLUSTRATED PARTS CATALOG INTRODUCTION Original Issue This manual is provided in addendum to the Aircraft Maintenance Manual and Illustrated Parts Catalog. It has been prepared to assist maintenance personnel in servicing and maintaining the interior of Model 750 airplanes. This manual provides the necessary information required to enable the mechanic to service, inspect, remove and replace components or repair systems. Information beyond the scope of this manual may be found in Cessna Model 750 Wiring Diagram Manual, Illustrated Parts Catalog, Structural Repair Manual, Component Maintenance Manual, Nondestructive Testing Manual and Illustrated Tool and Equipment Manual. For technical assis- tance concerning this manual, contact Cessna Aircraft Company, Citation Completion Center. Technical Publications available from the manufacturer of the various components and systems which are not covered in this manual must be utilized as required for maintenance of those components and systems. To expedite the order process please include the following. 1. Aircraft model and unit numbers. 2. When ordering custom fitted interior parts include old part or exact measurements. The Cessna Aircraft Completion Center would like to assure you of our full cooperation with any questions you may have concerning your interior. CESSNA AIRCRAFT COMPANY MODEL 750 INTERIOR MAINTENANCE MANUAL AND ILLUSTRATED PARTS CATALOG CONTENT Original Issue Subject Forward Maintenance Parts General 25-00 Flight Compartment 25-10 Passenger Compartment 25-20 Galley 25-30 Lavatories 25-40 Cargo Compartment 25-50 Emergency 25-60 Electrical 25-90 CESSNA AIRCRAFT COMPANY MODEL 750 INTERIOR MAINTENANCE MANUAL AND ILLUSTRATED PARTS CATALOG CONTENT Original Issue Subject Forward Maintenance Parts General General Warnings, Cautions and Notes ....................... 25-00-01 Interior Care ................................................................ 25-00-02 Cleaning Solutions ...................................................... 25-00-03 Loose Equipment ......................................................... 25-00-04 Vendor List ................................................................... 25-00-05 Interior Trim Coordination Package .............................. 25-00-06 Upholstry, Finishes, Plating .......................................... 25-00-06 Exterior Paint ............................................................... 25-00-06 Interior Placards .......................................................... 25-00-07 Page 1 25-00-01 Original Issue CESSNA AIRCRAFT COMPANY MODEL 750 INTERIOR MAINTENANCE MANUAL AND ILLUSTRATED PARTS CATALOG GENERAL WARNINGS, CAUTIONS AND NOTES This manual is to be utilized as an aid only. Accepted airplane maintenance practices and sound judgment shall be exercised for interior care and maintenance. WARNING: THE FOLLOWING WARNINGS SHALL APPLY FOR ALL INTERIOR MAINTENANCE ACTIVITIES TO INSURE PERSONAL SAFETY. 1. When installing interior components, insure that all installation point attachments are made properly and secured. 2. When removing / installing electrical components, insure that system power is off. 3. Maintain the proper placard and limitation requirements as specified in the airplane at all times. CAUTION: The following cautions are applicable for all maintenance activities to insure against interior damage. 1. In areas where grease or dirt are prevalent, wear protection over footwear when entering the interior. 2. Do not carry sharp tools or instruments in pockets. 3. Cover all necessary interior furniture to prevent damage. NOTE: When servicing or performing maintenance on the interior, care should be exercised to keep it clean. Protective covers should be used to the maximum extent. When ordering plated parts, the plating number found in section 25-00-06 must follow the part number without a space. LIFE VEST - DESCRIPTION AND OPERATION NOTE: (1) A life vest is provided in a pouch and stored in a container under the passenger seat carriage assembly. An elastic band holds the vest in the container. Life vests are also located in a pocket on the back of the pilot and copilot seats. A life vest is located in the bottom of the toilet seat assembly. (2) The life vest is designed to be stored in its pouch and should be removed only in a emergency or for inspection. Instructions for use of the life vest are provided on a card for each passenger. (3) Life vest are inflated by pulling handle with discharges an air cylinder. The vest can be inflated manu ally by blowing into a filler tube. (4) Life Vests need to be returned to the vendor for inspection every 12 months. The date of original certification is stamped on the vest. Page 2 25-00-02 Original Issue CESSNA AIRCRAFT COMPANY MODEL 750 INTERIOR MAINTENANCE MANUAL AND ILLUSTRATED PARTS CATALOG INTERIOR CARE An Interior Cleaning Kit, is provided with your aircraft. Please follow the instructions included in this kit. If the use of the cleaning kit products does not produce the desired effect, follow the procedures in this chapter. Cleaning Instructions PVC Suede Frequent gentle cleaning with upholstery shampoo foam is the most satisfactory method to maintain suedes appearance.Suggested shampoos such as ‘Blue Luster‘, which contain a sodium lauryl sulfate are recommended. Follow directions on the label. Heavily soiled areas should be treated immediately with an application of ‘Lestoil’ type cleaner, followed immediately by brisk rubbing with a clean, wet cloth. Rinse with clear water and blot dry with clean towel. CAUTION: The use of solvents and dry cleaning fluids must be avoided. Suede and Caressa
Show full textShow less
Suede is treated to resist dirt and natural soil. Generally, suede may be cleaned by brushing with a suede brush or very fine sand paper. Oil spots can usually be removed by the use of chalk sprayed from an aerosol can. ‘Spot’ manufactured by Red Devil is one available brand. Ultra Suede For weekly cleaning - clean with plastic brush wiping in horizontal or vertical direction. On ink marks - use a Q-Tip with isopropyl alcohol and blot with white wiper. On heavily soiled areas use vinegar and water mixture with a white wiper to help prevent build up of soil and smoke film, do not rub, gently blot. Wood Veneer Do not use solvent based cleanser or restorer. To clean, use any oil base spray or liquid furniture polish on soft cloth and wipe. If heavily soiled use warm water and mild detergent before polish. Laminate and Vinyl Wipe with a clean white wiper using a mixture of white vinegar and water (1/3 cup of vinegar to 2/3 cup of water) or use warm water and mild detergent. Wipe dry with clean cloth. Leather Of all the upholstery materials on the market today, genuine leather requires the least care. To remove almost any stain clean according to the following instructions: 1.Apply small amount of colorless dishwashing liquid to damp white cheesecloth. Rub cloth until soap suds appear. Wipe stained area. 2.Rinse off the soap film with a piece of cheesecloth dampened in clear lukewarm water. 3.Finish by wiping with a dry, soft white cloth. CAUTION: Never use furniture polishes, oils, varnishes or ammonia water. Page 3 25-00-02 Original Issue CESSNA AIRCRAFT COMPANY MODEL 750 INTERIOR MAINTENANCE MANUAL AND ILLUSTRATED PARTS CATALOG INTERIOR CARE - CONTINUED Plated Parts To clean wipe with a soft cloth and a mild soap detergent (small amount of soap in warm water) or a non- abrasive window cleaner (without ammonia) diluted 50% with water. Apply to a cloth and gently wipe away fingerprints or residue, rinse with warm water and dry with a soft cloth. This will clean and protect your plated parts. CAUTION: Never use abrasives, glass cleaner, or polish to clean. WARNING: Many household-type products can be very aggressive and damage the clearcoat or plating. These items include soaps,hand cleaners, any product that has chlorine or abrasives, spray cleaners, cleansers, mouth wash, any product with lower than 7ph or higher than 10ph, solvent-based cleaners, waxes or polishes, and or any type of drain cleaner. Silk To clean airborne particles, thoroughly vacuum surfaces. To remove stains, consult a professional dry cleaning service. CAUTION: Never use any type of cleaning detergent. Mirrors Wipe with white wiper in a horizontal or vertical direction only using a well diluted window cleaner or an aircraft plexiglass cleaner. Plastic Trays Wipe with a clean white wiper using a mixture of white vinegar and water (1/3 cup of vinegar to 2/3 cup of water). Place mixture in a labeled bottle and place on aircraft for daily maintenance. CAUTION: Trays are not dishwasher safe. Polished Wool Use a dry cleaning product such as ‘Picrin’. Apply product on a clean cloth then lightly rub on dried stained area. Carpet For general maintenance - lightly vacuum weekly. WARNING: Do not use vacuum cleaner or any object which may generate sparks while air plane is being fueled. Professional dry cleaning is recommended. If a spill occurs, first blot up any excess liquid with a clean white cloth or paper towel. Scrape up solids with the dull edge of a knife or spoon. Blot residue and avoid rubbing soil into the fabric or carpet. CAUTION: Do not use a mechanical shampooer. It will distort the carpet. Prepco Tank should be rinsed after each use with water. To clean use warm water and mild soap or 1 part vinegar / two parts water, or baking soda and water. Rinse out cleaner with water. If spigot becomes stained it can be removed from prepco for ease in cleaning with a scouring pad. Page 4 25-00-03 Original Issue CESSNA AIRCRAFT COMPANY MODEL 750 INTERIOR MAINTENANCE MANUAL AND ILLUSTRATED PARTS CATALOG CLEANING SOLUTIONS Refer to Chart for solution to use on particular stain. Pretest solution on an inconspicuous area. Apply appropri- ate stain removal solution sparingly, working in from edge to center of stain. Remove excess moisture with white paper towel. NOTE: Use all cleaning solutions sparingly. Solutions 1. Ammonia Solution: 1 tablespoon clear household ammonia (3% solution) with 1/2 cup water. Sponge with fresh water and blot to dry. 2. Detergent Solution: 1 teaspoon colorless dishwashing liquid with 1 cup of warm water. Apply with damp paper towels and blot to dry. 3. Dry Cleaning Solution: Use a dry cleaning solvent such as ‘Carbona’, ‘Energine’ or ‘K2R’ (chemically 1.1.1. trichloroethane preferred). Read directions on package carefully. Supplies Scrub Brush: Soft plastic scrub brush with handle. Wipes: Box of soft wipers. Recommended are plexiglass white wiper #8710 made by Chicopee. Spot Remover: Spot remover for oil, tar or grease. NOTE: For treated fabric - the type of spot remover used for cleaning should be recommended by the company which applies the fabric treatment. Follow specific instructions listed on the product. n i a t S f o e p y T n o it u l o S re e B ,lo h o clA 2 d o olB 2 rettu B ,e nira gra M 1 etalo c o h C ,y d n a C 2 sk nir D tfo S ,s alo C 2 e ciu J ota m o T ,p u sta C 2 s nru B ettera giC 3 e effo C 2 m a er C dlo C 1 diulF n oitc erro C 1 scite m s o C 1 p ury S h g u o C 2 tn aro d o e D 1 niatS yrre B ,tiurF 2 e s a er G 1 m u G 3 liO ria H 1 tnio plla B ,k nI 2 diulF ,k nI 3 e nid oI 1 kcits piL 3 e sia n n o y a M 1 w e dli M 3 kli M 2 d u M 2 drats u M 2 h silo P lia N 3 liO 1 e s a B liO ,tnia P 3 e m ufre P 3 tn e m e C re b b u R 1 ts u R 2 h silo P e o h S 1 tla h p s A ,ra T 1 a e T 2 ets a p hto o T 2 e nir U 3 ti m o V 2 e ni W 2 Part Number Description Vendor Quantity CESSNA AIRCRAFT COMPANY MODEL 750 INTERIOR MAINTENANCE MANUAL AND ILLUSTRATED PARTS CATALOG Page 5 25-00-04 Original Issue LOOSE EQUIPMENT 4611006-1 LOOSE EQUIPMENT INSTL (standard) 1259 FLASHLIGHT KANS 2 4611060-1 BAGGAGE RESTRAINT SYSTEM 1 4611061-1 EXT PAINT TOUCH UP KIT 1 4611062-8 CARPET ASSY-DROPPED ASLE 1 4611063-1 PASSENGER BRIEFING CARD 9 4611079-1 THRESHOLD CARPET ASSY 1 4611079-4 THROW RUG ASSY 4 4611143-1 RESTRAINT KIT 1 70002-00 FIRST AID KIT 53655 1 9910143-1 COAT HANGER 6 - - - LOOSE EQUIPMENT INSTL (special) - - - DISPOSABLE CUPS SEE PARTS CATALOG 01-0655 AIRSHOW CD 1 105009-2 DVD REMOTE CONTROL 2 GT/5 HEADSET 8 4690059-25 8.4 TOUCH SCREEN MONITOR MOD 1 4690059-26 8.4 MONITOR MOD 3 4690059-1 5.6 MONITOR MOD 2 5A3204-10112 LIFERAFT 3 Page 6 25-00-05 Original Issue CESSNA AIRCRAFT COMPANY MODEL 750 INTERIOR MAINTENANCE MANUAL AND ILLUSTRATED PARTS CATALOG AERI Aeristo P.O. Box 1088 Grapevine, TX 76099 APGR Appearance Group P.O. Box 36024 Dallas, TX 75235 AUIN Audio International 4618 JFK Blvd. N. Little Rock, AR 72116 AVWS Aerial View Systems P.O. Box 9905 New Port Beach, CA CLCO Clancey Co. 5812 Maple Mission, KS 66202 DAHL Dahlgren Duck 122222 Merit Drive Suite 980 Dallas, TX 75251-2217 DETT Dettmers Inc. 3081 S.E. Slater St. Stewart, FL 34997 HAAM Hafele America P.O. Box 1590 HighPoint, NC 27262 KANS Kansas Fire Equip. 123 So. Osage Wichita, KS K2962 Baxter Woodhouse and Taylor 2 Stockport CHES SK12 1AH, England MOIN Morgan Hinge Inc. 2922 Vancouver Drive Little Rock, AR 72204 MOLY Molly Crop. 504 Mt. Laurel Ave. Temple, PA 19560 OKATA Delta Faucet P.O. Box 40980 Indianapolis, IN 46280 PHGO Phoenix Gold 1170 N.E. 63rd. Portland, OR 97213 PRPF Price Pfister 1939 Hereford Rd. Irving, TX 75038 RPDE Rosen Product Development P.O. Box 5386 Eugene, OR 97405 SMCO Star Manufacturing Co. 9325 Olive Blvd. St. Louis, MO 63132 0A485 Vista Mfg. Inc. P.O. Box 438 Ponder, TX 0BW04 Aircraft Modular Products, Inc. 4000 N.W. 36th Ave. Miami, FL 33142 00779 Amp Inc. P.O. Box 3608 Harrisburg, PA 75105 02289 Hi-G Co. 101 Locust St. Hartford, CT 03743 Appleton Electric Col 2205 12th Ave. Milwaukee, WI 04221 Midtex Relays 1650 Tower Blvd. N. Mankato, MN 04729 UNICORP 291 Cleveland St. Orange, NJ 07050 06090 Raychem Corp. 300 Constitution Dr. Menlo Park, CA 940025-1111 07688 Joint Electron Device Eng 08806 General Electric Nela Park Cleveland, OH 44112 1K426 Litton Systems Inc Litton Special Devices 750 W Sproul Rd Springfield, PA 19064 10933 Avionic Instruments Inc 1414 Randolph Ave Avenel, NJ 07001 11139 Deutsch Co. 700 S. Hathaway Banning, CA 13029 Van Dusen Aircraft Products Box 10133 Lambert Field St. Louis, MO 14208 Minneapolis Speaker Co. 3806 Grand Ave. So. Minneapolis, MN 5540 16499 Standard Precision Inc Accuride Division 12311 S Shoemaker Ave Santa Fe Springs, CA 2W816 Petsche Co. Inc. 4545 W. Harry Wichita, KS 24403 Enidine Inc. 7 Centre Drive Orchid Park, NY 14127 24984 Hydra Flow 13259 E. 166th St. Cerritos, CA 90701 27264 Molex Inc. 2222 Wellington Ct. Lisie, IL. 29289 Aero Space Controls 1050 N. Mosley Wichita, KS 67214 29780 Monogram Industries P.O. Box 5002 Redondo Beach, CA 31272 Ancra Corp. 2233 E. Grand Ave. El Segundo, CA 90245 31845 Sealth Aero Marine 641 Ewing St. Seattle, WA 98119 33497 Precision Winding 109 S. Knight Wichita, KS 67213 37695 Magnavox Elec Systems Co. 1313 Production Rd. Fort Wayne, IN 46303 4W953 Precision Pattern 1643 S. Maize Wichita, KS 67209 43223 Alberts BJ Co. 537 S. Main St. Wichita, KS 67201 43588 Radio Shack 448 S. Rock Rd. Wichita, KS 67207 44055 Superior Supply 215 Laura St. Wichita, KS 67211 47911 Polar Ware Lake Shore Rd. Sheboygan, WI 53081 50333 Koss Corp. 4129 N. Port Washington Ave. Milwaukee, WI 53212-1029 51296 Charles Starr Co. 14713 1/2 Oxnard St. Van Nuys, CA 91411 51752 Global-Wulfsberg Systems 2144 Michaelson Drive Irvine, CA 92715 VENDOR LIST Page 7 25-00-05 Original Issue CESSNA AIRCRAFT COMPANY MODEL 750 INTERIOR MAINTENANCE MANUAL AND ILLUSTRATED PARTS CATALOG VENDOR LIST - CONTINUED 52607 Actron Mfg. Inc. 3800 E Miraloma Ave Anaheim CA 53421 Tyton Corp. P.O. Box 23055 Milwaukee, WI 53233 53655 Scott Aviation Div Figgie International Inc 225 Erie St Lancaster NY 56081 Baker Electronics Inc 1734 Northgate Blvd Sarasota FL 34234 57399 Eastern Aero Marine 3850 N.W. 25th St. Miami, FL 33142 59959 Pacific Systems Corp 1111 W Nickerson St Seattle WA 61806 Baekgarrd Ltd. 1855 Janke Dr. Northbrook, IL 60062-670 62139 Selby Furniture Hardware Co Inc 17 E 22nd St New York NY 62661 Colder Products Co. 1001 Westgage Dr. St. Paul, MN 55114 63367 FL Aerospace Lake Dr. Ext. Delray Beach, FL 67131 Vicor Corp. 23 Frontage Road Andover, MA 01810 70093 Asinc Inc 14661-C Myford Rd Tustin CA 71400 Bussman P.O. Box 14460 Wichita, KS 67213 71468 ITT Cannon 666 E. Dyer Rd Santa Ana, CA 92702-0929 72914 Fl Aerospace Corp Grimes Div 550 Rt 55 P O Box 247 Urbana OH 74868 Amphenol Corp. 1 Kennedy Ave. Danbury, CT 75345 Kirkhill Rubber Co. 300 E. Cypress Brea, CA 92621 76005 Lord Corp Aerospace Products Div 1635 W 12th St P O Box 10039 Erie PA 78372 Universal Industrial Prod Co. 1 Core Way Dr. Pioneer, Ohio 43554 80477 Adams Rite 540 W. Chevy Chase Dr. Glendale, CA 91204 82389 Switch Craft 5555 N. Elstrom Ave. Chicago, IL 82647 Texas Instruments 34 Forest St. Attleboro, MA 02703 82837 Grimes Div Midland Ross P.O. Box 277, Mansfield Airport Mansfield, OH 44901 83014 Hartwell Corp. 900 S. Richfield Rd. Placentia, CA 83564 Wemac, Inc. 18465 Pacific St. Fountain Valley, CA 92708-7004 91929 Honeywell Inc. Microswitch Div. 11 W. Spring St. Freeport, IL 61032 94222 Southco, Inc. 210 N. Brinton Lake Rd. Concordville, PA 19331 95146 Alco Switch 1551 Osgood St. North Andover, MA 01845 95263 Leecraft Mfg. 21-16 44th R. Long Island, NY 95957 Brownline/Brooks and Perkins 2950 W. Lomita Blvd Torrance, CA 98313 Davis Aircraft Products 1150 Walnut Ave. Bohemia, NY 11716 99539 General Fire Extinguisher 103 Brookside Drive 1685 Shermer Road Northbrook, IL 60062-5315 NOTE: SIX DIGIT NUMBERS 051531 American Cabin Supply 103 Brookside Drive Nicholasville, KY 40356 1-800-932-9933 054181 American Fun food 2810 N. Market Wichita KS 67207 147768 TIA Electric Col 22 Audrey Place Fairfield, NJ 07006 169871 CAE Inc. P.O. Box 430 Hamburg, MI 48139 248011 Cruver Manufacturing Chicago IL 448151 High Tech Finishing 6201 Royalton Houston, TX 77081 503291 Jims Builder Hardware 567 W. Douglas Wichita KS 67213 579951 Rexnord, Inc. P.O. Box 601 Hasbrouck Heights, NJ 610241 Mid Continent Paper 4700 S. Pallisade Wichita KS 67216 628434 Monogram Industries 800 W. Artesia Blvd. P.O. Box 71106 Compton CA 90224-9057 680772 Pacific Scientific 1346 S. State College Blvd. Anaheim, VA 92803 732751 Puritan Bennett Aero System 18465 Pacific JSt. Fountain Valley, CA 92708 847471 Charles A. Starr Co. P.O. Box 71106 Reno NV 89570 988271 Wulfsburg Electronics 11300 W. 89th St. Overland Park, KS 66214 Page 8 25-00-06 Original Issue CESSNA AIRCRAFT COMPANY MODEL 750 INTERIOR MAINTENANCE MANUAL AND ILLUSTRATED PARTS CATALOG INTERIOR TRIM COORDINATION PACKAGE: CARPET: ENTRY THRESHOLD & THROW RUG BINDING: MEGA, 922 MAIN CABIN CARPET BINDING: MEGA, 922 BAGGAGE CARPET: CONCOURSE, C014, MED. GRAY BAGGAGE CARPET BINDING: F520533, GRAY CABINETRY: PAINT TABLE HANDLE TO MATCH: SINA PEARSON, BAUHAUS TEXTURE, 174-62, TAUPE/SLATE TABLE HINGE FINISH: CLARIANT, GOLD SEAT BELT WEBBING COLOR: CREWSEATS: PAC SCI, BW POLY, BEIGE JUMPSEAT: NOT APPLICABLE PASSENGER SEATS: -420, CAPPUCCINO (NC-351) SIDEFACING SEAT: NOT APPLICABLE INTERIOR TRIM PAINTS: PASSENGER SEATS: ACRYFLEX (NON-METAL PARTS): 377-565, CHAMPAGNE POLYURETHANE (METAL PARTS): WP-3050, CHAMPAGNE CABIN & COCKPIT HEADLINER TRIM : ACRYFLEX (NON-METAL PARTS): 377-708, BAMBOO POLYURETHANE (METAL PARTS): WP-3337, BAMBOO WINDOW SHADES: ACRYFLEX (NON-METAL PARTS): 370-533, BONE ULTRASUEDE COCKPIT TRIM: (WINDOW) ACRYFLEX (NON-METAL PARTS): NOT APPLICABLE POLYURETHANE (METAL PARTS): AO-3487 CP BEIGE (IF ACRYFLEX NOT SPECIFIED PARTS ARE TO BE UNPAINTED) CARPET: ACRYFLEX (NON-METAL PARTS): 377-734, SEAL POLYURETHANE (METAL PARTS): WP-3390, SEAL ENTRANCE DOOR TRIM: (CABIN DOOR POST) ACRYFLEX (NON-METAL PARTS): NOT APPLICABLE POLYURETHANE (METAL PARTS): WP-3050, CHAMPAGNE DOORPOST TRIM TO BE COVERED DOORSTEP: POLYURETHANE: WP-3050 SF CHAMPAGNE TAILCONE GUSSETS: POLYURETHANE (METAL PARTS): WP-3058, LT. GRAY Page 9 25-00-06 Original Issue CESSNA AIRCRAFT COMPANY MODEL 750 INTERIOR MAINTENANCE MANUAL AND ILLUSTRATED PARTS CATALOG FLIGHT DECK COMPARTMENT 1 2 3 1. UPPER SIDEWALL MFG: (CDC) Townsend NAME: Traditional NO: CS-CM-136-97T COLOR: Creme 2. CONSOLE ARMREST MFG: (CDC) Townsend NAME: Traditional NO: CS-CM-136-97T COLOR: Creme 3. CONSOLE SIDEPANEL MFG: (CDC) Townsend NAME: Traditional NO: CS-CM-136-97T COLOR: Creme 4. HEADLINER (NOT SHOWN) MFG: (CDC) Pollack NAME: Clubcar NO: 5009-01 COLOR: Buff 5. LH & RH DIVIDERS (FWD SIDE) (NOT SHOWN) MFG: Carl Booth NAME: Wood Veneer NO: WS-233 COLOR: Walnut Burl 6. CARPET (NOT SHOWN) MFG: (CDC) Kalogridis NAME: Cut Pile NO: CVCP-1130 COLOR: Asphalt 7. SCUFF MATS (NOT SHOWN) MFG: NAME: NO: L443019 COLOR: Black 8. DIVIDER DOORS (FWD & AFT SIDE) MFG: Carl Booth NAME: Wood Veneer NO: WS-233 COLOR: Walnut Burl Page 10 25-00-06 Original Issue CESSNA AIRCRAFT COMPANY MODEL 750 INTERIOR MAINTENANCE MANUAL AND ILLUSTRATED PARTS CATALOG FLIGHT DECK COMPARTMENT - CREW SEATS 2 1 1 3 2 1. SEAT MATERIAL MFG: (CDC) Townsend NAME: Traditional NO: CS-CM-136-97T COLOR: Creme 2. SEAT TRIM MFG: (CDC) Townsend NAME: Traditional NO: CS-CM-136-97T COLOR: Creme 3. ARMREST MATERIAL MFG: (CDC) Townsend NAME: Traditional NO: CS-CM-136-97T COLOR: Creme 4. SHEEPSKIN SLIPCOVERS (NOT SHOWN) MFG: Douglass NAME: NO: COLOR: Tan Page 11 25-00-06 Original Issue CESSNA AIRCRAFT COMPANY MODEL 750 INTERIOR MAINTENANCE MANUAL AND ILLUSTRATED PARTS CATALOG 1 FLIGHT DECK COMPARTMENT - RH TWO BOOK NAVIGATION CHART CASE 2 1. CHART CASE MATERIAL MFG: Carl Booth NAME: Wood Veneer NO: WS-233 COLOR: Walnut Burl 2. INTERIOR COMPARTMENT MATERIAL MFG: Wilsonart NAME: Matte Laminate NO: D50-60 COLOR: Khaki Brown Page 12 25-00-06 Original Issue CESSNA AIRCRAFT COMPANY MODEL 750 INTERIOR MAINTENANCE MANUAL AND ILLUSTRATED PARTS CATALOG 1 FLIGHT DECK COMPARTMENT - LH TWO BOOK NAVIGATION CHART CASE 2 1. CHART CASE MATERIAL MFG: Carl Booth NAME: Wood Veneer NO: WS-233 COLOR: Walnut Burl 2. INTERIOR COMPARTMENT MATERIAL MFG: Wilsonart NAME: Matte Laminate NO: D50-60 COLOR: Khaki Brown Page 13 25-00-06 Original Issue CESSNA AIRCRAFT COMPANY MODEL 750 INTERIOR MAINTENANCE MANUAL AND ILLUSTRATED PARTS CATALOG 2 2 FWD CABIN AREA - LH FWD CLOSET 1 1. CABINETRY MFG: Carl Booth NAME: Wood Veneer NO: WS-233 COLOR: Walnut Burl 2. HARDWARE FINISH / INLAY MFG: Quaker City Plating NAME: NO: QCP-588 COLOR: Satin Blush White Gold 3. INTERIOR COMPARTMENTS (NOT SHOWN) MFG: Wilsonart NAME: Matte Laminate NO: D50-60 COLOR: Khaki Brown 1 1 Page 14 25-00-06 Original Issue CESSNA AIRCRAFT COMPANY MODEL 750 INTERIOR MAINTENANCE MANUAL AND ILLUSTRATED PARTS CATALOG 1. CABINETRY MFG: Carl Booth NAME: Wood Veneer NO: WS-233 COLOR: Walnut Burl 2. HARDWARE FINISH / INLAY MFG: Quaker City Plating NAME: NO: QCP-588 COLOR: Satin Blush White Gold 3. INTERIOR COMPARTMENTS (NOT SHOWN) MFG: Wilsonart NAME: Matte Laminate NO: D50-60 COLOR: Khaki Brown 4. WORK SURFACE MFG: Carl Booth NAME: Wood Veneer NO: WS-233 COLOR: Walnut Burl FWD CABIN AREA - RH FWD LARGE GALLEY 4 2 1 1 1 1 1 2 2 1 Page 15 25-00-06 Original Issue CESSNA AIRCRAFT COMPANY MODEL 750 INTERIOR MAINTENANCE MANUAL AND ILLUSTRATED PARTS CATALOG FWD CABIN AREA - ENTRY AREA 1 2 1. ENTRANCE DOOR TRIM/HAND RAIL COVER MFG: (CDC) Townsend NAME: Traditional NO: CS-CM-136-97 COLOR: Creme 2. CABIN DOOR STEPS MFG: Schneller NAME: Aeromat ST NO: 15239/15240/20R/54 COLOR: Beige Page 16 25-00-06 Original Issue CESSNA AIRCRAFT COMPANY MODEL 750 INTERIOR MAINTENANCE MANUAL AND ILLUSTRATED PARTS CATALOG MAIN CABIN AREA - PASSENGER SEAT 1 5 4 3 2 1. SEAT MATERIAL MFG: (CDC) Townsend NAME: Traditional NO: CS-CM-136-97 COLOR: Creme 2. ARMREST MATERIAL MFG: (CDC) Townsend NAME: Traditional NO: CS-CM-136-97 COLOR: Creme 3. SEAT TRIM MFG: (CDC) Townsend NAME: Traditional NO: CS-CM-136-97 COLOR: Creme 4. SEAT BASE MFG: (CDC) Townsend NAME: Traditional NO: CS-CM-136-97 COLOR: Creme 5. HARDWARE FINISH MFG: Quaker City Plating NAME: NO: QCP-588 COLOR: Satin Blush White Gold 6. HEADREST PILLOW MATERIAL MFG: (CDC) Townsend NAME: Traditional NO: CS-CM-136-97 COLOR: Creme Shredded Sheepskin Stuffing 6 Page 17 25-00-06 Original Issue CESSNA AIRCRAFT COMPANY MODEL 750 INTERIOR MAINTENANCE MANUAL AND ILLUSTRATED PARTS CATALOG MAIN CABIN AREA - MATERIALS 1 2 3 3 1. HEADLINER / PSU MFG: (CDC) Pollack NAME: Clubcar NO: 5009-01 COLOR: Buff 2. WINDOW REVEALS MFG: (CDC) Jim Thompson NAME: Thai Silk NO: 190021 COLOR: Ceylon Ivory 3. SIDEWALL MFG: (CDC) Sina Pearson NAME: Bauhaus Texture NO: 174-62 COLOR: Taupe/Slate 4. CARPET MFG: (CDC) Kalogridis NAME: Cut Pile NO: CVCP-1130 COLOR: Asphalt 5. WINDOW SHADES (NOT SHOWN) MFG: (CDC) NAME: Duette NO: F780831 COLOR: Beach Shells 6. LH/RH AFT DIVIDERS (FWD SIDE) (MIDDLE & LOWER AREA) MFG: Carl Booth NAME: Wood Veneer NO: WS-233 COLOR: Walnut Burl 7. LH/RH AFT DIVIDERS (FWD SIDE) (UPPER AREA) MFG: NAME: Mirror NO: COLOR: Bronze 4 4 1 3 7 6 6 Page 18 25-00-06 Original Issue CESSNA AIRCRAFT COMPANY MODEL 750 INTERIOR MAINTENANCE MANUAL AND ILLUSTRATED PARTS CATALOG MAIN CABIN AREA - FURNITURE 1 2 3 3 (Detail of Inlay) 1. SIDELEDGE / BACKSPLASH MFG: Carl Booth NAME: Wood Veneer NO: WS-233 COLOR: Walnut Burl 2. TABLE TOP SURFACE MFG: (CDC) NAME: Top Grain Leather NO: L441934 COLOR: Dk. Charcoal 3. HARDWARE FINISH / INLAY MFG: Quaker City Plating NAME: NO: QCP-588 COLOR: Satin Blush White Gold 4. MAIN TABLE LEAF (UNDERSIDE) MFG: Wilsonart NAME: Matte Laminate NO: D50-60 COLOR: Khaki Brown 5. TABLE TOP EDGE/ SECONDARY FOLD OUT SURFACE (UNDERSIDE) MFG: Carl Booth NAME: Wood Veneer NO: WS-233 COLOR: Walnut Burl 6. TABLE LEAF LID (UNDERSIDE) MFG: Carl Booth NAME: Wood Veneer NO: WS-233 COLOR: Walnut Burl 4 6 5 4 1 3 5 Page 19 25-00-06 Original Issue CESSNA AIRCRAFT COMPANY MODEL 750 INTERIOR MAINTENANCE MANUAL AND ILLUSTRATED PARTS CATALOG AFT LAVATORY AREA - VANITY CABINET 2 7 1 1 8 1. AFT VANITY CABINET (EXTERIOR) MFG: Carl Booth NAME: Wood Veneer NO: WS-233 COLOR: Walnut Burl 2. AFT VANITY BACKSPLASH MFG: NAME: Mirror NO: COLOR: Bronze 3. LH AFT DIVIDER (NOT SHOWN) MFG: (CDC) Townsend NAME: Traditional NO: CS-CM-136-97T COLOR: Creme 4. AFT VANITY TOP MFG: Carl Booth NAME: Wood Veneer NO: WS-233 COLOR: Walnut Burl 5. SINK FINISH MFG: Quaker City Plating NAME: NO: QCP-588 COLOR: Satin Blush White Gold 6. AFT VANITY CABINET (INTERIOR) MFG: Wilsonart NAME: Matte Laminate NO: D50-60 COLOR: Khaki Brown 7. REVEAL MFG: (CDC) Jim Thompson NAME: Thai Silk NO: 190021 COLOR: Ceylon Ivory 8. HARDWARE / INLAY MFG: Quaker City Plating NAME: NO: QCP-588 COLOR: Satin Blush White Gold 1 8 5 3 4 Page 20 25-00-06 Original Issue CESSNA AIRCRAFT COMPANY MODEL 750 INTERIOR MAINTENANCE MANUAL AND ILLUSTRATED PARTS CATALOG AFT LAVATORY AREA - TOILET 1 2 1. TOILET SEAT MATERIAL MFG: (CDC) Townsend NAME: Traditional NO: CS-CM-136-97T COLOR: Creme 2. TOILET CABINET BASE MFG: (CDC) Townsend NAME: Traditional NO: CS-CM-136-97T COLOR: Creme 3. RH AFT DIVIDER (AFT SIDE) MFG: (CDC) Townsend NAME: Traditional NO: CS-CM-136-97T COLOR: Creme 4. REVEAL MFG: (CDC) Jim Thompson NAME: Thai Silk NO: 190021 COLOR: Ceylon Ivory 5. DIVIDER DOOR (FWD & AFT SIDES) (NOT SHOWN) MFG: Carl Booth NAME: Wood Veneer NO: WS-233 COLOR: Walnut Burl 4 3 Page 21 25-00-06 Original Issue CESSNA AIRCRAFT COMPANY MODEL 750 INTERIOR MAINTENANCE MANUAL AND ILLUSTRATED PARTS CATALOG AFT LAVATORY AREA - LARGE AFT CLOSET 1 3 2 3 2 1. AFT BULKHEAD (UPPER AREA) MFG: NAME: Mirror NO: COLOR: Bronze 2. AFT BULKHEAD (LOWER AREA) MFG: Carl Booth NAME: Wood Veneer NO: WS-233 COLOR: Walnut Burl 3. HARDWARE FINISH / INLAY MFG: Quaker City Plating NAME: NO: QCP-588 COLOR: Satin Blush White Gold 4. CLOSET LINING / SHELVES (NOT SHOWN) MFG: Wilsonart NAME: Matte Laminate NO: D50-60 COLOR: Khaki Brown 5. CLOSET FLOOR (NOT SHOWN) MFG: Wilsonart NAME: Matte Laminate NO: D50-60 COLOR: Khaki Brown 3 1 2 2 1 2 2 Page 22 25-00-06 Original Issue CESSNA AIRCRAFT COMPANY MODEL 750 INTERIOR MAINTENANCE MANUAL AND ILLUSTRATED PARTS CATALOG TAILCONE BAGGAGE COMPARTMENT 1. BAGGAGE COMPARTMENT LINING MFG: NAME: Concourse NO: C014 COLOR: Medium Gray 2. BAGGAGE RESTRAINT WEBBING MFG: NAME: NO: COLOR: Gray Page 23 25-00-06 Original Issue CESSNA AIRCRAFT COMPANY MODEL 750 INTERIOR MAINTENANCE MANUAL AND ILLUSTRATED PARTS CATALOG REGISTRATION NUMBER: DATE: 9/29/99 PAINT CODE COLOR LOCATION: TAIL SIZE: 12î DRAWN BY: D. RAMSEY 1 810-002 SNOW WHITE STYLE: SLANT 2 MO-10653 HARVEST GOLD EMERGENCY DOOR MARKINGS: 3 MO-150 ANTIQUE SILVER COLOR: CHARCOAL GRAY SHADOW HARVEST GOLD 4 MO-250 CHARCOAL GRAY SHADOW W/HARVEST GOLD SHADOW 5 SPECIAL STANDARD 6 Scheme the Same as 750-103 7 UNIT NUMBER: 750-0107 Xo o NO STANDARD DECAL. Part Number Description Standard/Option Location CESSNA AIRCRAFT COMPANY MODEL 750 INTERIOR MAINTENANCE MANUAL AND ILLUSTRATED PARTS CATALOG Page 24 25-00-07 Original Issue INTERIOR PLACARDS 4616018-1 DATA MONITOR PLACARD ASSY S DROPPED AISLE 4919043-1 SILKSCREEN-LATCH SLIDING DOORS S FWD DIVIDERS 4611185-15 JUMPSEAT PIN PLACARD O LH FWD CLOSET 4611185-21 JUMPSEAT PLACARD O LH FWD CLOSET 4711060-8 SILKSCREEN-JUMPSEAT INSTRUCTIONS O LH FWD CLOSET 4919052-8 FIRE EXTINGUISHER SILKSCREEN S LH FWD CLOSET 4919053-11 OXYGEN BOTTLE SILKSCREEN S LH FWD CLOSET 4919044-1 CLOSE DRAWERS SILKSCREEN S RH FWD GALLEY 4919058-2 TRASH CONTAINER SILKSCREEN S RH FWD GALLEY 4919058-3 TRASH CONTAINER SILKSCREEN S RH FWD GALLEY 4616002-1 DECAL, DOOR, OPEN S CABIN DOOR 4616002-2 DECAL, DOOR, LOCK S CABIN DOOR 4616002-3 DECAL, DOOR, PULL S CABIN DOOR 4616004-1 PRECATCH PLACARD ASSY S CABIN DOOR 4616005-1 RELEASE HANDLE PLACARD ASSY S CABIN DOOR 4699043-3 DOOR PLACARD S CABIN DOOR 4699043-5 DOOR PLACARD S CABIN DOOR 4919062-1 LIFEVEST SILKSCREEN S SEATS 4616016-1 SILKSCREEN-THREE PLACE SOFA O THREE PLACE SOFA 4616016-2 THREE PLACE SOFA PLACARD O THREE PLACE SOFA 4690059-2 SILKSCREEN-MONITORS O SIDELEDGES 4919055-1 STOW TABLE SILKSCREEN S SIDELEDGES 4616012-1 DITCHING INFO SILKSCREEN S PSU 4616007-1 WINDOW SHADE SILKSCREEN S WINDOW SHADES 4616002-4 DECAL, ESCAPE HATCH, OPEN S ESCAPE HATCH 4616002-5 DECAL, ESCAPE HATCH, PUSH S ESCAPE HATCH 4616006-1 HATCH OPERATION INSTRUCTION S ESCAPE HATCH 4919056-2 PLACARD-EXIT REMOVE COVER S ESCAPE HATCH 4616014-1 LIFE RAFT PLACARD ASSY O AFT BULKHEAD CLOSET 4616025-1 PLACARD-ON SHLEF OVER J-BOX S AFT BULKHEAD CLOSET 4616012-2 WATER BARRIER PLACARD ASSY S WATER BARRIER 4616012-5 WATER BARRIER PLACARD ASSY S WATER BARRIER 4616012-8 WATER BARRIER PLACARD ASSY S WATER BARRIER 4919243-8 TOILET SERVICE PLACARD S RH AFT TOILET NOTE: Optional placards not installed on all aircraft. Part Number Description Standard/Option Location CESSNA AIRCRAFT COMPANY MODEL 750 INTERIOR MAINTENANCE MANUAL AND ILLUSTRATED PARTS CATALOG Page 25 25-00-07 Original Issue INTERIOR PLACARDS 4616008-3 GEAR ACCESS SILKSCREEN S LH AFT VANITY 4616015-1 HAND TOWELS SILKSCREEN O LH AFT VANITY 4616015-2 110 VOLT OUTLET SILKSCREEN O LH AFT VANITY 4616015-3 TOILET TISSUE SILKSCREEN S LH AFT VANITY 4616015-4 FACIAL TISSUE SILKSCREEN O LH AFT VANITY 4616015-5 ELECTRICAL OUTLET SILKSCREEN O LH AFT VANITY 4919058-4 TRASH CONTAINER SILKSCREEN S LH AFT VANITY 4919061-4 NO SMOKING IN LAVATORY SILKSCREEN S AFT DIVIDERS 4919061-5 NO SMOKING IN LAVATORY SILKSCREEN S AFT DIVIDERS 4616003-4 SKI COMPARTMENT PLACARD ASSY S BAGGAGE COMP. 4616013-1 BAGGAGE COMP. WEIGHT PLACARD S BAGGAGE COMP. 4616024-1 POWER SUPPLY PLACARD ASSY S POWER SUPPLY 4616024-4 AIRSHOW PLACARD ASSY S AIRSHOW GENESYS 4616024-7 STEREO AMP PLACARD ASSY S STEREO AMPLIFIER 4616024-9 DC CONVERTER PLACARD ASSY S DC CONVERTER 4616024-11 A/V CONTROLLER PLACARD ASSY S A/V CONTROLLER UNIT 4616024-13 CD CHANGER PLACARD ASSY S CD CHANGER 4616024-15 FAU PLACARD ASSY S FAU UNIT 4616024-17 CABIN MANAGEMENT PLACARD ASSY S MANAGEMENT MODULE 4616024-19 AC INVERTER PLACARD ASSY S AC INVERTER 4616024-21 TRANSFORMER PLACARD ASSY S ISOLATION TRANS. 4616024-23 CALL ALERTER PLACARD ASSY S CALL ALERTER 4616024-25 CDBR PLACARD ASSY S CDBR UNIT 4616024-27 AIRSHOW BRIEFER PLACRD ASSY S AIRSHOW GENESYS NOTE: Optional placards not installed on all aircraft. CESSNA AIRCRAFT COMPANY MODEL 750 INTERIOR MAINTENANCE MANUAL AND ILLUSTRATED PARTS CATALOG CONTENT Original Issue Subject Forward Maintenance Parts Flight Compartment Control Wheel Emblem .................................................................................... 25-10-01 ................ 25-10-02 Pedestal Panel Covers .................................................................................... 25-10-03 ................ 25-10-04 Crew Seats ...................................................................................................... 25-10-05 ................ 25-10-06 Jepp Case ....................................................................................................... 25-10-07 ................ 25-10-08 Cockpit Window Trim ....................................................................................... 25-10-09 ................ 25-10-10 Cockpit Overhead ............................................................................................ 25-10-11 ................ 25-10-12 Handset ........................................................................................................... 25-10-13 ................ 25-10-14 Sunvisor .......................................................................................................... 25-10-15 ................ 25-10-16 Cockpit Assist Handle ..................................................................................... 25-10-17 ................ 25-10-18 Sonalert Signal ................................................................................................ 25-10-19 ................ 25-10-20 Flashlight Charger Instl ................................................................................... 25-11-01 ................ 25-11-02 CESSNA AIRCRAFT COMPANY MODEL 750 INTERIOR MAINTENANCE MANUAL AND ILLUSTRATED PARTS CATALOG Page 2 25-10-01 Original Issue Blank Page CESSNA AIRCRAFT COMPANY MODEL 750 INTERIOR MAINTENANCE MANUAL AND ILLUSTRATED PARTS CATALOG Page 3 25-10-01 Original Issue CONTROL WHEEL EMBLEM - MAINTENANCE 1 General A. This section covers the control wheel emblem maintenance. 2 Control Wheel Emblem Removal / Installation A. Remove Control Wheel Emblem (1) Control wheel emblem is held in place by adhesive backing, to remove carefully pull it loose from face pad. B. Install Control Wheel Emblem (1) Remove protective backing from adhesive side of new emblem. NOTE: Do not contact unprotected adhesive. It must be free of any debris to ensure good adhesion. (2) Using notch on emblem, align with notch on face pad. (3) Firmly press emblem to face pad. 3 Face Pad Removal / Installation A. The face pad snaps into place on the control wheel. 4 Chart Holder Assembly A. The chart holder consists of a clip, bracket, and cover. B. Chart Holder Assembly Removal (1) Remove the chart holder assembly by sliding forward, loose from the control wheel assembly. (2) Remove screw securing clip to bracket and remove bracket. (3) Remove the nut securing cover plate to clip, and remove cover. C. Chart Holder Assembly Installation (1) Secure cover plate to clip with nut. (2) Secure clip to bracket with screw. (3) Attach chart holder assembly by aligning with control wheel and sliding aft, snapping into place. Page 1 25-10-02 Original Issue CESSNA AIRCRAFT COMPANY MODEL 750 INTERIOR MAINTENANCE MANUAL AND ILLUSTRATED PARTS CATALOG 2 3 4 5 7 8 6 1 CESSNA AIRCRAFT COMPANY MODEL 750 INTERIOR MAINTENANCE MANUAL AND ILLUSTRATED PARTS CATALOG Page 2 25-10-02 Original Issue No. Part Number Description Vendor NOTE: Parts not available as complete installations - 4611046-1 EMBLEM INSTL 1 - - - CONTROL WHEEL 2 MS27039-0805 SCREW 3 6219063-3 COVER 4 5519128-4 CLIP 5 6219063-2 CLIP SUPPORT 6 6219059-3 FACE PAD 7 9914182-1 PLACCARD 8 MS21042-08 NUT Page 3 25-10-02 Original Issue CESSNA AIRCRAFT COMPANY MODEL 750 INTERIOR MAINTENANCE MANUAL AND ILLUSTRATED PARTS CATALOG 2 3 4 5 7 8 6 1 CESSNA AIRCRAFT COMPANY MODEL 750 INTERIOR MAINTENANCE MANUAL AND ILLUSTRATED PARTS CATALOG Page 4 25-10-02 Original Issue No. Part Number Description Vendor NOTE: Parts not available as complete installations - 4919343-1 CHART HOLDER INSTL 1 10-62-01 CHARTHOLDER MIAN 2 4919343-2 RH BRACKET 3 4919343-3 LH BRACKET 4 MS35206-266 SCREW, MACHINE, PAN 5 AN960-10 WASHER 6 MS21044C3 NUT 7 MS35206-236 SCREW 8 S1438-2 WASHER CESSNA AIRCRAFT COMPANY MODEL 750 INTERIOR MAINTENANCE MANUAL AND ILLUSTRATED PARTS CATALOG Page 1 25-10-03 Original Issue Blank Page CESSNA AIRCRAFT COMPANY MODEL 750 INTERIOR MAINTENANCE MANUAL AND ILLUSTRATED PARTS CATALOG Page 2 25-10-03 Original Issue PEDESTAL PANEL COVERS - MAINTENANCE 1. Description A. Five upholstery panels are provided along both sides of the flight compartment. They incorporate padding and have an upholstery covering. They are held in place with fasteners and Velcro tape. The armrest upholstery panel is bonded to the upper edge of the side console. Two pedestal covers are installed along each side of the pedestal. They have an upholstery covering. 2. Upholstery Panel Removal/Installation NOTE : The upholstery panels should be removed in proper sequence. The upper side upholstery panel should be removed first followed by the circuit breaker upholstery panel and then the armrest upholstery panel. The side console upholstery panel can be removed and installed independantly. During installation the armrest upholstery panel goes on first since it is bonded to the top edge of the side console. A. Upper Side Upholstery Panel Removal / Installation (1) Remove Upper Side Upholstery Panel (a) Remove window trim as necessary to gain access to top side upholstery panel. (Refer to section 25-10-09) (b) Remove upper side upholstery panel secured with Velcro tape. (2) Install Upper Side Upholstery Panel NOTE : Ensure circuit breaker upholstery panel is installed prior to installing top side upholstery panel. (a) Position upper side upholstery panel and secure with Velcro tape. (b) Install window trim. (Refer to section 25-10-09) B. Circuit Breaker Upholstery Panel Removal / Installation (1) Remove Circuit Breaker Upholstery Panel (a) Remove two screws securing Electroluminescent (EL) panel from aft top side of circuit breaker upholstery panel and remove EL panel. (b) Remove trim ring from Wemac fixture and screws. (c) Remove MAP LIGHT knob by loosening Allen set screw. (d) Remove circuit breaker electroluminescet panel. (e) Remove circuit breaker upholstery panel held on with Velcro tape. (2) Install Circuit Breaker Upholstery Panel NOTE : Ensure armrest upholstery panel is installed prior to installing circuit breaker upholstery panel. (a) Position circuit breaker upholstery panel and secure with Velcro tape. (b) Install circuit breaker electroluminescent panel. (c) Install MAP LIGHT knob and secure with Allen set screw. (d) Secure to Wemac fixture and trim ring with screws. (e) Position electroluminescent panel to top of circuit breaker upholstery panel and secure with two screws. CESSNA AIRCRAFT COMPANY MODEL 750 INTERIOR MAINTENANCE MANUAL AND ILLUSTRATED PARTS CATALOG Page 3 25-10-03 Original Issue PEDESTAL PANEL COVERS - MAINTENANCE C. Armrest Upholstery Panel Removal / Installation (1) Remove Armrest Upholstery Panel (a) Remove ash tray and screw securing ash tray receptacle. Remove ash tray receptacle. (b) Remove screw securing cup holder and remove cup holder. (c) Remove safety wire from hand wheel and drive number 40 out with a punch. Remove hand wheel. (Pilot side only) (d) Remove AIRSPEED LIMITATIONS placard and placard retainer. (e) Remove side console upholstery panel. (f) Remove adhesive securing inboard side of armrest upholstery panel to top edge of side console structure. (g) Remove armrest upholstery panel secured on outboard side by fasteners. (h) If applicable modify armrest flange as follows : (1) Radius armrest flange to match circuit breaker panel(s) mounting screws. NOTE : The reason for this modification is to allow the removal and installation of the circuit breaker panel(s) without removing the arm rest. (2) Install Armrest Upholstery Panel NOTE : Side console panel must be removed prior to installing armrest upholstery panel. (a) Install armrest upholstery panel with fasteners along outboard edge. (b) Apply class II adhesive to top edge of side console structure and bond inboard edge of armrest upholstery panel material to edge. (c) Position AIRSPEED LIMITATIONS placard retainer and secure with screws. Install AIRSPEED LIMITATIONS placard. (d) Install hand wheel and secure with pin and safety wire. (e) Install cup holder and secure with screw. (f) Install ash tray receptacle and secure with screw. Install ash tray. (g) Install side console upholstery panel. D. Side Console Upholstery Panel Removal / Installation (1) Remove SIde Console Upholstery Panel (a) Remove pilot and/or co-pilot seat. (Refer to section 25-10-05) (b) Remove side console upholstery panel. (2) Install Side Console Upholstery Panel (a) Position side console upholstery panel and secure with fasteners and Velcro tape. (b) Install pilot and copilot seat. (Refer to section 25-10-05) CESSNA AIRCRAFT COMPANY MODEL 750 INTERIOR MAINTENANCE MANUAL AND ILLUSTRATED PARTS CATALOG Page 4 25-10-03 Original Issue PEDESTAL PANEL COVERS - MAINTENANCE E. Cowl Upholstery Panel Removal / Installation (1) Remove cowl upholstery panel by seperating the attaching Velcro fasteners. (2) Install cowl upholstery panel by aligning the panel and pressing the Velcro fasteners. F. Pedestal Covers Removal / Installation (1) Remove Pedestal Covers (a) Remove pilot / co-pilot seats as necessary to gain access to pedestal covers. (Refer to section 25-10- 05) (b) Remove screws securing pedestal covers and remove covers. (2) Install Pedestal Covers (a) Position covers to pedestal and secure with screws. (b) Install pilot / co-pilot seats. (Refer to section 25-10-05) Page 1 25-10-04 Original Issue CESSNA AIRCRAFT COMPANY MODEL 750 INTERIOR MAINTENANCE MANUAL AND ILLUSTRATED PARTS CATALOG 12 2 3 4 11 7 8 9 10 6 15 17 13 16 5 1 14 23 19 20 21 22 18 8 25 24 CESSNA AIRCRAFT COMPANY MODEL 750 INTERIOR MAINTENANCE MANUAL AND ILLUSTRATED PARTS CATALOG Page 2 25-10-04 Original Issue No. Part Number Description Vendor NOTE: Parts not available as complete installations - 4611047-2 CENTER PANEL INSTL - 4611269-2 RH SIDE PANEL INSTL - 4611269-1 LH SIDE PANEL INSTL 1 4611377-1 CENTER PEDESTAL COVER 2 4611085-2 COVER-RH, ACCESS PLATE 3 4611085-3 COVER-LH, ACCESS PLATE 4 4611085-6 COVER-RH, ACCESS PLATE 5 4611377-2 COVER-LH, ACCESS PLATE 6 4611268-18 COWL PANEL ASSY - RH 7 4611050-4 SIDE PANEL, FWD, CKPT, RH - 4919069-2 SILKSCREEN CKPT S/PNL RH 8 4811861-1 CUP HOLDER - 5514800-118 PAD - MS24693S28 SCREW 9 4611164-12 ARMREST PANEL ASSY - RH FWD - - - - OXYGEN MASK 10 4611164-14 ARMREST PANEL ASSY - RH AFT 11 4611268-8 UPR UPHOL PANEL ASSY - RH 12 4611268-4 LWR UPHOL PANEL ASSY - RH 13 4611164-10 LWR UPHOL PANEL ASSY - RH 14 4919011-89 COWL PNL ASSY, LH 15 4611050-5 SIDE PANEL, FWD, CKPT, LH - 4919069-1 SILKSCREEN CKPT S/PNL LH 16 4611268-11 ARMREST PANEL ASSY - LH FWD - - - - OXYGEN MASK 17 4611164-12 ARMREST PANEL ASSY - LH AFT 18 4611164-9 UPR UPHOL PANEL ASSY - LH 19 4611268-23 LWR UPHOL PANEL ASSY - LH FWD 20 4611268-21 LWR UPHOL PANEL ASSY - LH AFT 21 4611268-3 LWR UPHOL PANEL ASSY - LH 22 6219056-32 ESCUTCHEON - S1021A8-10C SCREW 23 4611268-5 UPHOL PANEL ASSY - LH POCKET - MS27039-1-06 SCREW 24 4611377-3 COVER - LH, ACCESS PLATE 25 4611377-4 COVER PLATE - LH CESSNA AIRCRAFT COMPANY MODEL 750 INTERIOR MAINTENANCE MANUAL AND ILLUSTRATED PARTS CATALOG Page 1 25-10-05 Original Issue Blank Page CESSNA AIRCRAFT COMPANY MODEL 750 INTERIOR MAINTENANCE MANUAL AND ILLUSTRATED PARTS CATALOG Page 2 25-10-05 Original Issue CREW SEATS - MAINTENANCE 1 General A Seats. (1) Adjustable seats are provided for the pilot and copilot. There are three levers for adjusting the position of the seat. The outboard lever adjusts the seat vertically. The inboard lever adjusts the seat to the desired reclin ing position. The center lever adjusts the seat forward and aft. A life vest is located in the back pocket of each seat. A fire extinguisher is located below the copilot seat. The seat incorporates a 5-point restraint system with inertia reel. (2) See General layout for locaton. 2 Operations and inspections A Armrest Operation (1) Pull outward and raise or lower to desired position. B LIfe Vest Certification (1) Life vest needs to be returned to the vendor for inspection and recertification evey 12 months. The date of original certification is stamped on the vest. C Fire Extinguisher Inspection (1) Recommended monthly inspections per manufacturers instructions. 3 Remove Crew Seats NOTE: If interference of the carpet makes it difficult to move the seat(s) on the seat track, it is permissible to neatly trim the carpet away from the track. NOTE: Care should be taken in removal / installation so as not to damage the fwd cabinetry. Use protective covers on fwd cabinets prior to removal of seat. A Remove interior furnishings as required to allow movement of seats to cutouts in seat tracks. B Remove seat stops forward of crew seat. C Raise lever on seat securing seat in place to allow forward or aft movement as required. D Position seat so feet match cutouts in seat track 4 Install Crew Seats A Position seat with feet of seat base at cutout in seat track and ensure engagement of feet in tracks. B Roll seat along tracks to position. C Install seat stops forward of crew seats. Ensure that seat stops are secure on reinstallation. D Install other interior furnishings removed for access. Page 1 25-10-06 Original Issue CESSNA AIRCRAFT COMPANY MODEL 750 INTERIOR MAINTENANCE MANUAL AND ILLUSTRATED PARTS CATALOG 12 2 3 4 5 11 7 8 9 10 6 14 15 17 13 16 1 CESSNA AIRCRAFT COMPANY MODEL 750 INTERIOR MAINTENANCE MANUAL AND ILLUSTRATED PARTS CATALOG Page 2 25-10-06 Original Issue No. Part Number Description Vendor - - - - CREW SEATS - 4611100-45 CREW SEAT ASSY. LH (SHOWN) - 4611008-3 CREW SEAT INSTL. LH (SHOWN) - 4611100-46 CREW SEAT ASSY. RH (OPPOSITE) - 4611008-4 CREW SEAT INSTL. RH (OPPOSITE) - 4690005-1 CREW SEAT LOWER BASE MOD 1 4611100-45 CREW SEAT UPHOLSTERY-LH - 4611100-46 CREW SEAT UPHOLSTERY-RH - P0723E105PA CREW LIFEVEST 57399 2 4699014-5 CONTROL ASSY (INBD) 3 MC194-24 CONTROL ASSY-SEAT LOCK (INBD CNTR) 02953 - MS16633-1025 RING, RETAINING, EXT 4 4699014-6 CONTROL ASSY (OUTBD) 5 4611009-45 SEAT STRUCTURE ASSY-LH - 4611009-46 SEAT STRUCTURE ASSY-RH 6 4611011-53 SEAT LOCK ASSY - AN4-14 BOLT - NAS43DD4-40 SPACER - AN310-4 NUT - AN960-416 WASHER - AN960-416L WASHER - MS24665-229 PIN - 4611011-51 LINK - NAS43DD1-28 SPACER - MS20392-1C37 PIN - MS24665-132 COTTER PIN - AN4-10A BOLT (lower) - AN960-416 WASHER (lower, bolt head) 7 4611201-3 ROLLER HOUSING (2 ea) - 4611011-64 ROLLER (2 ea) - NAS43HT3-91 SPACER (6 ea) - AN23-28A BOLT (6 ea) - AN960-10 WASHER (bolt head, 6 ea) - CM3224-3 NUT (6 ea) NOTE: Parts not available as complete installations NOTE: Life Vests need to be returned to the vendor for inspection every 12 months. The date of original certification is stamped on the vest. Page 3 25-10-06 Original Issue CESSNA AIRCRAFT COMPANY MODEL 750 INTERIOR MAINTENANCE MANUAL AND ILLUSTRATED PARTS CATALOG 12 2 3 4 5 11 7 8 9 10 6 1 14 15 17 13 16 CESSNA AIRCRAFT COMPANY MODEL 750 INTERIOR MAINTENANCE MANUAL AND ILLUSTRATED PARTS CATALOG Page 4 25-10-06 Original Issue No. Part Number Description Vendor - - - - CREW SEATS 8 4611201-1 ROLLER HOUSING (2 ea) - 4611011-63 ROLLER (2 ea) - NAS43HT4-91 SPACER (6 ea) - AN23-30A BOLT (6 ea) - AN960-416 WASHER - MS35333-40 LOCK-WASHER (6 ea) - CM3224-4 NUT (6 ea) 9 4611100-38 BOTTOM ASSY 10 4611100-35 BACK ASSY 11 AN525-832R6 SCREW (2 ea) 12 4711089-14 GUIDE ASSY - MS27039-0808 SCREW (2 ea) 13 4711089-3 UPHOLSTERY ASSY 14 4611100-3 ARMREST ASSY RH 15 5314537-2 BOLT - 5514502-18 WASHER - 5514502-33 WASHER - 5514502-25 SHAFT TUBE ASSY-LH - 5514502-26 SHAFT TUBE ASSY-RH 16 4611100-4 ARMREST ASSY LH 17 4699007-1 CREW RESTRAINT ASSY-LH - 4699007-2 CREW RESTRAINT ASSY-RH - 1111459-01 CROTCH STRAP ASSY 45402 - 6219149-19 RETAINER - 1111460-03 LAP BELT ASSY 45402 - 1117521-01 REEL & SHOULDER HARNESS 45402 NOTE: Parts not available as complete installations NOTE: Life Vests need to be returned to the vendor for inspection every 12 months. The date of original certification is stamped on the vest. CESSNA AIRCRAFT COMPANY MODEL 750 INTERIOR MAINTENANCE MANUAL AND ILLUSTRATED PARTS CATALOG Page 1 25-10-07 Original Issue Blank Page CESSNA AIRCRAFT COMPANY MODEL 750 INTERIOR MAINTENANCE MANUAL AND ILLUSTRATED PARTS CATALOG Page 2 25-10-07 Original Issue NAVIGATION CHART CASES - MAINTENANCE 1. General A. This section describes the Map Cases. (1) Map Case. (a) Two map cases are installed on the front side of the forward dividers. They are used to store navigational charts and maps. They are constructed of wood fiber and have a laminate covering. B. See General layout for locations. 2. Map Case Removal/Installation NOTE: Removal and Installation for left and right map case is typical. A. Remove Map Case. (1) Reposition or remove seats to gain access to screws securing map case to dividers. (Refer to section 25-10-05). (2) Remove screws and washers securing map case to dividers. (3) Remove map case from airplane. B. Install Map Case. (1) Position map case and secure to forward divider with four screws and washers. (2) Install or reposition seats. Refer to section 25-10-05. Page 1 25-10-08 Original Issue CESSNA AIRCRAFT COMPANY MODEL 750 INTERIOR MAINTENANCE MANUAL AND ILLUSTRATED PARTS CATALOG 2 3 4 1 CESSNA AIRCRAFT COMPANY MODEL 750 INTERIOR MAINTENANCE MANUAL AND ILLUSTRATED PARTS CATALOG Page 2 25-10-08 Original Issue No. Part Number Description Vendor NOTE: Parts not available as complete installations - 4611325-1,-2 NAVIGATION CHART CASE INSTL LH, RH 1 4699324-3 NAVIGATION CHART CASE-LH - #10 INSERT THRU (4 ea) - 1322-1-32 110 VOLT OUTLET (not shown) 59959 - 1322-1-42 FAX/DATA OUTLET (not shown) 59959 2 4699179-4 NAVIGATION CHART CASE-RH - #10 INSERT THRU (4 ea) 3 MS24694C52 SCREW (4 ea) 4 - - - FWD DIVIDERS CESSNA AIRCRAFT COMPANY MODEL 750 INTERIOR MAINTENANCE MANUAL AND ILLUSTRATED PARTS CATALOG Page 1 25-10-09 Original Issue COCKPIT WINDOW TRIM - MAINTENANCE 1. Description A. Trim encloses the windows and windshields in the flight compartment. The trim around the aft openable window is bonded in place. The window insert trim around the aft openable window opening is held in place with screws. It is removed first and installed last. The window and windshield trim is held in place with clips secured to the structure as well as screws. 2. Window / Windshield Trim Removal/Installation NOTE : Install a protective coating to window and windshield prior to performing maintenance. A. Remove Window / Windshield Trim (1) Remove aft openable side window. (2) Remove screws securing magnetic compass. Save screws for reinstallation. (3) Remove oxygen mask holder, sunvisor, and any brackets or clips for equipment that may be securing trim to structure. Save screws for reinstallation. (4) Remove window and windshield trim in the followimg order: NOTE : Trim around aft openable window is bonded on with RTV and is normally not removed. (a) Remove screws securing the window insert trim from around aft openable window opening and remove trim. (b) Remove screws securing forward side window trim and remove trim. (c) Remove screws securing windshield trim and remove trim. B. Install Window / Windshield trim (1) Install window and windshield trim in the following order: NOTE : Use cleco fasteners (number 21) to properly align screw holes. (a) Position trim around windshield and secure with screws. (b) Position trim around forward side windows and secure with screws. (c) Position the window insert trim around aft openable window area and secure with screws. NOTE : If trim around aft openable window requires replacement, install with RTV 157, Class 5A (gray). (2) Install any brackets, clips, sunvisors and oxygen mask holders that were removed. (3) Install magnetic compass with screws. (4) Install aft openable side window. (5) Remove protective coating from windows and windshield. CESSNA AIRCRAFT COMPANY MODEL 750 INTERIOR MAINTENANCE MANUAL AND ILLUSTRATED PARTS CATALOG Page 2 25-10-09 Original Issue COCKPIT WINDOW TRIM - MAINTENANCE C. Openable Window Trim Replacement (1) Remove screws securing openable window trim. Retain screws for reinstallation. Remove and discard existing openable window trim. (2) Position new aft openable window trim on window frame and drill two number 27 (0.144" diameter) holes through new aft openable window trim to match existing holes in support brackets and secure trim with existing screws. (3) Position new forward openable window trim on window frame. Ensure that trim is flat against window frame. (4) Trim ends of new forward openable window trim to match joggled ends of new aft openable window trim.Solvent bond trim pieces together. (5) Drill three number 27 (0.144" diameter) holes through new forward openable window trim to match existing holes in support brackets and secure trim with existing screws. Page 1 25-10-10 Original Issue CESSNA AIRCRAFT COMPANY MODEL 750 INTERIOR MAINTENANCE MANUAL AND ILLUSTRATED PARTS CATALOG 12 2 3 4 27 13 29 8 11 10 1 24 14 15 17 2 19 20 21 22 18 13 16 26 25 15 23 3 29 27 6 30 28 5 9 7 31 31 CESSNA AIRCRAFT COMPANY MODEL 750 INTERIOR MAINTENANCE MANUAL AND ILLUSTRATED PARTS CATALOG Page 2 25-10-10 Original Issue No. Part Number Description Vendor NOTE: Parts not available as complete installations - 6719149-6 COCKPIT WINDOW TRIM INSTL - 4611320-1 COCKPIT TRIM BRACKET INSTL 1 MS35206-228 SCREW (17 ea) - NAS1329A06-75 RIVNUT (17 ea) 2 4611045-14 EDGE TRIM 3 4611045-18 EDGE TRIM 4 4611067-9 WINDOW TRIM, CENTER - 5119405-11 COMPASS CARD - 5119405-12 CARD COVER - MS24622-8 SCREW 5 6719121-21 LH WINDOW TRIM 6 6719121-22 RH WINDOW TRIM 7 4611093-31 LH AFT TRIM 8 4611093-32 RH AFT TRIM 9 6719123-5 FWD, LH OPENABLE WINDOW TRIM 10 6719123-6 FWD, RH OPENABLE WINDOW TRIM 11 6219023-26 LH OPENABLE WINDOW TRIM 12 6219023-27 RH OPENABLE WINDOW TRIM 13 6719123-17 AFT, LH OPENABLE WINDOW TRIM 14 6719123-18 AFT, RH OPENABLE WINDOW TRIM 15 4611320-4 BRACKET ASSY - MS27039-108 SCREW 16 4611320-4 BRACKET ASSY - MS27039-0808 SCREW 17 4611025-7 BRACKET ASSY - MS27039-0810 SCREW 18 4611025-11 BRACKET ASSY - 4611025-10 BRACKET ASSY - MS27039-0810 SCREW 19 4611025-15 BRACKET 20 4611025-20 BRACKET 21 4611025-21 BRACKET 22 4611025-18 BRACKET 23 4611025-9 BRACKET - MS27039-0810 SCREW 24 4611320-6 BRACKET - MS27039-0808 SCREW - S1477-08 NUT 25 4611025-13 BRACKET 26 4611025-19 BRACKET 27 4611045-27 EDGE TRIM 28 4611120-12 TRIM STRIP - CM3657-2 SCREW (40 ea) 29 4611045-23 EDGE TRIM - 6219238-29 DUCT SEAL 30 4611320-7 BRACKET ASSY 31 4611287-1 SMOKE GOGGLE INSTL - MS35206-214 SCREW - S2080-1 HOOK - 4611287-2 SMOKE GOGGLE ASSY - 4611287-5 PLATE ASSY CESSNA AIRCRAFT COMPANY MODEL 750 INTERIOR MAINTENANCE MANUAL AND ILLUSTRATED PARTS CATALOG Page 1 25-10-11 Original Issue Blank Page CESSNA AIRCRAFT COMPANY MODEL 750 INTERIOR MAINTENANCE MANUAL AND ILLUSTRATED PARTS CATALOG Page 2 25-10-11 Original Issue COCKPIT OVERHEAD - MAINTENANCE 1 Description A. The overhead is located along the top of the flight compartment. It contains cutouts and inserts for air outlets, Wemacs, maplights, floodlights, speakers and a warning horn. 2 Cockpit Overhead Removal / Installation A. Remove Cockpit Overhead Assembly (1) Disengage COCKPIT FLOOD and MAP LIGHTS circuit breakers. (2) Remove window and windshield trim to gain access to screws around headliner. (Refer to section 25- 10-09) (3) Remove Wemacs from overhead with a Wemac tool. (4) Remove screws around edge of overhead and lower overhead assembly. (5) Identify, tag, and disconnect wiring for lights, speakers, and warning horn. (6) Remove overhead assembly from flight compartment. NOTE : Do not disturb the air ducts. Misalignment could occur. B. Install Cockpit Overhead Assembly (1) Position overhead assembly and connect wiring for lights, speakers, and warning horn. (2) Align overhead assembly with Wemacs openings and secure with screws. (3) Install Wemacs with a Wemac tool. (4) Install trim around windows and windshields. (Refer to section 25-10-09) (5) Engage COCKPIT FLOOD and MAP LIGHTS circuit breakers. (6) Operational test floodlights, map lights, speakers, and warning horn. Page 1 25-10-12 Original Issue CESSNA AIRCRAFT COMPANY MODEL 750 INTERIOR MAINTENANCE MANUAL AND ILLUSTRATED PARTS CATALOG 12 2 3 4 5 11 7 8 9 10 6 1 CESSNA AIRCRAFT COMPANY MODEL 750 INTERIOR MAINTENANCE MANUAL AND ILLUSTRATED PARTS CATALOG Page 2 25-10-12 Original Issue No. Part Number Description Vendor NOTE: Parts not available as complete installations - 4611335-6 COCKPIT OVERHEAD INSTL 1 4611334-3 COCKPIT OVERHEAD UPHOLSTERY ASSY - 4611334-2 COCKPIT OVERHEAD PANEL 2 4611094-45 LH LIGHT SHROUD - MS35206-231 SCREW 3 M85528/2-10A MOUNTING FLANGE - MS35206-215 SCREW 4 4611094-46 RH LIGHT SHROUD - MS35206-231 SCREW 5 4611048-4 SPEAKER MOD- COPILOT - MS24694S8 SCREW - 4611048-5 SPEAKER MOD- PILOT - MS24694S8 SCREW - 4611094-12 SPEAKER GRILL - 4611094-13 SPEAKER BEZEL - CM3559-6-12LB SCREW 6 4611335-7 BRACKET ASSY - 4611335-15 PLATE ASSY - MS27039-1-10 SCREW - NAS1149F0332P WASHER 7 2585 CHART LIGHT 83564 - MS24693S50 SCREW - 4611094-50 LIGHT SHROUD 8 1205-2 AIR VALVE 83564 - 4811884-4 WEMAC ISOLATOR 9 RSLM5CCM/28 5.6” COCKPIT MONITOR RPDE - 4611336-2 MONITOR SHROUD UPHOLSTERY ASSY - MS24694S49 SCREW 10 4611335-9 BRACKET ASSY - 4611335-15 PLATE ASSY - MS27039-1-10 SCREW - NAS1149F0332P WASHER 11 4611335-8 BRACKET ASSY - 4611335-15 PLATE ASSY - MS27039-1-10 SCREW - NAS1149F0332P WASHER 12 4611335-10 BRACKET ASSY - 4611335-15 PLATE ASSY - MS27039-1-10 SCREW - NAS1149F0332P WASHER CESSNA AIRCRAFT COMPANY MODEL 750 INTERIOR MAINTENANCE MANUAL AND ILLUSTRATED PARTS CATALOG Page 1 25-10-13 Original Issue Blank Page CESSNA AIRCRAFT COMPANY MODEL 750 INTERIOR MAINTENANCE MANUAL AND ILLUSTRATED PARTS CATALOG Page 2 25-10-13 Original Issue HANDSET - MAINTENANCE 1 General A. This section covers the maintenance of the cockpit handset. 2 Handset Removal / Installation A. Remove Handset (1) With handset removed from cradle, remove two screws securing handset assembly to divider. (2) With phone assembly removed from divider, remove spacer blocks from back of phone. (3) Remove phone assembly from bezel box by unsnapping the upper end and sliding the phone up and out of the bezel box. B. Install Handset (1) Install phone assembly in the bezel box by sliding the lower end (with cord reel) in and down into bezel and snap upper end in place. (2) Align two spacer blocks with the back of phone assembly. (3) Secure phone assembly to divider with screws and replace handset in cradle. Page 1 25-10-14 Original Issue CESSNA AIRCRAFT COMPANY MODEL 750 INTERIOR MAINTENANCE MANUAL AND ILLUSTRATED PARTS CATALOG 2 3 4 5 1 CESSNA AIRCRAFT COMPANY MODEL 750 INTERIOR MAINTENANCE MANUAL AND ILLUSTRATED PARTS CATALOG Page 2 25-10-14 Original Issue No. Part Number Description Vendor NOTE: Parts not available as complete installations - 4611333-1 HANDSET INSTL 1 725729-805WH COCKPIT HANDSET 37695 2 MS35206-330 SCREW 3 4611333-2 BEZEL BOX 4 4611333-3 SPACER BLOCK 5 4611333-4 SPACER BLOCK CESSNA AIRCRAFT COMPANY MODEL 750 INTERIOR MAINTENANCE MANUAL AND ILLUSTRATED PARTS CATALOG Page 1 25-10-15 Original Issue SUNVISOR - MAINTENANCE NOTE : Planes may be equipped with either a monorail sunvisor assembly or telescoping rod sunvisors.This section will cover the maintenance on both. Be sure to refer to the section that corresponds to the proper equipment. MONORAIL SUNVISOR 1 General A. This section covers the monorail sunvisor located in the flight compartment. 2 Monorail Sunvisor Removal / Installation A. Remove Monorail Sunvisor (1) Remove the two screws that secure the cockpit assist handle. (Refer to section 25-10-17) (2) Remove 8 screws (2 per bracket), that secure the monorail sunvisor to the aircraft structure. (3) Remove monorail sunvisor from airplane. B. Install Monorail Sunvisor (1) Align and install monorail sunvisor with 8 screws (2 per bracket), but do not tighten. (2) Install assist handle with forward screw through the center bracket of monorail sunvisor. (3) Tighten all remaining screws to secure the sunvisor to structure. TELESCOPING ROD SUNVISORS 1 General A. The telescoping sunvisor assembly consists of a telescoping rod assembly and shade assembly. The sunvisor utilizes pivot-type installation hardware at the window frame and on the shade assembly. 2 Sunvisor Removal / Installation A. Remove Sunvisor (1) Remove tension adjustment screws from window frame. (2) Remove sunvisor assembly. B. Install Sunvisor (1) Position sunvisor assembly to window frame and secure with tension adjustment screws. (2) If sunvisor assembly rotates too freely in socket plate tighten tension adjustment screws. NOTE : If shade assembly telescopes on rod assembly too freely, tighten tension adjustment nut. CESSNA AIRCRAFT COMPANY MODEL 750 INTERIOR MAINTENANCE MANUAL AND ILLUSTRATED PARTS CATALOG Page 2 25-10-15 Original Issue SUNVISOR - MAINTENANCE TELESCOPING SUNVISOR (CONT.) 3 Nylon Insert Replacement A. Replace Nylon Insert in Window Frame (1) Remove sunvisor assembly. (2) Remove trim as necessary to gain access to plate and socket. (Refer to section 25-10-09) (3) Remove screws securing top plate to socket plate. Replace nylon insert. (4) Install top plate to socket plate and secure with screws. (5) Install trim. (Refer to section 25-10-09) (6) Install sunvisor assembly. B. Replace Nylon Insert in Shade Assembly (1) Remove two tension adjustment screws securing rod assembly to shade assembly. Replace nylon inserts. (2) Position shade assembly to rod assembly and secure with two tension adjustment screws. (3) If shade assembly rotates too freely on rod assembly tighten tension adjustment screws. 4 Storage Clip Removal / Installation A. Remove Storage Clip (1) Remove window trim as necessary to gain access to storage clip. (Refer to section 25-10-09) (2) Remove screws securing storage clip and remove clip from structure. B. Install Storage Clip (1) Position storage clip to structure and secure with screws. (2) Install window trim. (Refer to section 25-10-09) Page 1 25-10-16 Original Issue CESSNA AIRCRAFT COMPANY MODEL 750 INTERIOR MAINTENANCE MANUAL AND ILLUSTRATED PARTS CATALOG 2 3 4 5 1 6 DETAIL A A CESSNA AIRCRAFT COMPANY MODEL 750 INTERIOR MAINTENANCE MANUAL AND ILLUSTRATED PARTS CATALOG Page 2 25-10-16 Original Issue No. Part Number Description Vendor NOTE: Parts not available as complete installations - 4611384-1 MONORAIL SUNVISOR INSTL 1 MS27039C1-17 SCREW (existing assist handle) 2 - - - TRACK 3 AN526C10R12 SCREW 4 R750-300-1 SUNVISOR KIT RPDE 5 AN526C10R12 SCREW 6 - - - COCKPIT TRIM CESSNA AIRCRAFT COMPANY MODEL 750 INTERIOR MAINTENANCE MANUAL AND ILLUSTRATED PARTS CATALOG Page 1 25-10-17 Original Issue Blank Page CESSNA AIRCRAFT COMPANY MODEL 750 INTERIOR MAINTENANCE MANUAL AND ILLUSTRATED PARTS CATALOG Page 2 25-10-17 Original Issue COCKPIT ASSIST HANDLE - MAINTENANCE 1 General A. There is an assist handle provided to ease entry/exit from the crew seats. 2 Cockpit Assist Handle Removal / Installation A. Remove Cockpit Assist Handle (1) Remove screws securing assist handle. Be sure to retain the screws and spacers. (2) Remove assist handle and plate assembly. B. Install Cockpit Assist Handle (1) Ensure alignment of assist handle, plate assembly, and spacers. (2) Secure assist handle, plate assembly, and spacers with screws. Page 1 25-10-18 Original Issue CESSNA AIRCRAFT COMPANY MODEL 750 INTERIOR MAINTENANCE MANUAL AND ILLUSTRATED PARTS CATALOG 2 3 4 5 7 6 1 CESSNA AIRCRAFT COMPANY MODEL 750 INTERIOR MAINTENANCE MANUAL AND ILLUSTRATED PARTS CATALOG Page 2 25-10-18 Original Issue No. Part Number Description Vendor NOTE: Parts not available as complete installations - 4611223-1 ASSIST HANDLE INSTL 1 MS27039C1-13 SCREW 2 MS27039C1-17 SCREW 3 4611208-1 COCKPIT ASSIST HANDLE 4 4611223-2 PLATE ASSY 5 NAS43DD3-10 SPACER 6 NAS43DD3-29 SPACER 7 MS21069L3K NUTPLATE CESSNA AIRCRAFT COMPANY MODEL 750 INTERIOR MAINTENANCE MANUAL AND ILLUSTRATED PARTS CATALOG Page 1 25-10-19 Original Issue Blank Page CESSNA AIRCRAFT COMPANY MODEL 750 INTERIOR MAINTENANCE MANUAL AND ILLUSTRATED PARTS CATALOG Page 2 25-10-19 Original Issue SONALERT SIGNAL - MAINTENANCE 1 General A. This section covers the Sonalert Signal located in the cockpit overhead assembly, refer to section 25- 10-11. 2 Sonalert Signal Removal / Installation A. Remove Sonalert Signal (1) Remove cockpit overhead. (Refer to section 25-10-11) (2) Remove three screws that secure cover plate to overhead, and remove cover plate and grill. (3) On the upper side of the overhead assembly, the sonalert signal unit can be removed. (4) Remove cowling from nutplate assembly by pulling the forward end down and out. (5) Remove nut securing Sonalert signal to nutplate assembly, and remove signal. B. Install Sonalert Signal (1) Secure Sonalert signal to nutplate assembly with nut. (2) Align cowling to nutplate assembly by first inserting the aft end and rocking the forward end up and back into place. (3) Align the Sonalert signal unit to upper side of overhead assembly. (4) With grill and cover plate aligned on lower side of overhead, and signal unit aligned on upper side of overhead, secure with three screws. (5) Install cockpit overhead. (Refer to section 25-10-11) Page 1 25-10-20 Original Issue CESSNA AIRCRAFT COMPANY MODEL 750 INTERIOR MAINTENANCE MANUAL AND ILLUSTRATED PARTS CATALOG 2 3 4 5 6 1 CESSNA AIRCRAFT COMPANY MODEL 750 INTERIOR MAINTENANCE MANUAL AND ILLUSTRATED PARTS CATALOG Page 2 25-10-20 Original Issue No. Part Number Description Vendor NOTE: Parts not available as complete installations - 4611107-1 SONALERT INSTL 1 SC616CP SONALERT SIGNAL 90201 2 4611107-4 NUTPLATE ASSY 3 4611107-6 COWLING 4 4611107-3 FRONT GRILL COVER 5 4611107-2 FRONT COVER PLATE 6 MS24693S31 SCREW CESSNA AIRCRAFT COMPANY MODEL 750 INTERIOR MAINTENANCE MANUAL AND ILLUSTRATED PARTS CATALOG Page 1 25-11-01 Original Issue Blank Page CESSNA AIRCRAFT COMPANY MODEL 750 INTERIOR MAINTENANCE MANUAL AND ILLUSTRATED PARTS CATALOG Page 2 25-11-01 Original Issue FLASHLIGHT CHARGER INSTALLATION - MAINTENANCE 1 General A. This section covers the Flashlight Charger located on the left hand Jepp case in the cockpit. 2 Flashlight Charger Removal / Installation A. Remove Flashlight Charger (1) Remove flashlight from charger. (2) Remove screws attaching the charger to the Jepp case. (3) Disconnect and tag wiring for installation. B. Install Flashlight Charger (1) Locate and connect wiring to charger, secure charger to Jepp case with screws. (2) Install flashlight by snapping it into the charger. Page 1 25-11-02 Original Issue CESSNA AIRCRAFT COMPANY MODEL 750 INTERIOR MAINTENANCE MANUAL AND ILLUSTRATED PARTS CATALOG 2 3 4 5 1 6 CESSNA AIRCRAFT COMPANY MODEL 750 INTERIOR MAINTENANCE MANUAL AND ILLUSTRATED PARTS CATALOG Page 2 25-11-02 Original Issue No. Part Number Description Vendor NOTE: Parts not available as complete installations - 4611364-3, -4 LH, RH FLASHLIGHT W/ CHARGER INSTL 1 - - - FLASHLIGHT 2 MS24694-S19 SCREW 3 4648004-1 FLASHLIGHT CHARGER MOD 4 MS24694-S13 SCREW 5 - - - NAVIGATIONAL CHART CASE 6 NAS1833-3-250 INSERT CESSNA AIRCRAFT COMPANY MODEL 750 INTERIOR MAINTENANCE MANUAL AND ILLUSTRATED PARTS CATALOG CONTENT Original Issue Subject Forward Maintenance Parts Passenger Compartment FWD Divider .................................................................................................... 25-20-01 ................ 25-20-02 Floorboards ..................................................................................................... 25-20-03 ................ 25-20-04 Carpet ............................................................................................................. 25-20-05 ................ 25-20-06 Aisle Lights ...................................................................................................... 25-20-07 ................ 25-20-08 Fixed Step ....................................................................................................... 25-20-09 ................ 25-20-10 Entry Door Trim ............................................................................................... 25-20-11 ................ 25-20-12 Proximity Sign ................................................................................................. 25-20-13 ................ 25-20-14 Sideledge ........................................................................................................ 25-20-15 ................ 25-20-16 Sidewall ........................................................................................................... 25-20-17 ................ 25-20-18 Sidewall Switches ............................................................................................ 25-20-19 ................ 25-20-20 Passenger Seats ............................................................................................. 25-20-21 ................ 25-20-22 PSU Installation ............................................................................................... 25-20-23 ................ 25-20-24 Indirect Lighting ............................................................................................... 25-20-25 ................ 25-20-26 Window Reveal ................................................................................................ 25-20-27 ................ 25-20-28 Backsplash ...................................................................................................... 25-20-29 ................ 25-20-30 Electrical Window Shade Installation ............................................................... 25-20-31 ................ 25-20-32 Aft Dividers ...................................................................................................... 25-20-33 ................ 25-20-34 Forward Closet ................................................................................................ 25-20-35 ................ 25-20-36 Audio/ Video Operation Procedures ................................................................................................ 25-20-38 Speaker Assembly Installation ........................................................................ 25-20-39 ................ 25-20-40 Woofer Module Assembly Installation .............................................................. 25-20-41 ................ 25-20-42 Cabin Data Bus Repeater ............................................................................... 25-21-01 ................ 25-21-02 Dropped Aisle Storage Box ............................................................................. 25-21-03 ................ 25-21-04 Seat Shroud Mod ............................................................................................ 25-21-05 ................ 25-21-06 Smart Screen Control Box Installation ............................................................ 25-21-07 ................ 25-21-08 CESSNA AIRCRAFT COMPANY MODEL 750 INTERIOR MAINTENANCE MANUAL AND ILLUSTRATED PARTS CATALOG Page 2 25-20-01 Original Issue Blank Page CESSNA AIRCRAFT COMPANY MODEL 750 INTERIOR MAINTENANCE MANUAL AND ILLUSTRATED PARTS CATALOG Page 3 25-20-01 Original Issue FORWARD DIVIDER - MAINTENANCE 1 General A. The fwd partition is fastened to the front of the fwd cabinetry. With the fwd panel of the cabinet making up the aft panel of the partition. 2 Removal/Installation A. Remove fwd partition (1) Pull carpet back to expose screws securing fwd panel to brackets. (2) Remove screws securing fwd panel to brackets. (3) Tag and remove fwd partition panel. (4) Locate and remove screws securing aft partition panel to fwd cabinetry, this includes screws acces sible inside of cabinetry. (5) Remove screws securing aft partition panel to brackets, tag and remove partition panel. B. Install fwd partition (1) Locate aft partition panel. (2) Install screws securing aft partition panel to fwd cabinetry, including screws accessible inside of cabinetry. (3) Install screws securing aft partition panel cabinetry to brackets. (4) Locate fwd partition panel. (5) Install screws securing fwd partition panel to brackets. 3 Operations and inspections A. Inspect (1) Inspect fwd partitions for nicks, cracks, scratches. (2) Inspect for security of installation. Page 1 25-20-02 Original Issue CESSNA AIRCRAFT COMPANY MODEL 750 INTERIOR MAINTENANCE MANUAL AND ILLUSTRATED PARTS CATALOG 2 3 4 5 11 7 8 10 6 1 9 CESSNA AIRCRAFT COMPANY MODEL 750 INTERIOR MAINTENANCE MANUAL AND ILLUSTRATED PARTS CATALOG Page 2 25-20-02 Original Issue No. Part Number Description Vendor - 4699142-2 RH POCKET DOOR INSTL - 4699142-1 LH POCKET DOOR INSTL 1 4699142-3 LH DOOR HARDWARE INSTL - - - - Hardware to be installed on fwd side of closet panel. - - - - Refer to closet for instl. 2 4699142-4 RH DOOR HARDWARE ASSY - - - - Hardware to be installed on fwd side of galley panel. - - - - Refer to refreshment center for instl. 3 4699142-6 RH FWD PANEL ASSY - #10 SCREW (4 ea) - #10 INSERT 4 4699142-5 LH FWD PANEL ASSY - #10 SCREW (4 ea) - #10 INSERT 5 4699016-6 RH DOOR ASSY - NAS1149FN832P WASHER (4 ea) - MS35206-250 SCREW (4 ea) - S-1091-10-16 KNURLED INSERT 4W953 - S1091-8-8 INSERT 4W953 - 12366-2 DOOR ASSY - RH 4W953 6 4699016-5 LH DOOR ASSY - NAS1149FN832P WASHER (4 ea) - MS35206-250 SCREW (4 ea) - S-1091-10-16 KNURLED INSERT 4W953 - S1091-8-8 INSERT 4W953 - 12366-1 DOOR ASSY - LH 4W953 7 12350-19 LH POP-UP PANEL ASSY 4W953 - 12350-20 RH POP-UP PANEL ASSY 4W953 8 12350-25 LH POP-UP TRACK 4W953 - 12350-26 RH POP-UP TRACK 4W953 - #6 THREADED INSERT - #6 SCREW 9 12469-1 LH PUSH BUTTON LATCH 4W953 - 12469-2 RH PUSH BUTTON LATCH 4W953 10 12363-1-11 SLIDE ASSY 4W953 - MS25083-5BB4 JUMPER ASSY - #8 SCREW - #8 INSERT NOTE: Parts not available as complete installations CESSNA AIRCRAFT COMPANY MODEL 750 INTERIOR MAINTENANCE MANUAL AND ILLUSTRATED PARTS CATALOG Page 1 25-20-03 Original Issue Blank Page CESSNA AIRCRAFT COMPANY MODEL 750 INTERIOR MAINTENANCE MANUAL AND ILLUSTRATED PARTS CATALOG Page 2 25-20-03 Original Issue FLOORBOARDS - MAINTENANCE 1 General A. This section covers the cabin floorboards, which a made up of several panel assemblies. They are located between the forward dividers and the aft pressurized bulkhead. (1) If the dropped aisle floorboard panel is to be removed during maintenance, a .75 thick panel of plywood padded on the lower side must be installed to prevent damage to the pressure vessel. The panel must rest on the angles on both sides the dropped aisle. (2) Walking on the pressure vessel is never permitted. (3) If the cabin door floorboard panel is removed a wire bundle will be exposed.cover with a .75 thick plywood to prevent wire bundle damage. (4) The temporary panel(s) must remain in place except for required maintenance access to that area of the plane. (5) Walking on the bulkhead on the forward end of the footwell located in the aft portion of the cabin is never permitted with the floorboard panel removed. 2 Removal/Installation A. Remove floorboard panel. (1) Remove screws securing floorboard panel to structure. (2) Remove floorboard panel. (3) Identify and tag floorboard for reinstallation. B. Install floorboard panel. (1) Locate proper tagged floorboard panel. (2) Install floorboard panel. (3) Install screws securing floorboard panel to structure. 3 Operations and inspections A. Inspect floorboards. (1) Inspect floorboard(s) for nicks, cracks, proper fit, and security of installation. Page 1 25-20-04 Original Issue CESSNA AIRCRAFT COMPANY MODEL 750 INTERIOR MAINTENANCE MANUAL AND ILLUSTRATED PARTS CATALOG 12 2 3 4 5 11 7 8 9 10 6 1 14 15 17 18 13 16 CESSNA AIRCRAFT COMPANY MODEL 750 INTERIOR MAINTENANCE MANUAL AND ILLUSTRATED PARTS CATALOG Page 2 25-20-04 Original Issue No. Part Number Description Vendor NOTE: Parts not available as complete installations - 4611127-1 CABIN FLOORBOARDS INSTL - 6719044-1 AFT CABIN FLOORBOARDS 1 MS27039-1-07 SCREW - S1477-3 NUT 2 4611127-9 PANEL ASSY 3 4611127-11 PANEL ASSY 4 4611127-10 PANEL ASSY 5 4611127-12 PANEL ASSY 6 4611127-9 PANEL ASSY 7 4611127-11 PANEL ASSY 8 4611127-10 PANEL ASSY 9 4611127-13 PANEL ASSY 10 6711136-7 PANEL ASSY 11 6711136-2 PANEL ASSY 12 6711130-4 PANEL ASSY 13 6711130-5 PANEL 14 6711130-6 PANEL 15 6719043-14 FLOORBOARD ASSY, RH 16 6719043-3 FLOORBOARD ASSY, CENTER 17 6719043-13 FLOORBOARD ASSY, LH AFT 18 6719043-15 FLOORBOARD ASSY, LH CESSNA AIRCRAFT COMPANY MODEL 750 INTERIOR MAINTENANCE MANUAL AND ILLUSTRATED PARTS CATALOG Page 1 25-20-05 Original Issue Blank Page CESSNA AIRCRAFT COMPANY MODEL 750 INTERIOR MAINTENANCE MANUAL AND ILLUSTRATED PARTS CATALOG Page 2 25-20-05 Original Issue CARPET - MAINTENANCE 1 General A. This section covers information on removal and installation of the various sections of carpet in thepassen ger compartment. The carpeting is installed along the floorboards and lower level air ducts. B. For carpet cleaning instructions refer to (25-00-02 Interior Care), (25-00-03 Cleaning Solutions). C. The carpet sections are primarily held in place with hook and pile fasteners. The mating hook and pile fastener strips are solvent bonded to the floorboards and sewed into the carpet. 2 Removal/Installation A. Remove Carpet (1) Remove seats. (2) Remove screws from bezel-lens assemblies. (3) Remove carpet by pulling up on carpet section until the hook and pile fasteners separate. NOTE: If the hook fastener has separated from the floorboards, it may be necessary to install new hook fastener. Use 76 high tack adhesive, manufactured by 3M, is recommended to install new hook fastener. EC1300l adhesive may also be used. B. Install Carpet (1) Position carpet sections around bezel-lens assemblies and secure with screws to floorboard panel. (2) Position remaining carpet sections and secure with hook and pile fasteners. 3 Operations and inspections A. Inspect carpet (1) Inspect carpet for snags, runs, proper fit, and security of installation. Page 1 25-20-06 Original Issue CESSNA AIRCRAFT COMPANY MODEL 750 INTERIOR MAINTENANCE MANUAL AND ILLUSTRATED PARTS CATALOG 12 2 3 4 5 11 7 8 9 10 6 1 14 15 17 13 16 CESSNA AIRCRAFT COMPANY MODEL 750 INTERIOR MAINTENANCE MANUAL AND ILLUSTRATED PARTS CATALOG Page 2 25-20-06 Original Issue No. Part Number Description Vendor NOTE: Parts not available as complete installations - 4611062-1 COCKPIT/CABIN CARPET INSTL 1 4611062-14 CARPET ASSY - RH,FWD,OUTBD 2 4611062-2 CARPET ASSY - FWD,AISLE 3 4611062-13 CARPET ASSY - LH,FWD,OUTBD 4 4611062-11 SCUFFPLATE ASSY - LH 5 4919040-40 SCUFFPLATE ASSY - RH 6 4919040-39 SCUFFPLATE ASSY - LH 7 4611062-12 SCUFFPLATE ASSY - RH 8 4611062-10 CARPET ASSY - AFT 9 4611062-17 CARPET ASSY - LH, SEAT 10 4611062-5 CARPET ASSY - LH, OUTBD 11 4611062-3 CARPET ASSY - LH, INBD 12 4611062-19 CARPET ASSY - THRESHOLD 13 4611062-7 CARPET ASSY - LH, FWD BAR 14 4611062-8 CARPET ASSY - DROPPED ASLE 15 4611062-4 CARPET ASSY - RH, INBD 16 4611062-6 CARPET ASSY - RH, OUTBD 17 4611062-18 CARPET ASSY - RH, SEAT CESSNA AIRCRAFT COMPANY MODEL 750 INTERIOR MAINTENANCE MANUAL AND ILLUSTRATED PARTS CATALOG Page 1 25-20-07 Original Issue Blank Page CESSNA AIRCRAFT COMPANY MODEL 750 INTERIOR MAINTENANCE MANUAL AND ILLUSTRATED PARTS CATALOG Page 2 25-20-07 Original Issue AISLE LIGHTS - MAINTENANCE 1 General A. The aisle lights are located on each side, just inside the entry door near the floor, and light strips on the left and right hand side running fore & aft near the floor in the footwell area. The aisle lights are hidden by the carpet installation, an initial inspection must be performed to insure security of installation and proper operation prior to installation of the carpet. 2 Removal/Installation A. Remove aisle lights (1) Disengage aisle lights circuit breaker(s) located in the left hand aft bulkhead closet under the lower left hand shelf. (2) Remove the necessary carpet to expose the support angle which includes the light strip assembly and identify for reinstallation. (3) Remove (9) screws from the support angle. (4) Gently remove support angle which includes the light strip assembly and disconnect the electrical wire. (5) Identify wire for reinstallation. (6) Remove support angle and light strip assembly & identify for reinstallation. B. Install aisle lights (1) Position support angle and light strip assembly in the location identified for reinstallation. (2) Connect electrical wire identified for reinstallation. (3) Install support angle which includes the light strip assembly being careful not to damage electrical wires. (4) Use (9) screws to attach the angle and light strip assembly to the location identified for reinstallation. (5) Engage circuit breaker(s) located in the left hand aft bulkhead closet under the lower left handshelf. (6) Initial inspection must be made prior to carpet reinstallation. (7) Install carpets identified for reinstallation. 3 Operations and Inspections A. Inspect aisle lights (1) Inspect aisle lights for proper operation and security of installation. (2) Inspect carpet for security of installation and fit. (3) Inspect all the electrical components for evidence of arcing, shorting, or overheating. Page 1 25-20-08 Original Issue CESSNA AIRCRAFT COMPANY MODEL 750 INTERIOR MAINTENANCE MANUAL AND ILLUSTRATED PARTS CATALOG A B B B DETAIL A 12 2 3 4 5 11 7 8 9 10 6 1 B DETAIL B CESSNA AIRCRAFT COMPANY MODEL 750 INTERIOR MAINTENANCE MANUAL AND ILLUSTRATED PARTS CATALOG Page 2 25-20-08 Original Issue No. Part Number Description Vendor NOTE: Parts not available as complete installations - 4611148-7 AISLE LIGHT INSTL - 4611148-3 LIGHT ASSY (LH) - 4611148-4 LIGHT ASSY (RH) 1 4611186-1 THRESHOLD LIGHT HOUSING 2 4638001-4 CABIN DOOR THRESHOLD LIGHT 3 MS24693S27 SCREW 4 4611148-5 SUPPORT ANGLE ASSY 5 4611148-6 CARPET STOP 6 - - - CARPET 7 MS35206-227 SCREW 8 4638001-9 AISLE LIGHT ASSY 9 BULB-END-TIPS CHANNEL END TIPS 0A485 10 MS35489-134 GROMMET 11 - - - CENTER AISLE PANEL 12 MS27039C0806 SCREW - MS21076L08E NUTPLATE CESSNA AIRCRAFT COMPANY MODEL 750 INTERIOR MAINTENANCE MANUAL AND ILLUSTRATED PARTS CATALOG Page 1 25-20-09 Original Issue Blank Page CESSNA AIRCRAFT COMPANY MODEL 750 INTERIOR MAINTENANCE MANUAL AND ILLUSTRATED PARTS CATALOG Page 2 25-20-09 Original Issue FIXED STEP - MAINTENANCE 1 Description A. This section covers the fixed step located with the main cabin entryway. 2 Removal/Installation (See Illustration) A. Remove Fixed door step. (1) Remove electrical power. (2) It is necessary to pull mat back to gain access to step installation screws. (Refer to Chap. 52 in the 750 Maintenance Manual) (Refer to Chap. in the 750 illustrated Parts Catalog) B. Install Fixed door step. (1) Clean area removed with solvent (Imperial). (2) Apply Adhesive to area to be reattached press firmly. NOTE: Use a medium bonding adhesive. 3 Inspection/Check A. Inspect Fixed door step. (1) Inspect Doorstep for nicks, cracks, dents and security of installation. Page 1 25-20-10 Original Issue CESSNA AIRCRAFT COMPANY MODEL 750 INTERIOR MAINTENANCE MANUAL AND ILLUSTRATED PARTS CATALOG 2 4 7 9 6 8 1 10 3 5 CESSNA AIRCRAFT COMPANY MODEL 750 INTERIOR MAINTENANCE MANUAL AND ILLUSTRATED PARTS CATALOG Page 2 25-20-10 Original Issue No. Part Number Description Vendor NOTE: Parts not available as complete installations - 4611044-2 STEP MAT AND PLACARD INSTL - 4611138-1 PLACARD, CABIN DOOR INSTL - 4611309-4 DOORSTEP TRIM INSTL 1 4611015-3 MAT, FIXED STEP 2 4616004-1 PRECATCH PLACARD 3 4611309-5 TRIM - P840299 TRANSFER TAPE 4 4611015-4 MAT, FIXED STEP 5 4611309-6 TRIM - P840299 TRANSFER TAPE 6 4699043-5 DOOR PLACARD 7 4616005-1 RELEASE HANDLE PLACARD 8 4699043-3 DOOR PLACARD - 4699043-4 ARROW 9 4611015-2 MAT, FOLDING STEP 10 6791125-22 VENT DOOR PLACARD UPPER - 6791125-25 VENT DOOR PLACARD LOWER CESSNA AIRCRAFT COMPANY MODEL 750 INTERIOR MAINTENANCE MANUAL AND ILLUSTRATED PARTS CATALOG Page 1 25-20-11 Original Issue ENTRY DOOR TRIM - MAINTENANCE 1 General A. Entry door Trim (1) There is a total of (4) entry door trim panels (2 at the floor, 1 fore and 1 aft). The entry door trim panels are fastened to the structure with screws. The forward panel contains (1) entry door lights switch, (1) proximity sign, (1) door handle stop, (1) wedjit and (1) wedjit cover. The aft panel contains (1) proximity sign, (1) wedjit and (1) wedjit cover. (2) Tip for removal: (1 each) widjit can be found in the lower area of the forward and aft entry door trim panel. Screws (2) attach the widjet cover, the entry door trim panel, and the widjit, to a bracket on the frame of the aircraft. A third different size screw is used to release the water barrier after it has been installed. It screws through the widjit cover, entry door trim panel and attaches only to the widjit. During removal, once the (2) screws have been removed the widjit may fall down behind the entry door trim panel to the floor. If this happens remember to remove and identify the widjit as soon as the forward and aft entry door trim panels have been removed. (3) Tip for installation: because the widjit rests behind the entry door trim panel it is inaccessible after the entry door trim is in place. A piece of double sided sticky tape can be used to hold the widjit in posi tion on the back side of each panel until the panel and widjit cover can be secured to the plane with (2) screws each. (4) Before the entry door trim has been refastened to the structure an initial test of the forward panel, proximity sign, entry door lights switch and aft panel proximity switch must be performed to insure security of installation and proper operation. (5) When the (4) entry door trim panels are removed from the aircraft, they must be covered with furni ture tape and masking tape. This is to prevent nicks, scratches, or other damage. This tape is to remain on the entry door trim panels after reinstallation and removed only after all maintenance is completed on the interior of the plane. 2 Removal/Installation A. Remove Entry door Trim (1) Disengage the door entry lights, and proximity signs circuit breaker located in the left hand aft bulk head closet under the lower left hand shelf. (2) Unscrew the door handle stop found near the bottom of the forward entry door trim panel and identify for reinstallation. (3) Remove and identify (2) wedjit covers held in place with (2) screws each. (4) Remove (2 each) screws, which attach the lower (2) entry door trim panels to the plane. they will be found at the bottom of the door entrance. Remove, and identify the (2) entry door trimpanels. (5) Cover with furniture tape. (6) To access the (3 each) top screws, the psu cover directly over the door must be removed. It is held in place by plastic catches on the outboard side and tabs on the inboard side. Grasp the outboard side and gently pull in a downward direction. The psu cover will then swing down and inboard and slip off the inboard tabs. (7) Remove the forward and aft entry door trim panels, which are attached with (11) screws each with (3 each) of the screws found at the top hidden by the psu cover. Disconnect the (3) wire bundles before completely removing the entry door trim panels. CESSNA AIRCRAFT COMPANY MODEL 750 INTERIOR MAINTENANCE MANUAL AND ILLUSTRATED PARTS CATALOG Page 2 25-20-11 Original Issue ENTRY DOOR TRIM - MAINTENANCE (8) On the forward entry door trim panel locate and disconnect the electrical wire bundle attached to the proximity sign, and the entry door lights switch. (9) On the aft entry door trim panel locate and disconnect the electrical wire bundle attached to the proximity sign. (10)Identify the wire bundles for reinstallation. (11)Identify the forward and aft entry door trim panels for reinstallation. B. Install Entry door Trim (1) Position the forward and aft entry door trim panels at the location identified for reinstallation. (2) On the forward entry door trim panel reattach the proximity sign, and entry door lights switch electri cal wire bundle identified for reinstallation. (3) On the aft entry door trim panel reattach the proximity sign electrical wire bundle identified for reinstal lation. (4) Place widjit on entry door trim panel with double sided tape. (5) Fit the entry door trim panel into place. Position the widjit cover on the entry door trim panel and attach with (2) screws. (6) Gently finish fitting the forward and aft entry door trim panels into the correct position and replace (11) screws on each, being careful not to damage the electrical wire bundles. Note: the forward entry door trim panel fits behind the closet edge. (7) Identify the psu cover for reinstallation and install it by hanging it on the inboard tabs. then swing it outboard and up until the psu snaps into place. (8) Identify the door handle stop and screw it into the lower forward entry door trim panel. (9) Identify the (2) lower entry door trim panels for reinstallation. They are installed at the bottom of the door entrance with (2) screws each. (10)Remove furniture tape after all maintenance is performed. (11)Engage proximity sign and entry door lights circuit breaker. 3 Operations and Inspections A. Inspect entry door trim (1) Inspect proximity sign, entry door lights switch, entry door trim, the side of the forward closet, and psu cover for nicks, scratches, and security of installation. (2) Inspect the carpet and headliner for dirt and tears in the upholstery. (3) Inspect proximity sign and entry door lights for proper operation. (4) Inspect all the electrical components for evidence of arcing, shorting, or overheating. Page 1 25-20-12 Original Issue CESSNA AIRCRAFT COMPANY MODEL 750 INTERIOR MAINTENANCE MANUAL AND ILLUSTRATED PARTS CATALOG 2 3 8 7 4 6 1 5 CESSNA AIRCRAFT COMPANY MODEL 750 INTERIOR MAINTENANCE MANUAL AND ILLUSTRATED PARTS CATALOG Page 2 25-20-12 Original Issue No. Part Number Description Vendor NOTE: Parts not available as complete installations - 4611178-1 ENTRY DOOR TRIM INSTL 1 MS35206-262 SCREW (6 ea) 2 NAS1149F0332P WASHER (6 ea) 3 4611177-4 CAB DR TRIM-FWD LOWER 4 MS24694S1 SCREW 5 4611177-5 CAB DR TRIM-AFT LOWER 6 4611177-2 CAB DR TRIM-AFT UPPER 7 4611266-1 KNOB 8 4611211-1 HANDRAIL COVER CESSNA AIRCRAFT COMPANY MODEL 750 INTERIOR MAINTENANCE MANUAL AND ILLUSTRATED PARTS CATALOG Page 1 25-20-13 Original Issue Blank Page CESSNA AIRCRAFT COMPANY MODEL 750 INTERIOR MAINTENANCE MANUAL AND ILLUSTRATED PARTS CATALOG Page 2 25-20-13 Original Issue PROXIMITY SIGN - MAINTENANCE 1 General A. The proximity signs are located inside the aircraft on either side of the entrance door. (1) Installation tip: before the door trim has been fastened to the aircraft an initial test of the proximity sign must be performed to insure security of installation and proper operation. This inspection is to be made on all the electrical components for evidence of arcing, shorting, or overheating. (2) There is (1) panel on each side of the cabin door (1 fore and 1 aft). Each door panel has (1) proximity sign. The door panels are fastened to the Stucture with screws. It is only necessary to remove the top (6) screws from each panel to gain access to the proximity signs. (3) When bending the door panel(s) inboard to gain access to the proximity sign(s) use caution, and if necessary to prevent damage, remove the remaining screws and remove the complete door panel(s). 2 Removal/Installation A. Remove proximity sign (1) Disengage proximity sign circuit breaker located in the left hand aft bulkhead closet under the lower left hand shelf. (2) It is not necessary to completely remove door panel to remove the proximity sign. Remove (6)screws and gently bend the door panel inboard. Locate and disconnect the electrical wire attached to the proximity sign. Identify the wire for reinstallation. (3) On the back of the proximity sign locate (2) each, plastic retainer clips (1 on the top and 1 on the bottom). (4) Gently push both retainer clips together which will release the proximity sign from the door panel. It can then be removed from the door panel by gently pulling the proximity sign inboard. (5) Identify and tag for installation. NOTE: The use of a screwdriver may be required to press each retainer clip together. B. Install proximity sign (1) Identify proximity sign for installation. (2) Position the proximity sign at the location identified for installation and gently press the proximity sign into door panel cutout until the (2) plastic retaining clips snap into place. (3) Gently bend the door panel inboard. Connect electrical wire identified for installation. (4) Gently allow door panel to bend back to correct position and replace (6) screws being careful not to damage the electrical wire. (5) Engage proximity sign circuit breaker. 3 Operations and inspections A. Inspect proximity sign (1) Inspect proximity sign and door panels for nicks, scratches, and security of installation. (2) Inspect proximity sign for proper operation. (3) Inspect all the electrical components for evidence of arcing, shorting, or overheating. Page 1 25-20-14 Original Issue CESSNA AIRCRAFT COMPANY MODEL 750 INTERIOR MAINTENANCE MANUAL AND ILLUSTRATED PARTS CATALOG 2 1 CESSNA AIRCRAFT COMPANY MODEL 750 INTERIOR MAINTENANCE MANUAL AND ILLUSTRATED PARTS CATALOG Page 2 25-20-14 Original Issue No. Part Number Description Vendor NOTE: Parts not available as complete installations - 4611059-1 PROXIMITY SIGN INSTL - 4611059-4 DOORPOST SWITCH INSTL 1 1322-1-16 DOOR POST SWITCH 59959 2 BR9424-031 EXIT SIGN 17023 CESSNA AIRCRAFT COMPANY MODEL 750 INTERIOR MAINTENANCE MANUAL AND ILLUSTRATED PARTS CATALOG Page 1 25-20-15 Original Issue Blank Page CESSNA AIRCRAFT COMPANY MODEL 750 INTERIOR MAINTENANCE MANUAL AND ILLUSTRATED PARTS CATALOG Page 2 25-20-15 Original Issue SIDELEDGE - MAINTENANCE 1 General A. The sideledges are located on the right and left sides of the cabin. They incorporate armrests, executive tables, escape hatch table, cupholders and monitor jacks. (1) Sidepanels must be removed in order to gain access to hardware necessary to remove table shrouds, tables and armrest. Refer to section (25-20-18). 2 Removal/Installation A. Remove sideledges (1) Remove and identify table shroud, by pulling inboard to disconnect hook and pile fastener. (2) Remove and identify table leaf to gain access to hardware connecting table to structure. (3) Remove screws attaching table to brackets, identify table. (4) Tag and disconnect electrical wiring. (5) Remove armrest and tag, remove screws attaching it to structure, remove from aircraft. B. Install sideledges (1) Identify armrest for installation, install screws attaching it to structure. (2) Identify and connect electrical wiring. (3) Identify and install table, install screws securing it to bracketry. (4) Identify and install table leaf, install attaching screws. (5) Identify and install table shroud align hook and pile fasteners, press firmly to secure. 3 Operations and inspections A. Inspect sideledges (1) Inspect sideledge, tables and armrest for nicks, scratches, and security of installation. (2) Inspect all the electrical components for evidence of arcing, shorting, or overheating. Page 1 25-20-16 Original Issue CESSNA AIRCRAFT COMPANY MODEL 750 INTERIOR MAINTENANCE MANUAL AND ILLUSTRATED PARTS CATALOG 2 5 7 8 1 8A 8A A E A 7 DETAIL A C 3 4 6 9 B D 12 11 10 DETAIL B 24 15 17 23 20 21 22 18 13 16 DETAIL C 19 14 DETAIL D 25 26 27 28 30 29 36 35 34 33 32 31 3A CESSNA AIRCRAFT COMPANY MODEL 750 INTERIOR MAINTENANCE MANUAL AND ILLUSTRATED PARTS CATALOG Page 2 25-20-16 Original Issue No. Part Number Description Vendor - - - - LH SIDELEDGE ASSY - - - - RH SIDELEDGE ASSY 1 4699418-1 LH SIDELEDGE ASSY 2
What's in the CESSNA 210N TCDS
A Type Certificate Data Sheet (TCDS) is the FAA's record of what an aircraft type was approved as. It is the source of truth for weights, seating, fuel and the rules the design was certified against. Expand any line to see what it means.
64 CESSNA 210N parts for sale
See all →

Parts listed for sale by vetted eBay sellers — confirmed on eBay at checkout.