Airplane Flight Manual
CESSNA 172C · Aircraft Flight Manual
Overview
This Airplane Flight Manual (AFM) provides essential information for the operation of the Cessna 172C. It is designed for pilots and aviation enthusiasts, detailing the aircraft's specifications, performance data, operating procedures, and safety information. The manual serves as a comprehensive guide to ensure safe and efficient flight operations, covering everything from preflight checks to emergency procedures. Pilots will find critical information regarding weight and balance, fuel requirements, and performance charts, which are vital for flight planning and execution.
- Maximum takeoff weight: 2,400 lbs (1,088 kg)
- Cruise speed: 122 knots
- Range: 640 nautical miles
- Climb rate: 730 feet per minute
- Fuel capacity: 40 gallons (151 liters)
Document
Source
Originally published by txwg.cap.gov. Sprinkle hosts a reference copy with an added summary, specifications and searchable full text.
Document details
- Type
- Aircraft Flight Manual
- Pages
- 40
- File size
- 8.8 MB
- Publisher
- txwg.cap.gov
Common. One of the most common aircraft types we track.
Most owners only have the POH. Here's the essential set for the CESSNA 172C.
CESSNA 172C for sale now


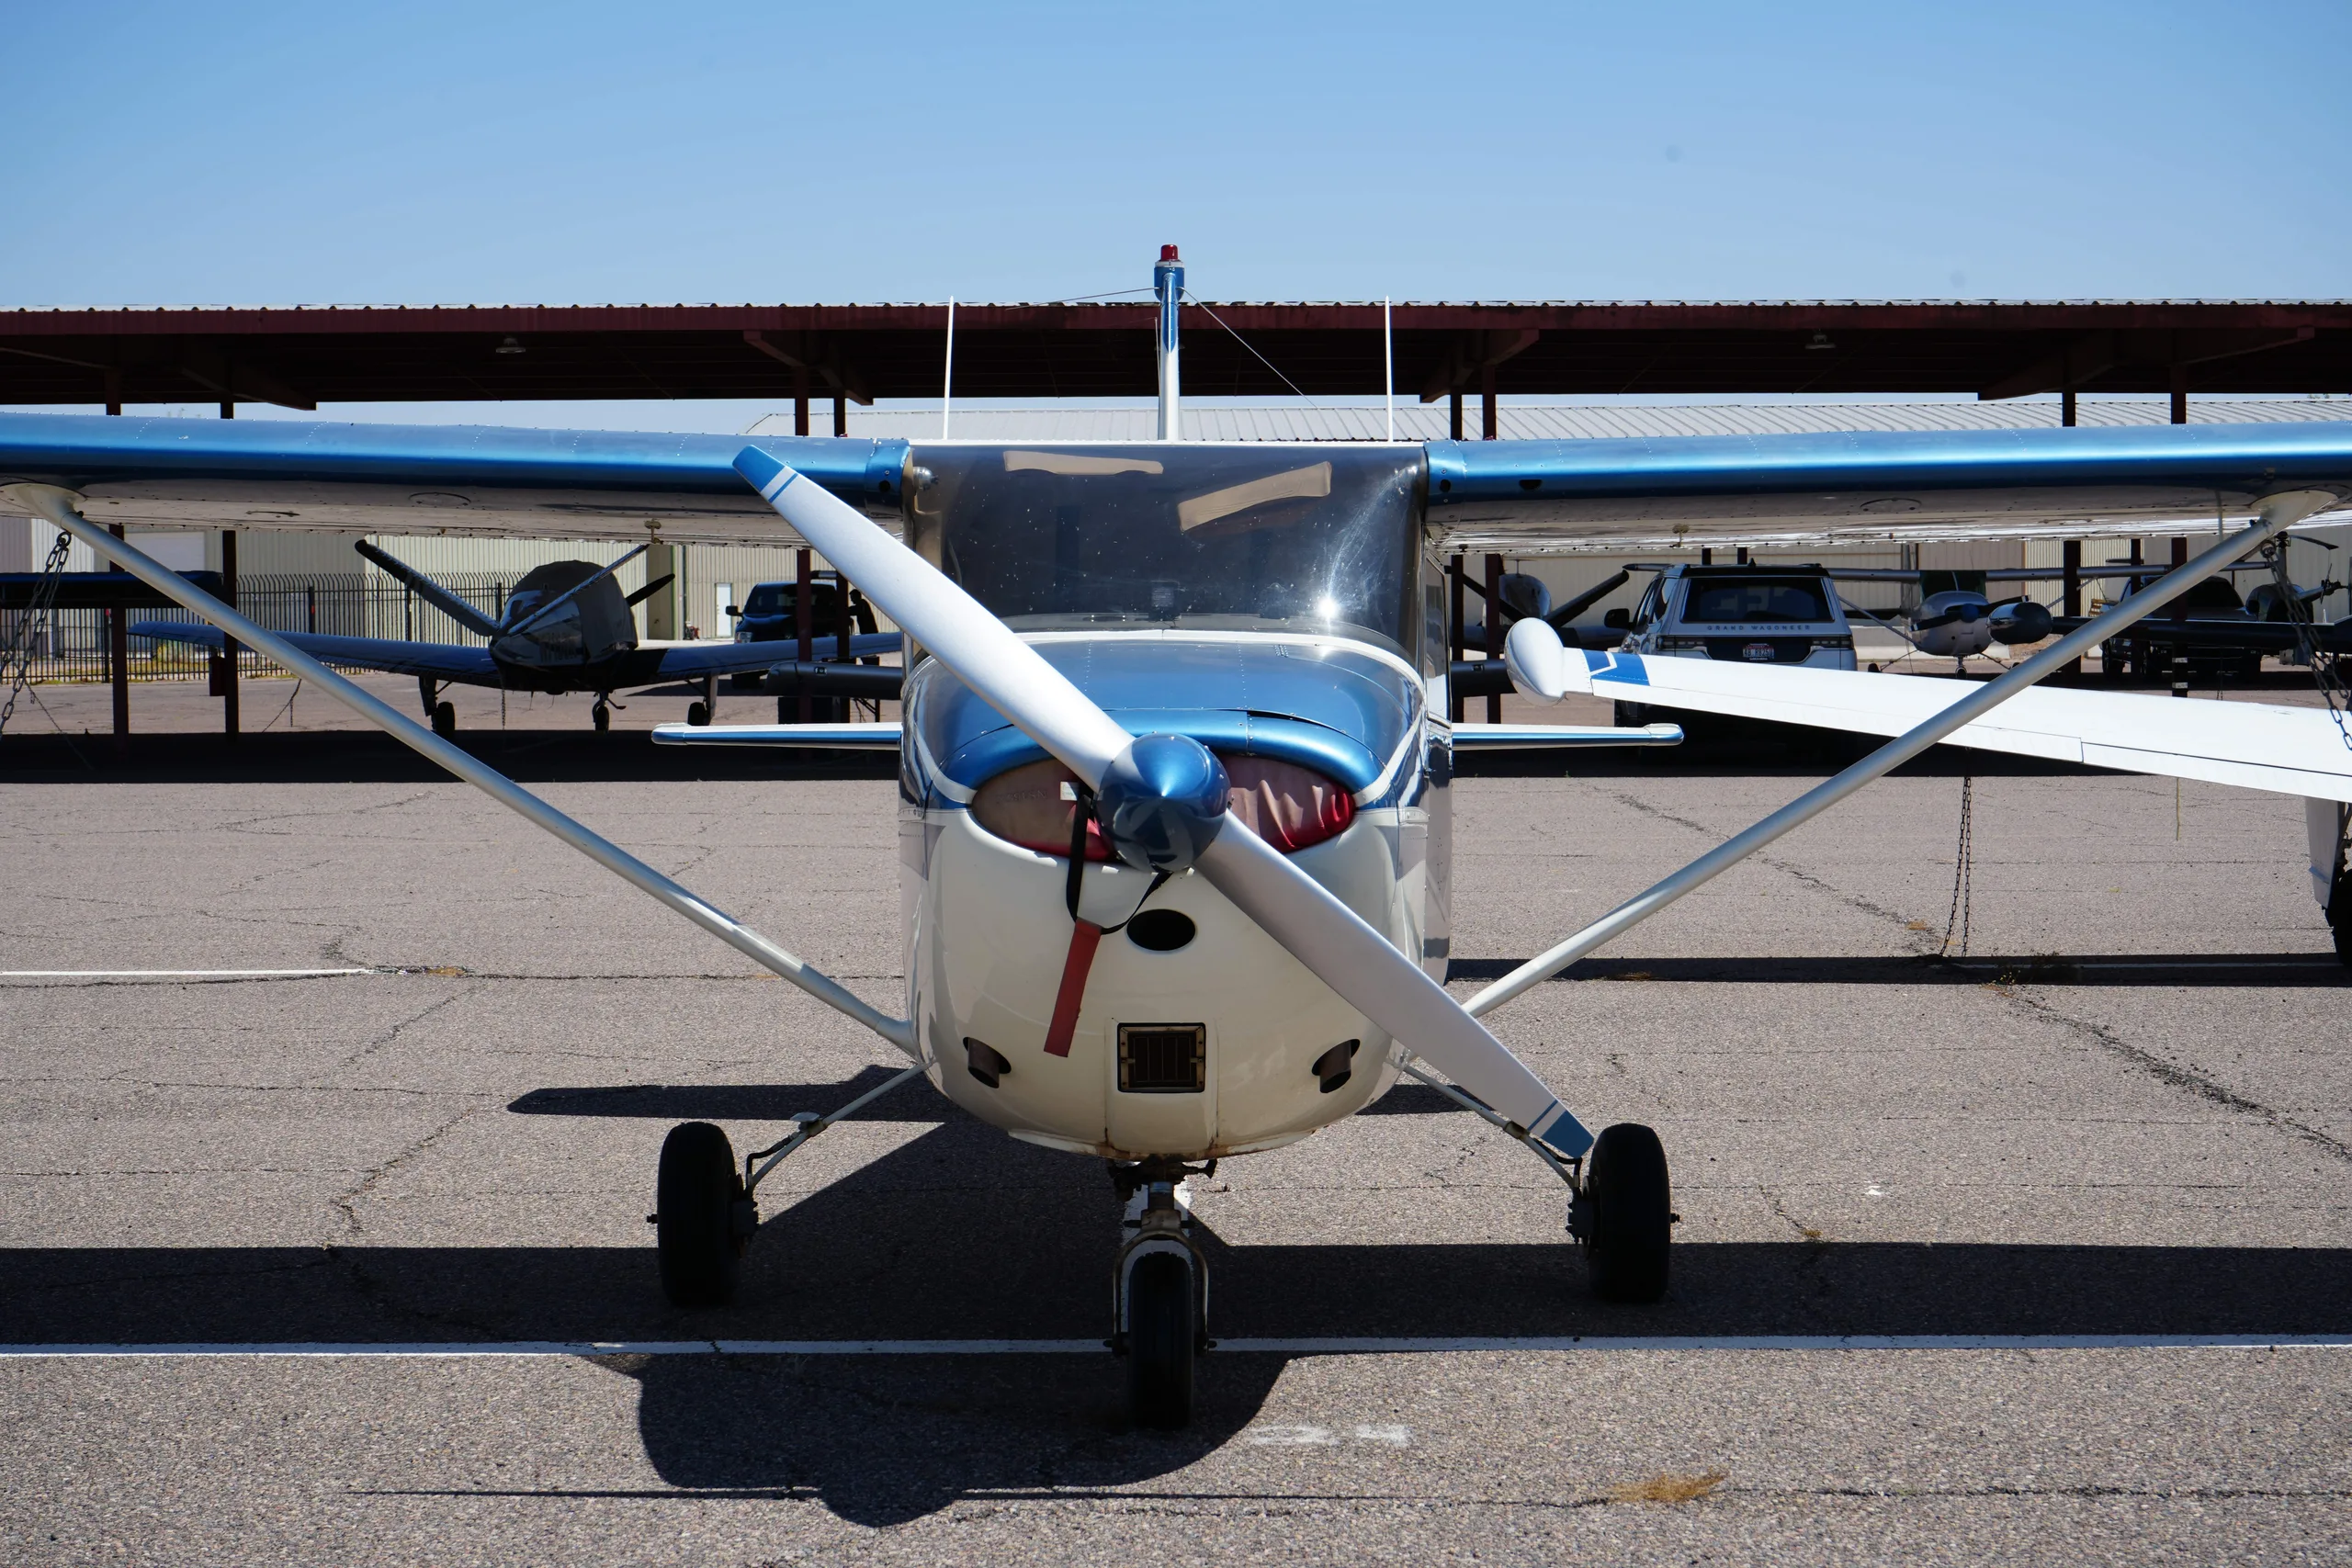
Free — save the 172C to your watchlist and track it in one place.
More CESSNA 172Cmanuals & documents
See all 29 →- Approved Model List For ETX900-TSO Battery InstallationType Certificate
- Service Bulletin SB-12Service Bulletins
- Special Inspection Policy ManualTraining Manual
- CRIMINAL OFFENDER RECORD INFORMATION (C.O.R.I.)Other Documents
- FAA Approved Airplane Flight Manual Supplement for Aerocet Model 2200 Seaplane Float Installation on Cessna Model 172 to 172P and F172D to F172P with Tricycle GearFlight Manual
- Aircraft Weight and Balance ControlPilot's Operating Handbook
- APPROVED MODEL LIST (AML) SA02594SE FOR INSTALLATION OF THE SKYVIEW HDX INSTRUMENTATION AND AUTOPILOT SYSTEMFlight Manual
- SUPPLEMENTAL TYPE CERTIFICATE - 10059692 REV. 1Supplemental Type Certificate
- HAWAII ARMY NATIONAL GUARD (HIARNG) BUILDING 621 RENOVATION AND LATRINE IMPROVEMENTSSpecifications
- Best Glide Speed and DistanceOther Documents
- SUPPLEMENTAL TYPE CERTIFICATE 10051939Supplemental Type Certificate
- Single Engine Service Bulletin SEB07-5 Revision 6, Pilot and Copilot Secondary Seat Stop InstallationService Bulletins
If you fly the CESSNA 172C, you may also be researching these.


In this document
Aircraft Specifications
The Cessna 172C features a high-wing design with a maximum takeoff weight of 2,400 lbs (1,088 kg) and a useful load of approximately 900 lbs (408 kg). The aircraft is powered by a Lycoming O-320 engine, producing 150 horsepower. The fuel capacity is 40 gallons (151 liters), with 36 gallons (136 liters) usable. The stall speed in landing configuration is 47 knots.
Performance Data
The Cessna 172C has a maximum cruise speed of 122 knots and a range of approximately 640 nautical miles. The climb rate is about 730 feet per minute at sea level. Takeoff distance over a 50-foot obstacle is approximately 1,600 feet, while landing distance over the same obstacle is about 1,500 feet.
Operating Procedures
Pilots must conduct a thorough preflight inspection, ensuring all systems are operational. The manual outlines the steps for engine start, taxiing, takeoff, and landing procedures. Emergency procedures are also detailed, including engine failure and electrical system malfunctions.
Weight and Balance
Proper weight and balance calculations are crucial for safe flight operations. The manual provides charts and formulas to determine the center of gravity and ensure the aircraft is within limits for safe operation.
Safety Information
Safety is paramount in aviation. The manual includes important safety notes, including the use of seat belts, the importance of maintaining situational awareness, and procedures for handling in-flight emergencies.
Safety notes
- Always perform a preflight inspection before flight.
- Maintain weight and balance within specified limits.
- Use seat belts during all phases of flight.
Full document text
Cessna MORE PEOPLE BUY AND FLY CESSNA AIRPLANES THAN ANY OTHER MAKE MODEL 172 AND SKYHAWK Cessna. SALES AND SERVICE "TAKE YOUR CESSNA HOME FOR SERVICE AT THE SIGN OF THE CESSNA SHIELD". 1972 WORLD'S LARGEST PRO- DUCER OF GENERAL AVIATION AIRCRAFT SINCE 1956 OWNER'S MANUAL CESSNA AIRCRAFT COMPANY WICHITA, KANSAS PERFORMANCE 132 mph 780 mi 132 mph 655 mi 5.5 hrs 118 mph 830 mi Model 172* SPECIFICATIONS Skyhawk GROSS WEIGHT SPEED: 2300 lbs 2300 lbs Top Speed at Sea Level 139 mph 140 mph Cruise, 75% Power at 9000 ft 131 mph 132 mph RANGE: Cruise, 75% Power at 9000 ft 38 Gal., No Reserve 615 mi 4.7 hrs 620 mi 4.7 hrs Cruise, 75% Power at 9000 ft 48 Gal., No Reserve Optimum Range at 10,000 ft 38 Gal., No Reserve Optimum Range at 10,000 ft 131 mph 775 mi 5.9 hrs 5.9 hrs 131 mph 640 mi 5.5 hrs 117 mph 820 mi . 48 Gal., No Reserve 7.0 hrs 7.0 hrs 117 mph 118 mph RATE OF CLIMB AT SEA LEVEL 645 fpm 645 fpm SERVICE CEILING. TAKE-OFF: 13, 100 ft 13, 100 ft Ground Run Total Distance Over 50- Foot Obstacle. LANDING: Ground Roll Total Distance Over 50- Foot Obstacle. STALL SPEED: Flaps Up, Power Off 865 ft 865 ft 1525 ft 1525 ft 520 ft 520 ft 1250 ft 1250 ft . 57 mph 57 mph Flaps Down, Power Off 49 mph 49 mph EMPTY WEIGHT (Approximate) 1265 lbs USEFUL LOAD. 1035 lbs 995 lbs BAGGAGE. 120 lbs 120 lbs WING LOADING: Pounds/Sq Foot 13.2 POWER LOADING: Pounds/HP 15.3 13.2 15.3 FUEL CAPACITY: Total 42 gal. 52 gal. 42 gal. 52 gal. 8 qts 75 inches Standard Tanks Optional Long Range Tanks OIL CAPACITY: Total PROPELLER: Fixed Pitch (Diameter) ENGINE: Lycoming Engine . . . . 150 rated HP at 2700 RPM 8 qts 0-320-E2D 1305 lbs 75 inches O-320-E2D This manual covers operation of the Model 172/Skyhawk which is certificated as Model 172L under FAA Type Certificate No. 3A12. The manual also covers operation of the Reims/Cessna Model F172 which is certificated as Model F172L under French Type Certificate No. 25 and FAA Type Certificate No. A4EU. D902-13 DUKE 5M-9-72 CONGRATULATIONS Welcome to the ranks of Cessna owners! Your Cessna has been designed and con- structed to give you the most in performance, economy, and comfort. It is our de- sire that you will find flying it, either for business or pleasure, a pleasant and profitable experience. This Owner's Manual has been prepared as a guide to help you get the most pleasure and utility from your Model 172/Skyhawk. It contains information about your Cessna's equipment, operating procedures, and performance; and suggestions for its servicing and care. We urge you to read it from cover to cover, and to refer to it frequently. Our interest in your flying pleasure has not ceased with your purchase of a Cessna. World-wide, the Cessna Dealer Organization backed by the Cessna Service Depart- ment stands ready to serve you. The following services are offered by most Cessna Dealers: THE CESSNA WARRANTY -- It is designed to provide you with the most comprehensive coverage possible: a. b. c. d. No exclusions Coverage includes parts and labor Available at Cessna Dealers world wide Best in the industry Specific benefits and provisions of the warranty plus other important benefits for you are contained in your Warranty and Owner's Service Policy Booklet supplied with your aircraft. Warranty service is avail- able to you at any authorized Cessna Dealer throughout the world upon presentation of your Warranty and Owner's Service Policy Booklet which establishes your eligibility under the warranty. FACTORY TRAINED PERSONNEL to provide you with courteous expert service. FACTORY APPROVED SERVICE EQUIPMENT to provide you with the most efficient and accurate workmanship possible. A STOCK OF GENUINE CESSNA SERVICE PARTS on hand when you need them. THE LATEST AUTHORITATIVE INFORMATION FOR SERVICING CESSNA AIRPLANES, since Cessna Dealers have all of the Service Manuals and Parts Catalogs, kept current by Service Letters and Service News Letters, published by Cessna Aircraft Company. We urge all Cessna owners to use the Cessna Dealer Organization to the fullest. A current Cessna Dealer Directory accompanies your new airplane. The Directory is revised frequently, and a current copy can be obtained from your Cessna Dealer. Make your Directory one of your cross-country flight planning aids; a warm welcome awaits you at every Cessna Dealer. i ii 26-11' PRINCIPAL DIMENSIONS 6'-3"MAX. 00 36'-1". 8-3%" 8-9% MAX. Maximum height of airplane with nose gear depressed, all tires and nose strut properly inflated, and optional flashing beacon installed. Wing span of airplane with optional strobe lights. installed. TABLE OF CONTENTS Page = SECTION I - OPERATING CHECK LIST 1-1 ------- SECTION II - DESCRIPTION AND OPERATING DETAILS 2-1 SECTION III - EMERGENCY PROCEDURES ..... 3-1 SECTION IV SECTION V - OOPERATING LIMITATIONS - 4-1 - CARE OF THE AIRPLANE 5-1 - OWNER FOLLOW-UP SYSTEM SECTION VI OPERATIONAL DATA SECTION VII- OPTIONAL SYSTEMS... 5-11 6-1 7-1 This manual describes the operation and performance of both the Cessna Model 172 and Skyhawk. Equipment des- cribed as "Optional" denotes that the subject equipment is optional on the Model 172. Much of this equipment is standard on the Skyhawk model. iii Section I OPERATING CHECK LIST One of the first steps in obtaining the utmost performance, service, and flying enjoyment from your Cessna is to familiarize yourself with your airplane's equipment, systems, and controls. This can best be done by reviewing this equipment while sitting in the airplane. Those items whose function and operation are not obvious are covered in Section II. Section I lists, in Pilot's Check List form, the steps necessary to operate your airplane efficiently and safely. It is not a check list in its true form as it is considerably longer, but it does cover briefly all of the points that you should know for a typical flight. The flight and operational characteristics of your airplane are normal in all respects. There are no "unconventional" characteristics or opera-
Show full textShow less
tions that need to be mastered. All controls respond in the normal way within the entire range of operation. All airspeeds mentioned in Sections I, II and III are indicated airspeeds. Corresponding calibrated airspeed may be obtained from the Airspeed Correction Table in Section VI. BEFORE ENTERING THE AIRPLANE. (1) Make an exterior inspection in accordance with figure 1-1. BEFORE STARTING THE ENGINE. " -- (1) Seats, Seat Belts and Shoulder Harnesses Adjust and lock. (2) Fuel Selector Valve -- "BOTH. (3) Brakes -- Test and set. -- "OFF." (4) Radios and Electrical Equipment - 1-1 5 2 a. Remove rudder gust lock, if installed. b. C. b. C. 8 5 a. EXTERIOR INSPECTION b. a. 3 4 a. فيه C. d. نه نن Disconnect tail tie-down. Check control surfaces for freedom of movement and security. Check aileron for freedom of movement and security. Disconnect wing tie-down. Check main wheel tire for proper inflation. Visually check fuel quantity, then check fuel filler cap secure. Check oil level. Do not operate with less than six quarts. Fill to eight quarts for extended flights. Before first flight of day and after each refueling, pull out strainer drain knob for about four seconds to clear fuel strainer of possible water and sediment. Check strainer drain closed. If water is observed, there is a possibility that the fuel tank sumps contain water. Thus, the fuel tank sump drain plugs and fuel selector valve drain plug should be removed to check for the presence of water. Check propeller and spinner for nicks and security. Check landing light for condition and cleanliness. e. Check carburetor air filter for restrictions by dust or other foreign matter. Note f. g. Check nose wheel strut and tire for proper inflation. Disconnect tie-down rope. Visually check aircraft for general condition during walk- around inspection. In cold weather, remove even small accumulations of frost, ice or snow from wing, tail and control surfaces. Also, make sure that control surfaces contain no internal accumulations of ice or debris. If night flight is planned, check operation of all lights, and make sure a flashlight is available. h. Inspect flight instrument static source opening on side of fuselage for stoppage (left side only). (6) a. Check main wheel tire for proper inflation. b. Visually check fuel quantity, then check fuel filler cap secure. ⑦ a. Check fuel tank vent opening for stoppage. b. ① a. b. 20 C. Remove control wheel lock. Remove pitot tube cover, if installed, and check pitot tube opening for stoppage. d. e. Check ignition switch "OFF." Turn on master switch and check fuel quantity indicators, then turn master switch "OFF." Check fuel selector valve handle on "BOTH." Check baggage door for security. Lock with key if children are to occupy child's seat. C. d. Check stall warning vent opening for stoppage. Disconnect wing tie-down. 8 a. Check aileron for freedom of movement and security. 1-2 Figure 1-1. 1-3 STARTING THE ENGINE. (1) Mixture -- Rich. (2) Carburetor Heat -- -- Cold. (3) Primer 2 6 strokes as required (none if engine is warm). Close and lock primer. (4) Throttle -- Open 1/8". (5) Master Switch -- "ON." (6) Propeller Area (7) Ignition Switch (8) Oil Pressure -- -- -- Clear. "START" (release when engine starts). Check. BEFORE TAKE-OFF. (1) Parking Brake -- Set. (2) Flight Controls Check for free and correct movement. -- (3) Fuel Selector Valve -- "BOTH." (4) Elevator Trim Control Wheel -- (5) Throttle Setting. 1700 RPM. -- "TAKE-OFF" setting.. (6) Engine Instruments and Ammeter -- Check. (7) Suction Gage -- Check (4.6 to 5.4 inches of mercury). (8) Magnetos -- Check (RPM drop should not exceed 125 RPM on either magneto or 50 RPM differential between magnetos). (9) Carburetor Heat -- Check operation. (10) Flight Instruments and Radios -- Set. (11) Optional Autopilot or Wing Leveler -- (12) Cabin Doors and Window -- Off. Closed and locked. (2) Carburetor Heat Brakes -- Apply. Cold. (4) Power -- Full throttle. (5) Brakes Release. (6) -- Airplane Attitude -- Slightly tail low. (7) Climb Speed -- 68 MPH until all obstacles are cleared. CLIMB. (1) Airspeed - 80 to 90 MPH. NOTE If a maximum performance climb is necessary, use speeds shown in the Maximum Rate-Of-Climb Data chart in Section VI. (2) Power -- Full throttle. (3) Mixture - Full rich (mixture may be leaned above 3000 feet). CRUISING. (1) Power 2200 to 2700 RPM. -- NOTE TAKE-OFF. NORMAL TAKE-OFF. (1) Wing Flaps 0°. (2) Carburetor Heat -- Cold. (3) Power -- Full throttle. (4) Elevator Control -- Lift nose wheel at 60 MPH. (5) Climb Speed - ―― 75 to 85 MPH. MAXIMUM PERFORMANCE TAKE-OFF. 1-4 (1) Wing Flaps -- 0°. Maximum cruise RPM varies with altitude. For details, refer to Section IV. (2) Elevator Trim Control Wheel -- Adjust. (3) Mixture -- Lean for maximum RPM. LET-DOWN. (1) Mixture Rich. -- (2) Power - As desired. (3) Carburetor Heat -- As required to prevent carburetor icing. 1-5 BEFORE LANDING. (1) Fuel Selector Valve -- "BOTH." (2) Mixture -- Rich. (3) Carburetor Heat -- Apply full heat before closing throttle. (4) Wing Flaps -- As desired. (5) Airspeed -- 70 to 80 MPH (flaps up), 65 to 75 MPH (flaps down). BALKED LANDING (GO-AROUND). (1) Power Full throttle. -- (2) Carburetor Heat -- Cold. (3) Wing Flaps -- Retract to 20°. (4) Upon reaching an airspeed of approximately 65 MPH, retract flaps slowly. NORMAL LANDING. (1) Touchdown -- Main wheels first. (2) Landing Roll -- Lower nose wheel gently. (3) Braking Minimum required. AFTER LANDING. (1) Wing Flaps Up. (2) Carburetor Heat -- Cold. SECURING AIRCRAFT. Set. -- "OFF." (1) Parking Brake -- (2) Radios and Electrical Equipment (3) Mixture Idle cut-off (pulled full out). (4) Ignition and Master Switch "OFF." (5) Control Lock -- Installed. LT -- 1-6 1-7 INSTRUMENT PANEL 2 4 5 6 7 8 9 10 11 12 13 14 15 16 · Section II DESCRIPTION AND OPERATING DETAILS The following paragraphs describe the systems and equipment whose function and operation is not obvious when sitting in the airplane. This section also covers in somewhat greater detail some of the items listed in Check List form in Section I that require further explanation. oooogoo0 37 36 35 34 33 32 31 30 29 24 23 22 21 20 19 18 17 28 25 1. Boom Microphone Keying Switch (Opt.) 2. Aircraft Registration Number 3. Flight Instrument Group 4. Suction Gage (Opt.) 5. Marker Beacon Indicator Lights and Switches (Opt.) 6. Compass Correction Card 7. Tachometer 8. Magnetic Compass. 9. Radio Selector Switches (Opt.) 10. Rear View Mirror (Opt.) 11. Transponder (Opt.) 12. Radios (Opt.) 13. Fuel and Oil Gages 27 26 24. Autopilot Control Unit (Opt.) 25. Microphone (Opt.) 26. Fuel Selector Valve Handle 14. Over-Voltage Warning Light 27. Elevator Trim Control Wheel 15. Ammeter 16. Optional Instrument and Radio Space 17. Map Compartment 18. Wing Flap Position Indicator 19. Cigar Lighter 20. Cabin Air and Heat Controls 21. Wing Flap Switch 22. Static Pressure Alternate Source Valve (Opt.) 23. Mixture Control Knob 28. Throttle 29. Carburetor Heat Control 30. Electrical Switches 31. Circuit Breakers. 32. Parking Brake Handle 33. Ignition/Starter Switch 34. Instrument and Radio Dial Light Rheostats 35. Master Switch 36. Primer 37. Phone Jack FUEL SYSTEM. Fuel is supplied to the engine from two tanks, one in each wing. With the fuel selector valve on "BOTH," the total usable fuel for all flight con- ditions is 38 gallons for the standard tanks and 48 gallons for the optional long range tanks. Fuel from each wing tank flows by gravity to a selector valve. De- pending upon the setting of the selector valve, fuel from the left, right, or both tanks flows through a fuel strainer and carburetor to the engine induction system. The fuel selector valve should be in the "BOTH" position for take-off, climb, landing, and maneuvers that involve prolonged slips or skids. Operation from either "LEFT" or "RIGHT" tank is reserved for cruising flight. NOTE With low fuel (1/8th tank or less), a prolonged steep de- scent (1500 feet or more) with partial power, full flaps, and 80 MPH or greater should be avoided due to the pos- sibility of the fuel tank outlets being uncovered, causing temporary fuel starvation. If starvation occurs, leveling the nose should restore power within 20 seconds. NOTE 1-8 Figure 2-1. When the fuel selector valve handle is in the "BOTH" position in cruising flight, unequal fuel flow from each 2-1 VENT FUEL SYSTEM SCHEMATIC LEFT FUEL TANK 10TH TANKS ON FOR RIGHT FUEL TANK tank may occur if the wings are not maintained exactly level. Resulting wing heaviness can be alleviated gradually by turning the selector valve handle to the tank in the "heavy" wing. For fuel system servicing information, refer to Lubrication and Servicing Procedures in Section V. TO ENSURE MAXIMUM FUEL CAPACITY WHEN REFUELING, PLACE THE FUEL SELECTOR VALVE IN EITHER "LEFT" OR "RIGHT POSITION TO PREVENT CROSS-FEEDING. ΤΟ ENGINE CODE FUEL SUPPLY ENGINE PRIMER SELECTOR VALVE FUEL STRAINER 100 VENT THROTTLE MECHANICAL LINKAGE CARBURETOR TO ENGINE 2-2 Figure 2-2. MIXTURE CONTROL KNOB ELECTRICAL SYSTEM. Electrical energy is supplied by a 14-volt, direct-current system powered by an engine-driven alternator (see figure 2-3). A 12-volt bat- tery is located on the left-hand forward portion of the firewall. Power is supplied to all electrical circuits through a split bus bar, one side con- taining electronic systems and the other side having general electrical systems. Both sides of the bus are on at all times except when either an external power source is connected or the ignition/starter switch is turned on; then a power contactor is automatically activated to open the circuit to the electronic bus. Isolating the electronic circuits in this manner pre- vents harmful transient voltages from damaging the transistors in the electronic equipment. MASTER SWITCH. " The master switch is a split-rocker type switch labeled "MASTER, and is "ON" in the up position and "OFF" in the down position. The right half of the switch, labeled "BAT," controls all electrical power to the airplane. The left half, labeled "ALT" controls the alternator. Normally, both sides of the master switch should be used simulta- neously, however, the "BAT" side of the switch could be turned "ON" separately to check equipment while on the ground. The "ALT" side of the switch, when placed in the "OFF" position, removes the alternator from the electrical system. With this switch in the "OFF" position, the entire electrical load is placed on the battery, and all non-essential elec- trical equipment should be turned off for the remainder of the flight. AMMETER. The ammeter indicates the flow of current, in amperes, from the alternator to the battery or from the battery to the aircraft electrical system. When the engine is operating and the master switch is "ON, " 2-3 OVER- VOLTAGE WARNING LIGHT ELECTRICAL SYSTEM SCHEMATIC REGULATOR ALTERNATOR G TO PRIMARY BUS MASTER SWITCH STARTER CONTACTOR HHI TO ALT FIELD CIRCUIT BREAKER OVER- VOLTAGE SENSOR ALT TO ALT FIELD CIGAR LIGHTER (WITH CIRCUIT BREAKER) CIRCUIT BREAKER REVERSE POLARITY CONTACTOR FLIGHT HOUR RECORDER (OPT) OIL STARTER BATTERY CONTACTOR PRESSURE SWITCH (OPT) BATTERY CODE CIRCUIT BREAKER (PUSH-TO-RESET) FUSE DIODE RESISTOR + CAPACITOR INQISE FILTER) CLOCK (OPT) H AMMETER GROUND SERVICE PLUG RECEPTACLE (OPT) SPLIT BUS CONTACTOR (NORMALLY CLOSED) TO NAVIGATION LIGHT CIRCUIT BREAKER IGNITION STARTER SWITCH MAGNETOS Figure 2-3. ALT BUS ELECTRONIC BUS ALT FIELD AUTO PILOT -TO OVER-VOLTAGE WARNING LIGHT -TO OVER-VOLTAGE SENSOR AND MASTER SWITCH -TO AUTOMATIC PILOT (OPT) TO RADIO (OPT) RADIO 1 TO RADIO (OPT) RADIO 2 TO RADIO (OPT) ORADIO 3 TO RADIO (OPT) RADIO 4 RADIO S SAUD AMP LAND LT LT TO RADIO (OPT) TO AUDIO AMPLIFIER (OPT) FROM ALTERNATOR BUS TO LANDING LIGHT (OPT) TO NAVIGATION LIGHTS AND OPTIONAL CONTROL WHEEL MAP LIGHT NAV TO TRANSMITTER RELAY (OPT) -TO IGNITION-STARTER SWITCH ⑨TO FLASHING BEACON (OPT) BCH LT MINT LT PRIMARY BUS INST -TO DOOR POST MAP LIGHT (OPT) TO DOME AND OPTIONAL COURTESY LIGHTS -TO COMPASS AND INSTRUMENT LIGHTS the ammeter indicates the charging rate applied to the battery. In the event the alternator is not functioning or the electrical load exceeds the output of the alternator, the ammeter indicates the discharge rate of the battery. OVER-VOLTAGE SENSOR AND WARNING LIGHT. The aircraft is equipped with an automatic over-voltage protection system consisting of an over-voltage sensor behind the instrument panel and a red warning light, labeled "HIGH VOLTAGE", near the fuel gages. In the event an over-voltage condition occurs, the over-voltage sen- sor automatically removes alternator field current and shuts down the alternator. The red warning light will then turn on, indicating to the pilot that the alternator is not operating and the aircraft battery is supply- ing all electrical power. The over-voltage sensor may be reset by turning the master switch off and back on again. If the warning light does not illuminate, normal alternator charging has resumed; however, if the light does illuminate again, a malfunction has occurred, and the flight should be terminated as soon as practical. The over-voltage warning light may be tested by momentarily turning off the "ALT" portion of the master switch and leaving the "BAT" portion turned on. TO FUEL QUANTITY INDICATORS TO WING FLAP POSITION INDICATOR ①TO WING FLAP SYSTEM FLAP TO STROBE LIGHTS (OPT) STROBE LT TO PITOT HEAT SYSTEM (OPT) TO TURN COORDINATOR OR OPTIONAL TURN AND BANK INDICATOR CIRCUIT BREAKERS AND FUSES. The majority of electrical circuits in the airplane are protected by "push-to-reset" circuit breakers mounted on the instrument panel. Ex- ceptions to this are the optional clock, flight hour recorder, and battery contactor closing (external power) circuits which have fuses mounted adjacent to the battery. Also, the cigar lighter is protected by a man- ually reset type circuit breaker mounted directly on the back of the lighter behind the instrument panel. When more than one radio is installed, the radio transmitter relay (which is a part of the radio installation) is protected by the navigation lights circuit breaker labeled "NAV LTS." If a malfunction in the navi- gation lights system causes the circuit breaker to open, de-activating the lights and transmitter relay, turn off the navigation light switch and reset PITOT HT TURN COORD 2-4 2-5 the circuit breaker. This will re-activate the transmitter relay and per- mit its usage. Do not turn the switch on again until the malfunction is corrected. LIGHTING EQUIPMENT. EXTERIOR LIGHTING. Conventional navigation lights are located on the wing tips and top of the rudder. Optional lighting includes a single landing light in the cowl nose cap, a flashing beacon on the top of the vertical fin, a strobe light on each wing tip, and two courtesy lights, one under each wing, just out- board of the cabin door. The courtesy lights are controlled by the dome light switch located on the overhead console. All other exterior lights are controlled by rocker type switches located on the left switch and control panel. The switches are "ON" in the up position and "OFF" in the down position. The flashing beacon should not be used when flying through clouds or overcast; the flashing light reflected from water droplets or particles in the atmosphere, particularly at night, can produce vertigo and loss of orientation. The two high intensity strobe lights will enhance anti-collision pro- tection. However, the lights should be turned off when taxiing in the vicinity of other aircraft, or during flight through clouds, fog or haze. INTERIOR LIGHTING. Illumination of the instrument panel is provided by red flood lighting in the forward portion of the overhead console. The magnetic compass and radio equipment have integral lighting. A dual rheostat control on the left switch and control panel operates these lights. The inner knob, la- beled "PANEL," operates the instrument panel and compass lighting. The outer knob, labeled "RADIO" controls all radio lighting. A cabin dome light is located in the overhead console, and is operated by a switch adjacent to the light. To turn the light on, move the switch to the right. This will also operate the optional courtesy lights. 2-6 An optional map light may be mounted on the bottom of the pilot's control wheel. The light illuminates the lower portion of the cabin, just forward of the pilot and is helpful when checking maps and other flight data during night operations. To operate the light, first turn on the "NAV LT" Switch, then adjust the map light's intensity with the knurled disk type rheostat control located at the bottom of the control wheel. A door post map light is also offered as optional equipment, and is located at the top of the left forward doorpost. The light contains both red and white bulbs, and may be positioned to illuminate any area de- sired by the pilot. A switch on the left forward door post is labeled "RED", "OFF", and "WHITE". Placing the switch in the top position will provide a red light. In the bottom position, standard white lighting is provided. The center position is "OFF". CABIN HEATING, VENTILATING AND DEFROSTING SYSTEM. For cabin ventilation, pull the "CABIN AIR" knob out. To raise the air temperature, pull the "CABIN HT" knob out approximately 1/4" to 1/2" for a small amount of cabin heat. Additional heat is available by pulling the knob out farther; maximum heat is available with the "CABIN HT" knob pulled full out and the "CABIN AIR" knob pushed full in. When no heat is desired in the cabin, the "CABIN HT" knob is pushed full in. Front cabin heat and ventilating air is supplied by outlet holes spaced across a cabin manifold just forward of the pilot's and copilot's feet. Rear cabin heat and air is supplied by two ducts from the manifold, one extending down each side of the cabin to an outlet at the front door post at floor level. Windshield defrost air is also supplied by a duct leading from the cabin manifold. Separate adjustable ventilators supply additional air; one near each upper corner of the windshield supplies air for the pilot and copilot, and two optional ventilators in the rear cabin ceiling supply air to the rear seat passengers. SHOULDER HARNESSES. Shoulder harnesses are provided as standard equipment for the pilot 2-7 and front seat passenger, and as optional equipment for the rear seat passengers. Each front seat harness is attached to a rear door post just above window line and is stowed above the cabin door. When stowed, the har- ness is held in place by two retaining clips, one above the door and one on the front of the forward door post. When stowing the harness, place it behind both retaining clips and secure the loose end behind the retaining clip above the door. The optional rear seat shoulder harnesses are at- tached just below the lower corners of the rear window. Each rear seat harness is stowed behind a retaining clip located at the bottom edge of the aft side window. To use the front and rear seat shoulder harnesses, fasten and adjust the seat belt first. Remove the harness from the stowed position, and lengthen as required by pulling on the end of the harness and the narrow release strap. Snap the harness metal stud firmly into the retaining slot adjacent to the seat belt buckle. Then adjust to length by pulling down on the free end of the harness. A properly adjusted harness will permit the occupant to lean forward enough to sit completely erect but is tight enough to prevent excessive forward movement and contact with objects during sudden deceleration. Also, the pilot will want the freedom to reach all controls easily. Releasing and removing the shoulder harness is accomplished pulling upward on the narrow release strap and removing the harness stud from the slot in the seat belt buckle. In an emergency, the shoulder harness may be removed by releasing the seat belt first and pulling the harness over the head by pulling up on the release strap. STARTING ENGINE. During engine starting, open the throttle approximately 1/8 inch. In warm temperatures, one or two strokes of the primer should be sufficient. In cold weather, up to six strokes of the primer may be necessary. If the engine is warm, no priming will be required. In extremely cold tem- peratures, it may be necessary to continue priming while cranking the engine. 2-8 Weak intermittent firing followed by puffs of black smoke from the exhaust stack indicates overpriming or flooding. Excess fuel can be cleared from the combustion chambers by the following procedure: Set the mixture control full lean and the throttle full open; then crank the engine through several revolutions with the starter. Repeat the start- ing procedure without any additional priming. If the engine is underprimed (most likely in cold weather with a cold engine) it will not fire at all, and additional priming will be necessary. As soon as the cylinders begin to fire, open the throttle slightly to keep it running. After starting, if the oil gage does not begin to show pressure within 30 seconds in the summertime and about twice that long in very cold weather, stop engine and investigate. Lack of oil pressure can cause serious engine damage. After starting, avoid the use of carburetor heat unless icing conditions prevail. NOTE Additional details for cold weather starting and operation may be found under Cold Weather Operation in this section. TAXIING. When taxiing, it is important that speed and use of brakes be held to a minimum and that all controls be utilized (see Taxiing Diagram, figure 2-4) to maintain directional control and balance. The carburetor heat control knob should be pushed full in during all ground operations unless heat is absolutely necessary. When the knob is pulled out to the heat position, air entering the engine is not filtered. Taxiing over loose gravel or cinders should be done at low engine speed to avoid abrasion and stone damage to the propeller tips. BEFORE TAKE-OFF. WARM-UP. If the engine accelerates smoothly, the airplane is ready for take-off. 2-9 2-10 TAXIING DIAGRAM USE UP AILERON ON LH WING AND NEUTRAL ELEVATOR 00 USE UP AILERON ON RH WING AND NEUTRAL ELEVATOR USE DOWN AILERON ON LH WING AND DOWN ELEVATOR USE DOWN AILERON ON RH WING AND DOWN ELEVATOR Since the engine is closely cowled for efficient in-flight engine cooling, precautions should be taken to avoid overheating during prolonged engine operation on the ground. Also, long periods of idling may cause fouled spark plugs. MAGNETO CHECK. The magneto check should be made at 1700 RPM as follows: Move ignition switch first to "R" position, and note RPM. Next move switch back to "BOTH" to clear the other set of plugs. Then move switch to the "L" position, note RPM and return the switch to the "BOTH" position. RPM drop should not exceed 125 RPM on either magneto or show greater than 50 RPM differential between magnetos. If there is a doubt concern- ing operation of the ignition system, RPM checks at higher engine speeds will usually confirm whether a deficiency exists. An absence of RPM drop may be an indication of faulty grounding of one side of the ignition system or should be cause for suspicion that the magneto timing is set in advance of the setting specified. ALTERNATOR CHECK. Prior to flights where verification of proper alternator and voltage regulator operation is essential (such as night or instrument flights), a positive verification can be made by loading the electrical system momen- tarily (3 to 5 seconds) with the optional landing light (if so equipped), or by operating the wing flaps during the engine runup (1700 RPM). The am- meter will remain within a needle width of zero if the alternator and vol- tage regulator are operating properly. CODE WIND DIRECTION NOTE Strong quartering tail winds require caution. Avoid sudden bursts of the throttle and sharp braking when the airplane is in this attitude. Use the steerable nose wheel and rudder to maintain direction. Figure 2-4. TAKE-OFF. POWER CHECK. It is important to check full-throttle engine operation early in the take-off run. Any signs of rough engine operation or sluggish engine acceleration is good cause for discontinuing the take-off. If this occurs, you are justified in making a thorough full-throttle, static runup before another take-off is attempted. The engine should run smoothly and turn approximately 2260 to 2360 RPM with carburetor heat off. 2-11 NOTE Carburetor heat should not be used during take-off unless it is absolutely necessary for obtaining smooth engine acceleration. Full-throttle runups over loose gravel are especially harmful to pro- peller tips. When take-offs must be made over a gravel surface, it is very important that the throttle be advanced slowly. This allows the air- plane to start rolling before high RPM is developed, and the gravel will be blown back of the propeller rather than pulled into it. When unavoid- able small dents appear in the propeller blades, they should be immedi- ately corrected as described in Section V under propeller care. Prior to take-off from fields above 3000 feet elevation, the mixture should be leaned to give maximum RPM in a full-throttle, static runup. WING FLAP SETTINGS. Normal and obstacle clearance take-offs are performed with wing flaps up. The use of 10° flaps will shorten the ground run approximately 10%, but this advantage is lost in the climb to a 50-foot obstacle. There- fore, the use of 10° flaps is reserved for minimum ground runs or for take-off from soft or rough fields. If 10° of flaps are used for minimum ground runs, it is preferable to leave them extended rather than retract them in the climb to the obstacle. In this case, use an obstacle clearance speed of 65 MPH. As soon as the obstacle is cleared, the flaps may be retracted as the airplane accelerates to the normal flaps-up climb speed of 80 to 90 MPH. During a high altitude take-off in hot weather where climb would be marginal with 10° flaps, it is recommended that the flaps not be used for take-off. Flap settings greater than 10° are not recommended at any time for take-off. PERFORMANCE CHARTS. Consult the Take-Off Data chart in Section VI for take-off distances under various gross weight, altitude, headwind, temperature, and run- way surface conditions. CROSSWIND TAKE-OFFS. 2-12 Take-offs into strong crosswinds normally are performed with the minimum flap setting necessary for the field length to minimize the drift angle immediately after take-off. The airplane is accelerated to a speed slightly higher than normal, then pulled off abruptly to prevent possible settling back to the runway while drifting. When clear of the ground, make a coordinated turn into the wind to correct for drift. ENROUTE CLIMB. CLIMB DATA. For detailed data, refer to the Maximum Rate-Of-Climb Data chart in Section VI. CLIMB SPEEDS. Normal climbs are performed at 80 to 90 MPH with flaps up and full throttle for best engine cooling. The mixture should be full rich below 3000 feet and may be leaned above 3000 feet for smoother engine opera- tion. The maximum rate-of-climb speeds range from 82 MPH at sea level to 79 MPH at 10, 000 feet. If an enroute obstruction dictates the use of a steep climb angle, climb at 68 MPH with flaps retracted. NOTE Steep climbs at low speeds should be of short duration to improve engine cooling. CRUISE. Normal cruising is done between 65% and 75% power. The power settings required to obtain these powers at various altitudes and outside air temperatures can be determined by using your Cessna Power Com- puter or the OPERATIONAL DATA, Section VI. Cruising can be done more efficiently at high altitudes because of 2-13 lower air density and therefore higher true airspeeds for the same power. This is illustrated in the table below, which shows performance at 75% power at various altitudes. All figures are based on lean mixture, 38 gallons of fuel (no reserve), zero wind, standard atmospheric conditions, and 2300 pounds gross weight. To achieve the lean mixture fuel consumption figures shown in Sec- tion VI, the mixture should be leaned as follows: pull mixture control out until engine RPM peaks and begins to fall off, then enrichen slightly back to peak RPM. Carburetor ice, as evidenced by an unexplained drop in RPM, can be removed by application of full carburetor heat. Upon regaining the origi- nal RPM (with heat off), use the minimum amount of heat (by trial and error) to prevent ice from forming. Since the heated air causes a richer mixture, readjust the mixture setting when carburetor heat is to be used continuously in cruise flight. The use of full carburetor heat is recommended during flight in heavy rain to avoid the possibility of engine stoppage due to excessive water in- gestion or carburetor ice. The mixture setting should be readjusted for smoothest operation. In extremely heavy rain, the use of partial carburetor heat (control approximately 2/3 out), and part throttle (closed at least one inch), may be necessary to retain adequate power. Power changes should be made cautiously followed by prompt adjustment of the mixture for smoothest operation. STALLS. The stall characteristics are conventional and aural warning is pro- vided by a stall warning horn which sounds between 5-and 10 MPH above the stall in all configurations. Power-off stall speeds at maximum gross weight and aft c.g. posi- tion are presented on page 6-2 as calibrated airspeeds since indicated airspeeds are unreliable near the stall. SPINS. Intentional spins are prohibited in this airplane, except in the Utility Category. To recover from a spin, use the following technique. (1) Retard throttle to idle position. (2) Apply full rudder opposite to the direction of rotation. (3) After one-fourth turn, move the control wheel forward of neutral in a brisk motion. (4) As rotation stops, neutralize rudder, and make a smooth recov- ery from the resulting dive. Intentional spins with flaps extended are prohibited. MAXIMUM CRUISE SPEED PERFORMANCE 2-14 ALTITUDE RPM 75% POWER TRUE AIRSPEED RANGE SEA LEVEL 2490 123 575 5000 ft. 2600 128 600 9000 ft. FULL THROTTLE 132 620 LANDINGS. Normal landings are made power-off with any flap setting desired. Slips should be avoided with flap settings greater than 30° due to a down- ward pitch encountered under certain combinations of airspeed, side slip angle, and center of gravity loadings. NOTE Carburetor heat should be applied prior to any signi- ficant reduction or closing of the throttle. NORMAL LANDING. Landings should be made on the main wheels first to reduce the land- ing speed and subsequent need for braking in the landing roll. The nose wheel is lowered to the runway gently after the speed has diminished to 2-15
What's in the CESSNA 172C TCDS
A Type Certificate Data Sheet (TCDS) is the FAA's record of what an aircraft type was approved as. It is the source of truth for weights, seating, fuel and the rules the design was certified against. Expand any line to see what it means.
43 CESSNA 172C parts for sale
See all →



Parts listed for sale by vetted eBay sellers — confirmed on eBay at checkout.