NAVIGATION - STALL WARNING HORN REPLACEMENT FOR CESSNA MODELS 182, U206, 207
CESSNA 182P SKYLANE · Service Bulletins
Overview
This service bulletin (SEB-34-32) addresses the replacement of the stall warning horn for specific Cessna models, including the 182, U206, and 207. The original stall warning horn is no longer available, necessitating the installation of a new horn and bracket. The document outlines the compliance requirements, parts needed, and detailed instructions for the replacement process. It is intended for aircraft owners and maintenance personnel, providing essential information to ensure proper installation and compliance with FAA regulations. The service bulletin is optional and can be performed at the owner's discretion, with specific guidelines for maintenance practices and documentation.
- The service bulletin applies to Cessna models 182, U206, and 207.
- Replacement of the stall warning horn is optional and at the owner's discretion.
- Specific serial numbers are affected, including 182Q, 182R, U206G, and 207A.
- Installation requires a kit with specific part numbers for the new horn and bracket.
- Compliance must be documented in the aircraft logbook.
Document
Source
Originally published by cessnaowner.org. Sprinkle hosts a reference copy with an added summary, specifications and searchable full text.
Document details
- Type
- Service Bulletins
- Year
- 2023
- Pages
- 12
- File size
- 1.1 MB
- Publisher
- cessnaowner.org
Common. Rarer than 1% of the aircraft models we track.
Most owners only have the POH. Here's the essential set for the CESSNA 182P SKYLANE.
- Pilot's Operating Handbook / AFM
- Checklist
- Maintenance Manual
- Parts Catalog (IPC)
- Systems & Wiring
- Service Bulletins
- Type Certificate (TCDS)
CESSNA 182P SKYLANE for sale now


Free — save the 182P Skylane to your watchlist and track it in one place.
More CESSNA 182P SKYLANEmanuals & documents
See all 35 →- Cessna Skylane Performance DataPerformance Data
- Type Certificate Data Sheet No. 3A13Parts Catalog
- Cessna 182S 182T, T182T Skylane Systems & Procedures CourseMaintenance Manual
- Cessna 182R Skylane Checklist - Redpaw AviationChecklist
- Type Acceptance Report TAR 1/21B/15 — Cessna 182 SeriesParts Catalog
- TURBO OR NO? Comparing the Skylane RGsOther Documents
- John Frank’s Cessna 182 Skylane Buyers GuideChecklist
- Aircraft Checklist Cessna 182-P - Leading Edge AviationChecklist
- Aircraft Source Noise Measurement Studies Summary of Measurements, Data and AnalysisPerformance
- Cessna 182 Skylane Checklist For Reference OnlyFlight Manual
- Cessna Pilots Association TM - Kirtland Flight CenterService Bulletins
- Pilot's Operating Handbook and FAA Approved Airplane Flight ManualPilot's Operating Handbook
If you fly the CESSNA 182P SKYLANE, you may also be researching these.


In this document
Effectivity
The service bulletin applies to the following Cessna models and serial numbers: 182Q (18266545 to 18267715), 182R/T182 (18267302, 18267716 to 18268541), 182R (643, 18268542 to 18268586), U206G/TU206G (676, U20604595 to U20607020), and 207A/T207A (20700469 to 20700788).
Compliance
Compliance with this service bulletin is optional and can be performed at the discretion of the aircraft owner. Specific requirements must be met for the service document to be recorded as completed in the aircraft log.
Accomplishment Instructions
The bulletin provides step-by-step instructions for replacing the stall warning horn, including safety precautions such as grounding the aircraft and disconnecting electrical power. It details the removal of the old horn and installation of the new horn and bracket, including necessary tools and materials.
Material Information
A kit is required for the modification, which includes a new stall warning horn (P/N 9910080-5), a bracket assembly (P/N 0790604-2), and lock washers (P/N MS35333-37). The old parts must be discarded.
References
The bulletin references several maintenance manuals for the Cessna Model 182, U206, and 207 series for detailed procedures related to the stall warning system.
Safety notes
- Ensure the aircraft is electrically grounded before starting work.
- Disconnect electrical power from the airplane to prevent accidental activation.
Full document text
Single Engine SERVICE BULLETIN SEB-34-32 TITLE NAVIGATION - STALL WARNING HORN REPLACEMENT FOR CESSNA MODELS 182, U206, 207 EFFECTIVITY MODEL SERIAL NUMBERS 182Q 18266545 thru 18267715 182R/T182 18267302, 18267716 thru 18268541 182R 643, 18268542 thru 18268586 U206G/TU206G 676, U20604595 thru U20607020 207A/T207A 20700469 thru 20700788 REASON The original stall warning horn is no longer available. If the stall warning horn needs to be replaced a new stall warning horn and bracket are available. DESCRIPTION This service document provides parts and instructions to remove the original stall warning horn and bracket. Then install the new stall warning horn with the new bracket. COMPLIANCE OPTIONAL. This service document can be accomplished at the discretion of the owner. A service document published by Textron Aviation may be recorded as completed in an aircraft log only when the following requirements are satisfied: 1) The mechanic must complete all of the instructions in the service document, including the intent therein. 2) The mechanic must correctly use and install all applicable parts supplied with the service document kit. Only with written authorization from Textron Aviation can substitute parts or rebuilt parts be used to replace new parts. 3) The mechanic or airplane owner must use the technical data in the service document only as approved and published. 4) The mechanic or airplane owner must apply the information in the service document only to aircraft serial numbers identified in the Effectivity section of the document. 5) The mechanic or airplane owner must use maintenance practices that are identified as acceptable standard practices in the aviation industry and governmental regulations. No individual or corporate organization other than Textron Aviation is authorized to make or apply any changes to a Textron Aviation-issued service document or flight manual supplement without prior written consent from Textron Aviation. Textron Aviation is not responsible for the quality of maintenance performed to comply with this document, unless the maintenance is accomplished at a Textron Aviation-owned Service Center. APPROVAL Textron Aviation received FAA approval for the technical data in this publication that changes the airplane type design. SEB-34-32 January 5, 2023 Page 1 of 9 Textron Aviation Customer Service, P.O. Box 7706, Wichita, KS 67277, U.S.A. 1-316-517-5800 This document contains technical data and is subject to U.S. export regulations. This information has been exported from the United States in accordance with export administration regulations. Diversion contrary to U.S. law is prohibited. ECCN: 9E991 COPYRIGHT © 2023 SEB-34-32 Page 2 January 5, 2023 Single Engine SERVICE BULLETIN SEB-34-32 FLIGHT CREW OPERATIONS No Changes CONSUMABLE MATERIAL You must use the consumable materials that follow, or their equivalent, to complete this service document. NAME NUMBER MANUFACTURER USE Color Chemical Film Treatment Alodine 1132 Touch n Prep Pen Commercially Avaliable To protect bare aluminum surface. TOOLING No specialized tooling is required to complete this service document. WEIGHT AND BALANCE INFORMATION Negligible REFERENCES Cessna Model 182 and T182 Series (1977-1986) Maintenance Manual Cessna Model 206 and T206 Series (1977-1986) Service Manual Cessna Model 207 and T207 Series (1969-1984) Service Manual NOTE: To make sure all publications used are complete and current. Refer to www.txtavsupport.com. PUBLICATIONS AFFECTED Cessna Model 182 and T182 Series (1974-1986) Parts Catalog Cessna Model 206 and T206 (1974-1986) Illustrated Parts Catalog Cessna Model 207 and T207 Series (1969-1984) Parts Catalog ACCOMPLISHMENT INSTRUCTIONS 1. Prepare the airplane for maintenance. A. Make sure that the airplane is electrically grounded. B. Make sure that all switches are in the OFF/NORM position. C. Disconnect electrical power from the airplane. (1) Disconnect external electrical power. (2) Disconnect the airplane battery. Single Engine SERVICE BULLETIN SEB-34-32 D. Attach maintenance warning tags to the battery and external power receptacle that have "DO NOT CONNECT ELECTRICAL POWER - MAINTENANCE IN PROGRESS" written on them. NOTE: Use the references that follow for the removal and operational procedures of the stall warning horn. Cessna Model 182 • Refer to the Cessna Model 182 and T182 Series (1977-1986) Maintenance Manual, Section 3, Fuselage - Seats, Removal/Installation. • Refer to the Cessna Model 182 and T182 Series (1977-1986) Maintenance Manual, Section 16, Electrical System - Stall Warning System. Cessna Model U206 • Refer to the Cessna Model 206 and T206 Series (1977-1986) Service Manual, Section 3, Fuselage - Seats, Removal/Installation. • Refer to the Cessna Model 206 and T206 Series (1977-1986) Service Manual, Section 17, Electrical Systems - Stall Warning System. Cessna Model 207 • Refer to the Cessna Model 207 and T207 Series (1969-1984) Service Manual, Section 3, Fuselage - Seats, Removal/Installation. • Refer to the Cessna Model 207 and T207 Series (1969-1984) Service Manual, Section 17, Electrical Systems - Stall Warning System. 2. Remove the co-pilot seat. 3. (Refer to Figure 1, Sheet 1.) Remove the 1670056-6/-7 Stall Warning Horn as follows: NOTE: Depending upon the airplane model the 1670056-6/-7 Stall Warning Horn Assembly will be mounted on the bottom or forward side of the glovebox assembly. The removal and installation methods are the same for all models within this service document. A. Remove and keep the two mounting screws from the 1670056-6/-7 Stall Warning Horn. NOTE: The kept mounting screws will be used for installation. B. Remove the nuts and washers from the studs of the 1670056-6/-7 Stall Warning Horn. C. Disconnect the electrical wiring from the 1670056-6/-7 Stall Warning Horn. D. Discard the 1670056-6/-7 Stall Warning Horn and the 0713738-3 Bracket Assembly.
Show full textShow less
4. (Refer to Figure 2, Sheets 1 and 2.) Install the 9910080-5 Stall Warning Horn as follows: NOTE: All installations of the 9910080-5 Stall Warning Horn will be mounted onto the forward side of the glovebox assembly. A. Depending upon where the 1670056-6/-7 Stall Warning Horn was installed, go to the steps as follows: (1) If the 1670056-6/-7 Stall Warning Horn was mounted on the forward side of the glovebox assembly, go to Step 4. C. (2) If the 1670056-6/-7 Stall Warning Horn was mounted on the bottom side of the glovebox assembly, go to Step 4. B. B. (Refer to Figure 3, Sheet 1.) Match drill the two holes of the 0790604-2 Bracket Assembly to a Number 26 (0.147 inch diameter) holes into the glovebox assembly. (1) Debur the drilled holes. (2) Apply Color Chemical Film Treatment to all bare metal. C. Install the 9910080-5 Stall Warning Horn into the 0790604-2 Bracket Assembly. SEB-34-32 January 5, 2023 Page 3 SEB-34-32 Page 4 January 5, 2023 Single Engine SERVICE BULLETIN SEB-34-32 D. Install the knurled nut onto the 9910080-5 Landing Gear Warning Horn. NOTE: The plastic knurled nut must be installed with the three indents toward the bracket and horn assembly. On the internal circumference, the smooth side without threads is installed first, towards the bracket and horn. This technique of installation will make sure the nut fully seats against the bracket and not bottom-out on the threads. If not installed correctly the knurled nut will bottom-out on the threads and the horn assembly will not be fully tightened in the bracket. E. Install the 0790604-2 Bracket Assembly with the two kept mounting screws onto the glovebox assembly. F. Install the electrical wiring with one MS35333-37 Lock Washer onto each terminal of the 9910080-5 Stall Warning Horn. NOTE: The screws that attach the wiring are supplied with the 9910080-5 Stall Warning Horn. 5. Remove the maintenance warning tags and connect the airplane battery. 6. Put the master power switch to the ON position. 7. On the left wing, lift the stall vane's tab until the 9910080-5 Stall Warning Horn emits sound. 8. Put the master power switch to the OFF position. 9. Install the co-pilot seat. 10. Make an entry in the airplane logbook that states compliance and method of compliance with this service document. Single Engine SERVICE BULLETIN SEB-34-32 Figure 1. Before Modification (Sheet 1) SEB-34-32 January 5, 2023 Page 5 SEB-34-32 Page 6 January 5, 2023 Single Engine SERVICE BULLETIN SEB-34-32 Figure 2. After Modification (Sheet 1) Single Engine SERVICE BULLETIN SEB-34-32 Figure 2. After Modification (Sheet 2) SEB-34-32 January 5, 2023 Page 7 SEB-34-32 Page 8 January 5, 2023 Single Engine SERVICE BULLETIN SEB-34-32 Figure 3. Drilling Dimensions (Sheet 1) Single Engine SERVICE BULLETIN SEB-34-32 MATERIAL INFORMATION Order the kit below to install this modification. NEW P/N QUAN- TITY KEY WORD OLD P/N INSTRUCTIONS/ DISPOSITION SEB-34-32 1 Kit, consisting of the following parts: MS35333-37 2 Lock Washer N/A Install 0790604-2 1 Bracket Assembly 0713738-3 Discard 9910080-5 1 Stall Warning Horn 1670056-6 1670056-7 Discard SEB-34-32 Instructions * Please contact a Textron Aviation Authorized Service Facility for current cost and availability of parts listed in this service document. SEB-34-32 January 5, 2023 Page 9 Single Engine OWNER ADVISORY SEB-34-32 TITLE NAVIGATION - STALL WARNING HORN REPLACEMENT FOR CESSNA MODELS 182, U206, 207 TO: Cessna Model 182, U206, and 207 Aircraft Owners REASON The original stall warning horn is no longer available. If the stall warning horn needs to be replaced a new stall warning horn and bracket are available. COMPLIANCE OPTIONAL. This service document can be accomplished at the discretion of the owner. LABOR HOURS For planning purposes only: WORK PHASE LABOR-HOURS Modification As Required MATERIAL AVAILABILITY PART NUMBER AVAILABILITY COST SEB-34-32 * * * Please contact a Textron Aviation Authorized Service Facility for current cost and availability of parts listed in this service document. Based on availability and lead times, parts may require advanced scheduling. WARRANTY None NOTE: As a convenience, service documents are now available online to all our customers through a simple, free-of-charge registration process. If you would like to sign up, please visit the Customer Access link at www.txtavsupport.com to register. SEB-34-32 January 5, 2023 Page 1 of 1 Textron Aviation Customer Service, P.O. Box 7706, Wichita, KS 67277, U.S.A. 1-316-517-5800 This document contains technical data and is subject to U.S. export regulations. This information has been exported from the United States in accordance with export administration regulations. Diversion contrary to U.S. law is prohibited. ECCN: 9E991 COPYRIGHT © 2023
638 CESSNA 182P SKYLANE parts for sale
See all →

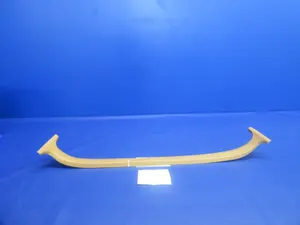
Parts listed for sale by vetted eBay sellers — confirmed on eBay at checkout.