Cirrus Owners and Pilots Quick Reference Guide for SR Series aircraft
Cirrus SR20 · V Speeds Reference
Overview
This document is a Quick Reference Guide for Cirrus SR Series aircraft, aimed at owners and pilots. It provides best practices for the operation and maintenance of Cirrus aircraft, emphasizing the importance of referring to the official Pilot Operating Handbook (POH) and other manuals for mandatory information. The guide covers various topics including pre-flight inspections, refueling procedures, winter operations, and cockpit preparation. It serves as a supplementary resource to enhance the ownership experience and ensure the proper care of the aircraft.
- Maintain a minimum of 6 quarts of engine oil before flight.
- Check tire pressures: nose wheel 30-35 PSI, mains 60-65 PSI.
- Never fly with a contaminated wing; decontaminate before flight.
- Use a tow bar for ground handling to avoid damage.
- Always refer to the POH for mandatory operational procedures.
Document
Source
Originally published by cirrusaircraft.com. Sprinkle hosts a reference copy with an added summary, specifications and searchable full text.
Document details
- Type
- V Speeds Reference
- Year
- 2023
- Pages
- 36
- File size
- 4.3 MB
- Publisher
- cirrusaircraft.com
Specifications & performance
Extracted from this document.
Specifications
- Wingspan (ft)
- 38
Common. One of the most common aircraft types we track.
Most owners only have the POH. Here's the essential set for the Cirrus SR20.
- Pilot's Operating Handbook / AFM
- Checklist
- Maintenance Manual
- Parts Catalog (IPC)
- Systems & Wiring
- Service Bulletins
- Type Certificate (TCDS)
Cirrus SR20 for sale now
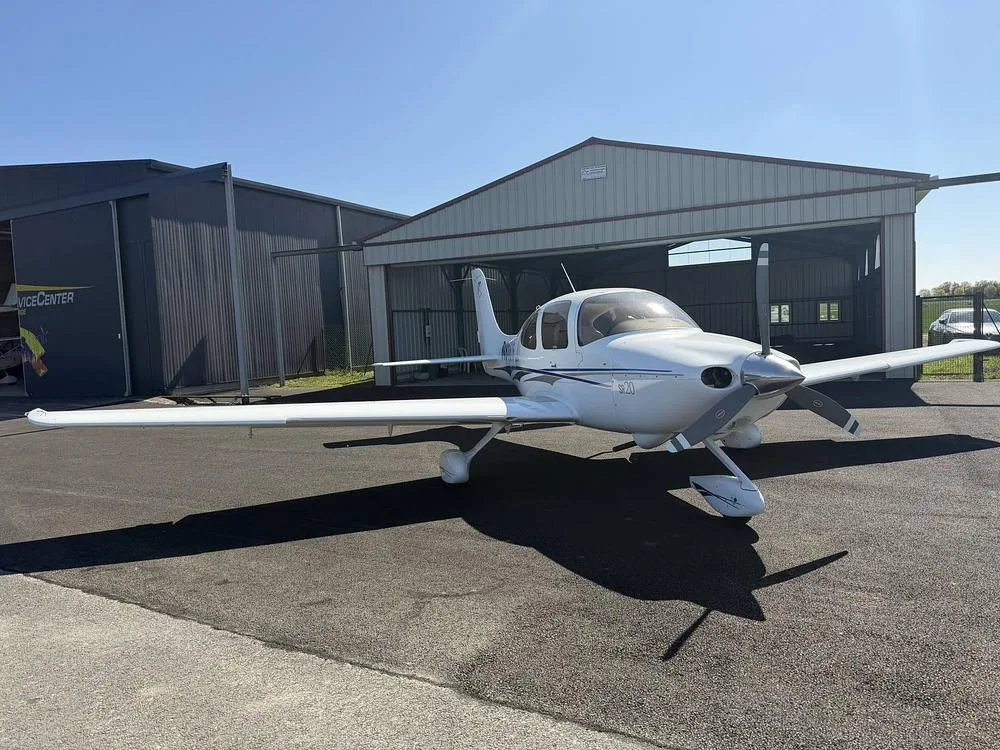
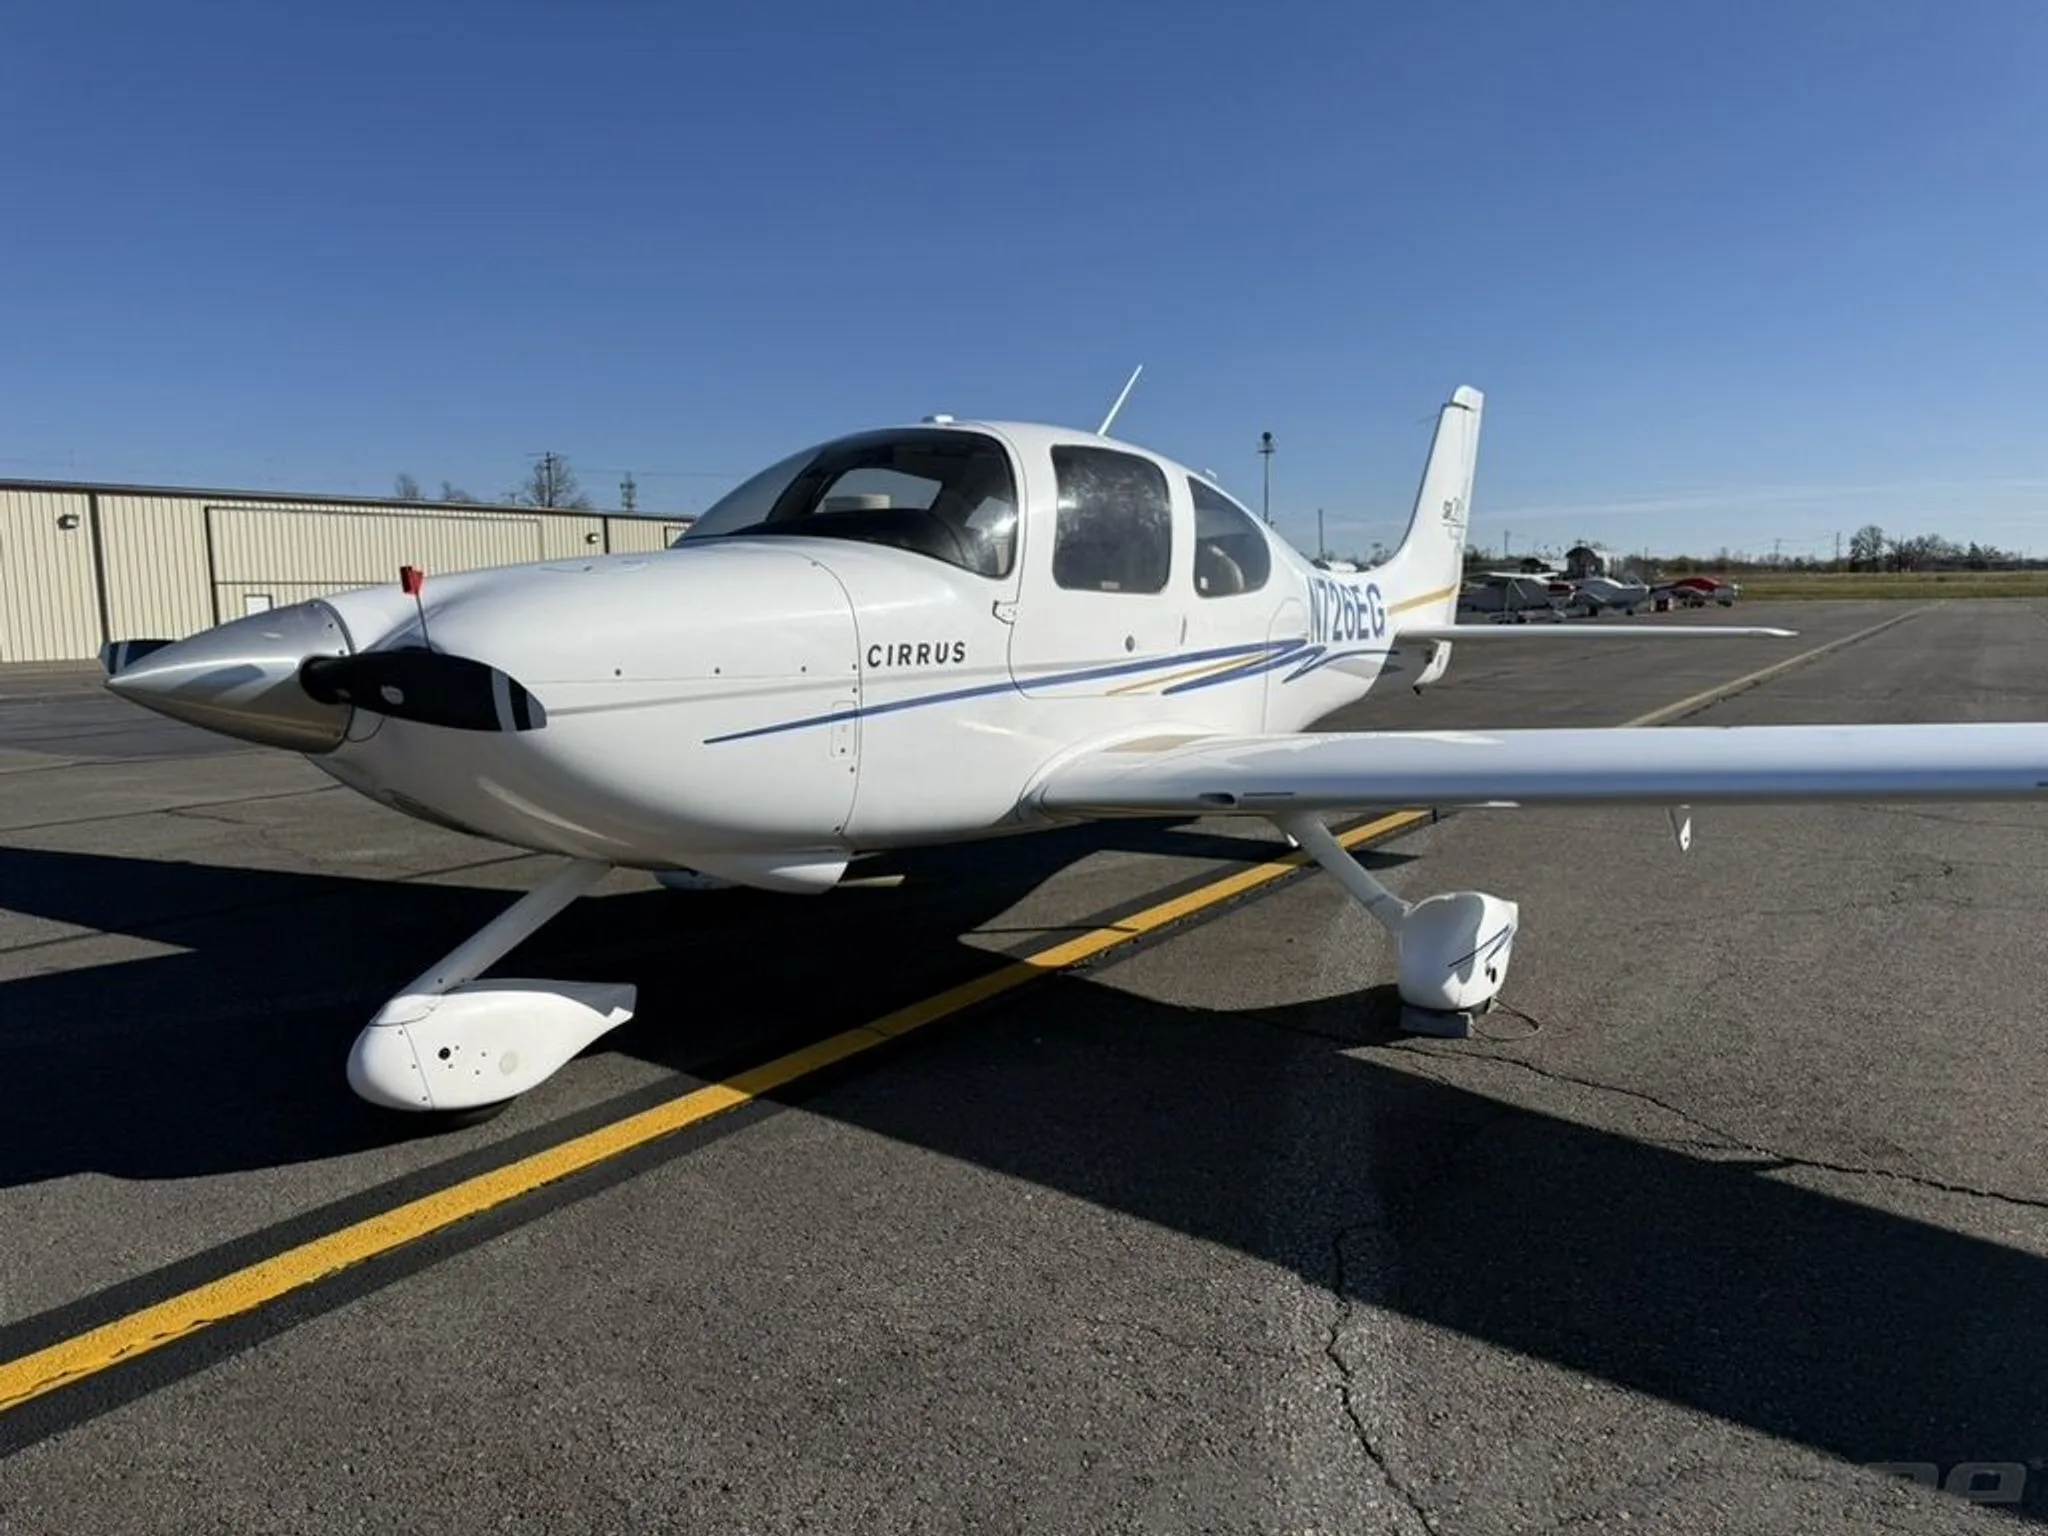

Free — save the SR20 to your watchlist and track it in one place.
More Cirrus SR20manuals & documents
See all 17 →- DFC Autopilot Series Installation ManualWiring Diagram
- Validation ReportOther Documents
- PILOT’S OPERATING HANDBOOK AND FAA APPROVED AIRPLANE FLIGHT MANUAL for the CIRRUS DESIGN SR20Pilot's Operating Handbook
- Standard Practice Maintenance ManualMaintenance Manual
- Aviation Maintenance Alert - Cirrus SR20 and SR22 AircraftMaintenance Manual
- PILOT’S OPERATING HANDBOOK AND FAA APPROVED AIRPLANE FLIGHT MANUAL for the CIRRUS SR20Training Manual
- CIRRUS SR20 NORMAL CHECKLISTEmergency Procedures
- Dual Fuel Level – Cirrus Aircraft w/ CIES Inc. SendersWiring Diagram
- Pilot’s Operating HandbookPilot's Operating Handbook
- Service BulletinService Bulletins
- AIRWORTHINESS DIRECTIVEAirworthiness Directives
- SERVICE BULLETIN SB 7084Service Bulletins
If you fly the Cirrus SR20, you may also be researching these.


In this document
Pre-Flight Inspection and Consumables
This section outlines essential pre-flight checks, including the removal of cowl plugs, pitot tube covers, and tie-downs. It emphasizes the importance of checking oil levels, ensuring a minimum of 6 quarts of engine oil, and inspecting static ports and control hinge cotter pins.
Refueling
Guidelines for safe refueling practices are provided, including tips to avoid fuel spills and contamination. It highlights the importance of checking fuel levels and ensuring the security of fuel caps.
Winter Operations
This section discusses procedures for operating the aircraft in cold weather, stressing the need to decontaminate wings before flight to prevent loss of lift due to frost or ice.
Cockpit Preparation
Instructions for preparing the cockpit before flight are detailed, including checking the avionics startup sequence and ensuring all systems are operational.
Ground Handling and Parking
Best practices for moving and parking the aircraft are covered, including the importance of using a tow bar and being aware of the aircraft's wingspan during ground operations.
Safety notes
- Ensure all pre-flight checks are completed as per the POH/AFM.
- Never operate the engine without securing the cowling screws.
Full document text
1 AN OVERVIEW TO OWNING AND OPERATING CIRRUS AIRCRAFT OWNERS AND PILOTS QUICK REFERENCE GUIDE 2 This Quick Reference Guide is intended to help protect the cosmetic appearance and mechanical integrity of the aircraft. It is not a Cirrus Aircraft FAA Authorized Pilot Operating Handbook, Aircraft Flight Manual, Flight Operations Manual, Aircraft Maintenance Manual, or supplement nor is it intended to replace those documents. Always refer to these documents for mandatory aircraft operation and maintenance information. For technical or maintenance questions, please contact Cirrus Field Support: fieldservice@cirrusaircraft.com or (218) 788-3000 For pilot operation or flight training questions, please contact Cirrus Approach: learning@cirrusaircraft.com 2023 Cirrus Owners and Pilots Quick Reference Guide for SR Series aircraft. Updated: 11/28/2022 3 Welcome to the Cirrus family. This Quick Reference Guide is a collection of best practices from Cirrus company pilots and covers day to day operation of your Cirrus aircraft that may not be covered in the POH, AFM, or AMM (Aircraft Maintenance Manual). It is designed to answer many common questions about ownership and operation, and basic maintenance & service requirements. When it comes to flying your Cirrus SR Series aircraft, please refer to both the POH and the interactive Cirrus iFOM or Flight Operations Manual which is available from the Apple iBooks store. To download it onto your iPad, look in the Apple Books app and search for “Flight Operations Manual” published by Cirrus Aircraft. This tool truly revolutionizes the flight training experience and is now available for both Cirrus Perspective aircraft and Avidyne aircraft. (Make sure you download the version appropriate for the avionics in the plane you fly.) A note for pilots/operators of previous generation aircraft: At Cirrus Aircraft a key component to our success has been our continuous innovation from year to year. This Quick Reference Guide has been created for the 2022 SR Series, so while the majority of the sections herein apply to all our aircraft, you may see some features that are different from or not included in your aircraft. Nonetheless, we think you’ll still find this to be a valuable addition to your ownership experience. WELCOME PRE-FLIGHT INSPECTION AND CONSUMABLES RE-FUELING WINTER OPERATIONS WINDSHIELD/WINDOW CLEANING ACCESSING THE AIRCRAFT PREPARING THE COCKPIT PERSPECTIVE+ PILOT PROFILES EFFICIENT PRE-FLIGHT PROCESS TIPS GROUND HANDLING AND PARKING ADJUSTING HEADSET VOLUMES - GMA 350C USB CABLES SUPPLEMENTAL OXYGEN UNSCHEDULED/EMERGENCY MAINTENANCE TABLE OF CONTENTS 05 11 12 14 15 17 23 24 26 28 29 30 33 4 5 Make sure you remove these four items prior to flight, if they are present: Cowl plugs, pitot tube cover, tie-down ropes, chocks. No gust lock is used in Cirrus aircraft because the trim cartridges are sufficient to prevent a gust from moving the controls to the stops. Beware of leaving a chock behind a wheel. While it may appear to be clear as you pre-flight, once you add weight to the plane this chock could damage the wheel pant as you taxi away. The plane will also tend to “rock laterally” once the engine starts, increasing the risk of trapping a chock. If there is a canopy cover on, carefully remove it making note as to how to reinstall it. Be careful not to scratch the paint as you remove and/or reinstall the canopy cover. Whenever possible, store the canopy cover in its bag in the baggage compartment. If the cover is wet, it is best to dry it prior to placing it in its bag for storage. IN ADDITION TO FOLLOWING ALL PRE-FLIGHT CHECKLISTS CALLED OUT IN THE POH/AFM AND/OR FOM, PLEASE FOLLOW THESE HELPFUL REMINDERS. PRE-FLIGHT INSPECTION AND CONSUMABLES 6 2021 OR EARLIER BAGGAGE DOOR When opening the baggage door on a 2021 or earlier Model Year, don’t leave the keys hanging in the lock. Dangling keys can scratch the paint so remove the keys as soon as the latch is open. As you load baggage into the baggage compartment, be aware of sharp edges that could tear carpet or seat backs and ensure any used or partially used oil containers are 100% sealed and cannot leak or spill. NEW BAGGAGE DOOR In 2022 Cirrus redesigned the rear baggage door adding convenience and utility. First, you’ll no longer need a key to open the door. The door will lock and unlock, along with the two main cabin doors, using the remote fob. Then, a simple push of the button on the baggage door will open it. When closing the door, push firmly until you feel the latch “click”. You’ll also see that the button within the outer bezzle will sit out slightly, and a fine green ring around the button should also be visible. Since there is now a gas strut that holds the door open, it’s good to double check the latch security before you start up and taxi out. While airflow will keep the door closed in flight, the gas strut could open the door on the ground, which may then allow items to fall out on the taxiway. IN-DOOR STORAGE In addition to the gas strut to hold the door open and the wider opening angle, the new door now features a great storage pocket that is custom sized for two quarts of engine oil and a small fuel tester. It’s also a great place to store your two wing jack point lugs, mentioned elsewhere in this User Guide. PRE-FLIGHT INSPECTION AND CONSUMABLES 7 SEAT RECLINE/FOLD-DOWN MECHANISM The front and rear seats are equipped with an automotive- style recline and fold-down mechanism. Simply use the lever on the side of either seat to position the seat into one of four positions: 1. Fully upright 2. 50% reclined 3. Fully reclined or 4. Folded forward CLEANING KITS Many owners choose to keep a small cleaning kit in their aircraft, often in a sealed plastic container. CAUTION: Never use any chemicals on the PFD or MFD screens, never use paper towels on the windshield and never clean the windshield “dry”! DUPLICATE KEYS Some owners choose to have a spare key accessible in
Show full textShow less
case they accidently lock themselves out of their plane. To do this, order a blank key, part number 51013-002 from your Cirrus Authorized Service Center. Then take your door key to a local specialty locksmith and get a spare or two made. PRE-FLIGHT WALK-AROUND Check the two Phillips head screws (one each side) in the cowling just behind the propeller. The engine MUST NOT BE STARTED if either screw is loose or missing. Operating the engine without these screws may result in damage to your cowl, propeller, or engine. Pay special attention after having the cowling removed. PRE-FLIGHT INSPECTION AND CONSUMABLES 8 PRE-FLIGHT INSPECTION AND CONSUMABLES OIL As you open the oil inspection cover don’t allow the spring-loaded latches to “snap” open as this will eventually chip the paint. Hold and guide them up with your finger as they unlatch. Avoid holding anything else in your hand when you check the oil…if you drop anything into the engine compartment it’ll be very difficult to retrieve without removing the cowling! ADDING OIL All Cirrus SR Series aircraft should be operated with a minimum 6 quarts of engine oil. If you find less than 6, add a quart. Over time you will discover the optimum oil level for your aircraft’s engine. For the G6 SR20 with the Lycoming engine, the access door is on the co-pilot side and has a single dip stick/ filler tube. Be cautious to NOT tighten the dip stick more than finger tight to avoid stripping the threads. SR22 AND SR22T NOTE: THE DIPSTICK HAS A FLEXIBLE SECTION. CAUTION: IT IS IMPORTANT TO KEEP DIPSTICK FREE OF ANY CONTAMINATES OR DEBRIS SUCH AS DIRT. AVOID PLACING DIPSTICK ON THE GROUND. 9 PRE-FLIGHT INSPECTION AND CONSUMABLES STATIC PORT There is a static source on each side of the aircraft aft of the rear window. Make sure each is not blocked, contaminated or covered over. Just above this, behind the rear window, is the area through which the CAPS system fires upon activation. This area should be perfectly smooth. If it appears uneven, ask your Cirrus Authorized Service Center (ASC) to inspect it. HORIZONTAL STABILIZER Ensure the clear tape covering access holes is intact. ELEVATOR HORN Ensure that the counterweight in the elevator horn is present, and that the torque stripes are intact. TAIL If the rudder is equipped with a counterweight be sure it’s securely in place and safety wired. 10 PRE-FLIGHT INSPECTION AND CONSUMABLES CONTROL HINGE COTTER PINS Check that the cotter pins are present in the appropriate places. During the pre-flight of the flaps, inspect the push rod that drives the flaps and ensure that the rod ends are properly aligned with the center safetywired turnbuckle. NOTE: THE REAR-FACING WHITE NAVIGATION LIGHTS ARE BUILT INTO THE SPECTRATM WING TIP AND THE STROBES TAKE THE PLACE OF A RED ROTATING BEACON ON A MODERN AIRCRAFT. TIRE PRESSURES In order to ensure maximum tire life and guard against wheel shimmy or damaging tension on the nose landing gear, it is important to maintain correct tire pressures. Be sure they are checked regularly with a tire pressure gauge. The nose wheel should be 30 to 35 PSI and the mains should be 60 to 65 PSI. This applies to the SR20, SR22 and the SR22T. We recommend aiming for the middle of these ranges. Each wheel fairing is equipped with an access panel to ease in testing tire pressure. 11 If you’re using self-serve or a line service truck, please observe the following tips: • Your belt buckle can easily scratch the leading edge so cover this or any other sharp objects on your clothing • Use the exhaust pipe as the grounding point for static electricity discharge • Use a rubber refueling mat whenever possible • To avoid “splash back”, insert the nozzle at an angle pointed towards the cabin • Avoid rubbing the fuel nozzle against the rim of the filler hole • Avoid allowing the fuel nozzle to rest on the bottom of the tank or on the small metal fuel level tabs that can be easily bent FUEL Be careful when you look into the fuel tanks to check levels, especially at night if you are holding a flashlight. As you pour the “sumped” gas back into the tank make sure you don’t drop the fuel tester into the tank and be sure to check the security of the filler cap latches once you’re finished with the fuel checks. FUEL DRAINS There are five fuel drains to check - two under each wing and one just behind the nose wheel. On FIKI equipped aircraft, avoid sampling from the TKS drains, as they look similar to the underwing fuel sumps. Be especially cognizant of the inboard (collector tank) drains: they can flow very quickly. We recommend you return clean sumped fuel to the tanks. Contaminated fuel should be properly disposed of in designated containers. Dumping fuel on the ground may result in significant monetary fines. RE-FUELING 12 For cold weather engine operations please refer to section 4 of your POH and to the engine manufacturer’s operating manuals for the best procedures. NEVER FLY WITH A CONTAMINATED WING. The Cirrus laminar flow composite wing could lose lift with EVEN THE SLIGHTEST FROST. DECONTAMINATE YOUR AIRCRAFT BEFORE YOU ATTEMPT TO FLY! There are a number of techniques to do this: • Use TKS ice protection fluid from a garden-style sprayer to melt the frost/ice and then wipe clean. This requires having access to a sprayer and TKS fluid. (There are actually two approved fluids: AL-5 and DTD-406B) • Park the aircraft facing the sun and then wipe the melting frost off. This can take time. • Move the plane to a heated hangar until the frost melts. SR22 AND SR22T WITH CERTIFIED FLIGHT INTO KNOWN ICE (FIKI) Adhere to the “Never fly with a contaminated wing” rule as discussed above. Once you are airborne, the FIKI system is designed to handle most icing conditions; however, it is VITAL that you have studied the online Cirrus Icing Awareness course and passed the quiz at the end. This must be completed every 24 months or the aircraft’s FIKI certification will no longer apply. Even the FIKI system has its limitations; treat icing conditions with respect at all times! Any operations in icing conditions must be conducted according to the criteria defined by FAR Part 25, Appendix C. If you need to refill the ice protection fluid tanks, you can ask the FBO to do it for you, but be aware it may be a maintenance department function rather than a line crew function and may incur a minimum labor charge. If you have spare fluid available and choose to fill yourself, use an appropriate funnel. MAKE SURE YOU’RE FILLING THE TWO INBOARD DE-ICE TANKS AND NOT THE OUTBOARD 100LL GAS TANKS! WINTER OPERATIONS TKS ice protection fluid filler tank. One on each wing. 13 14 Never use a paper cloth….it will scratch the windshield! If the windshield needs cleaning, make sure you use a perfectly clean micro-fiber rag along with a cleaning aerosol such as Prist™ or similar cleaning product identified on Cirrus’ approved cleaning product list. NEVER use a dry cloth on a dry windshield and if you drop the cloth on the ground DO NOT continue with that cloth. Dust and dirt in a dry cloth will create scratches and swirls in the windshield. Use the Prist™ (or similar cleaning product identified on Cirrus’ approved cleaning product list) liberally to ensure a damp surface and wipe in straight lines up and down, never in a circular motion as this too can create “swirls” in the windshield. Cirrus approved cleaning products are listed in section 8 of your POH. PREVENTING PAINT SCRATCHES Be very careful when leaning over the cowling or the wing to check fluids as your belt buckle can easily scratch the paint, so try to cover this or any other sharp objects on your clothing. FOR FIKI EQUIPPED AIRCRAFT The leading edge of the wing uses a titanium panel with over 820 holes drilled per square inch. To prevent clogging these tiny holes DO NOT USE ANY WAX ON THE LEADING EDGE! Refer to POH for more details on cleaning the TKS panels. As you prepare to enter the aircraft, take one more look under the airplane to make sure that nothing is hanging/dangling — tie-downs, pitot tube cover, chocks — and ensure that the baggage door latch is secure. WINDSHIELD/WINDOW CLEANING 15 OPENING DOORS WHEN WET If it’s been raining and you open the doors, water can drip on the seats. The best way to avoid this is to wipe the water off the door, from front to back, along the top door seam, either side of the GPS and traffic antennae. This is where water that can drip on the seats sits. UNLOCKING THE DOORS We recommend unlocking and opening the doors from the leading edge, while standing in front of the wing: It’s simply easier to control the door from in front than from behind. FLAPS Some owners choose to leave the aircraft with the flaps in the 50% position while parked. This makes it easier for people to board with much less likelihood that they’ll accidently step on the flap. WING WALK As you and your passengers step up onto the plane, stay on the rough wing walk surface and be especially aware of any small stones on the bottom of your shoes. These can damage the paint if you’re not careful. Try to avoid dust, mud or oil on your shoes. OPENING DOORS As with the baggage door don’t leave the keys in the lock as you unlatch the door as they will dangle and scratch the paint. As you release the door catch, try to “hold/ guide” the door as it opens and don’t allow the door to “swing” hard against the gas strut. ACCESSING THE AIRCRAFT 16 INGRESS/EGRESS The seats in Cirrus aircraft are made of special energy-absorbing material, which, if pressed on with a focused point, such as a knee or a foot, will lose its absorbent qualities over time, so don’t place a knee on the seat or stand on the seat. Also, be careful as you settle into the seat as the center console is not designed to withstand heavy side-loading. CUP HOLDERS There are folding cup holders for both the front and rear seats. They can be easily damaged if stepped on, so please keep them folded away when not in use. DOOR LATCHES Redesigned for 2016, the door latches are easier to close. They do not require the same force that the older doors needed. Simply pull the door in and once the latches engage you can push down on the lever to lock. Before attempting to close the doors, look to make sure all belts, buckles, headset cables and fingers are clear of the door frame. Doors do require a solid pull but they do not need to be slammed. Practice closing the door a few times and BEFORE the engine is running so you have a smooth technique. WARNING: Do not commence your take-off roll if the doors are not secured. It’s impossible to secure the doors once in flight. If enough runway remains, consider an abort. If safely aborting the takeoff is not possible the plane will fly with the door unlatched allowing you to safely circle back to the airport to land and then close the door. ACCESSING THE AIRCRAFT 17 CAPS® SAFETY PIN Once you remove the parachute safety pin you may wish to pass the ignition key through the ring on the safety pin prior to inserting it into the ignition switch. This does two things…first it prevents the keys from scratching the instrument panel in turbulence. Also, it ensures that everyone on board can clearly see that the CAPS pin is removed prior to flight. You may also choose to reposition the CAPS handle cover back on the rear-most Velcro tabs so the CAPS handle remains visible to all occupants at all times. Remember that the CAPS handle cover is a required placard and must also remain visible to all occupants. Avoid placing headsets, knee boards or any other items on the glare shield; it’s just too easy for them to slip off and scratch either the avionics screens or to slide forward and scratch the inside of the windshield. ENSURING ALL HEADSETS ARE WORKING There are a variety of headsets available, and your new Cirrus can accommodate both Lemo style single-plug multi-pin connectors and dual-pronged plugs. The Lemo style plugs offer connections for both microphone and stereo audio through the single plug, and the noise cancelling is powered by the plug itself. If you are using Bose headsets with the single multi-pin connector, be sure the indicator, either a red dot, a white dot or a pair of white arrows, is aligned towards the tail of the aircraft or “6 O’clock” position. DO NOT FORCE THE CONNECTOR INTO THE SOCKET. If it’s properly aligned it will slide in and latch easily. PREPARING THE COCKPIT 18 EXAMPLES OF DUAL PLUG STYLE CONNECTORS These pictures show some of the different microphone and headset plugs you may see on Bose, David Clark or Lightspeed brand headsets. You’ll notice that they differ somewhat meaning that you may need to adjust the depth to which they are plugged into the socket in order to achieve a good connection. If you have Bose A20 headsets with the dual plug you may wish to upgrade to the Lemo plug module. These are available from Bose and are easy to swap out. SWAPPING HEADSETS When flying with more than one headset make sure you don’t accidently “swap” headsets between seats. If they’re swapped and you push the pilot’s transmit (PTT) button, you’re activating the co-pilot’s mic, since he/ she is actually wearing the pilot headset. If ATC says “aircraft transmitting on 123.45, carrier, no voice,” this means you’re transmitting, but since you have the wrong headset on, you’re speaking into the wrong microphone. Another clue that it’s not a radio malfunction is that the letters “TX” for Transmit appear next to the frequency as you push to talk. PREPARING THE COCKPIT 19 CIRRUS PERSPECTIVE+™ SCREENS The screens have a special non-reflective coating which will be damaged if cleaned with anything other than a very slightly water-dampened, soft, clean micro-fiber cloth. Using ANY chemicals will DESTROY the screen coating, and this item is NOT covered under warranty. NEVER USE ANY CHEMICALS ON THE SCREENS! FINGER PRINTS To avoid the build-up of finger prints, avoid touching the screens directly. If you need to point out something on a screen we recommend using either the end of a pencil or pen with the nib retracted or the tip of your nail with your finger reversed. ALTERNATOR #1 LOAD You may notice Alt 1 amp load drop to 1 or 2 amps and an “ALT1 CAUTION” CAS message may be displayed on the PFD. This is normal if the air conditioning is off and is no cause for alarm. In normal operations, Alt #1 powers only the A/C, the yaw damper and landing light. It also recharges Bat 1 after a start. The power draw from the yaw damper and the landing light are so insignificant that you’ll see this very low charge if flying with the A/C off. To check that Alt #1 is OK, just turn on the A/C and check to see that the amps increase. PREPARING THE COCKPIT 20 NIGHT DIMMING OPERATIONS Although the Cirrus Perspective+ screens use a sensor to automatically adjust screen brightness, as it starts to get dark you might want to adjust the brightness manually. This is a three-step process. 7 O’clock daylight mode 5 O’clock manual bright mode 2 O’clock manual mode With the dimmers rotated all the way counter-clockwise to the 7 O’clock position they will dim automatically. This is the best setting for daylight operations. (Left picture) As it gets dark, turn the dimmers all the way clockwise to the 5 O’clock position. This is the brightest “Manual” setting. (Center picture) As it continues to get darker, start to rotate the dimmers counter-clockwise and continue to adjust down as your eyes adjust to the darkness. (Right picture) NOTE: BEST PRACTICE IS TO RETURN THE DIMMERS TO THE FULL COUNTER-CLOCK- WISE 7 O’CLOCK POSITION (LEFT PICTURE) FOR THE NEXT DAYLIGHT FLIGHT, OTHER- WISE THE SCREENS WILL BE TOO DIM TO SEE IN DAYLIGHT. PREPARING THE COCKPIT 21 FRONT SEAT ADJUSTMENT The front seats adjust back and forth and the seat tracks are set at an angle to make the seat go higher as it travels forward. To adjust the seat place one hand under the “Grab Here” label below the standby instruments and release the seat with the bar between your knees. You may also use the grab handle above the windshield. DO NOT USE THE TOP OF THE GLARE SHIELD; IT IS NOT STRUCTURAL! The grab point is just under the standby instruments. (Right picture) Since the seat is on an angle, remember to brace yourself as you slide back to avoid moving back too fast. Consider helping your passenger into the right seat; show them where to grab (and where NOT to grab!) to get their seat adjusted, get them buckled up, and close their door from the outside. The seat will be locked in place when you release the bar and the pins in the left and right seat tracks spring into place. To ensure the seat is locked in your desired seating position, listen for the pins to click into place, and verify that the seat adjustment bar is in the down position. A quick “shuffle” back and forth in the seat can confirm that the pins are locked into the rail and that you’re safe to go. PREPARING THE COCKPIT 22 23 One of the great features of the Cirrus Perspective+ by Garmin® system is its display flexibility with hundreds of variations and configurations that a user may choose from, and the ability to store custom profiles for up to 25 users. In a multi-user environment each pilot should be respectful of their fellow pilot’s profile. If you have started the system with a different pilot’s profile and you make changes to the displays, those changes will be recorded into that other pilot’s profile. AUDIO PANEL Cirrus uses the Garmin® GMA350c audio panel with Bluetooth® connectivity. This audio panel has some amazing features such as “3-D” audio and the option to connect audio devices like phones and MP3 players via Bluetooth. We recommend a thorough tutorial, review, practice and check out before flying with this for the first time. Just like any new technology, it’s great once you become familiar. To avoid making these unwanted changes to other profiles, try the following: 1. The first time you fly behind the Garmin system, use a generic profile. 2. Immediately go into the systems page and record a new profile with your name. 3. Make all the adjustments, tweaks and changes you would like. 4. Always select your profile for future flights. 5. As you learn more about the Garmin system or if you are flying in different environments, you may wish to make changes to your profile. 6. Changing profiles can be done upon start-up or after the system has booted. This is done on the systems page. CIRRUS PERSPECTIVE+™ PILOT PROFILES 24 CIRRUS PERSPECTIVE+™ BY GARMIN® Switch on the left-most switch—this is battery 2. With the pilot’s door open, you can easily see the switch from the leading edge. The flap position indicator light in the center console should NOT come on and the flaps should NOT work. If they do, the isolation diodes may be damaged or inoperative. Consult with your ASC or Cirrus Field Service prior to flying the aircraft. Additionally, verify that the Essential Bus voltage is 23 to 25 volts while powered only by battery 2. Then, switch on battery 1 in addition to battery 2. Verify that the Essential Bus remains at 23 to 25 volts after turning on battery 1. Drop full flaps. Switch on the lights and, if appropriate, pitot heat (make sure the pitot cover is removed first!). Quickly walk around and check them. When you come back, both Garmin screens should be on. You can check to see that the electronic charts are up to date on the MFD splash screen at this time. Right now, looking in at the pilot’s foot well is the best time to check all of the circuit breakers. Limit battery use before starting the engine to 5 minutes. If you and/or your CSIP instructor need to practice programming the Cirrus Perspective+ panel, then consider using an external power source. We suggest using a Start Pac 24 volt Avionics Power Supply available from the Cirrus Store, cirrusstore.com Everything in the Cirrus cockpit is ergonomically arranged. It is nevertheless helpful to make yourself familiar with the center console before you sit down. 1. Note the times on the Hobbs and Flight meters. 2. Plug in the headsets. 3. Close the compartment BEFORE sitting down. PASSENGER BRIEFING Make certain your passengers have received a thorough safety briefing including: 1. The CAPS handle. 2. The Level button. 3. The door latches. 4. The emergency egress hammer. 5. The fire extinguisher. Also remind them that there is no smoking and discuss “Sterile Cockpit” during key phases of flight or an emergency. Apologize in advance if you need to “Shush” someone who chimes in at a bad time. EFFICIENT PRE-FLIGHT PROCESS TIPS 25 AVIONICS STARTUP Once pre-flight inspections are complete, and you are ready to start the engine, here are some avionics startup tips: The processors in the displays are the brains of the Cirrus Perspective+ avionics and function much like any other computer. Upon start-up they take time to load the software needed, to connect with the remote sensors and LRUs that make up the system and run self-tests. To avoid system interruption upon start-up, it’s best to take a steady and deliberate approach. 1. Turn on BAT 2. To check that the bus isolation diodes are working, ensure you do NOT have Flap Position Indicator, MFD or Avionics Cooling Fan. 2. Note your starting Hobbs and Flight hours. 3. Adjust your seat and seat belts. 4. Remove the CAPS safety pin. 5. Insert the ignition key into the key barrel. 6. By now the system should be ready for the next step. 7. Turn on BAT 1. 8. Do NOT activate the pitch or roll trim high hat. Trim inputs during the Automatic Flight Control System (AFCS) self-test can upset the system. 9. Look for the TAWS and AFCS annunciations in the top right corner of the PFD to go out. Finally, wait for the Synthetic Vision (if so equipped) to appear on the PFD. 10. If you have any fault annunciations remaining, go ahead and shut off BAT 1 and BAT 2, let the system wait for 30 seconds or so, and re-try this sequence. 11. Once all systems are up and running, start the engine and watch the ammeters on the “Engine” page for an amps rise as you turn on first ALT 1 then ALT 2. If you start the engine and need to re-boot the system, it’s OK to leave the engine running while you do a steady and measured re-boot as shown above. EFFICIENT PRE-FLIGHT PROCESS TIPS 26 The wingspan is just over 38 feet! Situational awareness is very important as you move the aircraft on the ground. The wingspan is wider than many other general aviation aircraft and the wing is closer to the ground. Look around before you move the aircraft to ensure that your ground handling (or taxi) will not bring the Cirrus close to other aircraft or fixed objects on the ground. When in doubt, ask someone to assist you as a “wing walker” until you are certain that the airplane is clear of all obstacles. The G6 SR20 has a max take-off weight of 3,150 lbs and a G6 SR22 or SR22T tops out at 3,600 lbs so they can be a challenge to handle without assistance. ALWAYS use a tow bar for controlling the nose wheel as you move the plane around. Make certain that the tow bar is between prop blades as shown here. If a blade is pointing straight down, turn the prop counter-clockwise, looking from the front at the prop. MAKE SURE THE KEYS ARE NOT IN THE IGINITION AND BOTH BATTERIES ARE OFF BEFORE TURNING ANY PROP. When moving forward you can pull the tow bar or the prop. If you have help, ask them to pull from in front of the wing by grabbing the door frame. When moving in reverse DO NOT PUSH WITH THE TOW BAR. There is a risk that the lugs will jump out and damage the wheel pant. Instead, push on the inner most part of a prop blade and use the tow bar to steer the nose wheel. NEVER PUSH ON THE PROP SPINNER! Remember also that the nose wheel is free-castering, so if you have someone helping you ask them to push with you on the base of another prop blade, as close to the center line of the fuselage as possible. If the person helping pushes backwards on a wing, even at the root, the plane will start to pivot quickly and get off line. Of course, if you’re pushing from behind DO NOT PUSH ON THE FLAPS OR THE AILERONS. PUSH ONLY ON THE WING ITSELF. NEVER WALK AWAY WITH THE TOW BAR CONNECTED. REMOVE THE TOW BAR BEFORE YOU START THE ENGINE! A SIMPLE DISTRACTION CAN LEAD TO AN EXPENSIVE MISTAKE! GROUND HANDLING AND PARKING 27 GROUND HANDLING AND PARKING Taxi or tow the Cirrus straight into the parking spot. Keep situational awareness at all times! CHOCKS Since the plane has low-profile wheel fairings it’s important to use the Cirrus low-profile chocks to avoid damaging the wheel fairings. Also, there’s no need to “wedge” the chocks in place…simply place them directly in front of and/or behind the wheel. Always assume that the FBO line crew or a mechanic will try to tug the plane while you’re parked. Most FBOs will ask that you confirm the brakes are released when you stop at their facility. Also, their tugs are often powerful enough to pull a Gulfstream™ and so the driver may not even notice that he’s tugging your plane with the brakes on. If the plane is tugged with the brakes on, damage could occur. Pay close attention to the “Park Brake” annunciation on the PFD and make it a consistant “last check” as you step away from the plane. “Park Brake Off” TUGGING When stopping at FBOs, especially facilities that handle larger aircraft, it’s likely that your plane will be tugged. Talk to the line crew and make sure they have experience and the correct tow bar adaptors to hook up a Cirrus. Using the wrong adaptors can easily damage the nose wheel pant. Be very careful if they use a ride-on “Lektro” tug. These must ONLY be used with the correct Cirrus “Fixed Gear” adaptor installed. PRIOR TO ENGINE SHUT DOWN At the end of the flight make sure you turn off the air conditioning, the recirculator and the fan BEFORE you shut the engine down. This removes the A/C system as a load on the engine and the starter for the next flight and extends A/C life. 28 RADIO VOLUME This controls the volume of incoming radio calls from ATC and other aircraft and is a single setting for all intercom positions in the aircraft. The pilot will usually set this to best suit his/her listening preferences. In the G6 Perspective+ cockpit, the volume control knob is now duplicated in the radio control section of the FMS. INTERCOM VOLUME This controls the volume of all radio and intercom signals in three zones: Pilot, Co-Pilot and rear seat Passengers (all three rear seats are grouped together). Use the inner “skinny” part of the knob to change the headset volume. As soon as you rotate this knob the unit will start to adjust the Pilots headset volume and the triangular LED above “Pilot” will flash. The stack of LEDs beside the knob will also show the volume changing graphically. SEAT SELECTION To change to the volume for the next seat(s)/person, use the outer “Base” part of the knob to step through the seating positions. The triangular LED above the “seat” will flash as you rotate the knob and you can then adjust that person’s volume. HEADSET VOLUME Lastly, most brands of headsets allow the user to adjust the overall volume of all the signals coming into their ears. These volume controls may be on a “Control Module” built into the cable, or on some models the rotary knobs are on the outside of the ear cups of the headset itself. High-end headsets will also allow for a cable or Bluetooth connection to an audio player, such as an iPhone® or iPod®. To ensure you and your passengers have an enjoyable flight, it’s worth a few moments to check the headset volumes are set to appropriate levels so everyone can hear and understand any instructions. Headset volume is controlled in three places: ADJUSTING HEADSET VOLUMES - GMA 350C 29 AFTER-MARKET CABLES These after-market cables, especially when coiled as shown, can introduce interference into the aircraft audio system and so should be avoided. If you hear audio interference that is new, try removing all USB cables and see if they are the cause. “APPROVED” CABLES Cirrus prefers Apple® brand cables. Inside the center armrest you’ll find two charging ports: a high power USB-C® port that supplies up to 60 watts of power and a USB-A port that supplies up to 15 watts. There are also two additional USB ports on the rear face of the center console for your rearseat passengers. Be careful with what you plug in here as some after-market accessories have been known to introduce interference into the aircraft’s audio system. USB CABLES 30 The Cirrus SR22T is equipped with a built-in oxygen system as standard, and the system is offered as an option on the SR22 non-turbo too. Even if you use a portable oxygen bottle, these tips can be helpful. Using supplemental oxygen adds greatly to the utility of your aircraft and to your comfort and safety. Supplemental oxygen above 10,000 ft is strongly recommended, and in some airspace, it is required (refer to your local aviation authority for specific legal requirements). Once above 18,000 ft (or FL180), cannulas are no longer allowed and you must use a mask with a built-in microphone for the crew members. Before you embark on a flight that may require supplemental oxygen, get a briefing from a CSIP on the use of the system and how to spot symptoms of hypoxia. Be aware that a key symptom of hypoxia is euphoria, so you may not realize you’re hypoxic since you may be feeling “buzzed”. Even at altitudes below the local requirements, using oxygen can be very useful. Since night vision is the first physiological system to be impacted by reduced blood oxygen saturation levels, the FAA strongly recommends using supplemental oxygen above 5,000 ft at night. Remember, no two pilots react the same to lower blood oxygen saturation levels, and so using oxygen can keep you feeling “fresher”, especially on a long trip. Considering the approach and landing phases at the end of your trip are among the highest workload environments, oxygen can be especially helpful. Not using supplemental oxygen can leave you feeling “groggy” or even somewhat “hung-over”. On all but the shortest hops it’s a good idea to have your oxygen kits available. If you found yourself needing to climb for weather, turbulence, terrain, winds, or ATC routing, and your oxygen kit is not available, you could find yourself in a sticky corner. SUPPLEMENTAL OXYGEN SYSTEM IMPORTANT PRE-FLIGHT ITEMS First, the masks, cannulas and regulators have a shelf-life and must be replaced periodically. In addition, you should check for brittle or faded tubing and any cracks or leaks in the tubes or couplings. Don’t wait until the engine is running to check the system. During your pre-flight, turn the system on and listen inside the baggage compartment. Rarely, there may be a leak at the refill port on the rear baggage bulkhead. Then, check all the in-cockpit components. It’ll be impossible to hear any subtle “hissing” from a leaking or cracked tube or fitting once the engine is running. 31 SUPPLEMENTAL OXYGEN SYSTEM CONNECTING THE REGULATOR As you engage the BNC connector into the 5-way outlet in the roof of the cockpit, be sure to listen for a positive “click’ to know it is engaged and give the tube a gentle tug to ensure it is secure. Then turn the system on and listen for any leaking or hissing. WHITE PLASTIC COUPLER To connect the output of the regulator to the input of your cannula or mask, you’ll need a short plastic “male- to-male” coupler. These are easily lost and so make sure you have enough to connect all your occupants tubing. The tubing is of the same outside diameter for all sections so cannot be fitted together without a coupler. FITTING THE CANNULAS AND MASKS It’s a good idea to check the fit of cannulas and masks before you start flying. The masks have elastic adjustable straps, and you’ll want these to fit snug but comfortably. Consider the routing for the tubing to avoid pinching or entanglement once you’re flying. DO I HAVE ENOUGH OXYGEN ONBOARD? On the EIS or “Engine” page there is an oxygen quantity gauge. Full is 2000 PSI. The amount of oxygen you’re likely to consume is a combination of the flow rate based upon your altitude; the number of people using the system; and if you’re using cannulas or masks. A chart to estimate usage can be found in the oxygen supplement pages of the POH. TURNING ON THE SYSTEM The system is turned on using the rocker switch to the left of the flap lever. There is an LED quantity display; a system fault light; and an O2 required light by the switch. 32 PULSE OXIMETER Each oxygen-equipped Cirrus comes with a full set of cannulas and masks and a simple pulse oximeter. These can also be found at larger drug stores, usually for under $50, and are a great accessory to have at your fingertips. (Pun intended) The pilot and passengers should check their blood oxygen saturation levels prior to take off to establish a “baseline”. Then keep checking regularly, as often as every 10 minutes, especially as you climb higher where the onset of hypoxia will be quicker. If your level is lower than you’re comfortable with, you can take a few deep breaths, especially through your nose if you’re using a cannula. You can also increase the flow rate through the regulator, but this will increase usage. SETTING THE FLOW RATE The regulator has a small black knob at its base. Adjust this knob to increase or decrease the flow of oxygen. You’ll see a small grey ball “bobbling” in the flow of oxygen to indicate that oxygen is flowing. Check the flow rate periodically as the tubing can become kinked or pinched during the flight and remember to adjust the setting as you change altitude. A post-flight “Got-Ya”. It’s likely that you’ll turn the oxygen off as you descend, but if you still have it on after you land, there’s a little “Got-Ya” to watch for. The oxygen system uses electrical power to both open AND CLOSE the flow valve, so if you don’t turn the system off BEFORE you power down the aircraft, the valve WILL NOT CLOSE, and you’ll waste the rest of your oxygen. The closer you are to mountainous areas, the more FBOs will carry oxygen. Note that many treat an oxygen refill as a maintenance work order, not line service, so hours and pricing will be different from fueling. It’s best to call in advance and make sure the service will be available when you need it. SUPPLEMENTAL OXYGEN SYSTEM 33 Below are some helpful tips and insights for basic repairs. For a complete guide to repair, maintenance and diagnostics, refer to your specific aircraft’s maintenance manual. FLAT TIRE If the aircraft requires jacking up, make sure you remove the tie-down eye bolt from the jack point screw and replace it with one of the jacking lugs which are usually kept in the center console or the storage pocket inside the rear baggage door. UNDER NO CIRCUMSTANCES should you lift the plane with the tie down rings. The ring may slip off or it will snap and the jack will puncture the wing as it falls! Also, jack both wings evenly not just one side. This also avoids the nose wheel rotating and the jack point slipping! Complete instructions are located in the Aircraft Maintenance Manual (AMM) DEAD BATTERY OR STUCK STARTER Below are some helpful tips if you have to remove the cowling of your aircraft. • Protect the prop spinner and the windshield. It’s very easy to scratch the polished or painted prop spinner when removing or reinstalling the cowling. • Like many composite components, the cowling derives its rigidity from being screwed together. Once you start to remove the screws the cowling becomes pliable and can easily twist and damage surrounding parts. • Take part of an old cardboard box about 18” x 24” and cut a “mouse hole” about 4” in diameter in the center of the lower edge. • Place this piece of cardboard between the back of the prop spinner and the cowling with the mouse hole sitting over the crankshaft. • Also, be aware that there are environmental air ducts and landing light power connections that attach to the lower cowling. These need to be reattached during reinstallation. • When re-installing the cowling make 100% sure you have replaced the screws at the 9 O’clock and 3 O’clock positions in the air intakes just behind the prop. UNSCHEDULED/EMERGENCY MAINTENANCE 34 35 36 ©2023 CIRRUS DESIGN CORPORATION D/B/A CIRRUS AIRCRAFT. ALL RIGHTS RESERVED.
What's in the Cirrus SR20 TCDS
A Type Certificate Data Sheet (TCDS) is the FAA's record of what an aircraft type was approved as. It is the source of truth for weights, seating, fuel and the rules the design was certified against. Expand any line to see what it means.
844 Cirrus SR20 parts for sale
See all →
Parts listed for sale by vetted eBay sellers — confirmed on eBay at checkout.