MODEL 172 AND SKYHAWK SERIES SERVICE MANUAL
CESSNA 172K Skyhawk · Maintenance Manual
Overview
The Cessna 172K Skyhawk Service Manual provides comprehensive maintenance and servicing information for the Cessna 172 model from 1969 to 1976. It includes details on various systems, inspection procedures, and revisions to ensure compliance with technical standards.
- Covers maintenance for Cessna 172K Skyhawk from 1969 to 1976.
- Includes revisions and updates to the basic manual.
- Contains detailed sections on aircraft systems and servicing.
- Provides a list of effective pages for easy reference.
- Includes a cross-reference of popular names and model numbers.
- Published by Cessna Aircraft Company.
- Revision 4 was issued in March 2004.
Summary written by AI from the source document. Check the original before relying on it. See which parts of Sprinkle are written by AI.
Reference only, not for flight. Use the current approved manual for your aircraft. See terms, section 5.
Document
Source
Copy found at aeroelectric.com. Sprinkle hosts a reference copy with an added summary, specifications and searchable full text.
Document details
- Type ·
- Maintenance Manual
- Year ·
- 2004
- File size ·
- 21 MB
- Copy found at ·
- aeroelectric.com
- Language ·
- en
What is the MODEL 172 AND SKYHAWK SERIES SERVICE MANUAL?
The MODEL 172 AND SKYHAWK SERIES SERVICE MANUAL is a maintenance manual for the CESSNA 172K Skyhawk, dated 2004.
What year was the MODEL 172 AND SKYHAWK SERIES SERVICE MANUAL published?
The MODEL 172 AND SKYHAWK SERIES SERVICE MANUAL — the CESSNA 172K Skyhawk maintenance manual on file — is dated 2004.
Common. One of the most common aircraft types we track.
Most owners only have the POH. Here's the essential set for the CESSNA 172K Skyhawk.
- Pilot's Operating Handbook / AFM
- Checklist
- Maintenance Manual
- Parts Catalog (IPC)
- Systems & Wiring
- Service Bulletins on file
- Type Certificate (TCDS)
CESSNA 172K Skyhawk for sale now
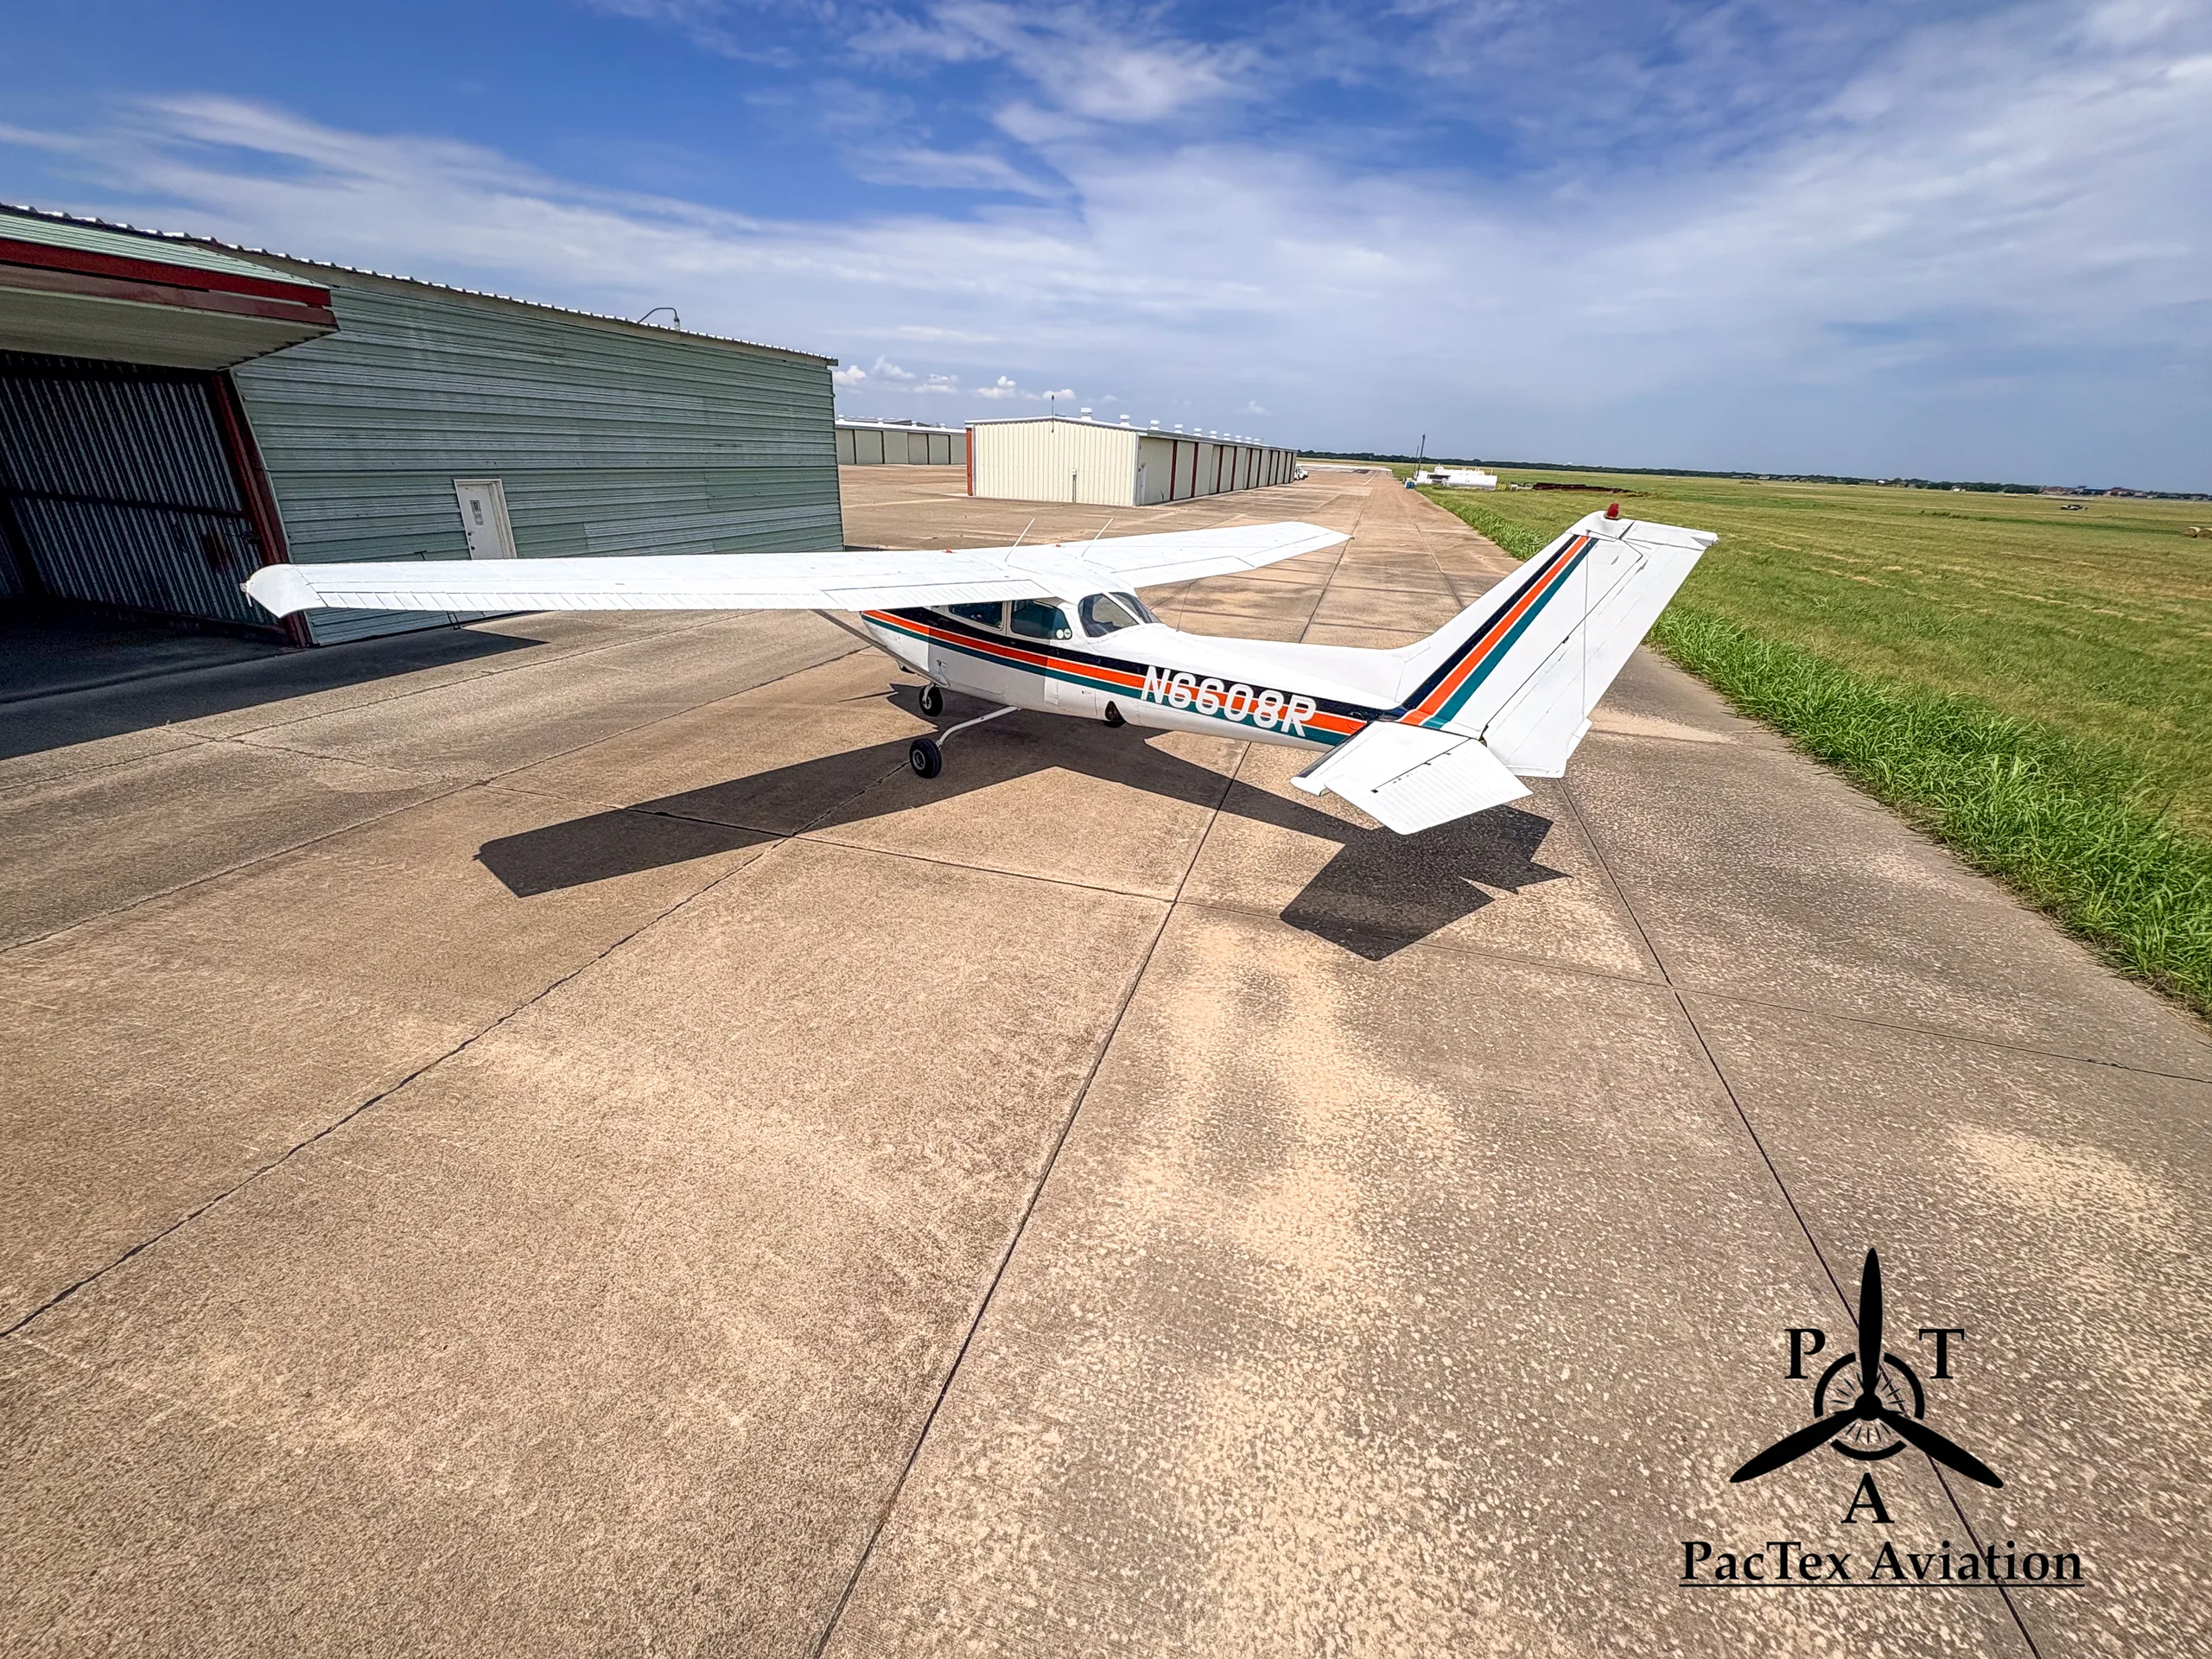
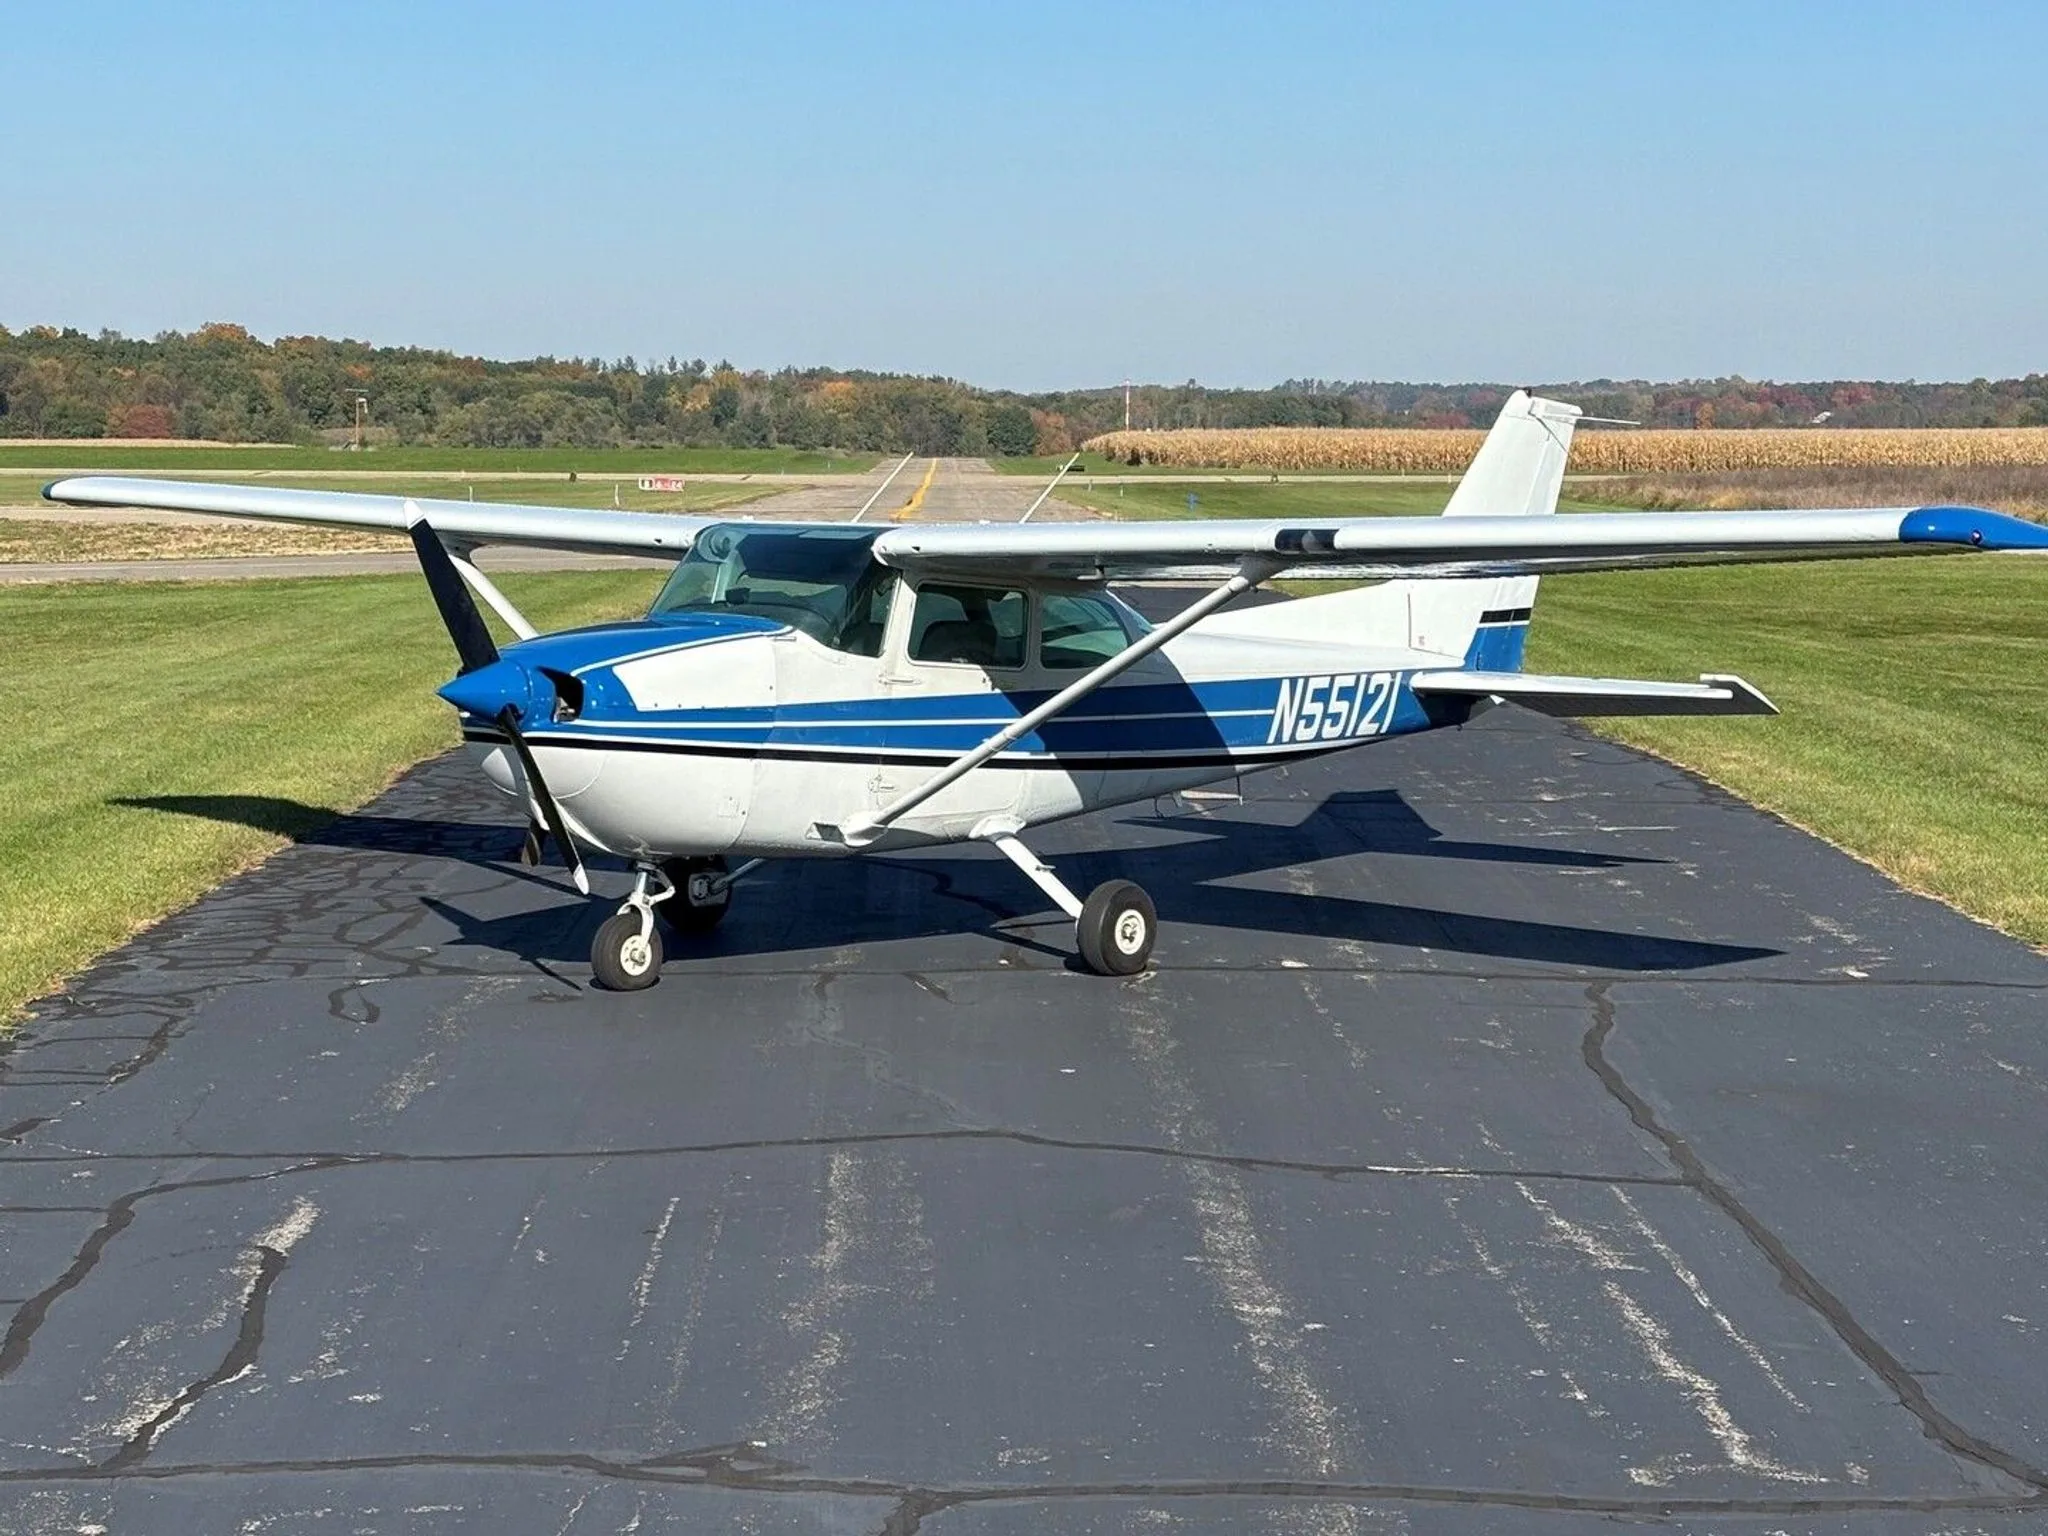
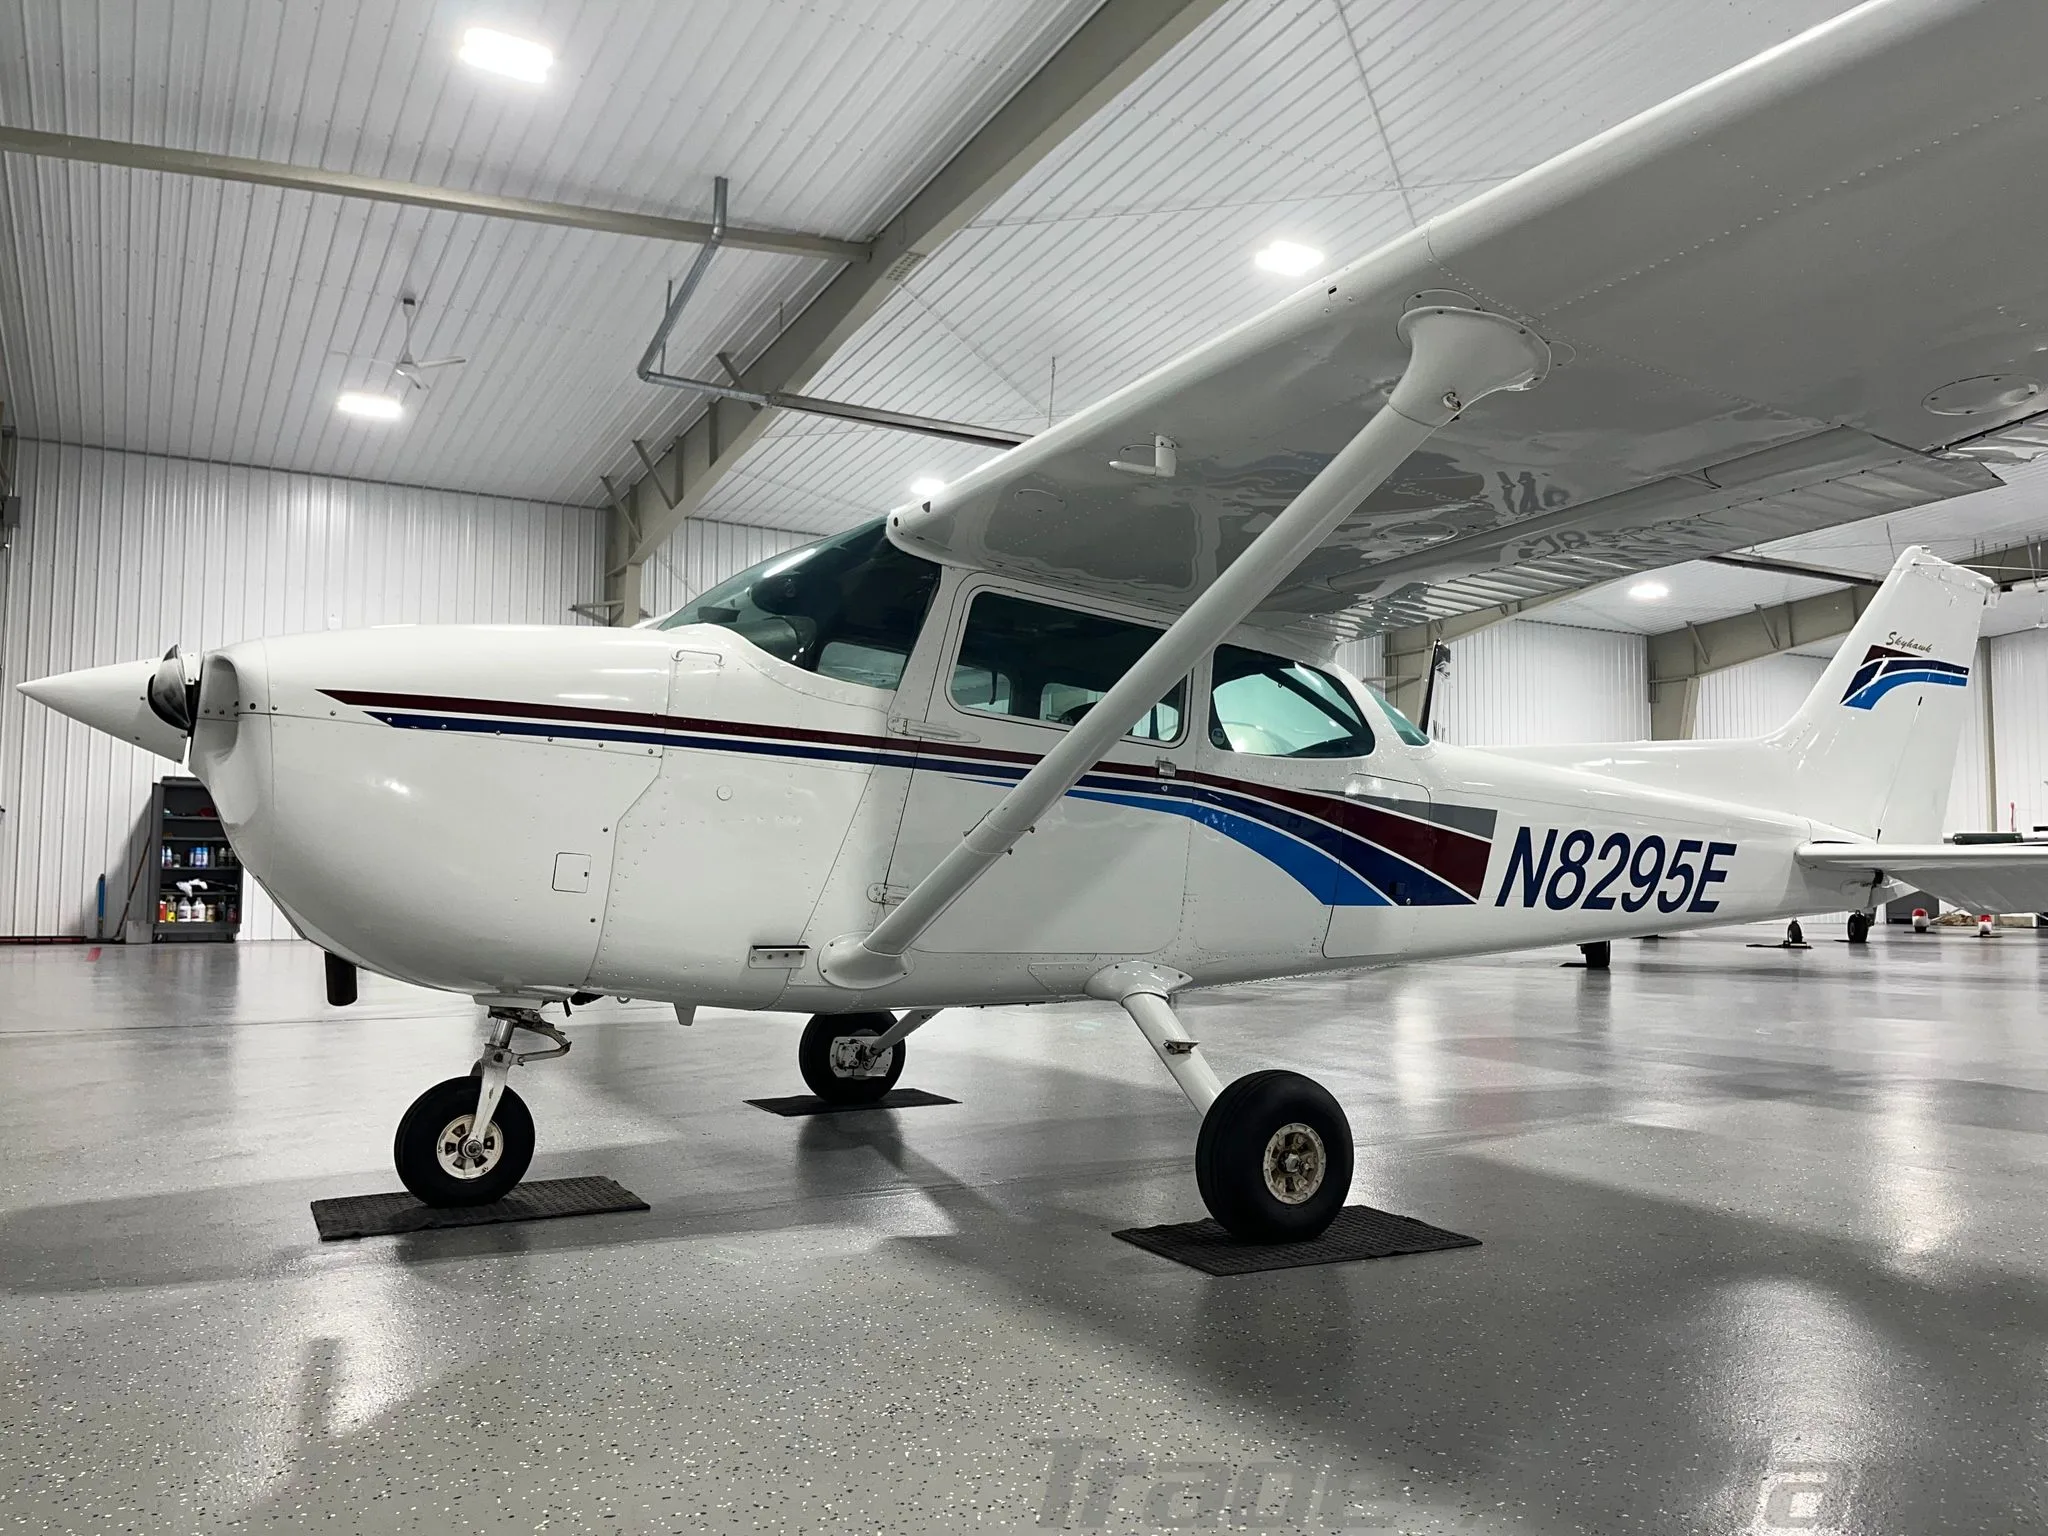
Free — save the 172 to your watchlist and track it in one place.
More CESSNA 172K Skyhawkmanuals & documents
- CESSNA 172K Skyhawk Model GuideModel Guide
- Final Report Accident involving a Textron Aviation Inc., Cessna 172K type of aircraft with Registry Number RP-C6923Other Documents
- C172K-Checklist-rev-B-2020-09Checklist
- Weight and BalanceWeight & Balance
- Cessna 172 XP 1977 V-SpeedsChecklist
- Cessna 172k parts manualParts Catalog
- Airplane Flight ManualFlight Manual
Related documents
- Cessna Model 182 and Skylane Series Service ManualCESSNA 182P SKYLANE · Weight & Balance
- Cessna Stationair Series, Skywagon 206 Series, and Super Skylane Series Service ManualCESSNA U206F STATIONAIR · Maintenance Manual
- 1977 Thru 1986 Model 182 & T182 Series Service ManualCESSNA 182Q SKYLANE · Maintenance Manual
- Piper PA-34-220T Airplane Maintenance ManualPiper PA-34 Seneca V · Maintenance Manual
- Pilot's Operating Handbook and FAA Approved Airplane Flight ManualCESSNA 182S SKYLANE · Pilot's Operating Handbook
If you fly the CESSNA 172K Skyhawk, you may also be researching these.


In this document
General Description
Provides an overview of the aircraft and its specifications.
Ground Handling, Servicing, Cleaning, Lubrication and Inspection
Details procedures for the proper handling and maintenance of the aircraft.
Fuselage
Covers maintenance and inspection procedures for the fuselage.
Wings and Empennage
Includes information on the wings and tail assembly maintenance.
Landing Gear and Brakes
Describes the maintenance procedures for the landing gear and braking systems.
Engine (Lycoming 'Blue-Streak')
Details maintenance and servicing for the Lycoming engine used in the aircraft.
Summary written by AI from the source document. Check the original before relying on it. See which parts of Sprinkle are written by AI.
Full document text
CessnaA Textron Company Service Manual 1969 THRU 1976 MODEL 172 SKYHAWK SERIES Member of GAMA FAA APPROVAL HAS BEEN OBTAINED ON TECHNICAL AFFECTS AIRPLANE TYPE DESIGN. REVISION 4 TO THE BASIC MANUAL INCORPORATES 3 OCTOBER 1994, TEMPORARY REVISION 2 DATED 7 REVISION 3 DATED 7 OCTOBER 2002. Copyright © 2004 Cessna Aircraft Company Wichita, Kansas, USA D972-4-13 REVISION 4 DATA IN THIS PUBLICATION THAT TEMPORARY REVISION 1 DATED JANUARY 2000, AND TEMPORARY 1 JULY 1972 1 MARCH 2004 CESSNA AIRCRAFT COMPANY MODEL 172 SKYHAWK SERIES SERVICE MANUAL LIST OF EFFECTIVE PAGES INSERT THE LATEST CHANGED PAGES. DESTROY SUPERSEDED PAGES. Dates of issue for original and revisions are: 01 July 1972 01 July 1973 01 July 1974 Change 3 Revision 4 15 June 1975 1 March 2004 Note: The portion of the text affected by the revision is indicated by a vertical line in the outer margin of the page. *The asterisk indicates pages revised, added, or deleted by current revision. Page No. Revision No. *Title............................4 *A thru B ..................... 4 i thru ii ....................... 3 iii ................................ 0 iv Blank ..................... 0 1-1 ............................. 0 1-2.............................2 1-3.............................1 1-4.............................0 1-5.............................2 1-6 Blank...................2 2-1 ............................. 3 2-2.............................2 2-2A .......................... 2 2-2B Blank ................ 2 2-3 ............................. 1 2-4.............................3 2-5.............................0 2-6.............................2 2-7 thru 2-8 ............... 3 2-9.............................0 2-10 thru2-14 ........... 3 2-14A ........................ 3 2-14B Blank .............. 3 2-15 ........................... 3 2-16...........................2 2-17 thru 2-18 ........... 3 2-19 thru 2-20........... 1 2-21 ........................... 2 2-22...........................3 *2-23 thru 2-30........... 4 3-1 ............................. 2 3-2 ............................. 0 3-3.............................3 3-4.............................0 3-5 thru 3-6...............3 3-6A thru 3-6B .......... 3 Page No. Revision No. 3-7.............................3 3-8 ............................. 0 3 -9 ............................. 1 3-10...........................3 3-11 thru 3-12 ........... 1 3-13...........................3 3-14...........................1 3-14A thru 3-14B....... 1 3-15...........................0 3-16...........................2 3-17 thru 3-18 ........... 0 3-19 thru 3-20 ........... 3 4 -1 ............................. 3 4-2 thru 4-3 ............... 2 4-4 ............................. 3 4-5 ............................. 0 4-6 thru 4-7 ............... 3 4-8 Blank .................. 3 5 -1 ............................. 4 5-2.............................3 *5-3 thru 5-3A ............. 4 *5-3B Blank ................. 4 5-4 ............................. 0 5-5.............................3 *5-6 thru 5-6A ............. 4 *5-6B Blank ................ 4 5-7 thru 5-8 ............... 1 5-8A thru 5-8B...........3 5-9 thru 5-10 ............. 3 *5-10A thru 5-10B ....... 4 5-11 thru 5-15 ........... 3 5 -1 6 ........................... 1 5-17 thru 5-18 ........... 3 5-18A........................3 5-18B Blank .............. 3 5-19 ........................... 3 5-20 ........................... 0 Page No. Revision No. 5 -2 1 ........................... 1 5-22 thru 5-23............0 5-24 ........................... 3 5-25 thru 5-26............0 5-2 7 ........................... 1 5-28 Blank ................. 1 6-1 thru 6-2................0 6-3 ............................. 3 6-4 ............................. 0 6-5 ............................. 3 6-6 thru 6-7................0 6-8 Blank...................0 7-1 thru 7-9................1 7-10 thru 7-11 ........... 2 7-12 Blank ............... 2 8 -1 ............................. 3 8 -2 ............................. 0 8-3 thru 8-6 ................ 3 9-1 thru 9-7................3 9-8 Blank ................... 3 10-1 thru 10-2............2 10-3 thru 10-6............3 10-7 thru 10-8 ............ 2 11-1 ........................... 3 11-2 ........................... 0 11-3 ........................... 2 11-4 thru 11-7............3 11-8 ........................... 0 11-9 thru 11-11 .......... 3 * 1 1-1 1 ......................... 4 11-12 thru 11-13 ....... 0 11-14 thru 11-15 ....... 2 11-16.........................1 11-17 thru 11-20........0 11-21 thru 11-22........1 11-23 thru 11-24........3 © Cessna Aircraft Company Original Change Change 0 1 2 Revision 4 Mar 1/2004 CESSNA AIRCRAFT COMPANY MODEL 172 SKYHAWK SERIES SERVICE MANUAL Page No. Revision No. 11-25............................2 11-26 thru 11-27 ......... 0 11-28 Blank..................0 11A-1 ........................... 3 11A-2 ........................... 0 11A-3 ........................... 3 11A-4 ........................... 1 11A-5 thru 11A-9 ......... 0 11A-10 ......................... 1 11A-11 thru 11A-12 .....3 11A-13thru 11A-16 ..... 0 12-1 .............................. 3 12-2 thru 12-5 .............. 0 12-6 thru 12-7 .............. 2 12-8 thru 12-10 ............ 1 12-11 ............................ 0 12-12 Blank .................. 0 13 -1 .............................. 3 * 13-2 .... ............... ...... 4 13-3 .............................. 0 13-4 Blank .................... 0 14-1 thru 14-2 ............. 0 14-3 .............................. 2 14-4 ............................. 0 *15 -1 .............................. 4 15-2 ............................. 3 15-2A .......................... 3 15-2B Blank ................. 3 15-3 thru 15-4 .............. 3 15-4A .......................... 3 15-4B Blank ................. 3 15-5 thru 15-6 .............. 3 15-7 thru 15-8 ............ 0 15 -9 ............................. 3 15-10 thru 15-12..........0 15-13...........................2
Show full textShow less
15-14 ........................... 3 15-15 ........................... 2 15-16 ........................... 0 *15-17 ................. ....... 4 15 -18 ........................... 1 15-19 thru 15-22 .......... 0 *15-19 ............................ 4 Page No. Revision No. *15-19Athru 15-19B...... 4 *15-20 thru 15-22 ............ 0 15-23 .............................. 2 15-24 thru 15-25 ..........3 15-26 Blank.................... 3 16 -1 ................................ 3 16-2 thru 16-4 .............. 0 16-5 thru 16-6 ................ 1 16 -7 ................................ 0 16 -8 ............. ................ 3 16-9 thru 16-12 .............. 0 16 -13 .............................. 1 16-14 .............................. 3 16-15 thru 16-16............ 1 16-17 thru 16-18 ............ 2 16-19 thru 16-21 ............ 1 16-22 .............................. 3 16-22A .............. ....... 2 16-22B ........................... 3 16-23 thru 16-24 ............ 1 16-24A ........................... 3 16-24B ........................... 2 16-25 thru 16-26 ..........2 16-27..............................3 16-28 .............................. 2 16 -2 9 .............................. 0 16-30 ............................. 3 16 -3 1 .............................. 1 16-32 thru 16-36 .......... 3 *16-37 thru 16-38 ............ 4 *18-1 thru 18-3 ................ 4 *18-3Athru 18-3B ..........4 *18-4 thru 18-4A .............. 4 *18-4B Blank .................. 4 18-5 thru 18-6 .............. 2 *18-7 thru 18-7A .............. 4 *18-7B Blank .................. 4 18-8 thru 18-33 .............. 0 18-34 Blank .................... 0 19-1 thru 19-2 .............. 3 20-1 thru 20-3 ................ 3 2 0-4 ................................ 0 Page No. Revision No. 20-5 ................................ 3 20-6 ................................ 0 20-7 ................................ 3 20-8 ................................ 0 20-9 thru 20-10 ............... 3 20-11 .............................. 0 20-12 thru 20-17.............3 20-18 .............................. 0 20-19 thru 20-22.............3 20-22A thru 20-22B ........ 3 20-23 .............................. 3 20-24 .............................. 2 20-24A ............................ 3 20-24B Blank .................. 3 20-25 .............................. 2 20-26 .............................. 3 20-27 .............................. 0 20-28 thru 20-29 ............. 3 20-30 Blank .................... 3 20-31 .............................. 3 20-32 .............................. 0 20-33 .............................. 3 20-34 .............................. 0 20-35 .............................. 2 20-36 .............................. 1 20-36A ............................ 3 20-36B Blank .................. 3 20-37 .............................. 0 20-38 .............................. 3 20-39 thru 20-40 ............. 1 20-41 .............................. 3 20-42 .............................. 0 20-43 .............................. 3 20-44 thru 20-45 ............. 1 20-46 .............................. 3 20-47 .............................. 0 20-48 .............................. 3 20-49 .............................. 0 20-50 thru 20-53 ............ 3 20-54 Blank .................... 3 20-55 thru 20-85 ............ 3 20-86 Blank .................... 3 © Cessna Aircraft Company Revision 4 Mar 1/2004 TABLE OF CONTENTS SECTION Page 1 GENERAL DESCRIPTION ....................... 1-1 2 GROUND HANDLING, SERVICING, CLEANING, LUBRICATION AND INSPECTION. ................... .... ..... 2-1 3 FUSELAGE .. .. ... .. . .. . . . . . . . . . . . .. . .. . 3-1 4 WINGS AND EMPENNAGE. ...................... 4-1 5 LANDING GEAR AND BRAKES. ................. . 5-1 6 AILERON CONTROL SYSTEM ..................... 6-1 7 WING FLAP CONTROL SYSTEM .................... 7-1 8 ELEVATOR CONTROL SYSTEM .................... 8-1 9 ELEVATOR TRIM TAB CONTROL SYSTEM ............... 9-1 10 RUDDER CONTROL SYSTEM ..................... 10-1 11 ENGINE (LYCOMING "BLUE-STREAK") ................ 11-1 11A ENGINE (CONTINENTAL) ....................... 11A-1 12 FUEL SYSTEM. .......................... . 12-1 13 PROPELLER ............................ 13-1 14 UTILITY SYSTEMS .......................... 14-1 15 INSTRUMENTS AND INSTRUMENT SYSTEMS .............. 15-1 16 ELECTRICAL SYSTEMS. ................. ..... 16-1 17 ELECTRONIC SYSTEMS (DELETED) (See Page iii) ........... 18 STRUCTURAL REPAIR ................ .... .. . 18-1 19 PAINTING ................... ........... 19-1 20 WIRING DIAGRAMS. ...................... 20-1 Change 3 CROSS REFERENCE LISTING OF POPULAR NAME VS. MODEL NUMBER AND SERIALS All aircraft, regardless of manufacturer, are certificated under model number designations. However, popular names are often used for marketing purposes. To provide a consistent method of referring to the various aircraft, model numbers will be used in this publication unless names are required to differentiate between versions of the same basic model. The following table provides a cross reference listing of popular name vs. model numbers. MODEL SERIALS POPULAR NAME YEAR MODEL BEGINNING ENDING 172 or SKYHAWK 1969 172K 17257162 17258486 1970 172K 17258487 17259223 1971 172L 17259224 17259903 1972 172L 17259904 17260758 1973 172M 17260759 17261898 172, SKYHAWK or 1974 172M 17261899 17263458 SKYHAWK II 1975 172M 17263459 17265684 SKYHAWK or 1976 172M 17265685 SKYHAWK II REIMS 172 1969 F172H F17200560 F17200654 REIMS/CESSNA F172 1970 F172H F17200655 F17200754 1971 F172K F17200755 F17200804 1972 F172L F17200805 F17200904 1973 F172M F17200905 F17201034 REIMS/CESSNA F172 1974 F172M F17201035 F17201234 SKYHAWK, SKYHAWK II 1975 F172M F17201235 F17201384 1976 F172M F 17201385 ii Change 3 FOREWORD This manual contains factory recommended procedures and instructions for ground handling, servicing and maintaining Cessna Model 172-Series aircraft. This includes the Models 172, Skyhawk, Reims 172 and Reims/Cessna F172. The Reims versions of the Model 172 and Skyhawk are identical to the Model 172 and Skyhawk, through Model year 1971, except that they are powered by O-300-D Rolls Royce engines. Beginning with the 1972 Models, both 172 and F172-Series aircraft are powered by "Blue-Streak" (Lycoming) engines. Besides serving as a refer- ence for the experienced mechanic, this manual also covers step-by-step procedures for the less experienced man. This manual should be kept in a handy place for ready reference. If properly used, it will better enable the mechanic to maintain Cessna 172-Series aircraft and thereby establish a reputation for reliable service. The information in this manual is based on data available at the time of publication, and is supplemented and kept current by service letters and service news letters published by Cessna Aircraft Company. These are sent to all Cessna Dealers so that they have the latest authoritative recommendations for servicing Cessna aircraft. Therefore, it is recommended that Cessna owners utilize the knowledge and experience of the factory-trained Dealer Service Organization. In addition to the information in this Service Manual, a group of Vendor publications is available from the Cessna Service Parts Center which describe complete disassembly, overhaul, and parts breakdown of some of the various vendor equipment items. A listing of the available publications is issued periodically in service letters. Information for Nav-O-Matic Autopilots, Electronic Communi- cations, and Navigation Equipment are not included in this manual. These manuals are available from the Cessna Service Parts Center. iii/(iv blank) SECTION 1 GENERAL DESCRIPTION TABLE OF CONTENTS Page GENERAL DESCRIPTION .......... 1-1 Aircraft Specifications ......... 1-1 Model 172-Series ........... 1-1 Stations ................ 1-1 Description ............ 1-1 Torque Values ............ 1-1 1-1. GENERAL DESCRIPTION. peller. Model 172-Series aircraft feature rear side windows, a "wrap-around" rear window and a swept- 1-2. MODEL 172-SERIES. back fin and rudder. 1-13. DESCRIPTION. Cessna Model 172 Series 1-4. AIRCRAFT SPECIFICATIONS. Leading parti- aircraft, described in this manual, are high-wing culars of these aircraft, with dimensions based on monoplanes of all-metal, semimonocoque construct- gross weight, are given in figure 1-1. If these di- ion. These aircraft are equipped with a fixed tri- mensions are used for constructing a hangar or corn- cycle landing gear. Thru 1970 Models, they are puting clearances, remember that such factors as equipped with flat spring-steel main landing gear nose gear strut inflation, tire pressures, tire sizes struts. Beginning with 1971 Models, these aircraft and load distribution may result in some dimensions are equipped with tubular spring-steel main gear that are considerably different from those listed. struts. The steerable nose gear is equipped with an air/hydraulic fluid shock strut. Four-place seating 1-5. STATIONS. Station diagrams are shown in fig- is standard, and a double-width, fold-up auxiliary ures 1-2 and 1-3 to assist in locating equipment when rear seat may be installed as optional equipment, a written description is inadequate or impractical. Thru 1971 Models, F172-Series aircraft are equip- ped with six-cylinder air-cooled 0-300-Series, Con- 1-6. TORQUE VALUES. A chart of recommended tinental engines, manufactured under license by nut torque values is shown in figure 1-4. These tor- Rolls Royce. Model 172-Series aircraft, and F172- que values are recommended for all installation pro- Series aircraft, beginning with 1972 Models, are cedures contained in this manual, except where other powered by four-cylinder, horizontally opposed, air- values are stipulated. They are not to be used for cooled "Blue Streak" (Lycoming) engines. Each of checking tightness of installed parts during service. the engines drives are all-metal, fixed-pitch pro- 1-1 GROSS WEIGHT ........................ 2300 lb NOTE FUEL CAPACITY Standard Wing (Total). ............ ..... . 42 gal. These specifications are Standard Wing (Usable) .................. 38 gal. applicable to both Model 172 Long-Range Wing (Total) .................. 52 gal. and F172-Series aircraft, Long-Range Wing (Usable) ................. 48 gal. except as indicated. OIL CAPACITY (Without External Filter) .............. . 8 qt (With External Filter). ................... 9 qt ENGINE MODEL 172-Series (Refer to Section 11 for Engine Data) ........ LYCOMING 0-320 Series F172-Series (Refer to Section 11A thru 1971 Models). ..... CONTINENTAL 0-300 Series F172-Series (Refer to Section 11 Beginning with 1972 Models). .LYCOMING.0-320 Series PROPELLER (Fixed Pitch) ................... 76" MCCAULEY MAIN WHEEL TIRES ...................... 6.00 x 6, 4-Ply Rating Pressure (Thru 1970 Models) ................ 24 psi Pressure (Beginning with 1971 Models) ... .. ...... 29 psi NOSE WHEEL TIRE (Standard) ................. 5.00 x 5, 4-Ply Rating Pressure (Thru 1970 Models) ................ 26 psi Pressure (Beginning with 1971 Models) ............ 31 psi NOSE WHEEL TIRE (172-Series Only, Optional) ......... 6.00 x 6, 4-Ply Rating Pressure ................. ........ 26 psi NOSE GEAR STRUT PRESSURE (Strut Extended) .......... 45 psi WHEEL ALIGNMENT (Flat Spring Struts) Camber ......................... 3° to 5° Toe-In ... .... .............. .. ... 0" to .06" WHEEL ALIGNMENT (Tublar Spring Struts Camber .......................... 2° to 4 ° Toe-In ... .... ...... ........ .. ... 0" to .18" * (Tubular Gear is non-adjustable) AILERON TRAVEL Up ........................... 20 ° 1° Down .... .......... .. . 15 ° 1° WING FLAP TRAVEL (Thru 1972 Models) ..................... 0 ° to 40 ° * 2 ° (Beginning with 1973 Models) ......... ..... .... 0 to 40', +0 -2* RUDDER TRAVEL (Measured parallel to water line) Right . . . . . . . . . . . . . . . . . . . . . . . .... 16f 10' ±1 Left . . . . . . . . . . . . . . . . . . . . . . . . . . . 16" 10' 1' RUDDER TRAVEL (Measured perpendicular to hinge line) Right ........................... 17- 44' *1' Left .................... 17' 44' *1 ELEVATOR TRAVEL Up . ......................... 28 ° , +1 ° - 0 ° Down ........................... 23 ° , +1° - 0 ° ELEVATOR TRIM TAB TRAVEL Up ................................ 28°, +10 - 0° Down ........................... 13° , +1°- 0 ° PRINCIPAL DIMENSIONS Wing Span (Conventional Wing Tip) ............. . 36' 2" Wing Span (Conical-Camber Wing Tip) ............ 35' 10" Wing Span (Conical-Camber With Strobe Lights) ........ ' 36' Tail Span . . . . . . . . . . . . . . . . . . . . . . . . . 11' Length ........................ . 26' 11" Fin Height (Maximum with Nose Gear Depressed and Flashing Beacon Installed on Fin ............. 8' - 9 1/2" Track Width (Thru 1970 Models) .............. . 7' 2" Track Width (Beginning with 1971 Models). ............ 8' - 3 1/2" BATTERY LOCATION. ..................... Firewall * No provisions are made for aligning wheels on tubular gear aircraft. The tolerances provided are to be used only for checking existing wheel alignment. Figure 1-1. Aircraft Specifications 1-2 Change 2 THRU 1970 - WHEEL FAIRINGS BEGINNING WITH 1974 MODELS STATIONS REMAIN THE SAME 172-SERIES AND F172-SERIES BEGINNING WITH 1972 Figure 1-2. Reference Stations Change 1 1-3 :S31ON dOHS guoln)S bulT '6-1 aewn i,.Z9 EZ RECOMMENDED NUT TORQUES THE TORQUE VALUES STATED ARE POUND-INCHES, RELATED ONLY TO STEEL NUTS ON OIL-FREE CADMIUM PLATED THREADS. FINE THREAD SERIES TENSION SHEAR TAP SIZE TORQUE TORQUE STD ALT STD ALT (NOTE 1) (NOTE 2) (NOTE 3) (NOTE 2) 8-36 12-15 7-9 10-32 20-25 20-28 12-15 12-19 1/4-28 50-70 50-75 30-40 30-48 5/16-24 100-140 100-150 60-85 60-106 3/8-24 160-190 160-260 95-110 95-170 7/16-20 450-500 450-560 270-300 270-390 1/2-20 480-690 480-730 290-410 290-500 9/16 -18 800-1000 800-1070 480-600 480-750 5/8-18 1100-1300 1100-1600 660-780 660-1060 3/4-16 2300-2500 2300-3350 1300-1500 1300-2200 7/8-14 2500-3000 2500-4650 1500-1800 1500-2900 1-14 3700-5500 3700-6650 2200-3300 2200-4400 1-1/8-12 5000-7000 5000-10000 3000-4200 3000-6300 1-1/4-12 9000-11000 9000-16700 5400-6600 5400-10000 COARSE THREAD SERIES (NOTE 4) (NOTE 5) W 8-32 12-15 7-9 10-24 20-25 12-15 1/4-20 40-50 25-30 5/16-18 80-90 48-55 3/8-16 160-185 95-100 7/16-14 235-255 140-155 1/2-13 400-480 240-290 9/16-12 500-700 300-420 5/8-11 700-900 420-540 3/4-10 1150-1600 700-950 7/8-9 2200-3000 1300-1800 1-8 3700-5000 2200-3000 1-1/8-8 5500-6500 3300-4000 1-1/4-8 6500-8000 4000-5000 NOTES 1. Covers AN310, AN315, AN345, AN363, MS20365, MS21042, MS21044, MS21045 and MS21046. 2. When using AN310 or AN320 castellated nuts where alignment between the bolt and cotter pin slots is not reached using normal torque values, use alternate torque values or replace the nut. 3. Covers AN316, AN320, MS20364 and MS21245. 4. Covers AN363, MS20365, MS21042, MS21043, MS21044, MS21045 and MS21046. 5. Covers AN340. CAUTION DO NOT REUSE SELF-LOCKING NUTS. The above values are recommended for all installation procedures contained in this manual, except where other values are stipulated. They are not to be used for checking tightness of installed parts during service. Figure 1-4. Torque Values Change 2 1-5/(1-6 blank) SECTION 2 GROUND HANDLING, SERVICING. CLEANING, LUBRICATION AND INSPECTION TABLE OF CONTENTS Page GROUND HANDLING ............ 2-1 Vacuum System Filter .......... 2-9 Towing ................. 2-1 Battery ................ . 2-9 Hoisting ................ 2-3 Tires ................. 2-9 Jacking ................ 2-3 Nose Gear Shock Strut .......... 2-9 Leveling ................ 2-3 Nose Gear Shimmy Dampener ....... 2-10 Parking ................ 2-3 Hydraulic Brake System ......... 2-10 Tie-Down ............... 2-3 CLEANING ................ 2-10 Flyable Storage. ............ 2-3 Windshield and Windows ......... 2-10 Returning Aircraft To Service ...... 2-3 Plastic Trim .............. 2-10 Temporary Storage ........... 2-3 Painted Surfaces ............ 2-10 Inspection During Storage .. ...... 2-4 Aluminum Surfaces ........... 2-10 Returning Aircraft To Service ...... 2-4 Engine Compartment .......... 2-11 Indefinite Storage ............ 2-4 Upholstery and Interior ......... 2-11 Inspection During Storage ........ 2-6 Propeller. ............... 2-11 Returning Aircraft To Service ...... 2-6 Wheels ........ ........ . 2-11 SERVICING ................ 2-6 LUBRICATION .............. 2-11 Fuel .................. 2-6 Wheel Bearings ............ . 2-11 Fuel Drains .............. 2-6 Nose Gear Torque Links ......... 2-11 Carburetor Drain Plug Inspection . ... . . 2-6 Wing Flap Actuator . ......... 2-11 Engine Oil . ......... ........ 2-7 Fuel Selector Valve .......... . 2-12 Engine Induction Air Filter ........ 2-8 INSPECTION ............... 2-19 2-1. GROUND HANDLING. CAUTION 2-2. TOWING. Moving the aircraft by hand is ac- complished by using the wing struts and landing gear When towing the aircraft, never turn the nose struts as push points. A tow bar attached to the nose wheel more than 30 degrees either side of gear should be used for steering and maneuvering the center or the nose gear will be damaged. Do aircraft on the ground. When no tow bar is available, not push on control surfaces or outboard em- press down at the horizontal stabilizer front spar ad- pennage surfaces. When pushing on the tail- jacent to the fuselage to raise the nose wheel off the cone, always apply pressure at a bulkhead to ground. With the nose wheel clear of the ground, the avoid buckling the skin. aircraft can be turned by pivoting it about the main wheels. TOW BAR: PART NUMBER 0501019-1 IS AVAILABLE FROM THE CESSNA SERVICE PARTS CENTER. NOTE avoid scarring finish on speed fairing. Figure 2-1. Tow Bar Change 3 2-1 REFER TO SHEET 2 FOR JACKING A INFORMATION ITEM NUMBER TYPE AND NUMBER REMARKS Jack Any short jack of capable capacity Universal tail stand Any tail stand of capable capacity Cessna #SE-576 (41-1/2" high) Universal jack stand (FOR USE WITH ITEM 2) Cessna #10004-98 Jack point * (SEE CAUTION) (i) Cessna #0541208-1 Jack point # (SEE NOTE 5) Built-in jack pad Part of step bracket t #2-170 Basic jack Closed height: 69-1/2 inches; extended (i) #2-70 Slide tube height: 92" (Insert slide tube extension (Use with item 1) into basic jack) * THRU 17259223 AND F17200754 # 17259224 THRU 17260554 AND F17200755 THRU F17200879 t BEGINNING WITH 17260555 AND F17200880 Corresponding points on both upper door sills may be used to level the aircraft laterally. Prior to 1972 Models, reference points for leveling the aircraft longitudinally are the top of the tailcone between rear window and vertical fin. Beginning with 1972 Models, reference points for longitudinal leveling of aircraft are two screws on left side of tailcone at zero waterline. These are indicated in illustration byA (Also refer to paragraph 2-5) Figure 2-2. Jacking and Leveling (Sheet 1 of 2) 2-2 Change 2 JACKING INFORMATION 1. Wing jacks are placed under front spar of wing just outboard of wing strut, and must extend far enough to raise wheels off ground, and must be of adeq uate strength. 2. Attach a suitable stand to the tie-down ring. Be sure tail stand weighs enough to keep tail down and under all conditions that it is strong enough to support any weight that might be placed on it (place shot bags or sand bags on tail stand. In addition, the base of adjustable tail stand is to be filled with concrete for additional weight as a safety factor. 3. Operate jacks evenly until desired height is reached. When using universal jack point (10004-98), flexibility of the gear strut will cause the main wheel to slide inboard as the wheel is raised, tilting the jack. The jack must be lowered for a second operation. Jacking both wheels simultaneously with universal jack points is not recommended. Universal jack point may be used to raise only one main wheel. DO NOT USE brake casting as a jack point. 4. Items (4), (5) and (6) are available from the Cessna Service Parts Center. 5. On tubular gear aircraft, the only fairing requiring removal is the fuselage-to-tube gear fairing. Jack pad is inserted on tube in area between fuselage and upper end of tube fairing, then jack aircraft as required. SHOP NOTES: Figure 2-2. Jacking and Leveling (Sheet 2 of 2) Change 2 2-2A/(2-2B blank) 2-3. HOISTING. The aircraft may be lifted with a age and/or the first 25 hours of intermittent engine hoist of two-ton capacity by using hoisting rings, operation. which are optional equipment, or by means of suit- able slings. The front sling should be hooked to NOTE each upper engine mount at the firewall, and the aft sling should be positioned around the fuselage at the The aircraft is delivered from Cessna with a first bulkhead forward of the leading edge of the Corrosion Preventive Aircraft Engine Oil stabilizer. If the optional hoisting rings are used, (MIL-C-6529, Type I, RUST BAN). a minimum cable length of 60 inches for each cable This engine oil is a blend of aviation grade is required to prevent bending of the eyebolt-type straight mineral oil and a corrosion preven- hoisting rings. If desired, a spreader jig may be tive compound. This engine oil should be fabricated to apply vertical force to the eyebolts. used for the first 50 hours of engine opera- tion. Refer to paragraph 2-21 for oil changes 2-4. JACKING. Refer to figure 2-2 for jacking during the first 50 hours of operation. procedures. During the 30 day non-operational storage or the first 2-5. LEVELING. Corresponding points on both upper 25 hours of intermittent engine operation, every sev- door sills may be used to level the aircraft laterally. enth day the propeller shall be rotated through five Prior to 1972 models, the reference point for leveling revolutions, without running the engine. If the air- the aircraft longitudinally is the top of the tailcone, be- craft is stored outside, tie-down in accordance with tween the rear window and vertical fin. Beginning paragraph 2-7. In addition, the pitot tube, static with 1972 models, the reference points for longitud- air vents, air vents, openings in the engine cowling, inally leveling the aircraft, are the two screws located and other similar openings shall have protective on the left side of the tailcone. Refer to figure 2-2 covers installed to prevent entry of foreign material. for screw locations. After 30 days, aircraft should be flown for 30 minutes or ground run-up until oil has reached operating tem- 2-6. PARKING. Parking precautions depend prin- perature. cipally on local conditions. As a general precaution, set parking brake or chock the wheels and install the 2-9. RETURNING AIRCRAFT TO SERVICE. After controls lock. In severe weather and high wind con- flyable storage, returning the aircraft to service is ditions, tie down the aircraft as outlined in paragraph accomplished by performing a thorough pre-flight in- 2-7 if a hangar is not available. spection. At the end of the first 25 hours of engine operation, drain engine oil, clean oil screens and 2-7. TIE-DOWN. When mooring the aircraft in the change external oil filter element. Service engine open, head into the wind if possible. Secure control with correct grade and quantity of engine oil. Refer surfaces with the internal control lock and set brakes. to figure 2-4 and paragraph 2-21 for correct grade of engine oil. 2-10. TEMPORARY STORAGE. Temporary storage Do not set parking brakes during cold weather is defined as aircraft in a non-operational status for when accumulated moisture may freeze the a maximum of 90 days. The aircraft is constructed brakes or when the brakes are overheated. of corrosion resistant alclad aluminum, which will last indefinitely under normal conditions if kept clean, After completing the preceding, proceed to moor the however, these alloys are subject to oxidation. The aircraft as follows: first indication of corrosion on unpainted surfaces is a. Tie ropes, cables, or chains to the wing tie- in the form of white deposits or spots. On painted down fittings located at the upper end of each wing surfaces, the paint is discolored or blistered. Stor- strut. Secure the opposite ends of ropes, cables, age in a dry hangar is essential to good preservation or chains to ground anchors, and should be procured if possible. Varying condi- b. Secure rope (no chains or cables) to forward moo- tions will alter the measures of preservation, but ring ring and secure opposite end to ground anchor. under normal conditions in a dry hangar, and for c. Secure the middle of a rope to the tail tie-down storage periods not to exceed 90 days, the following ring. Pull each end of rope away at a 45 degree angle methods of treatment are suggested: and secure to ground anchors at each side of tail. a. Fill fuel tanks with correct grade of gasoline. d. Secure control lock on pilot control column. If b. Clean and wax aircraft thoroughly. control lock is not available, tie pilot control wheel c. Clean any oil or grease from tires and coat back with front seat belt. tires with a tire preservative. Cover tires to pro- e. These aircraft are equipped with a spring-loaded tect against grease and oil. steering system which affords protection against nor- d. Either block up fuselage to relieve pressure on mal wind gusts. However, if extremely high wind tires or rotate wheels every 30 days to change sup- gusts are anticipated, additional external locks may porting points and prevent flat spotting the tires. be installed. e. Lubricate all airframe items and seal or cover all openings which could allow moisture and/or dust 2-8. FLYABLE STORAGE. Flyable storage is de- to enter. fined as a maximum of 30 days non-operational stor- Change 1 2-3 NOTE openings should have protective covers installed to prevent entry of foreign material. The aircraft battery serial number is recorded o. Attach a warning placard to the propeller to the in the aircraft equipment list. To assure ac- effect that the propeller shall not be moved while the curate warranty records, the battery should be engine is in storage. re-installed in the same aircraft from which it was removed. If the battery is returned to 2-11. INSPECTION DURING STORAGE. service in a different aircraft, appropriate a. Inspect airframe for corrosion at least once a record changes must be made and notification month and remove dust collections as frequently as sent to the Cessna Claims Department. possible. Clean and wax as required. b. Inspect the interior of at least one cylinder f. Remove battery and store in a cool dry place; through the spark plug hole for corrosion at least service the battery periodically and charge as re- once a month. quired. NOTE NOTE Do not move crankshaft when inspecting An engine treated in accordance with the fol- interior of cylinder for corrosion. lowing may be considered protected against normal atmospheric corrosion for a period c. If at the end of the 90 day period, the aircraft is not to exceed 90 days. to be continued in non-operational storage, again per- form the procedural steps "g thru o" of paragraph g. Disconnect spark plug leads and remove upper 2-10. and lower spark plugs from each cylinder. 2-12. RETURNING AIRCRAFT TO SERVICE. After NOTE temporary storage, use the following procedures to return the aircraft to service. The preservative oil must be Lubricating a. Remove aircraft from blocks and check tires for Oil-Contact and Volatile, Corrosion In- proper inflation. Check for proper nose gear strut hibited, MIL-L-46002, Grade 1 or equiva- inflation. lent. The following oils are approved for b. Check battery and install. spraying operations by Teledyne Continental c. Check that oil sump has proper grade and quan- Motors, Nude Oil 105 - Daubert Chemical, tity of engine oil. Co., 4700 So. Central Ave., Chicago, Illinois, d. Service induction air filter and remove warning Petratect VA-Pennsylvania Refining Co., placard from propeller. Butler, Pennsylvania, Ferro-Gard 1009G - e. Remove materials used to cover openings. Ranco Laboratories, Inc., 3617 Brownsville f. Remove spark plugs from engine. Rd., Pittsburg, Pennsylvania. The following g. While spark plugs are removed, rotate propel- oils are approved for spraying operation by ler several revolutions to clear excess rust preven- Lycoming, Socony Averex 901, or Esso Rust- tive oil from cylinders. Ban 626, or equivalent. h. Clean, gap and install spark plugs. Torque plugs to the value specified in Section 11 or 11A; h. Using a portable pressure sprayer, atomize connect spark plug leads. spray preservative oil through the upper spark plug i. Check fuel strainer. Remove and clean filter hole of each cylinder with the piston in a down posi- screen if necessary. Check fuel tanks and fuel lines tion. Rotate crankshaft as each pair of cylinders is for moisture and sediment, drain enough fuel to elimi- sprayed. nate moisture and sediment. i. After completing step "h, " rotate crankshaft so j. Perform a thorough pre-flight inspection, then that no piston is at a top position. If the aircraft is start and warm-up engine. to be stored outside, stop two-bladed propeller so that blades are as near horizontal as possible to pro- 2-13. INDEFINITE STORAGE. Indefinite storage is vide maximum clearance with passing aircraft. defined as aircraft in a non-operational status for an j. Again spray each cylinder without moving the indefinite period of time. Engines treated in accor- crankshaft to thoroughly cover all interior surfaces dance with the following may be considered protected of the cylinder above the piston. against normal atmosphere corrosion, provided the k. Install spark plugs and connect spark plug leads. procedure outlined in paragraph 2-14 are performed 1. Apply preservative oil to the engine interior by at the intervals specified. spraying approximately two ounces of the preserva- a. Operate engine until oil temperature reaches tive oil through the oil filler tube. normal operating range. Drain engine oil sump and m. Seal all engine openings exposed to the atmos- reinstall drain plug. phere using suitable plugs or non-hygroscopic tape. b. Fill oil sump to normal operating capacity with Attach a red streamer at each point that a plug or corrosion preventive mixture which has been thor- tape is installed. oughly mixed and pre-heated to a minimum of 221°F n. If the aircraft is to be stored outside, perform at the time it is added to the engine. the procedures outlined in paragraph 2-7. In addi- tion, the pitot tube, static source vents, air vents, operings in the engine cowling and other similar 2-4 Change 3 NOTE CAUTION Corrosion preventive mixture consists of Injecting corrosion-preventive mixture too one part compound MIL-C-6529, type I, fast can cause a hydrostatic lock. mixed with three parts new lubricating oil of the grade recommended for service. e. Do not rotate propeller after completing step Lycoming recommends Esso Rust-Ban 628 "d". or equivalent. Continental Motors Corpor- f. Remove all spark plugs and spray corrosion- ation recommends Cosmoline No. 1223, sup- preventive mixture, which has been pre-heated to plied by E. F. Houghton & Co., 305 W. Le- 221 ° to 250°F, into all spark plug holes to thorough- High Avenue, Philadelphia, Pa. During all ly cover interior surfaces of cylinders. spraying operations corrosion mixture is g. Install lower spark plugs or install solid plugs. pre-heated to 221 to 250 F. and install dehydrator plugs in upper spark plug holes. Be sure that dehydrator plugs are blue in c. Immediately after filling the oil sump with cor- color when installed. rosion preventative mixture, fly the aircraft for a h. Cover spark plug lead terminals with shipping period of time not to exceed a maximum of 30 min- plugs (AN4060- 1) or other suitable covers. utes. i. With throttle in full open position, place a bag d. With engine operating at 1200 to 1500 rpm and of desiccant in the carburetor intake and seal open- induction air filter removed, spray corrosion pre- ing with moisture resistant paper and tape. ventive mixture into induction airbox, at the rate of j. Place a bag of desiccant in the exhaust tail- one-half gallon per minute, until heavy smoke pipe(s) and seal openings with moisture resistant comes from exhaust stack, then increase the spray tape. until the engine is stopped. k. Seal cold air inlet to the heater muff with mois- ture resistant tape. IF IT BECOMES NECESSARY TO 2 ; '-:::-. / LOCKS ON WINGS EQUIPPED WING FLAPS . IF CONTROL LOCK IS NOT AVAILABLE, TIE CONTROL WHEEL BACK WITH THE PILOT SEAT BELT Figure 2-3. Tie-Down Details 2-5 1. Seal engine breather by inserting a protex plug install and safety. On aircraft that are equipped in the breather hose and clamping in place. with an external oil filter, install new filter element. m. Seal all other engine openings exposed to atmos- f. Remove oil sump drain plug and drain sump. phere using suitable plugs or non-hygroscopic tape. Install and safety drain plug. NOTE NOTE Attach a red streamer to each place plugs or The corrosion-preventive mixture will mix tape is installed. Either attach red streamers with the engine lubricating oil, so flushing outside of the sealed area with tape or to the the oil system is not necessary. Draining inside of the sealed area with safety wire to the oil sump will remove enough of the cor- prevent wicking of moisture into the sealed area. rosion-preventive mixture. n. Drain corrosion-preventive mixture from engine g. Service and install the induction air filter. sump and reinstall drain plug. h. Remove dehydrator plugs and spark plugs or plugs installed in spark plug holes and rotate pro- NOTE peller by hand several revolutions to clear corrosion- preventive mixture from cylinders. The corrosion-preventive mixture is harmful i. Clean, gap, and install spark plugs. Torque to paint and should be wiped from painted sur- plugs to the value listed in Section 11 or 11A. faces immediately. j. Check fuel strainer. Remove and clean filter screen. Check fuel tanks and fuel lines for moisture o. Attach a warning placard on the throttle control and sediment, and drain enough fuel to eliminate. knob, to the effect that the engine contains no lubri- k. Perform a thorough pre-flight inspection, then cating oil. Placard the propeller to the effect that it start and warm-up engine. should not be moved while the engine is in storage. 1. Thoroughly clean aircraft and flight test air- p. Prepare airframe for storage as outlined in craft. paragraph 2-10 thru step "f." 2-16. SERVICING. NOTE 2-17. Servicing requirements are shown in figure As an alternate method of indefinite storage, 2-4. The following paragraphs supplement this the aircraft may be serviced in accordance figure by adding details not included in the figure. with paragraph 2-10 providing the aircraft is run-up at maximum intervals of 60 days and 2-18. FUEL. Fuel tanks should be filled immedi- then reserviced per paragraph 2-10. ately after flight to reduce condensation. Tank capa- cities are listed in figure 1-1. The recommended 2-14. INSPECTION DURING STORAGE. Aircraft in fuel grade to be used is given in figure 2-4. indefinite storage shall be inspected as follows: a. Inspect cylinder protex plugs each 7 days. 2-19. FUEL DRAINS. are located at various places b. Change protex plugs if their color indicates an throughout the fuel system. Refer to Section 12 for unsafe condition. location of the various drains in the system. The c. If the dehydrator plugs have changed color in one strainer drain valve is an integral part of the fuel half of the cylinders, all desiccant material in the strainer assembly. The strainer drain is equipped engine shall be replaced with new material. with a control which is located adjacent to the oil d. Every 6 months respray the cylinder interiors dipstick. Access to the control is through the oil with corrosion-preventive mixture. dipstick access door. Remove drain plugs and open strainer drain at the intervals specified in figure NOTE 2-4. Also, during daily inspection of the fuel strainer, if water is found in the fuel strainer, there Before spraying, inspect the interior of one is a possibility that the wing tank sumps or fuel line cylinder for corrosion through the spark contain water. Therefore, all fuel drain plugs should plug hole and remove at least one rocker box be removed and all water drained from the system. cover and inspect the valve mechanism. To activate drain valve for fuel sampling, place cup up to valve and depress valve with rod protruding 2-15. RETURNING AIRCRAFT TO SERVICE. from cup. (Refer to figure 12-3. ) After indefinite storage, use the following procedure to return the aircraft to service. 2-20. CARBURETOR DRAIN PLUG INSPECTION. a. Remove aircraft from blocks and check tires for In order to prevent the possibility of thread sealent correct inflation. Check for correct nose gear strut contamination in the carburetor float chamber, inflation. cleaning and inspection of the carburetor should be b. Check battery and install. accomplished at each 100-hour inspection and any- c. Remove all materials used to seal and cover time water in the fuel is suspected. openings. a. With the fuel valve OFF, remove carburetor d. Remove warning placards posted at throttle and drain plug and clean off any sealant present on the propeller. end of the plug or in the threads on the plug. e. Remove and clean engine oil screen, then re- b. Inspect drain plug hole in the carburetor and re- 2-6 Change 2 move any sealant remaining in the hole. during the first 25 hours, use only aviation c. Turn fuel valve to ON to flush float chamber and grade straight mineral oil (non-detergent) drain plug chamber while probing drain plug hole to conforming to Specification No. MIL-L-6082. ascertain that all residue of sealant material is dis- After the first 25 hours of operation, drain lodged and washed out of the chamber. Flushing engine oil sump and clean both the oil suction operation should last 15 to 30 seconds. strainer and oil pressure screen. If an op- d. A second flushing should then be accomplished tional oil filter is installed, change filter and the drained fuel retained for inspection to insure element at this time. Refill sump with that no sealant particles are present. straight mineral oil (non-detergent) and use e. Install drain plug as follows: until a total of 50 hours have accumulated or 1. Install drain plug in carburetor 1-1/2 to 2 oil consumption has stabilized, then change turns, to ashless dispersant oiL. 2. Apply NS-40 (RAS-4) MIL-T-5544 (Antiseize, Graphite Petrolatum) or equivalent to plug threads. When changing engine oil, remove and clean oil 3. Tighten and safety drain plug. screens, or install a new filter element on aircraft f. Turn fuel valve ON and inspect for evidence of equipped with an external oil filter. An oil quick- fuel leakage. drain valve may be installed. This valve provides a quick and cleaner method of draining the engine 2-21. ENGINE OIL. Check engine lubricating oil oil. This valve is installed in the oil drain port with the dipstick five to ten minutes after the engine of the oil sump, and allows oil to be drained by at- has been stopped. The aircraft should be in as near taching a hose over the fitting end and pushing up, a level position as possible when checking the engine causing the oil to drain through the hose into a con- oil, so that a true reading is obtained. Engine oil tainer. To drain the engine oil, proceed as follows: should be drained while the engine is still hot, and a. Operate engine until oil temperature is at nor- the nose of the aircraft should be raised slightly for mal operating temperature. more positive draining of any sludge which may have b. (With Quick-Drain Valve.) Attach a hose to the collected in the engine oil sump. Engine oil should quick-drain valve in oil sump. Push upon quick-drain be changed every six months, even though less than valve until it locks open, and allow oil to drain through the specified hours have accumulated. Reduce these hose into container. intervals for prolonged operations in dusty areas, in c. (Without Quick-Drain Valve.) Remove oil drain cold climates where sludging conditions exist, or plug from engine sump and allow oil to drain into a where short flights and long idle periods are encoun- container. tered, which cause sludging conditions. Always d. After engine oil has drained, close quick-drain change oil, clean oil screens, and clean and/or valve and remove hose. Install and safety drain change external filter element whenever oil on the plug. dipstick appears dirty. Aviation grade oil conforming e. Remove and clean oil screen, or change exter- toAVCO Lycoming Specification No. 301 and Service nal oil filter element. Instruction No.1014, and to any revisions or supple- f. Service engine with correct quantity and grade ments thereto, shall be used in the "Blue Streak" of engine oil. (Lycoming) engine. Ashless dispersant oil conform- ing to Continental Motors Specification MHS-24 and all revisions or supplements thereto and conforming NOTE with current Continental Aircraft Engine Service Bulletins shall be used in the Continental engine. Refer to inspection charts for intervals for changing oil and filter elements. NOTE New or newly-overhauled engines should be NOTE operated on aviation grade straight mineral oil until the first oil change. If an ashless Oil capacities for the different models are dispersant oil is used in a new or newly- given in the following chart. To minimize overhauled engine, high oil consumption may loss of oil through the breather, fill to be experienced. The anti-friction additives specified oil level on dipstick for normal in detergent and dispersant oils will retard operation (flight of less than three hours "break-in" of the pistons, rings and cylinder duration). For extended flight, fill to FULL walls. This condition can be avoided by the mark on dipstick. Do not operate with less use of straight mineral oil. The aircraft is than MINIMUM-FOR-FLIGHT quantities delivered from Cessna with a Corrosion listed. If an external oil filter is installed, Preventive Aircraft Engine Oil (MIL-C-6529, one additional quart of oil is required when Type II, RUST BAN). If oil must be added filter element is changed. MODEL CAPACITY CAPACITY (TOTAL NORMAL MINIMUM (TOTAL) WITH FILTER) OPERATION FOR FLIGHT 172 8 9 7 6 Change 3 2-7 When adding or changing oil, use aviation grade oil in accordance with the following chart. "BLUE STREAK" (Lycoming) ENGINE MODEL AMBIENT GRADE TEMPERATURE RANGE STRAIGHT ASHLESS MINERAL OIL* DISPERSANT OIL* 172 AND ABOVE 60°F SAE 50 SAE 40 OR SAE 50 F172 (1972 & ON) 30 ° TO 90°F SAE 40 SAE 40 0 ° TO 70°F SAE 30 SAE 30 OR SAE 40 BELOW 10°F SAE 20 SAE 30 *AVIATION GRADE OILS CONFORMING TO AVCO LYCOMING SPECIFICATION NO. 301 AND SERVICE INSTRUCTION NO. 1014, AND TO ANY REVISIONS OR SUPPLEMENTS THERETO, MUST BE USED. CONTINENTAL ENGINE MODEL AMBIENT GRADE*** TEMPERATURE** F172 (THRU 1971) ABOVE 40EF SAE 40 BELOW 40°F SAE 20 ** WHEN OPERATING TEMPERATURES OVERLAP INDICATED RANGES, USE THE LIGHTER GRADE OF OIL. ** AVIATION GRADE ASHLESS DISPERSANT OILS CONFORMING TO CONTINENTAL MOTORS SPECIFICATION MHS-24 AND ALL REVISIONS AND SUPPLEMENTS THERETO MUST BE USED EXCEPT AS NOTED IN THIS PARAGRAPH. REFER TO CURRENT CONTINENTAL AIRCRAFT ENGINE SERVICE BULLETINS FOR FUTHER RECOMMENDATIONS. 2-22. ENGINE INDUCTION AIR FILTER. The induc- NOTE tion air filter keeps dust and dirt from entering the induction system. The value of maintaining the air Early Model F172-series was equipped with filter in a good clean condition can never be over- a flock-coated, oiled filter when it left the stressed. More engine wear is caused through the factory. However, new filters ordered from use of a dirty or damaged air filter than is generally the Cessna Service Parts Center will be the believed. The frequency with which the filter should dry type with an improved filtering element. be removed, inspected, and cleaned will be deter- The Model 172-series is equipped with the mined primarily by aircraft operating conditions. A dry type filter. good general rule however, is to remove, inspect, and clean the filter at least every 50 hours of engine To service the flock-coated, oiled filter, proceed as operating time and more frequently if warranted by follows: operating conditions. Some operators prefer to hold a. Remove filter from aircraft. spare induction air filters at their home base of b. Wash filter thoroughly, soiled face down in operation so that a clean filter is always readily solvent (Federal Specification P-S-661 or equiv- available for use. Under extremely dusty conditions, alent). daily servicing of the filter is recommended. Two c. Drain and dry filter, then dip flock-coated types of filters have been used. One is a flock-coated, screen filter in the same grade of oil used in the oiled filter and the other is a dry, paper-media filter. engine and allow excess oil to drain off. 2-8 Change 3 d. Be sure air box is clean, inspect filter and re- e. Be sure air box is clean, inspect filter. If place if damaged. filter is damaged, install a new filter. f. Install filter at entrance to air box with gasket NOTE on aft face of filter frame and with air flow arrows on filter frame pointed in the correct direction. A damaged filter may have broken filtering panels or the flock coating may be missing 2-23. VACUUM SYSTEM FILTER. The vacuum sys- from the filtering panels, which will allow ter central air filter keeps dirt and dust from enter- unfiltered air to enter the induction system. ing the vacuum operated instruments. Change central Any filter that appears doubtful, shall have air filter element every 500 hours of operating time a new filter installed in its place. and whenever suction gage reading drops below 4. 6 inches of mercury. Also, do not operate the vacuum e. Install filter at entrance to air box with gasket system with the filter removed, or a vacuum line on aft face of filter frame and with air flow arrow on disconnected as particles of dust or other foreign filter pointed in the correct direction, matter may enter the system and damage the gyros. To service the dry type filter, proceed as follows: 2-24. BATTERY. Battery servicing involves add- a. Remove filter from aircraft. ing distilled water to maintain the electrolyte even with the horizontal baffle plate at the bottom of the NOTE filler holes, checking the battery cable connections, and neutralizing and cleaning off and spilled electro- Use care to prevent damage to filter element lyte or corrosion. Use bicarbonate of soda (baking when cleaning filter with compressed air. soda) and water to neutralize electrolyte or corro- sion. Follow with a thorough flushing with water. b. Clean filter by blowing with compressed air Brighten cables and terminals with a wire brush, (not over 100 psi) from direction opposite of normal then coat with petroleum jelly before connecting. air flow. Arrows on filter case indicate direction of The battery box also should be checked and cleaned normal air flow. if any corrosion is noted. Distilled water, not acid or "rejuvenators, " should be used to maintain elec- CAUTION trolyte level. Check the battery every 50 hours (or at least every 30 days) oftener in hot weather. See Do not use solvent or cleaning fluids to wash Section 16 for detailed battery removal, installation filter. Use only a water and household deter- and testing. gent solution when washing the filter. 2-25. TIRES. Maintain tire pressure at the air c. After cleaning as outlined in step "b, " the filter pressures specified in figure 1-1. When checking may be washed, if necessary, in a solution of warm tire pressure, examine tires for wear, cuts, bruises, water and a mild household detergent. A cold water and slippage. Remove oil, grease, and mud from solution may be used. tires with soap and water. NOTE NOTE The filter assembly may be cleaned with Recommended tire pressures should be main- compressed air a maximum of 30 times or tained. Especially in cold weather, remember it may be washed a maximum of 20 times. that any drop in temperature of the air inside A new filter should be installed after using a tire causes a corresponding drop in air pres- 500 hours of engine operating time or one sure. year, whichever should occur first. How- ever, a new filter should be installed at 2-26. NOSE GEAR SHOCK STRUT. The nose gear anytime the existing filter is damaged. A shock strut requires periodic checking to ensure damaged filter may have sharp or broken that the strut is filled with hydraulic fluid and is edges in the filtering panels which would inflated to the correct air pressure. To service the allow unfiltered air to enter the induction nose gear shock strut, proceed as follows: system. Any filter that appears doubtful, a. Remove valve cap and release air pressure. shall have a new filter installed in its place. b. Remove valve housing. c. Compress nose gear to its shortest length and d. After washing, rinse filter with clear water un- fill strut with hydraulic fluid to the bottom of the til rinse water draining from filter is clear. Allow filler hole. water to drain from filter and dry with compressed d. Raise nose of aircraft, extend and compress air (not over 100 psi. strut several times to expel any entrapped air, then lower nose of aircraft and repeat step "c." NOTE e. With strut compressed, install valve housing assembly. The filtering panels of the filter may become f. With nose wheel off ground, inflate strut. Shock distorted when wet, but they will return to strut pressure is listed in Section 1. their original shape when dry. 2-9 NOTE . A sponge, soft cloth, or chamois may be used, but only as a means of carrying water to the plastic. The nose landing gear shock strut will nor- Rinse thoroughly, then dry with a clean moist cham- mally require only a minimum amount of ois. Do not rub the plastic with a dry cloth as this service. Maintain the strut extension pres- builds up an electrostatic charge which attracts dust. sure, as shown in figure 1-1. Lubricate Oil and grease may be removed by rubbing lightly landing gear as shown in figure 2-5. Check with a soft cloth moistened with Stoddard solvent. the landing gear daily for general cleanliness, security of mounting, and for hydraulic fluid CAUTION leakage. Keep machined surfaces wiped free of dirt and dust, using a clean lint-free cloth Do not use gasoline, alcohol, benzene, acetone, saturated with MIL-H-5606 hydraulic fluid carbon tetrachloride, fire extinguisher fluid, or kerosene. All surfaces should be wiped de-icer fluid, lacquer thinner, or glass window free of excessive hydraulic fluid. cleaning spray. These solvents will soften and craze the plastic. 2-27. NOSE GEAR SHIMMY DAMPENER. The shimmy dampener should be serviced at least every After washing, the plastic windshield and windows 50 hours. The shimmy dampener must be filled should be cleaned with an aircraft windshield cleaner. completely with fluid, free of entrapped air, to Apply the cleaner with soft cloths and rub with mod- serve its purpose. To service the shimmy damp- erate pressure. Allow the cleaner to dry, then wipe ener, proceed as follows: it off with soft flannel cloths. A thin, even coat of a. Remove shimmy dampener from aircraft. wax, polished out by hand with soft flannel cloths, b. While holding the dampener in a vertical posi- will fill in minor scratches and help prevent further tion with fitting end pointed downward, pull fitting scratching. Do not use a canvas cover on the wind- end of the dampener shaft to its limit of travel. shield or windows unless freezing rain or sleet is c. While holding dampener in this position, fill anticipated since the cover may scratch the plastic dampener through open end of cylinder with hydraulic surface. fluid. d. Push the shaft upward slowly to seal off the 2-32. PLASTIC TRIM. The instrument panel, plas- filler hole. tic trim, and control knobs need only be wiped with e. Clean dampener with solvent. Be sure to keep a damp cloth. Oil and grease on the control wheel the shaft protruding through the filler hole until and control knobs can be removed with a cloth moist- dampener is installed on the aircraft. ened with Stoddard solvent. Volatile solvents, such f. Install dampener on aircraft. as mentioned in paragraph 2-31, must never be used since they soften and craze the plastic. NOTE 2-33. PAINTED SURFACES. The painted exterior Keep the shimmy dampener, especially the surfaces of the aircraft, under normal conditions, exposed portions of the dampener piston require a minimum of polishing and buffing. Approxi- shaft, clean to prevent collection of dust mately 15 days are required for acrylic or lacquer and grit which could cut the seals in the paint to cure completely; in most cases, the curing dampener barrel. Keep machined surfaces period will have been completed prior to delivery of wiped free of dirt and dust, using a clean the aircraft. In the event that polishing or buffing is lint-free cloth saturated with MIL-H-5606 required within the curing period, it is recommended hydraulic fluid or kerosene. All surfaces that the work be done by an experienced painter. should be wiped free of excessive hydraulic Generally, the painted surfaces can be kept bright by fluid. washing with water and mild soap, followed by a rinse with water and drying with cloths or chamois. 2-28. HYDRAULIC BRAKE SYSTEMS. Check brake Harsh or abrasive soaps or detergents which could master cylinders and refill with hydraulic fluid as cause corrosion or make scratches should never be specified in the inspection charts. Bleed the brake used. Remove stubborn oil and grease-with:a cloth system of entrapped air whenever there is a spongy moistened with Stoddard solvent. After the curing response to the brake pedals. Refer to Section 5 for period, the aircraft may be waxed with a good auto- filling and bleeding of the brakes. motive wax. A heavier coating of wax on the leading edges of the wing and tail and on the engine nose cap 2-29. CLEANING. will help reduce the abrasion encountered in these areas. 2-30. Keeping the aircraft clean is important. Be- sides maintaining the trim appearance of the aircraft, 2-34. ALUMINUM SURFACES. The aluminum sur- cleaning lessens the possibility of corrosion and faces require a minimum of care, but should never makes inspection and maintenance easier. be neglected. The aircraft may be washed with clean water to remove dirt and may be washed with non- alkaline grease solvents to remove oil and/or grease. 2-31. WINDSHIELD AND WINDOWS. Windshield and Household type detergent soap powders are effective *windows should be cleaned carefully with plenty of cleaners, but should be used cautiously since some cleaners, but should be used cautiously since some fresh water and a mild detergent, using the palm of of them are strongly alkaline. Many good aluminum the hand to feel and dislodge any caked dirt or mud. cleaners, polishes, and waxes are available from 2-10 Change 3 commercial suppliers of aircraft products. 2-39. LUBRICATION. 2-35. ENGINE AND ENGINE COMPARTMENT. The 2-40. Lubrication requirements are shown in figure engine should be kept clean since dirty cooling fins 2-5. Before adding grease to grease fittings, wipe and baffle plates can cause overheating of the engine. dirt from fitting. Lubricate until grease appears Also, cleaning is essential to minimize any danger of around parts being lubricated, and wipe excess fire and provide for easier inspection of components. grease from parts. The following paragraphs sup- The entire engine cowling may be removed to facili- plement figure 2-5 by adding details. tate engine and interior cowl cleaning. Wash down the engine and components with a suitable solvent, 2-41. WHEEL BEARINGS. Clean and repack the such as Stoddard solvent or equivalent, then dry thor- wheel bearings at first 100-hour inspection and oughly with compressed air. at each 500-hour inspection thereafter. If more than the usual number of take-offs and landings are made, extensive taxiing is required, or the aircraft is operated in dusty areas or under seacoast condi- Particular care should be given to electri- tions, cleaning and lubrication of the wheel bearings cal equipment before cleaning. Solvent shall be accomplished at each 100-hour inspection. should not be allowed to enter magnetos, starters, alternators, voltage regulators, 2-42. NOSE GEAR TORQUE LINKS. Lubricate nose and the like. Hence, these components gear torque links every 50 hours. When operating in should be protected before saturating the dusty conditions, more frequent lubrication is re- engine with solvent. Any fuel, oil, and air quired. openings should be covered before washing the engine with solvent. Caustic cleaning 2-43. WING FLAP ACTUATOR. solutions should not be used. After clean- a. On aircraft prior to Serials 17259905 and F172- ing engine, re-lubricate all control arms 00805, not modified by Service Kit SK150-37B and and moving parts. SK150-41, proceed as follows: 1. At each 100 hour inspection, inspect wing 2-36. UPHOLSTERY AND INTERIOR. Keeping the flap actuator jack screw and ball retainer assembly upholstery and interior trim clean prolongs uphol- for lubrication, and lubricate if required. Also, stery fabric and interior trim life. To clean the in- remove, clean and lubricate jack screw whenever terior proceed as follows: actuator slippage is experienced. If lubrication is a. Empty all ash trays and refuse containers, required, proceed as follows: b. Brush or vacuum clean the upholstery and carpet a. Gain access to actuator by removing to remove dust and dirt. appropriate inspection plates on lower surface of c. Wipe leather and plastic trim with a damp cloth. wing. d. Soiled upholstery fabrics and carpet may be b. Expose jack screw by operating flaps to cleaned with a foam-type detergent used according full-down position. to the manufacturer's instructions. c. Wipe a small amount of lubricant from e. Oil spots and stains may be cleaned with house- jack screw with a rag and examine for condition. hold spot removers, used sparingly. Before using (Lubricant should not be dirty, sticky, gummy or any solvent, read the instructions on the container frothy in appearance.) and test it on an obscure place in the fabric to be d. Inspect wiped area on jack screw for cleaned. Never saturate the fabric with volatile sol- presence of hard scale deposit. Previous wiping vent; it may damage the padding and backing materiaL action will have exposed bare metal if no deposit is f. Scrape sticky material from fabric with a dull present. knife, then spot clean the area. e. If any of the above conditions exist, clean and relubricate jack screw as outlined in steps 2-37. PROPELLER. "f" thru "r" a. Wash hub and blade with a soft cloth and Stod- f. Remove actuator from aircraft in accor- dard cleaning solvent or equivalent, then dry thor- dance with procedures outlined in Section 7. oughly with compressed air. The propeller should g. Remove all existing lubricant from jack be wiped occasionally with an oily cloth, then wiped screw and torque tube by running the nut assembly with a dry cloth. In salt water areas this will assist to the end of the jack screw away from the gear box, in corrosion proofing the propeller. and soaking the nut assembly and jack screw in Stoddard solvent. 2-38. WHEELS. The wheels should be washed per- iodically and examined for corrosion, chipped paint, NOTE and cracks or dents in the wheel halves or in the flanges or hubs. If defects are found remove and re- Care must be taken to prevent solvent from pair in accordance with Section 5. Discard cracked entering gear box. The gear box lubricant wheel halves, flanges or hubs and install new parts. is not affected and should not be disturbed. Change 3 2-11 h. After soaking, clean entire length of Jack necessary, and dry with compressed air. screw with a wire brush, rinse with solvent and dry b. Relubricate jack screw with MIL-G- with compressed air. 21164 (Molybdenum Disulfide Grease) as required. c. On aircraft beginning with Serials 17259905 and NOTE F17200805 and aircraft modified by Service Kit SK150- 41, clean and lubricate wing flap actuator jack screw Do not disassemble nut and ball retainer each 100 hours as follows: assembly. down position. 2. Clean jack screw threads with solvent rag i. Relubricate jack screw with MIL-G-21164 and dry with compressed air. (Molybdenum Disulfide Grease) as outlined in steps "j" thru "m". NOTE j. Rotate nut down screw toward the motor. k. Coat screw and thread end of nut with It is not necessary to remove actuator from grease and run nut to full extension. aircraft to clean or lubricate threads. 1. Repeat the process and pack lubricant in the cavity between the nut and ball retainer at the 3. With oil can, apply light coat of No. 10 threaded end of the nut. weight, non-detergent oil to threads of jack screw. m. Repeat the process and work nut back and forth several times. 2-44. FUEL SELECTOR VALVE. At each 100 hour n. Remove excess grease. inspection, check the fuel selector valve and drive o. Reinstall actuator in aircraft per Section shaft for the following: 7. a. Valve control detent plate for cleanliness and ex- b. On aircraft prior to Serials 17259905 and F172- cessive wear. Dirt accumulation on this plate can 00805, which have been modified by Service Kit cause binding, poor detent feel and rapid wear of the SK150-37B, proceed as follows: plate. 1. At each 100 hour inspection, expose jack b. All drive shaft attach points for security, binding, screw by operating flaps to full-down position, and excessive wear and lubrication, if required. inspect wing flap actuator jack screw for proper c. Operate valve handle through all positions and lubrication. If lubrication is required, proceed as check for proper operation, detent feel and freedom follows: of movement. a. Clean jack screw with solvent rag, if SHOP NOTES: 2-12 Change 3 HYDRAULIC FLUID: RECOMMENDED FUEL: ENGINE MODEL 0-300-Series CONTINENTAL Compliance with conditions stated in Continental aircraft engine Service Bulletins M74-6 and M75-2 and supplements or revisions thereto, are recommended when using alternate fuel. FUEL: 1. MINIMUM: 80/87 Aviation Grade 2. ALTERNATES: a. 100/130 Low Lead Avgas (with lead content limited to a maximum of 2 cc Tetraethyl lead Figure 2-4. Servicing (Sheet, of 4) Change 3 2-13 Change 3 2-13 RECOMMENDED FUEL (Cont). ENGINE MODEL O-320-E LYCOMING Compliance with conditions stated in the latest edition of Avco Lycoming Service Instruction No. 1070 and also in applicable Service Letters is recommended when using alternate fuel. FUEL: 1. MINIMUM: 80/87 Aviation Grade 2. ALTERNATES: a. 100/130 Low Lead Avgas (with lead content limited to a maximum of 2 cc Tetraethyl lead per gallon). b. 100/130 Higher Lead Avgas (with lead content limited to a maximum of 4.6 cc Tetraethyl lead per gallon). c. 115/145 Aviation Grade (with lead content limited to a maximum of 4.6 cc Tetraethyl lead per gallon). RECOMMENDED ENGINE OIL: ENGINE MODEL 0-300-Series CONTINENTAL AVIATION GRADE: ABOVE 40 ° F SAE 40 BELOW 40" F SAE 20 Aviation Grade ashless dispersant oil, conforming to Continental Motors Specification MHS-24 and all revisions and supplements thereto, must be used except as noted in paragraph 2-21. Refer to Continental Aircraft Engine Service Bulletin M74-19 and any superseding bulletins, revisions, or supplements thereto for further recommendations. ENGINE MODEL O-320-E LYCOMING AVIATION GRADE: ABOVE 60" F SAE 40 OR SAE 50 30* TO 900 F SAE 40 0 TO 70" F SAE 40 OR SAE 30 BELOW 10" F SAE 30 Aviation Grade ashless dispersant oil, conforming to Lycoming Specification No. 301 and all revisions and supplements thereto must be used except as noted in paragraph 2-21. Refer to Avco Lycoming Service Instruction No. 1014E and any superseding bulletins, revisions or supplements thereto for further recommendations. SHOP NOTES: Figure 2-4. Servicing (Sheet 2 of 4) 2-14 Change 3 DAILY 3 FUEL TANK FILLER Service after each flight. Keep full to retard condensation. Refer to paragraph 2-18 for details. 4 FUEL TANK SUMP DRAINS If quick-drain valves are installed, drain off any water and sediment before first flight of the day. 6 PITOT AND STATIC PORTS Check for obstructions before first flight of the day. 10 FUEL STRAINER Drain off any water and sediment before the first flight of the day. Refer to paragraph 2-19 for details. 13 INDUCTION AIR FILTER Inspect and service under dusty conditions. Refer to paragraph 2-22 for details. 16 OIL DIPSTICK Check oil on preflight. Add oil as necessary. Refer to paragraph 2-21 for details. 18 OIL FILLER CAP: Whenever oil Is added, check that filler cap is tight and oil filler door is secure. FIRST 25 HOURS 15,17 ENGINE OIL SYSTEM Refill with straight mineral oil, non-detergent, and use until a total of 50 hours has accumulated or oil consumption has stabilized, then change to ashless dispersant oil. O 50 HOURS 13 INDUCTION AIR FILTER Clean filter per paragraph 2-22. Replace as required. 14 BATTERY Check electrolyte level and clean battery compartment each 50 hours or each 30 days. 15 17 ENGINE OIL SYSTEM Change oil each 50 hours if engine is NOT equipped with external oil filter; if equipped with external oil filter, change filter element each 50 hours and oil at each 100 hours, or every 6 months. 12 SHIMMY DAMPENER Check fluid level and refill as required with hydraulic fluid. Refer to paragraph 2-27. 7 TIRES Maintain correct tire pressure as listed in figure 1-1. Also refer to paragraph 2-25 for details. Figure 2-4 Servicing (Sheet 3 of 4) Change 3 2-14A/(2-14 B blank) 50 HOURS (Cont) 11 NOSE GEAR SHOCK STRUT Keep strut filled and inflate to correct pressure. Refer to paragraph 2-26 for details. D- 100 HOURS 10 FUEL STRAINER Disassemble and clean strainer bowl and screen. 01 200 HOURS 1 VACUUM RELIEF FILTER Change each 1000 hours, or to coincide with engine overhauls. 4 FUEL TANK SUMP DRAINS If quick-drain valves are not installed, remove plugs and drain off water or sediment. Reinstall plugs and safety. Also refer to paragraph 2-19. 5 SELECTOR VALVE DRAIN Remove plug and drain off any water or sediment. Also refer to paragraph 2-19. 9 BRAKE MASTER CYLINDERS Check fluid level and refill as required with hydraulic fluid. Refer to paragraph 2-28. 500 HOURS 2 VACUUM SYSTEM CENTRAL AIR FILTER Replace every 500 hours. A AS REQUIRED 8 GROUND SERVICE RECEPTACLE Connect to 12-volt DC, negative-ground power unit. Refer to paragraph 11-67 for details. Figure 2-4. Servicing (Sheet 4 of 4) Change 3 2-15 FREQUENCY (HOURS) METHOD OF APPLICATION GUN CAN (FOR POWDERED GRAPHITE) WHERE NO INTERVAL IS SPECIFIED, LUBRICATE AS REQUIRED AND WHEN ASSEMBLED OR INSTALLED. NOTE The military specifications listed are not mandatory, but are intended as guides in choosing satisfactory materials. Products of most reputable manufacturers meet or exceed these specifications. LUBRICANTS PG - SS-G-659 . ........... POWDERED GRAPHITE GR- MIL-G-81322A ............... GENERAL PURPOSE GREASE GH - MIL-G-23827A . .......... AIRCRAFT AND INSTRUMENT GREASE GL- MIL-G-21164C ........... MOLYBDENUM DISLULFIDE GREASE OG- MIL-L-7870A ........... GENERAL PURPOSE OIL FL - W-P-236 ................. PETROLATUM GS- MIL-S-8660 ............ DC4 DOW CORNING GP-- .................. .NO. 10-WEIGHT, NON-DETERGENT OIL BEARINGS ALSO REFER TO SHIMMY TORQUE LINKS ALSO REFER TO PARAGRAPH 2-41 STEERING ARM BEARING MAIN GEAR WHEEL BEARINGS WHEEL BEARINGS NOSE GEAR Figure 2-5. Lubrication (Sheet 1 of 3) 2-16 Change 2 WHEEL SHAFT BUSHINGS AND UNIVERSALS OILITE BEARINGS BATTERY ELEVATOR TRIM TAB NEEDLE BEARINGS CONTROL "U" ALSO REFER TO INSPECTION CHART IN THIS SECTION AND TO SECTION 9 OF THIS MANUAL ALL PIANO - HINGES FUEL SELECTOR DRIVE SHAFT ATTACH POINTS AILERON BELLCRANK NEEDLE BEARINGS REFER TO PARAGRAPH 2-44 CABIN DOOR WINDOW PH INSERT GROOVES GH Figure 2-5. Lubrication (Sheet 2 of 3) Change 3 2-17 BEARINGS BOLTS NOTES Sealed bearings require no lubrication. Do not lubricate roller chains or cables except under seacoast conditions. Wipe with a clean, dry cloth. Lubricate unsealed pulley bearings, rod ends, Oilite bearings, pivot and hinge points, and any other friction point obviously needing lubrication, with general purpose oil every 1000 hours or oftener if required. Paraffin wax rubbed on seat rails will ease sliding the seats fore and aft. Lubricate door latching mechanism with MIL-G-81322A general purpose grease, applied sparingly to friction points, every 1000 hours or oftener, if binding occurs. No lubrication is recommended on the rotary clutch. Figure 2-5. Lubrication (Sheet 3 of 3) 2-18 Change 3 INSPECTION REQUIREMENTS. As required by Federal Aviation Regulations, all civil aircraft of U.S. registry must undergo a complete inspection (annual) each twelve calendar months. In addition to the required ANNUAL inspection, aircraft operated commercially (for hire) must also have a complete aircraft inspection every 100 hours of operation. In lieu of the above requirements, an aircraft may be inspected in accordance with a progressive inspection schedule, which allows the work load to be divided into smaller operations that can be accomplished in shorter time periods. Therefore, the Cessna Aircraft Company recommends PROGRESSIVE CARE for aircraft that are being flown 200 hours or more per year, and the 100 HOUR inspection for all other aircraft. II INSPECTION CHARTS. The following charts show the recommended intervals at which items are to be inspected. As shown in the charts, there are items to be checked each 50 hours, each 100 hours, each 200 hours, and also Special Inspection items which require servicing or inspection at intervals other than 50, 100 or 200 hours. a. When conducting an inspection at 50 hours, all items marked under EACH 50 HOURS would be inspected, serviced or otherwise accomplished as necessary to insure continuous airworthiness. b. At each 100 hours, the 50 hour items would be accomplished in addition to the items marked under EACH 100 HOURS as necessary to insure continuous airworthiness. c. An inspection conducted at 200 hour intervals would likewise include the 50 hour items and 100 hour items in addition to those at EACH 200 HOURS. d. The numbers appearing in the SPECIAL INSPECTION ITEMS column refer to data listed at the end of the inspection charts. These items should be checked at each inspection interval to insure that applicable servicing and inspection requirements are accomplished at the specified intervals. e. A complete aircraft inspection includes all 50, 100 and 200 hour items plus those Special Inspection Items which are due at the time of the inspection. III INSPECTION PROGRAM SELECTION. AS A GUIDE FOR SELECTING THE INSPECTION PROGRAM THAT BEST SUITS THE OPERATION OF THE AIRCRAFT, THE FOLLOWING IS PROVIDED. 1. IF THE AIRCRAFT IS FLOWN LESS THAN 200 HOURS ANNUALLY. a. IF FLOWN FOR HIRE An aircraft operating in this category must have a complete aircraft inspection each 100 hours and each 12 calendar months of operation. A complete aircraft inspection consists of all 50, 100, 200 and Special Inspection Items shown in the inspection charts as defined in paragraph II above. b. IF NOT FLOWN FOR HIRE An aircraft operating in this category must have a complete aircraft inspection each 12 calendar months (ANNUAL,. A complete aircraft inspection consists of all 50, 100, 200 and Special Inspection Items shown in the inspection charts as defined in paragraph II above. In addition, it is recommended that between annual inspections, all items be inspected at the intervals specified in the inspection charts. Change 1 2-19 2. IF THE AIRCRAFT IS FLOWN MORE THAN 200 HOURS ANNUALLY. Whether flown for hire or not, it is recommended that aircraft operating in this category be placed on the CESSNA PROGRESSIVE CARE PROGRAM. However, if not placed on Progressive Care, the inspection requirements for aircraft in this category are the same as those defined under paragraph mi 1. (a) and (b). Cessna Progressive Care may be utilized as a total concept program which insures that the inspection intervals in the inspection charts are not exceeded. Manuals and forms which are required for conducting Progressive Care in- spections are available from the Cessna Service Parts Center. IV INSPECTION GUIDE LINES. (a) MOVABLE PARTS for: lubrication, servicing, security of attachment, binding, excessive wear, safetying, proper operation, proper adjustment, correct travel, cracked fittings, security of hinges, defective bearings, cleanliness, corrosion, deformation, sealing and tension. (b) FLUID LINES AND HOSES for: leaks, cracks, dents, kinks, chafing, proper radius, security, corrosion, deterioration, obstruction and foreign matter. (c) METAL PARTS for: security of attachment, cracks, metal distortion, broken spotwelds, corrosion, condition of paint and any other apparent damage. (d) WIRING for: security, chafing, burning, defective insulation, loose or broken terminals, heat deterioration and corroded terminals. (e) BOLTS IN CRITICAL AREAS for: correct torque in accordance with torque values given in the chart in Section 1, when installed or when visual inspection indicates the need for a torque check. NOTE Torque values listed in Section 1 are derived from oil-free cadmium-plated threads, and are recommended for all installation procedures contained in this book except where other values are stipulated. They are not to be used for checking tightness of installed parts during service. (f) FILTERS, SCREENS & FLUIDS for: cleanliness, contamination and/or replacement at specified intervals. (g) AIRCRAFT FILE. Miscellaneous data, information and licenses are a part of the aircraft file. Check that the following documents are up-to-date and in accordance with current Federal Aviation Regulations. Most of the items listed are required by the United States Federal Aviation Regulations. Since the regulations of other nations may require other documents and data, owners of exported aircraft should check with their own aviation officials to determine their individual requirements. To be displayed in the aircraft at all times: 1. Aircraft Airworthiness Certificate (FAA Form 8100-2). 2. Aircraft Registration Certificate (FAA Form 8050-3). 3. Aircraft Radio Station License, if transmitter is installed (FCC Form 556). To be carried in the aircraft at all times: 1. Weight and Balance, and associated papers (Latest copy of the Repair and Alteration Form, FAA Form 337, if applicable). 2. Aircraft Equipment List. To be made available upon request: 1. Aircraft Log Book and Engine Log Book. 2-20 Change 1 (h) ENGINE RUN-UP. Before beginning the step-by-step inspection, start, run up and shut down the engine in accordance with instructions in the Owner's Manual. During the run-up, observe the following, making note of any discrepancies or abnormalities: 1. Engine temperatures and pressures. 2. Static rpm. (Also refer to Section 11 or 11A of this Manual.) 3. Magneto drop. (Also refer to Section 11 or 11A of this Manual. ) 4. Engine response to changes in power. 5. Any unusual engine noises. 6. Fuel selector and/or shut-off valve; operate engine(s) on each tank (or cell) position and OFF position long enough to ensure shut-off and/or selector valve functions properly. 7. Idling speed and mixture; proper idle cut-off. 8. Alternator and ammeter. 9. Suction gage. 10. Fuel flow indicator. After the inspection has been completed, an engine run-up should again be performed to determine that any discrepancies or abnormalities have been corrected. SHOP NOTES: Change 2 2-21 SPECIAL INSPECTION ITEM IMPORTANT EACH 200 HOURS READ ALL INSPECTION REQUIRE- EACH 100 HOURS MENTS PARAGRAPHS PRIOR TO EACH 50 HOURS USING THESE CHARTS. PROPELLER 1. Spinner . . . . . . . . . . . . . . . . . . . . . . . . . . . . . . . . . ... 2. Spinner bulkhead . . . . . . . . . . . . . . . . . . . . . . . . . . . . . . . 3. Blades .................................... * 15 * 4. Bolts and/or nuts ................... .............. 5. H ub . . . . . . . . . . . . . . . . . . . . . . . . . . . . . . . . . . . . . . ENGINE COMPARTMENT Check for evidence of oil and fuel leaks, then clean entire engine and compartment, if needed, prior to inspection. 1. Engine oil, screen, filler cap, dipstick, drain plug and external filter element .... . 2. Oil cooler . . . . . . . . . . . . . . . . . . 3. Induction air filter. ............ ...................... 2 4. Induction airbox, air valves, doors and controls ................. . 5. Cold and hot air hoses . ............................ 6. Engine baffles . . . . . . . . . . . . . . . . . . . . . . . . . . . . . . ... 7. Cylinders, rocker box covers and push rod housing ................. . 8. Crankcase, oil sump, accessory section and front crankshaft seal .......... 9. Hoses, metal lines and fittings ......................... ... 3 10. Intake and exhaust systems . ..... ..... ..... .... ..... 4 11. Ignition harness . . . . . . . . . . . . . . . . . . . . . . . . . . . . . . . . 12. Spark plugs .............................. . 13. Compression check .. . . . .. .... ..... ............. 14. Crankcase and vacuum system breather lines ................... 15. Electrical wiring ............................ . 16. Vacuum pump and oil separator ......................... 17. Vacuum relief valve filter (cabin area) ................... . . 5 18. Engine controls and linkage ................... .. . . . . 6 * 19. Engine shockmounts, mount structure and ground straps .............. 20. Cabin heat valves, doors and controls ...................... 21. Starter, solenoid and electrical connections - . ......... ... . ... 2-22 Change 3 CESSNA AIRCRAFT COMPANY MODEL 172 SKYHAWK SERIES SERVICE MANUAL SPECIAL INSPECTION ITEM EACH 200 HOURS EACH 100 HOURS EACH 50 HOURS 22. Starter brushes, brush leads and commutator ........................................................................ 23. Alternator and electrical connections ........................................ ................................... 24. Alternator brushes, brush leads, commutator or slip rings..................................................... 7 25. Voltage regulator mounting and electrical leads .................................................................... 26. M agnetos (External) and electrical connections .................................................................... 27. M agneto timing....................................................................................................................... 8 28. Carburetor and drain plug ........................................ .................................. 29. Firewall................................................................................................................................... 30. Engine cowling ....................................................................................................................... FUEL SYSTEM 1. Fuel strainer, drain valve and control ..................................................................................... 2. Fuel strainer screen and bowl ................................................................................................ 3. Fuel tank vents, caps and placards........................................................................................ 4. Fuel tanks, sum p drains and fuel line drains.......................................................................... 5. Drain fuel and check tank interior, attachment and outlet screens........................................ 5 6. Fuel vent valves...................................................................................................................... 7. Fuel vent line drain ................................................................................................................. 8. Fuel selector valve and placards............................................................................................ 9. Fuel valve drain plug .............................................................................................................. 10 . Engin e prim er ......................................................................................................................... 11. Perform a fuel quantity indicating system operational test. Refer to 16 Section 15 for detailed accomplishment instructions ............................................................ LANDING GEAR 1. M ain gear wheels and fairings................................................................................................. 2. Nose gear wheel, torque links, steering rods, boots and fairing ............................................ 3. W heel bearin g s........................................................................................................................ 9 4. Nose gear strut and shimmy dampener (service as required) ................................................ 5. Tire s......................................................................................................................................... 6. Brake fluid, lines and hoses, linings, discs, brake assemblies and master cylinders ............. 7. Parking brake system .............................................................................................................. Revision 4 2-23 Mar 1/2004 © Cessna Aircraft Company CESSNA AIRCRAFT COMPANY MODEL 172 SKYHAWK SERIES SERVICE MANUAL SPECIAL INSPECTION ITEM EACH 200 HOURS EACH 100 HOURS EACH 50 HOURS 8. M ain gear springs................................................................... ................................................. 9. Nose steering arm lubrication................................................................................................. 10. Torque link lubrication ............................................................................................................ 11. Parking brake and toe brakes - operational check ................................................................ AIRFRAME 1. Aircraft exterior....................................................................................................................... 2. Aircraft structure..................................................................................................................... 3. W indows, windshield, doors and seals................................................................................... 4. Seat belt and shoulder harness.............................................................................................. 17 5. Seat stops, seat rails, upholstery, structure and mounting .................................................... 6. Control "Y" bearings, sprockets, pulleys, cables, chains and turnbuckles ............................. 7. Control lock, control wheel and control "Y" mechanism ......................................................... 8. Instruments and markings........................................... ............................ ............................... 9. Gyros central air filter ................................................................................ 10 10. M agnetic com pass com pensation.......................................................................................... 18 11. Instrument wiring and plumbing ............................................................................................. 12. Instrument panel, shock mounts, ground straps, cover, decals and labeling ........................ 13. Defrosting, heating and ventilating system s and controls ...................................................... 14. Cabin upholstery, trim, sunvisors and ash trays .................................................................... 15. Area beneath floor, lines, hoses, wires and control cables.................................................... 16. Lights, switches, circuit breakers, fuses, and spare fuses ..................................................... 17. Exterior lights ............................................................................................................................. 18. Pitot and static system s.......................................................................................................... 19. Stall warning unit and pitot heater.......................................................................................... 20. Radios, radio controls, avionics and flight instruments.......................................................... 21. Antennas and cables.............................................................................................................. 22. Battery, battery box and battery cables.................................................................................. 23. Battery electrolyte................................................................................................................... 11 24. Emergency locator transm itter............................................................................................... 12 25. Inspect all fluid-carrying lines and hoses in the cabin and wing areas for leaks, dam age, abrasion, and corrosion ........................................................................... 2-24 Revision 4 © Cessna Aircraft Company Mar 1/2004 CESSNA AIRCRAFT COMPANY MODEL 172 SKYHAWK SERIES SERVICE MANUAL SPECIAL INSPECTION ITEM EACH 200 HOURS EACH 100 HOURS EACH 50 HOURS CONTROL SYSTEMS In addition to the items listed below, always check for correct direction of movement, correct travel and correct cable tension. 1. Cables, terminals, pulleys, pulley brackets, cable guards, turnbuckles and fairleads............ 2. Chains, terminals, sprockets and chain guards...................................................................... 3. Trim control wheels, indicators, actuator and bungee............................................................ 4. T ra v el sto p s............................................................................................................................. 5. De ca ls and la belin g ................................................................................................................. 6. Flap control switch, rollers, tracks, and position indicator ...................................................... 7. Flap motor, transmission, limit switches, structure, linkage, bell cranks, etc ......................... 8. Elevator and trim tab hinges and push-pull tubes .................................................................. 9. Elevator trim tab actuator lubrication ana inspection.............................................................. 1 10. Elevator trim tab system free-play inspection ......................................................................... 11. Rudder pedal assemblies and linkage .................................................................................... 12. External skins of control surfaces and tabs............................................................................. 13. Internal structure of control surfaces ....................................................................................... 14. Balance weight attachment ........................................ ..................................... 15. Flap actuator jackscrew threads.............................................................................................. 14 Revision 4 2-25 Mar 1/2004 © Cessna Aircraft Company CESSNA AIRCRAFT COMPANY MODEL 172 SKYHAWK SERIES SERVICE MANUAL SPECIAL INSPECTION ITEMS 1. For Airplanes Equipped With Textron Lycoming Engines: Within the first ten hours of operation for any new, remanufactured, overhauled engine or an engine with a newly installed cylinder, accomplish the following: Drain oil sump and oil cooler, remove oil filter or pressure screen and inspect for metal particles and/or foreign material, replace filter with new filter or clean screen, remove suction screen from oil sump and check for metal particles, and refill with recommended grade aviation oil. For engines equipped with a full-flow oil filter, for every 50 hours of operation or four months, whichever occurs first, accomplish the following: Drain oil sump and oil cooler, remove oil filter and inspect for metal particles and/or foreign material, replace filter with new filter, remove suction screen from oil sump and check for metal particles, and refill with recommended grade aviation oil. For engines equipped with an oil pressure screen system (Not Equipped With Full-Flow Oil Filter), for every 25 hours of operation or four months, whichever occurs first, accomplish the following: Drain oil sump and oil cooler, remove oil pressure screen and inspect for metal particles and/or foreign material, clean and install screen, remove suction screen from oil sump and check for metal particles, and refill with recommended grade aviation oil. NOTE: Refer to Lycoming Mandatory Service Bulletin No. 480B, or latest revision, for Oil and Filter Change Interval. Refer to Lycoming Service Instruction No. 1014M, or latest revision, for Lycoming's Lubricating oil recommendations. For Airplanes equipped with Rolls/Royce Continental or Teledyne Continental Engines: First 25 hours: Use mineral oil conforming with MIL-C-6529 Type II for the first 25 hours of operation or until oil consumption has stabilized, or six months, whichever occurs first. If oil consumption has not stabilized in this time, drain and replenish the oil and replace the oil filter. After the oil consumption has stabilized, change to an ashless dispersant oil and refer to Teledyne Continental Service Information Letter SIL99-2 or latest revision for a current listing of lubricants authorized by Teledyne Continental Motors. Change oil each 25 hours if engine is NOT equipped with external oil filter; if it is equipped with an external oil filter, change oil filter element and oil at each 50 hours of operation or every six months, whichever occurs first. Refer to the latest edition of the applicable engine operator/maintenance manual for the latest oil change intervals and inspection procedures. 2. Clean filter per paragraph 2-22. Replace as required. 3. Replace engine compartment hoses per the following schedule: A. Cessna Installed Flexible Fluid-Carrying Rubber Hoses; replace every 5 years or at engine overhaul, whichever occurs first. B. Cessna-Installed Flexible Fluid-Carrying Teflon Hoses (AE3663819bXXXX series hoses), replace every 10 years or at engine overhaul, whichever occurs first. C. Lycoming-Installed Engine Compartment Flexible Fluid-Carrying Hoses, Refer to latest Textron Lycoming Engine Service Bulletins. D. Rolls/Royce Continental or Teledyne Continental Motors Installed Engine Compartment Flexible Fluid-Carrying Hoses, refer to Teledyne Continental Service Bulletin SB97-6 or latest revision for hose replacement intervals. 4. General inspection every 50 hours. Refer to Section 11 for 100 hour inspection. 5. Each 1000 hours, or at engine overhaul, whichever occurs first. 2-26 Revision 4 © Cessna Aircraft Company Mar 1/2004 CESSNA AIRCRAFT COMPANY MODEL 172 SKYHAWK SERIES SERVICE MANUAL 6. Each 50 hours for general condition and freedom of movement. If these controls are not repairable, replace throttle and mixture controls at each engine overhaul. 7. Each 500 hours. 8. Internal Timing: For airplanes equipped with Slick 4100 series magnetos: These magnetos cannot be overhauled in the field. The coil, capacitor, and breaker assembly are non- replaceable. These magnetos shall be removed from service upon reaching 800 hours total time in service. For airplanes equipped with Slick magnetos or TCM/Bendix magnetos: Refer to the applicable service manual and service bulletins for internal timing procedures and service intervals. Magneto-To-Engine Timing: For airplanes equipped with Textron Lycoming engines: First 50 hours, first 100 hours and each 200 hours thereafter. For airplanes equipped with Rolls/Royce Continental or Teledyne Continental Engines: Each 100 hours. 9. First 100 hours and each 500 hours thereafter. More often if operated under prevailing wet of dusty conditions. 10. Replace each 500 hours. 11. Check electrolyte level and clean battery compartment each 50 hours or 30 days, whichever occurs first. 12. Refer to Section 16 of this manual. 13. Replacement or overhaul of the actuator is required each 1000 hours and/or 3 years, whichever comes first. Refer to figure 2-5 for grease specifications. NOTE: Refer to Section 9 of this service manual and Cessna Single Engine Service Letter SE73-25, or latest revision, for free-play limits, inspection, replacement and/or repair information. 14. Refer to paragraph 2-43 for detailed instructions for various serial ranges. 15. A "one-time" dye penetrant inspection of the blades of Model 1C72/MTM7653 propellers should be performed in accordance with Service Letter SE 70-31 (Supplement #1). This inspection should be accomplished within the next 25 hours of operation if this Service Letter has not been complied with. 16. Fuel quantity indicating system accuracy test is required every 12 months. Refer to Section 15 for detailed accomplishment instructions. 17. Inspect each 50 hours for general condition and security. Replacement is required every 10 years. 18. Every 2 years, or anytime components are added or removed which have the potential to affect the magnetic accuracy and/or variation of the compass calibration, or anytime the accuracy of the compass is in question. If required, refer to AC 43. 13-1 B for compass swing procedures. Revision 4 2-27 Mar 1/2004 © Cessna Aircraft Company