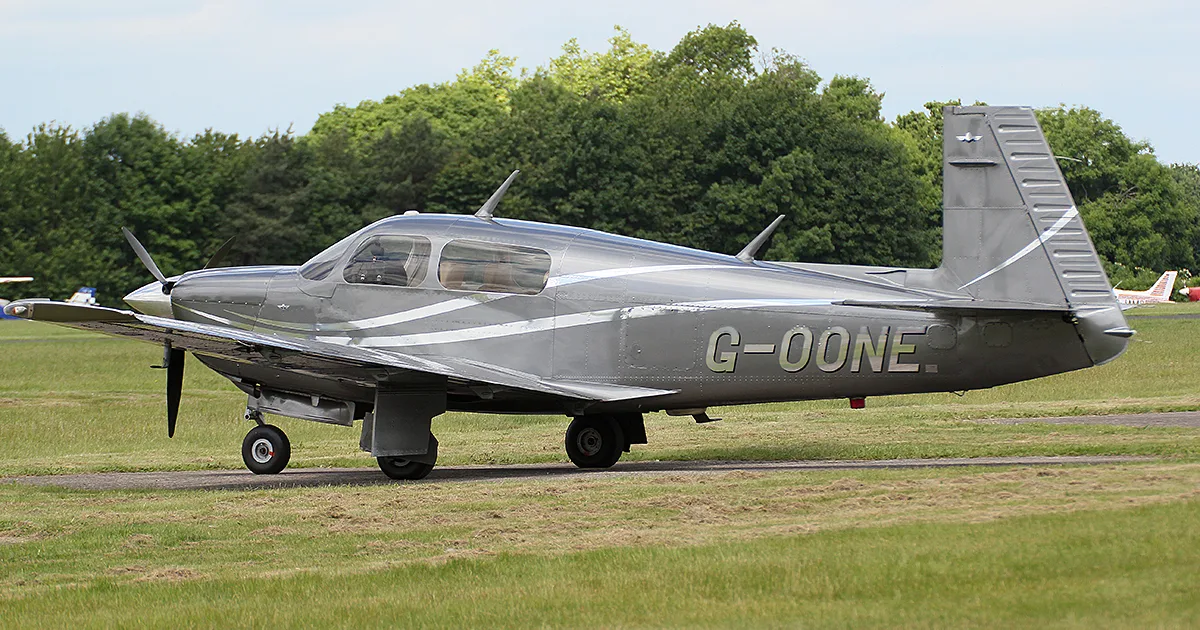
1965 MARK 21
Mooney M20D Master · Pilot's Operating Handbook
Overview
The document is a Pilot's Operating Handbook for the Mooney Mark 21 series, specifically detailing the M20C and M20D models. It provides essential information for pilots regarding the operation, maintenance, and performance of these aircraft. The handbook covers various systems including the fuel system, electrical system, landing gear, and flight controls, along with detailed procedures for starting the engine, weight and balance considerations, and performance data. It is crucial for pilots to familiarize themselves with this manual to ensure safe and efficient operation of the aircraft.
- The Mooney M20C and M20D are powered by a Lycoming 180 hp O-360-AID engine.
- Fuel capacity is 52 gallons, with 48 gallons usable.
- The aircraft features a manually operated landing gear system, which is unique to this model.
- Cruise speed at 75% power is approximately 130 knots at 10,000 feet.
- The maximum takeoff weight is 2,200 pounds.
Document
Source
Originally published by www.mattbeyer.com. Sprinkle hosts a reference copy with an added summary, specifications and searchable full text.
Document details
- Type
- Pilot's Operating Handbook
- Year
- 1965
- Pages
- 52
- File size
- 2.0 MB
- Publisher
- www.mattbeyer.com
Specifications & performance
Extracted from this document.
Specifications
- Engine (hp)
- 180
- Propeller
- constant speed
- Engine model
- O-360-AID
- Fuel capacity (gal)
- 48
- Max takeoff weight (lb)
- 2,200
Weight & balance
- Max takeoff weight (lb)
- 2,200
Common. Rarer than 24% of the aircraft models we track.
Most owners only have the POH. Here's the essential set for the Mooney M20D Master.
- Pilot's Operating Handbook / AFM
- Checklist
- Maintenance Manual
- Parts Catalog (IPC)
- Systems & Wiring
- Service Bulletins
- Type Certificate (TCDS)
Free — save the M.20D Master to your watchlist and track it in one place.
More Mooney M20D Mastermanuals & documents
See all 15 →- Preflight Mooney M20EChecklist
- Installation Guide, Vizion / AeroCruze 100 Autopilot, Mooney M20V Speeds Reference
- Sample Airplane Flight Manual Supplement for the 190-01810-13, Rev. 1Pilot's Operating Handbook
- Mooney M20D Master Systems DescriptionSystems Description
- SERVICE BULLETIN M20--288Service Bulletins
- SERVICE BULLETIN M20--289AService Bulletins
- TYPE CERTIFICATION - REVIEW CASESSupplemental Type Certificate
- OPERATORS MANUALMaintenance Manual
- Mooney 9351M systemsNormal Procedures
- Service Manual for the Mooney M20BService Manual
- Airplane Flight Manual for Mooney M20D MasterFlight Manual
- Airplane Flight Manual for Mooney M20D MasterFlight Manual
If you fly the Mooney M20D Master, you may also be researching these.





In this document
Description and Operation of Components
This section outlines the various systems of the Mooney Mark 21, including the fuel system, electrical system, landing gear, and flight controls. It describes the operation of the Lycoming 180 hp O-360-AID engine, the constant speed propeller, and the hydraulic systems for brakes and flaps.
Flight Procedures
This part details the standard flight procedures including weight and balance, pre-flight inspections, engine starting, and takeoff and landing procedures. It emphasizes the importance of following these procedures for safe operation.
Performance Data
The performance section provides critical data for the Mark 21, including takeoff and climb performance, cruise speeds, and fuel consumption rates. It includes tables for various weights and configurations.
Service and Maintenance
This section covers routine maintenance checks, required data for operation, and troubleshooting tips for common issues. It emphasizes the importance of regular maintenance to ensure aircraft safety and performance.
Operating Limitations
This section outlines the operational limits for the aircraft, including airspeed limitations, engine operating limitations, and weight restrictions. It is essential for pilots to adhere to these limitations to ensure safe flight.
Safety notes
- Always operate the aircraft within the specified limitations to ensure safety.
- Use only 91/98 octane fuel or higher to prevent engine damage.
- Perform pre-flight inspections thoroughly to identify any potential issues.
Full document text
M A R K 21 MODEL M 20 C OPERATE THIS AIRCRAFT ONLY - after reading owners manual @ with owners manual on board @ after you are fully qualified & understand all of the aircraft operating characteristics& limitations OWNERS MANUAL DATA INCLUDED MOONEY AIRCRAFT. /NC. Downloaded from www.Manualslib.com manuals search engine NOTE: Information i n the 1965 M A R K 21 owner's manual a l s o a p p l i e s to the 1962 through 1964 models w i t h the ex- 1852, 1940 thru 2207, 2209 thru 2255, 2257 thru 2296 2208,2256, 2297 thru 2622 ment to the 1965 MARK 21 owrrers manual PAR"1" DESCRIPTION AND OPERATION OF COMPONENTS FUEL SYSTEM (Reference page 3) The fuel tank capacity of the 1962 and 1963 Mark 21 is 24 gallons per wing tank o r 48 gallons total fuel. The '62 and '63 models do not have a pull ring to drain the fuel selector sump from the cabin. In these models the selector sump is drained from outside using the same procedure recommended for draining the wing tanks. 1962 and 1963 models have a gascolator in the nose wheel well which can be inspected and drained from outside the aircraft. LANDING GEAR: (Reference page 6) The thumb operated safety latch for the landing gear retrac- tion lever has not been factory installed on serial numbers 1852, 1940 through 2050. Downloaded from www.Manualslib.com manuals search engine POSITWE CONTROL SYSTEM: (Reference page 8) The Positive Control section does not apply to 1962, 1963 or 1964 models unless retrofit installation of the PC system has been made. TRIM SYSTEM: (Reference page 9) The friction adjsstment for the trim control wheel does not apply to 1962 models. FLAPS: (Reference page 9) The 1962 and I965 model fiaps a r e retracted by pulling the release knob adjacent to the flap handle. VACUUM SYSTEM: (Reference page 10) 1962, '63 and '64 models do not have a vacuum operated cabin entry seep. These models have a manually operated step retraction system activated by a hand crank on the left side panel near the pilot's knee. Turning the crank clockwise raises the step; counter clockw i s , lowers the step. The vacuum regulator will maintain vacuum between 3.5 and 5.0 inches of mercury on 1962, 1963 and 1964 models. The vacuum warning lights for these airplanes a r e see accord- ingly. HEATING AND VENTILATION SYSTEMS: (Reference pages 10 and 11) 1962 models do not have rear heat outlets. There Ls no left side air scoop on 1962, 1963 o r 1964 production aircraft. Serial numbers 1852 and 1940 through 2693 do not have a firewall-mounted radio cooling grill. PART II FLIGHT PROCEDURES WEIGHT AND BALANCE: (Reference page 14) 1962 models a r e not equipped with the utility shelf aft of the main baggage compartment. Therefore, related weight limita- tion does not apply. Downloaded from www.Manualslib.com manuals search engine ENTERING THE AIRCRAFT: (Reference page 15) Drain the fuel selector valve sump from outside the air- craft on 1962 and 1963 models. STARTING THE ENGINE: (Reference page 15) - -- "Push to Stare" feature was installed on the ignition switch beginning with 1963 models. On earlier aircraft, turning the ignition switch to "start" engages the s t a r t e r and the "shower of sparks" ignition. COLD WEATHER AND MANUAL STARTI* (Reference page 16 T o manually s t a r t aircraft with serial numbers 1852 and 1940 through 2342 use the following procedures: (1) Turn off the "starter disconnect switch" located on the upper center section of the firewall under the instrument panel. The switch disconnects the s t a r t e r s o that only the s t a r t e r vibrator operates when the magneto switch is turned to the start position. (2) As the engine is "propped", hold the magneto switch in the "start" position. This operates the s t a r t e r vibrator and furnishes retarded spark to the engine. (3) When the engine starts, release the switch to the "both" position and place the starter disconnect switch in the "on" position. Aircraft serial numbers from 2343 may be manually started a s described on page 16. PART i l l SERVICE AND MAINTENANCE VACUUM STEP: (Reference page 27) The maintenance check of the step retraction does not apply to 1962, 1963 or 1964 models. REQUIRED DATA : (Reference page 28) The F.A .A. approved flight manual i s part of the r e q u i r d data for 1962 and 1963 models. Placards in the aircraft and data in the owner's manual supercede the flight manual data for later models. Downloaded from www.Manualslib.com manuals search engine PART I V PERFORMANCE D A T A (Reference pages 29-37) Perforrnance data shown applies to all 1962, '63, '64 and '65 models except for endurance and range on '62 and '63 planes which c a r r y 48 gallons of fuel. Following a r e the '62-'63 cruise and range tables: CRUISE AND RANGE DATA AWRGGE CROSS WEIGHT - 2200 POUNDS BEST POWER MIXTURE - 48 GALLONS USABLE FUEL Downloaded from www.Manualslib.com manuals search engine ALTITUDE 5000' K3& Downloaded from www.Manualslib.com manuals search engine AETIPUDE 10,000' MSL I I I I I I J (1) T R U E A I R S P E E D ? 3 P E R C E N T ( 2 ) M A X I M U M RANGE EACH 100 LB.CHANGE I N A I R P L A N E W E I G H T # I L L R E D U C E OR i N C R E A S E TAS BY 1.2 MPH PART V OPERATION LlMlTATlONS The information in PART V of this manual does not apply to 1962 and 1963 models but does apply to 1964 aircraft. Refer to the airplane flight manual and instrument markings for 1962 and 1963 airplanes. Downloaded from www.Manualslib.com manuals search engine OPERATE THIS AIRCRAFT ONLY - @ after reading owners manual @ with owners manual on board @ after you are fully qualified 81 understand all of the aircraft o p e r a t i n g characteristics& limitations M A R K 2 OWNERS MANUAL Downloaded from www.Manualslib.com manuals search engine Thank you for choosing a hlooney The wisdom of your selection of a Mooney Mark 21 will
Show full textShow less
be proved many times a s your hours in this exceptional airplane increase. It takes a long time and a lot of flying to appreciate all of the mauy outstanding features built into the Mark 21. This owners manual w i l l help you know your airplane better and will make your experience with the Mark 21 more enjoyable. Welcome to the rapidly growing family of blooney own- ers. M 0 0 1 V E B8 A I R C R A F I , I N C . LOUIS SCHREINER F I E L D .X E R R V I L L E . T E X A S Downloaded from www.Manualslib.com manuals search engine 1965 M A R K 21 PART I DESCRlPTlON AND OPERATBa OF COMPONENTS Page Genera I Propeller Engine Engine ignition Fuel System E lectrical System Airframe Landing Gear Flight Controls Mooney Positive Control System Trim System Flaps Vacuum System Brakes Heating and Ventilation Systems Pictures Downloaded from www.Manualslib.com manuals search engine PART !l FLIGHT PROCEDURES General Weight and Balance Pre-F light Inspection Entering the Airplane Starting the Engine Cold Weather and Manual Starting Taxiing and Ground Operation Pre Take-Off Check Take-Off and C l i m b Power Changes Cruise Procedures Indicated Airspeed Fuel Management bet-Down Procedures Carburetor Heat Landing Procedures Normal Landing Stopping the Engine PART III SERVICE AHD MIHTEHANCE Page Genera I Ground Wondl ing Propeller Engine Battery Care of Interior Care of Exterior Windows banding Gear Vacuum Operated Step Required Data Service Letters and Bulietins Downloaded from www.Manualslib.com manuals search engine PART l\d PERFORMANCEDATA Take-Off and Climb Data (Fig- 7 ) Climb Performrsnee (Fig. 2) Cruise and Range (Fig. 3) (Fig. 3A) (Fig, 3B) (Fig. 3C) (Fig. 3D) Stall Speed vs. Bonk Angle (Fig. 4) Maximum Range & Glide Chart (Fig. 5 ) Landing Dora (Fig. 6) PART V OPERAnING LIMBPATBONS Airspeed Limitations Engine Operating Limitations Engine lnstrunnent Markings Page 2 9 3 0 31 32 33 34 35 36 36 3 7 38 3 8 38 Downloaded from www.Manualslib.com manuals search engine Downloaded from www.Manualslib.com manuals search engine The Mark 21 is a single engine four-place low wing, retractable tricycle landing gear airplane, The design and operation of this aircraft a r e conventional with few exceptions, There are no tricky or complex operational characteristics requiring unusual or extreme piloting skill. This section will describe some of the components of the Mark 2 %and operating details. PROPELLER The Mark 2%.uses an aluminum alloy constant s p e d propeller of 74 inch diameter. The pitch of the blades is contro%ldby engine oil pressure which acts to increase or decrease blade angle of attack and thereby control engine s p e d . The propeller control in the cabin operates the propdler governor which contro%s the oil pressure providd to the propeller hub. The governor sating functions to maintain the engine at a constant SF& by actuating blade angle of ;track. In essence then, the function of the propeller control in the cabin is to regulate and maintain the rotational s p e d of the engine at a desired setting, The Mark 21 is powered by the Lycoming 180hp 0-360-AID four cylinder engine. This engine uses 91/98 octane fuel. Four rubber bushings on the aft side of the engine provide mounting and vibration isolation. Engine manifold pressure is regulated 5y the push-pull throttle control on the panel. The fuel-to-air ratio (mixture) is regulated by the hexagon shaped push-pull control located between the throttle and pro- peller controls in the cabin. The Mark 2 1 engine baffling directs air flow over the cylinders for cooling in flight. Cowl flaps a r e Downloaded from www.Manualslib.com manuals search engine provided on .the lower cowling to allow more free air flow on the ground and during low speed, high power conditions (Leo, climb conditions). Cowl flaps should always be open on the ground, and prolonged engine operation on the ground should be avoided to prevent engine overhearing. A push-pull control is provided k l o w the instrument panel and to the right of the pilot for operation of the cowl flap. The engine has a pressure-type wee-sump %ubsicaeion syseern. It has an eight quart capacity; however, a s a general rule, when the oil level drops below six quarts, one quart is added. This will maintain the oil level between the six and seven w a r t level. See Pare IPI for tgrge of oil used and time kerween oil changes. A n oil temperature thermostat, see for 180 I?* i s located in the oil reservoir to assure warm oil for ,311 operations. An oil cooler is mounted on the lower %eft side of the cowling to pre- vent the oil from overheating. An oil filter mounted on the fise- wall is available as optional ewipmene. The Mark 29 ignition system has the following features: 1. Two Bendix magnetos, the left m a p e t o being e q i p p d with a see of retard breaker points. 2. A starting vibrator, located on the upper firewall, which furnishes a shower of sparks for starting. 3. A switch which combines both ignition and starting functions. 4. Shielded spark plugs and ignition harness to suppress radio noises. When the push-type starter switch is activated in the -'startD' position, the starter vibrator sends an interrupted current through the retard-breaker points while the right magndo is grounded out. The left magneto then provides a shower of sparks to each cylinder after the piston has reached top dead center on the compression stroke. The engine starts sooner and easier because of this system, Downloaded from www.Manualslib.com manuals search engine F U E L b"BSfEDIL Fuel is c o m a i n 4 in two imegral sealed sections in the front part of each wing root. Each tank will hold 26 gallons of gasoline. These fuel tanks each have a sump drain under the wing from which fuel may be s a m p l d to check for water or sediment con- tamination. A small plastic cup with an actuator prong is pro- vided to obtain fuel samples. If water i s present in the fuel, a distinct line separating the water from the gasoline may be seen through the plastic cup. Water, k i n g heavier, will be on the bottom of the cup, a d the light-colored fuel will be on top. Aluminum fuel lines feed the fidd from the tank to a two-way, positive-setting selector valve on the floor ahead 0%the pilot's seat. The selector valve feeds fuel from one of the tanks at a time, and also has an "off" position for extended periods of storage o I- for emergency use. The selector valve also contains a sump drain which is a c t u a t d by pullfrag the ring adjacent to the fuel valve handle, Switch the selector valve handle to the right and left tanks to drain the respective %laaes.Be s u r e sump drain returns t o normal closed position after releasing the ring. Fuel i s fed from the selector valve through the electric boost pump, then to the engine driven punip and into t h e carburetor. The electric boost pump is turned on for take-off and Lnding to provide fuel pressure if the engine driven pump malfunctions. WARNING: Under no circumsfances should aviation fuel of a lower grade than 91/98 octane be used. Aviation fuels may distinguished by their color: 80 octane is red, 91 octane is blue, and 100 octane is green. If 91/98 octane i s not available, 100/130 octane gas- oline may be used. T H E ELECTRICAL SYS"6M The Mark 21 electrical system is provided with a 50 amp 12 volt generator and a 35 amp-hour battery which is located on the forward left side of the firewall. All electrical systems can Downloaded from www.Manualslib.com manuals search engine be turn& off by the master switel~whicla actuates a relay locat& at the battery. T h e master switch for the electrical system i s located a t the %e%-hand side of the flight panel. T h e electrical system operates all the e%eetrlcalaccessories listed below: 1, Radios 2. Engine s t a r t e r 3, Starter vibrator 4. Navigation lights and interior lights 5. Landing light 6 . Rotsting beaeon (if installed) 7, Heated pirot (if installed) 8, Turn and bank (if installed) 9, Cigarette lighter 10. Electric lalading gear (if installed) I I. F ue%gages 12. Electric fuel pump 13. Stall warning horn 14, Landing gear warning horn and warning ligh9.s NOTE: The engine has its own separate electrical system and will ccistfnue to run, even though ehe master switch has been turned off, o r even t*!;~ughthe ac- cessory electrical systeln Should malfuriceion, bion i s provided by two adjustable spot lights mourned on the headliner. These lights a r e controlled by a rheostat located on the headliner near the lights. The fuel selector valve is illuminated by a small light 1-~~ounted under the panel on the left side. T h e intensity of this light i s controlled by rotating the lens housing. T h e cabin light, located on the headliner near the center of the cahi.n, can be used to illuminate the pailel if the instrurnenr lighrs malfunction, Electrical Load Meter lneter in the engine instrument cluster sholrrs the amperage being produced by the generator. T h i s in- strument is not directly associared with the battery circuit and, therefore, will not directly indicate if the battery is charging or discharging. In riorl11a.l flight, the alnperage reading w i l l be Downloaded from www.Manualslib.com manuals search engine proportional to the electrical power required to run the radios. lights. etc. and charge the battery. When all accessories a r e eurrled off, ally airperage reading on the lneter w i l l be that which is chargirig the battery. The Elecrl-ical Panel The electrical parlel is divided ir~totwo parts: a, The electrical toggle swiec:hes which a r e on the lower %eft side of the pilot's panel and which act i n con~binarionboth as ori-off switches arid a s hrea1te.r switches. Should any of these c:ircuirs be overloaded, the switch autoinatica%Iyturns to the "off" position. T h e s e switches a r e , front left to right: 1 . '['he elec~tricalfuel pun-~p 2. A r l optional equiprnent switch 3. An optional equiprnent switch 4 . The gitot heat (if insralled) 5. The rotating beacon (if installed) 6. 'The navigation lights 7. The Eandir~glight b. The breaker switches which a r e located on the lower right * side of the copilot's panel, a r e covered by a special b r e a k e r switch cover, These switches a r e of eke push-to-reset evne. T h e structure of the Mark 2 1 i s of conventional all-rnetal design. The cabin section corlsists of tubular steel structure covered with aluminuum sheet metal. T h e firewall i s stainless steel. T h e wing, stabilizer, and fin have a main s p a r design and an aux- iliary s p a r with s t r e s s e d skin to c a r r y torsional loads. T h e t a i l cone is a conventional monocoque design. The seat design fea- tures contoured sheet metal construction. The entire empennage pivots around two attachment points t o the tail cone t o provide stabilizer t r i m . A s c r e w mechanism actuates the empennage movement at the r e a r bulkhead when the t r i m control wheel i s operated. Downloaded from www.Manualslib.com manuals search engine LANDING G E A R Manual System The landing gear of the Mark 21 i s unique in that it is manually retracted by the pilot by means of a lever in the cabin. The sys- tem is operated by direct mechanical linkage and has proven to be one of the most reliable and maintenance-free retraction systems available. An electrically powered landing gear retrac- tion system i s also available at extra cost and is described in the following section. T h e manual systeln is aided by bungee type springs in the fuse- lage and a s s i s t springs in the wing, which balance the weight of the gear. Rubber discs a r e used for shock absorption in the welded steel tube gear structure. Grease fittings a r e provided at certain important lubrication points on the landing gear. The position of the gear is indicated by lights on the panel which will warn of an unlocked condition. These lights may be d i n ~ n ~ e d by rotating the lens housing to prevent glare at night. P r e s s the lens housing in to test the bulbs. The red indicator light will come on if the handle on the retraction lever is nos sufficiently engaged in the down and locked position, thereby in- dicating an unsafe-to-land condition. The green light indicates that the handle is properly engaged in the down position, and the gear is in the landing configuration. A thumb operated latch is provided on the down socket to prevent unlocking of the gear when it is clown unless it is deliberat&y releas&. To retract the gear, depress the safety latch button and slide the gear handle from the down-lock socket. Move the handle rapidly to the floor between the seats. Slide the gear handle into the up-lock socket, and the operation is complete. The more rapid the movement of the handle, the e a s i e r it is to retract the gear. The gear retracts easiest at low airspeeds. 1.0 lower the gear, slide the gear handle from the up-lock socket ar~d rnove the handle forward to the instrument panel. Slide the Downloaded from www.Manualslib.com manuals search engine gear handle into the down-lock socket and check the gear warning ]light for a gear-down indication (a green light). gear retraction system is op- erated by the wheel-shaped switch on the upper portion of the flight panel, To raise the gear, the knob is pulled out and the switch moved up to its upper detent. An "airspeed switch" is incorporated in the electrical circuit which prevents landing gear retraction until a safe airspeed is attained, The action of the system n a y be monitored visually by watching the movement of the indicator through the glass in the floorboard aft of the nose wheel well. A limit switch will stop the gear in its retracted position and the gear switch will require no further attention un- til landing. To lower the landing gear, the knob is pulled out, moved down, and placed in the lower detene. A limit switch will stop the gear system when the groper locking force has been exerted to hold the gear down. There are three ways to check that the gear is completely down and locked: 1. The green "safe-to-land" indicator light (on the left panel) will come on. 2. The black indicator marks, as seen through the glass in the floorboard, will be aligned. 3. Retard throttle fully and if no warning horn i s heard gear should be down and locked. When these conditions are fulfilled, the aircraft may be landed with no further attention to the landing gear system. function, etc., t h i system may be operated manually a s described below: 1. Pull landing gear circuit breaker OFF. 2. Put gear switch in the gear down position. 3. Push crank engage handle forward. 4. Crank clockwise approximately fifty (50) turns to lower the gear, 5. Gear is down when green gear light is on. If a total electrical malfunction occurs, see gear visual indicator. DO NOT RETRACT GEAR IN FLIGHT WITH MANUAL HAND CRANK. Downloaded from www.Manualslib.com manuals search engine FLIGHT CONTROLS The ailerons, devators, and ruidder of the Mark 211 o p e r a t a conventionally. Push-pull tubes with self-aligning rod end bear- ings actuate these control surfaces. The ailerons have a differ- ential linkage (f.e., up travel is greater than down travel) to minimize adverse yaw when they a r e deflected. Gap strips on the hinge line minimize a i r spillage from the high to the low pressure side of the control surfaces. The ailerons have kveled trailing edges to lower pilot control force. THE AIIOBWEWOSITIVE CONTROL SYSTEM The Mooney Positive Control (PC) system provides a high de- gree of roll stability by pneumatic inputs to the rudder a d ail- eron systems. This system is operating whenever the engim is running. The engine vacuum pump provides the pneumatic power required. The PC system cut-off valve located in the pilot's left-hand control wheel handle provides system cut-off when deprssed. The aircraft can be maneuver4 easily when this valve is held down. When the v a h e is r e l a s e d , the airplane will tend to r a u r n to straf@ and wings level flight from any attitude. The '%olE $rim9' knob provides an aileron trim func- tion. Clockwise rotation allows trim to the right; coumerclsck- wise rotation allows trim to the left. In the event of malfunction, the pilot can easily override the system at any time. Complete disengagement may be accomplishd by depresing the cut-off valve. In the event of complete loss of vacuum ( i d i c a t d by a red light on the gyro horizon), the PC system will automatically become inoperative. However, it should be noted that this system will continue to operate even after a complete engine power loss as long as the propeller is windmilling at approximately 11000 rpan or above. The PC system does not have any electronic requirements and, therefore, it will operate completely independently of the elec- trical system. This aircraft is not approved for spins. In the event that the pilot inadvertently approaches or enters a spin, the Positive Control system can be overpowered from either the pilot's or Downloaded from www.Manualslib.com manuals search engine copilot's side and the controls used for normal spin recovery techniques, The pilot should use the cut-off valve located in the pilot's left control wheel handle to cut off the PC systeln when employing spin recovery control p r o c e d u ~es. T H E T R I M SYSTEM A small control wheel on the floor between the front seats actu- ates the adjustable stabilizer via a gear reduction and torque tube linkage which, actuates the empennage jack screw. A fric- tion lock is provided on the pilot side of the t r i m control ped- estal. Rotating the friction screw clockwise increases trim friction. T h e position of the stabilizer i s indicated by a pointer on the aft side of the nose wheel well, T h e intern~ediatemark in the pointer range is the normal take-off setting of the trim control. The trinl system also changes the setting of the trim bungees connected to the elevator horns to obtain trill? assist froin the elevators. F L A P S The wide span flaps a r e hydraulically controlled by a hand oper- ated pump which actuates a hydraulic cylinder. A relief valve is provided which releases the flaps a s a slow r a t e a s the springs (or a i r pressure) raise thein. Hydraulic fluid used is the same a s the brake system fluid and is stored in the brake reservoir on the aft side of the firewall. To lower the flaps, first set the flap-shaped control (adjacent to the flap handle) in the down position. Then punip the handle to obtain the desired setting: two strokes for take-off; four and one-half strokes for full de- flection o r any intermediate setting. To r a i s e the flaps, place the control in the up position, The flaps will then r i s e a s a con- trolled r a t e to the up position o r they may be stopped at an in- termediate position by placing the control in the down position again. T h e position of the flaps i s indicated by a pointer on the aft side of the nose wheel well. The intermediate mark in the pointer range is the flap take-off setting. Downloaded from www.Manualslib.com manuals search engine VACUUM SYSTEM The vacuu111 requirel-r~ents of the Mark 21 a r e supplied by an er~ginedriven vacuuln pump. T h e output of the pulrlp is controlled by a regularor which ~ i ~ a i n r a i n s vacuum between 4.50 and 5.00 inches of EvIercury. T h e red indicator lights on the artificial horizon will indicate if t h e vacuum i s below 4.05 inches of Mercury o r above 5.20 inches of Mercury. T h e s e lights may b e tested by pressing the t e s t switch located to the left of the arri- ficial horizon. T o dill? these lights during night flight, turn the lens housings clockwise. T h e vacunnl systetn powers the artificial horizon, the directional gyro, the Mooney Positive Control systern, and the auto~natic retractable step. A vacuuln s e r v o will r a i s e t h e step when the engine i s started and sufficient vacuu111 i s pi-o- duced. A spring will pull the step down when the engine i s stop- ped arid vacuui~li s relieved. B R A K E S T h e Mark 21. i s equipped with hydraulic d i s c brakes on the main gear which a r e operated ind&pendently by toe p r e s s u r e on the rudder pedals. T h e brakes may b e set for parking by dep1:press- ing the toe pedals and pulling out the lock valve control which is located on the panel to the right of the pilot's control colurnn. Hydraulic fluid for the b r a k e and flap systelns i s stored in a reservoir on the top aft s i d e of the firewall. Copilots brakes a r e available a s optional equipment. HEATING AND V E N T I L A T I O N SYSTEMS The Lower Heat and Vent System Cabin heat i s obtained fro111 a rrtuff which surrounds the engine exhaust manifold. F r o m this muff, a flexible duct t r a n s i i t s heated a i r to a junction box on the aft s i d e of the firewall on t h e copilot's side. Cool a i r i s also ducted to this junction box fro1-n the flush a i r scoop on the right side of the airplane. T h e w a r m and cool a i r entering the junction box can be individually con- trolled to provide the combination required for the desired tem- Downloaded from www.Manualslib.com manuals search engine perature. F r o m the junction box, a i r is ducted to the pilot and copilot's feet, windshield defroster, r e a r passengers' feet, and to the baggage compartment. Deflectors a r e provided on the pilot and copilot outlets which can be used to direct the a i r flow in ehe desired direction o r to provide individual volume controls. When these deflectors a r ? in the neutral or "off" position, the a i r flow is forced to the windshield defrosters and to the aft outlets. consists of a retractable a i r scoop on top of the cabin seciion which supplies four individually con- trolled ceiling outlets. The scoop control knob, located above the pilot, is turned counter-clockwise to open (extend) the scoop so obtain ram air. T o minimize drag, open the scoop only enough to obtain sufficient a i r flow at all outlets. The outlets can be controlled individually by turning the inner knob to ad- just the a i r volume, and rotating the deflector to obtain air flow i n the desired direction. Left Side Air Scoop- scoop has one outlet which has a volume con- trol and can be adjusted directionally. This scoop also has two outlets behind the upholstery panel which provide a source of a i r for radio cooling. Radio Cooling Outlet In addition to the outlets on the left scoop for radio cooling tubes, the right side flush a i r scoop provides a i r for the radio vent grill which is mounted on the firewall, directly forward of the center radio panel. This grill directs a i r aft to insure suf- ficient air flow to prevent multiple radio installations from overheating. The tube supplying the grill has a control valve near the scoop to decrease a i r flow in extremely cold weather. Downloaded from www.Manualslib.com manuals search engine INSTRUMENVANEL AND CONTROLS - MARK 2% Downloaded from www.Manualslib.com manuals search engine Downloaded from www.Manualslib.com manuals search engine PART II FLIGHT PROCEDURES G E N E R A L This section will describe recommended flight procedt~resnec- essary for the proper operation of your Mark 21. The aircraft is normally flown from the left seat. However, when equipped with optional dual brakes, a copilot o r instructor has full con- trol of the aircraft and access to all instruments and controls. The copilot can override the Mooney PC system easily without depressing the cut-off valve %ocated on the left control wheel. WEIGHT AND B A L A N C E 'The aircraft weight and center of gravity location can be de- termined from the information and examples shown in the weight and balance data provided with the airplane, Refer to the Eatese F A A Form 337 for the corrected weight data if the airplane has been altered since leaving the factory, The maxirnurn allowable take-off weight of the Mark 21, in- cluding fuel, oil, baggage, and passengers is 2575 pounds. If there i s doubt concerning the weight or C.G. location of a pro- posed loading, that loading should be checked p e r the weight and balance data. F o r example, a loading consisting of full fuel, 120 pounds baggage (maximum allowable), pilot, and two r e a r passengers could result in a COG.location exceeding the rear- ward limit. Moving a rear passenger to the right front seat would eliminate this condition. The hat rack a r e a aft of the main baggage compartment is in- tended for light objects. WARNING: This area is limited to ten pounds weight for balance purposes. Downloaded from www.Manualslib.com manuals search engine PRE-FLIGHT INSPECTION The following pre-flight inspection is recommended: F l. Check all switches off. 2. Remove tiedowns o r wheel blocks, check t i r e s and prop clear of rocks, holes, etc. 3. Check wings and control surfaces clear of ice, snow, o r frost. 4. Check the propeller blades for nicks o r cracks. 5. Check the oil level to six quarts o r above. 6. Inspect the cowling for loose attachments. 7. Inspect the tires for proper inflation. 8. Inspect the a i r filters for cleanliness. 9. Check the left tank for fuel lwei and drain sump. 10. Check the left aileron for freedom of travel. 11. Inspect the left flap. 12. Inspect the eleva-cor and rudder for freedom of travel. (Rudder travel will be limited by nose gear steering mech- anism .) 13. Inspect the right flap. 14. Inspect the right aileron for freedona of travel. 15. Check the right fuel tank f o ~fuel level and drain sump. 16. Check lights if flight i s a t night. E N T E R I N G T H E A I R P L A N E After entering the cabin, close the door by pulling on the pull s t r a p and rotating the handle forward to the latched position. DO NOT SLAM THE DOOR. Check that the gear retraction handle (or electric gear switch) is in the gear down and locked position. Drain the fuel selector valve on the floorboard and turn the selector to the proper tank. Be s u r e the drain returns to '"OFF" position and that the pull ring is properly positioned in the cavity provided. If the flight is at night, check to a s s u r e a flashlight i s on board. STARTING THE ENGINE The following starting procedures a r e recommended; however, the starting characteristics of each engine may vary slightly Downloaded from www.Manualslib.com manuals search engine which could necessitate s o m e variation from t h e s e recommenda- tions. I. Gas selector on fullest tank. 2. All radio switches and electrical switches off. 3, B r a k e s on. 4. Carburetor heat control (OFF) position. 5* Cowl flaps open. 6. Mixture control full forward (rich). '7. P r o p e l l e r control full forward (high rpm). 8. M a s t e r switch on (green gear indicator light, "Low Vacu- um" warning light, and the e l e c t r i c turn and bank indicator should come on). 9. T u r n boost pump on and note fuel p r e s s u r e indication. $0. P u m p the throttle twice to p r i m e the engine. 11. Set the throttle approximately 1/4" open. 12. T u r n ignition switch to "Start" and p r e s s in. 13. When engine f i r e s , hold s t a r t switch on for another second rhen allow the spring loaded switch t o return to ""Both". C O L D WEATHER AND M A N U A L S T A R T I N G In extremely cold weather, it may be necessa,ry to provide ad- ditional fuel priming to the engine by pumping the Clrotcle t h r e e o r four times, le n ~ a ybe necessary to preheat the engine and engine oil prior to starting, NOTE: If oil p r e s s u r e is not indicated on engine gage within 30 seconds, stop engine immediately and d e ~ e r m i n e cause, In the event that it becomes necessary to s t a r t the engine with a low battery and no external battery s o u r c e rs available, u s e the following procedures: 1. As the engine is "propped," hold the rnagneto switch i n the "start" position to operate the s t a r r e r vibrator and furnish a retarded spark to the engine. WARNING: Do not push ;he magneto switch. This engages the s r a r t e r . 2. When the engine s t a r r s , release the switch to the "Both" position. Downloaded from www.Manualslib.com manuals search engine T A X l l N G AND GROUND O P E R A T $ON The nose gear of the Mark 2 1 is linked directly to the rudder pedals to provide stwring. The brakes may be applied fndepen- demly to assist steering for sharper turns. Caution should be used when operatfng on rough terrain, R is recommendd that minimum power be us& for starting to taxi on sod or gravel fields. Too much power will cause the propeller to suck up stones and thus nick the blades. Excessive s p e A aver rough ground should be avoided to greclsadle pitch d o m of the nose. The Lyeomirag 0-368- A 113s i s an air pressure cooled engine that depends on the forward speed of the airplane to maintain proper cooling, Pt is recomwaendal errhat the foilo~,~~ing precatltlons be observec4 for proper engine coo%ir~g: 1, When s!oppeA9 head the a.irj?iane into the wind, 2, Operate the engine on the ground oiily with the propeller in high rprn setting (control f'orr*~arc%), 3, Keep a.n&se.iure""Full Rich" ((control forward). 4, Do nor: overheat" engine by prolong~dground su~-rvifnf;,Moaf- .tor tlze cylinder head tenal3ersture ga!:gc, PRE T A K E - O F F C H E C K TNken operating on g ~ a v e lfields, it is recommend& that dle ~.~usa-upbe made while taxiing to ilu~oiclnicking the pro.peller, Wsrln up rlae engine at ICMd)Qto 1200 rpm, Avoid prolonged idling at Isw engine speeds a s this practice may result i n fouled spark p%ugsoThe engine is warm enough for take-off when it can de- velop full rpm and the throttle can be opened without backfiring or skipping of the engine or the throttle can be opened without a reduction in oil pressure. Check the following items before take-off: 1. Check flight controls for travel and smoothness of operation. 2. Check fuel quantity indicator, selector valve, and fuel pressure. 3. Check instruments. a. Set altimeter to field elevation. Downloaded from www.Manualslib.com manuals search engine b. Chwk oil pressure and temperamre. 6. Check dwtrica9. load meter for idteation (at 1200 rpm or gretlter, opration of any elmtrical ewipmenP should give an Mication). d. Chwk cyliMer head t e q e r a t u r e . e. Set dock* f. Check manifold p r a s u r e p u g e a d tachometer for read- ings proportional to engine power, Check rate of climb, a i r s p d , and turn I.%& bank i n d i eator for zero redings. he Check artificial horimn and directional gyros for pro- per orimation. i, T a t gear indicator lights and vacuum warning lights. Set. trim to take-off setting (see Indicator), Cheek cowl flaps open. Set wing flaps to take-off settinag (see indicator), Turn on boost pump. Check tTla@etos at 1700 RPM for smooth operation am% maximum drop of 125 RPM. NOTE: If one magneto rams rough; turn the switch back to the ""btW9 position a d reduce the power to $00 RE3Ms Allow the engine to rvaa-8 for a rnir~uteand then slowly increase the power to 22W WPM and recheck the magnetos, This operation will usually burn out the carbon deposits a& alllow the mag- netos to check properly. Exercise the propeller st 18W-2m0 RPM by pulling the propeller control to the "full-out" positfoar. After the tach- omeyer laas shorn a drop-Mf of 100 RPM, push the. propeller control to the "fu%l-in6"osfrion. Check mimure rich (full forward). Check lights if flight ja at night. Check all seat belts. Close door and pilot window and latch shut. Clear floor for retraction handle clearance. Downloaded from www.Manualslib.com manuals search engine , When applying power for take-off, move the throttle to tile full open position slowly to avoid picking up loose stones, etc., with the propeller. Apply back p r e s s u r e at about 65-75 mph airspeed. When the Mark 21 breaks ground, it will tend to "rock" into a nose-high attitude. T o compensate for this tendency, relax some of the elevator back p r e s s u r e a s the nose-wheel leaves the ground. F o r best results and a smoother take-off, do not allow the nose of the Mark 29 to lift above the horizon during take-off. After some practice, you will find that you can ivake your snloothest t a k e o f f s by applying elevator back p r e s s u r e a s flying speed is approached and then slowly reducing the back p r e s s u r e a s you feel the nose wheel lifting from the ground, This will allow the aircrafi to fly smoothly from the runway widlout any abrupt change in pitch attitude. As soon a s the Mark 2 1 is airborne and under good contl-01, per- forrri the following procedures: 4 . Apply brakes to stop whesl rotation. 2. Retrace the gear, 3. Reduce the propeller rpm to 2550-2600. 4, Retract the flaps. 5. Establish climb-out attitude, 6. Turn electric fuel pump to the " o f f 9 position. (Note fuel p r e s s u r e indication to verify that the engine driven fuel pump will provide fuel pressure.) An enroute cliinb speed of 115-120 inph TAS is recommended for improved cooling and good visibility. T h e speed for maxirnuni rate of climb i s approxinlately 105 1.4s. The speed for inaxiinuin --(obstacle clearance) is about 80 n?ph IAS. Recom- mended power setting for clii:?bir.g is 2500 rpm and 25 inches manifold pressure. POWER CHANGES The following sequence i s reconln~ended for increasing or de- creasing power settings. Downloaded from www.Manualslib.com manuals search engine To increase Power -- ... F i r s t , increase engine speed (rprn) by means of the propeller control. Secorid, increase manifold p r e s s u r e by means of the throttle. To Decrease Power First, reduce manifold p r e s s u r e by means of the throttle. Second, decrease engine speed (rpm) by means of the propeller control. CRUISE P R O C E D U R E S When the desired altitude i s reached, use the following pro- cedures. 1. Close cowl flaps. 2. T r i m nose to level flight. 3. Hecluce manitord p r e s s u r e and rprn to desired Setting, See performance charts in Section IV. 4. Set the mixture control for the fuel/air ratio desired. $I the optional. exhaust gas temperature indicator is installed, the mixture is determined a s follows: F o r best economy, lean the mixture by pulling the control out until. the indicator shows a peak (maximum) temperature and s t a r t s to de- crease. Continue leaning until the temperature drops 25" F. minimum (one inark on the gauge) froin the peak, T o obtain a best power (maximum airspeed) setting, lean to peak temperature and then enrich mixture (push control forward) until the indicator shows a 100 O F, drop (four marks on the gauge) from the peak temperature. Do not lean the mixture at power settings above 75% rated power. Operation of the mixture control should be slow enough to account for the slight lag in the EGT instrument. NOTE: Ti1 selecting a cruise rpm, it is recommended that the engine not be operated for cruise purposes within the range of 2150 t o 2300 rpm. Downloaded from www.Manualslib.com manuals search engine The superior aerodynamic efficiency of your airplane manifests itself in the normal indicated cruise speeds. Your airspeed in- dicator is marked with a green a r c to 150 mph and a yellow a r c starting a t 150 mph and ending at 189 mph, When cruising a t altitudes below approximately 8,000 feet, it is possible to cruise a t indicated airspeeds above 150 mph and in the yellow cautfon- a r y a r c . The yellow a r c indicates speeds a t which the pilot must exercise caution when encountering rough a i r o r severe gusts. Rough a i r i s considered to be a condition uncomfortable to pilot and passengers. Therefore, under these conditions, do not operate at airspeeds within the yellow arc. 'The following mahod is useful for monitoring remaining fuel, After take-off with both tanks full, use one tank only until one hour of fuel is depleted from it. Then switch to the second tank and record the time of switcla-over on the elapsed time indicator on the panel clock. Use all the fuel in the second tank. Then, the time of fuel remaining in the f i r s t tank is the time it took to deplete the second tank, less one hour. &fo%~yever, this will be correct only if the cruise altitude and power setting remain un- changed, If a tank runs dry and the engine loses power, retard the throttle before restarting. Restarting with advanced throttle may causf ngine over-speeding and can lead to mechanical rnalfuncei LET-DOWN PROCEDURES It is recommended that power let-downs be made in order to keep the engine from cooling too rapidly. By reducing the n-ian- ifoM p r e s s u r e to some figure below c r u i s e setting and then re- taining cruise speed, a let-down can be n~adc.without excessive cooling of the engine. Do not open the c o ~ r lflaps for let-down. Downloaded from www.Manualslib.com manuals search engine CARBURETOR WEAK Carburetor heat should be applied when power is reduced for descent o r landing. Full carburetor heat should be used rather than partial (which !say raise the carburetor air tenlperature to icing level) unless a carburetor air temperature iridicator is used. LANDING PROCEDURES Use the following check list before landing: 1. Fuel selector on fuller tank, 2. Roost pump on. 3. Mixture full rich (ccntrol forward). 4. Carburetor heat. 5. Landing gear dowll (lower at 120 ~nphor less). NOTE: Warning horn will sound if gear is not down and locked and throttle is retarded. Check for green "down arid locked" lighr, If green light is not work- ing, it can he screwed out and replaced in flight with the red "Gear Up" light to verify the locked position. 6. Propeller high rpin (control forward). 7. Seat belts fastened. It is recommended that the base leg be flown at 90 mph. Upon turning final, or sooner if necessary, extend the desired amount of flaps. Flap speed is 100 mph. A s the flaps a r e extended, the aircraft will become nose heavy. Roll the trim back so that the aircraft will glide hands-off at approximately 80 mph. The ad- dition of a slight amount of power will flatten out the glide con- siderably, The stall warning horn will blow if airspeed is re- duced to within 5 to 10 mph of stalling speed. NORMAL LANDING Begin your flare-out for landing closer to the ground than you ordinarily would. This is done for two reasons: 1. The hilark 2 1 sfis lower to the ground than most aircraft. Downloaded from www.Manualslib.com manuals search engine 2. The Mark 21 r e ~ i i r mvery little altitude to make a transi- tion from a glide to a l a d i n g attitude. A slight addition of back pressure is sufficient to stop the rate of descent. It is recommend& that full Flaps be used on all landings, be- cause of the added visibility over the nose that it affords. Flow- ever, the use of full flaps tends to make art aircraft nose-heavy, and it i s therefore necessary to roll the trim well back to make a good landing. In a normal approach for landing, the airplane: should be i n trinl down to the flare-out, ' Y O ! ~ Itnorv you liave i-nade u good landing w i l e ~ ~ you. can touch do'i:~sa gerarly on rile ~ . r ~ a i n gear oilly, holding clle nose wl1ee1clear sf the r~ar~b~ay and then allowing iu: t o touch down sixo(3Thlye?'his is the eon~reaatiana%,safe procer11.lre for rricycie-gear aircraft* STOPPING THE EMGIME Stop the engine ina the following manner: 1. Idle the engine at 1001) to 1200 RPM. 2, Pull the mixture control to the ""idl cutoff' position. 3, As the engine stops firing, retard the throttle all the way out to eliminate engiile vibration. 4, When the propeller stops, turn the rnagr~ero and master switches to the "oof' position. Downloaded from www.Manualslib.com manuals search engine SERVICE AND MAIMEEANCE G E N E R A L This section will present service and i~laintenanceinforination that is of a general or routine nature only. For Inore detailed information concerning maintenance that is more extensive, see the appropriate Mooney Service and Maintenance Manual. In the back of the Service and Maintenance Manual is a series of inspection guides covering reconxnended twenty-five, fifty and one-hundred hour inspections. It is recoinmended that you have these inspections and other inaintenance perforined at the nearest Mooney Service Center where factory trained mechanics a r e available. If it becolnes necessary to c ~ n s u l tthe Mooney factory concern- ing a specific problem, contact "Custon~er Service ManagerM, Mooney Aircraft, Inc., Kerrville, Texas, GROUND HANDLING A sinall hand tow bar is provided with the aircraft which fits into the nose gear lower structure to facilitate maneuvering the airplane by hand. Towing the airplane with another vehicle is not recommended a s damage to the gear structure could result if the steering limits were exceeded. Removable tiedown rings a r e provided for the wing which screw into an attachment marked "Hoist Point" outboard of each main gear. The bearing points provided for jacking or hoisting the airplane also screw into these attachments. The tail tiedown ring is located under the tail skid. Downloaded from www.Manualslib.com manuals search engine P R O P E L L E R Before each flight the propeller blades should be checked for any nicks, cracks, 01- signs of other damage. Nicks cause high stress concentrations in the blades which could s t a r t a crack, Have a inechanic remove any nicks as soon a s possible. It is nor unusual for the p:opeller blade to have a certain aiilount of end-play. This is a result of manufacturing tolerance in the parts. Sinall differences at the blade root a r e magnified inany times at the tip. This end-play has no adverse effect on the p e r - forinance Qr operation of the propeller. A s soon a s the propeller begins to rotate, the centrifugal force of the blades seats them posi.tively and rigidly against the bearing. Soii~etiines it niay be noted thzt the tachometer needle wavers in straight and level fligIit. If it is excessive, it may be further checked to deteriiline if the problein Iies in the propeller gov- ernor system or in the tachoineter by doing the following: 1. Increase the propeller control to the "high KPM" posi- tion. The R P M should go to 2700. 2 . Reduce the inanifold pressure control until the RPM is below 2700. At this tiiile, the propeller. will be in fixed pitch. If the rachoi~?eter needle continues to waver, the problem lies in the tachometer and cable systein itself. If the tachometer needle stabilizes, then the problei~l lies in the governor and propeller system. To eliminate this condition, have your inechanic purge, or clean the propeller system. If surging of the propeller occurs during takeoff or cliiills out, it ixay be caused by air in the systeiii or foreign matter in the governor passages. ENGINE Use 91/98 or 100/130 octane aviation fuel only. The wing suinps a r e drained with the plastic cup by inserting the center prong into the drain hole to release the valve. Overflow vents a r e incorporated in each fuel tank to allow for overflow of the tank and ventilation a s fuel is depleted. Downloaded from www.Manualslib.com manuals search engine The a i r filter should be removed and cleaned every 25 hour?. or more often if unusually dusty conditions a t e encou~ntred. The engine oil should be drained and replaced and the oil screens cleaned every 50 flight hours. 1,ycoming recoiii~nendsthe use of ashless dispersant type oil for the following outside a i r temper- atures : A b o v e 40' F, (4O C.) S A E 50 Below 40' F, (4O C.) S A E 30 Eelow 10' F. (-12' C.) S A E 20 Enco E80 and Aero She'll W a r e approved types. Oil capacity is eight quarts - six t-niriirnuiil for flight. The battery should be checked every 25 hours of flight or every 30 days (whichever coines first) for proper fluid level. T h e bat- tery of the Mark 21 i s located on the forward left side of the firewall and is easily accessible through the access panel on the left engine cowling. C A R E OF I N T E R I O R Normal cleaning methods rnay be used for routine cleaning of the Mark 21 interior. The fabric on the seats and side panels may be cleaned with any spray-on type d r y cleaner. The vinyl plastic and Royalite plastic used on the seats, side panels and headliner nlay be cleaned with a damp cloth o r soap and water. Do not use alcohol on Royalite plastic. C A R E OF E X T E R I O R The acrylic enamel paint used on the Mark 21 does not require waxing. However, if you d e s i r e to wax the exterior, a period of 90 days since the airplane was painted should be allowed before waxing to insure proper curing of the paint. When washing the Mark 21, do not use detergents. Do not use a cornbination cleaner and wax on the exterior. Downloaded from www.Manualslib.com manuals search engine WINDOWS The Plexiglas windows of the Mark 21 should be kept clean and waxed. Reiiiove dirt or illud with your hand while flushing with water. Do not rub the windows with a cloth o r chan~oiswhile cleaning. After clea ling, rinse and dry with a moist chamois. Reiilove oil or grezse with a cloth soaked in kerosene. Do not use solvents other than kerosene on Plexiglas. After cleaning, polishing wax n ~ a ybe applied and rubbed lightly with a soft dry cloth. Do not use a power buffer a s the heat generated by it inay soften the surface of the windows. ' L A N D I N G G E A R The landing gear retraction systein should be rigged only by a mechanic faiililiar with the gear rigging procedures of the hlark 21. The landing gear should be kept f r e e of iilud o r ice to pre- vent interference when retracted. If you notice an unusual force when operating the inanual retraction system, return the lever to the down and locked position and have the gear checked after landing. The gear warning horn ]?lay be checked in flight by retarding the throttle with the gear up. T h e horn should sound at about ten inches Hg manifold p r e s s w e . T h e t i r e p r e s s u r e (nose and ii~ain)shouldbemaintained at 30 PSI. VACUUM O P E R A T E D STEP The operation of the step may be checked easily on the ground by starting the engine and maintaining sufficient engine speed to turn off the "Low Vacuum" light while an observer checks the step retraction. 'The step should retract slowly and s~noothly into the fuselage. If there is evidence of binding a s the step re- tracts, the support blocks should be examined for alignment. Lubricants should not be used since they tend to collect dirt and may increase f r z i o n in cold weather. Downloaded from www.Manualslib.com manuals search engine The following items must be c a r r i d with the aircraft at all timest 1, Aircraft Airworthiness Certificate (displaysd) 2. Aircraft Regstration Certificate (displaysd) 3. O m e r s Manual (or s h e t colnraifling aircraft owratiraglhf a- tions) 4. Weight and Balance Data (including ewipmem list) SERVICE LETTERS AND BULLET INS Service letters and bullairas a r e availalole only on subserigiion from Mooney Distrilburors. It is r e c o m m e d d that all o m r s rnaineain contact with a u t h o r i d servim operators I k t d in the Msoney Service Directory to be a s s u r d of faaory r e o m - me&& service, Downloaded from www.Manualslib.com manuals search engine PART % V PERFORMANCEDATA FIGURE 1 T A K E O F F A N D CLIMB DATA Wind c a l m - hard surface runway CLIMB CONFIGURATION: Gear U p - B e s t Power Mixture - C o w l F l a p s Open - F l a p s U p Downloaded from www.Manualslib.com manuals search engine RATE OF CLIMB FEET PER MINUTE INDICATED AiRSPEED MILES PER HOUR Downloaded from www.Manualslib.com manuals search engine CRUISE h R A N G E D A T A WELGHT -2200 LBS.: BEST POWER MIXTURE 52 GAL. USABLE FUEL; NO RESERVE FOR RANGE CALCULATIONS STANDARD ATMOSPHERE * MAXIMURI R A N G E ACCIJRACY O F D A T A IS C 3% E A C H 100 LBS, C H A N G E IN A I R P L A N E WEIGHT W I L L A F F E C T T A S B Y 1.2 MPH. Downloaded from www.Manualslib.com manuals search engine CRUBSE Q& RANGE D A T A WEIGHT-2200 LBS.: BEST POWER MIXTURE 52 GAL. USABLE FUEL; NO RESERVE FOR RANGE CALCULAT IONS STANDARD ATMOSPHERE A L T I T U D E 5000' MSL --.- R A N G E Statute MILES * MAXIMUM RANGE ACCURACY OF D A T A IS 2 3% EACH 100 LBS. CHANGE IN A I R P L A N E WEIGHT W I L L A F F E C T TAS B Y 1.2 MPH. Downloaded from www.Manualslib.com manuals search engine CRUISE & RANGE D A T A WEIGHT 12200 LBS.: BEST POWER MIXTURE 52 GAL. USABLE FUEL; NO RESERVE FOR RANGE CALCULATIONS STANDARD ATMOSPHERE * MAXIMUM R A N G E ACCURACY O F D A T A IS 2 3% E A C H 100 LBS. C H A N G E IN A I R P L A N E WEIGHT WILL A F F E C T T A S B Y 1.2 M P H . Downloaded from www.Manualslib.com manuals search engine CRUISE & R A N G E D A T A WEIGHT ~ 2 2 0 0LBS.: BEST POWER MIXTURE 52 GAL. USABLE FUEL; NO RESERVE FOR RANGE CALCULATIONS STANDARD ATMOSPHERE * M A X I M U M R A N G E A C C U R A C Y O F D A T A IS ? 3% E A C H 100 LBS. C H A N G E I N A I R P L A N E WEIGHT W I L L AFFECT T A S B Y 1,2 MPH. Downloaded from www.Manualslib.com manuals search engine CRUlSE d R A N G E D A T A W$lGHT=2200 LBS.: BEST POWER MIXTURE 52 GAL. USABLE FUEL; NO RESERVE FOR RANGE CALCULATIONS STANDARD ATMOSPHERE * MAXIMUM R A N G E ACCURACY O F D A T A IS ?r 3% E A C H 100 LBS, CHANGE I N A I R P L A N E WEIGHT NIL-L AFFECT T A S ev 1.2 MPU. Downloaded from www.Manualslib.com manuals search engine STALL SPEED V S , B A N K ANGLE GROSS WEIGHT 2575 LBS.; I.A.S. MPW; POWER OFF FIGURE 5 SPEED FOR MAXIMUM (MAX. RANGE & GLIDE) T h e s p e e d a t w h i c h rhs~M20C i s rnosf e f f i c i e n t (i.e. t h e R a t i o of L i f t t o C r a g i s a t a Maximum) i s 105 MPH I N D I C A T E D A I R S P E E D , Gear LJP & F l a p s Up. F l y i n g a t t h i s a i r s p e e d . w i l l g i v e maximum range or m i n i m u m g i i d e angle, under z e r o w i n d c o n d i t i o n s . Downloaded from www.Manualslib.com manuals search engine UNDIWO DATA IB DISTANCE T m A L DISTANCE Downloaded from www.Manualslib.com manuals search engine kARK 2%(M28C) -.OPERATING LlMlTA9"90NS AIRSPEED LIMITATIONS The following are the certificated calibrated air speeds for your Mooney Mark 21. Maximum (Glide or dive-smooth air) 189 MPH (Red Line) Caution Range (Level flight or climb-smooth air) 150-189 MPN (Yellow Arc) Normal Range (Level flight or climb) 70-150 MPM (Green Arc) 'Maximum Maneuvering Speed 132 MPH Maximum Gear Operating Speed 120 MPN Maximum Gear Extended Speed 120 MPN F l a p Operating Range 63-100 MPH ( m i t e Arc) *The maximum speed a t which you can use abrupt full control travel without danger of exceeding the design load factor, ENGINE OPERATING LIWTATIONS Power and Speed 180 BP a t 2700 RPM ENGINE INSTRUMENT MRKIINGS Oil Temperature Radial Red Line (Maximum) Green Arc (Operating Radge) Oil Pressure Radial Red Line (Minimum Idling) Radial Red Line (Maximum) Green Arc (Operating Range) Yellow Arc (Idling Range) Yellow Arc (Starting & Warm-Up Range) Cylinder Head Temperature Radial Red Line (Maximunl) Green Arc (Operating Rang, 't 245 Degrees F. 100-225 Degrees P. 25 PSI 100 PSI 60-90 PSI 25-60 PSI 90-100 PSI 500 Degrees F. 350-450 Degrees F. Downloaded from www.Manualslib.com manuals search engine Tachometer R d i a l Red Lime (RatedB Green Arc-Harrow (Rated Operating Range) Green kc-Wide (Recommended Operating Range) Red A~G-Narrow Continuous Opemating In t\13s Ra~igc,) Pael Pressure Radial Red Line (Miasimnfaij Radial Red Line (Maximom) Green Line-Wide mesired Range) Green Arc-Narrow Normal Operating Range) 2700 RPM 2300-2700 RPM 2300-2500 RPM 23QutY-Z258WaJM 0.5 PSI 6,O PSI 2.5-3,s PSI 0,s-6.0 PSI Downloaded from www.Manualslib.com manuals search engine